はじめに
前回、SpringCLIでHelloWorldのREST APIを作成したので
今回はEclipseのプロジェクトからSpringプロジェクトを作成して、Hello World REST APIアプリを作成してみる。
環境
| ソフトウェア | バージョン |
|---|---|
| OS | Windows10 Pro |
| Java | JDK12 |
| Eclipse | 2020-12 M1 |
| SpringBoot | 2.4.0 |
| Spring Tool Suite (STS) | 4.8.1 |
実施
1. Eclipseを入手
まずはEclipseの入手から。
PleiadesのページからEclipse最新版(2020-12)を入手。
このEclipseには初めからSpring Tool Suite (STS) 4.8.1プラグインが入っている。
2. Spring用のプロジェクト作成
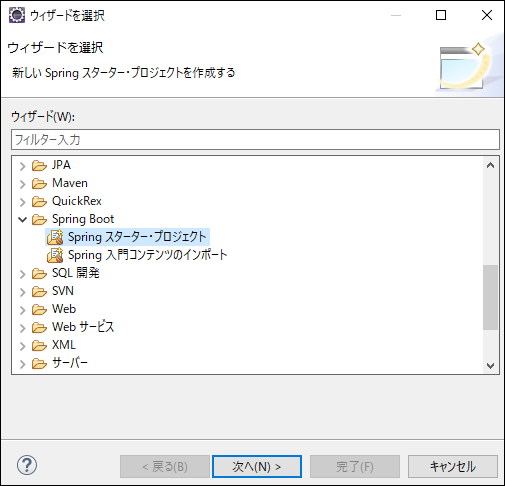
Eclipseを起動し、パッケージエクスプローラで右クリック→[新規]→[その他]を選択。
以下のウインドウが表示されるので[Spring Boot]→[Spring スターター・プロジェクト]を選択。
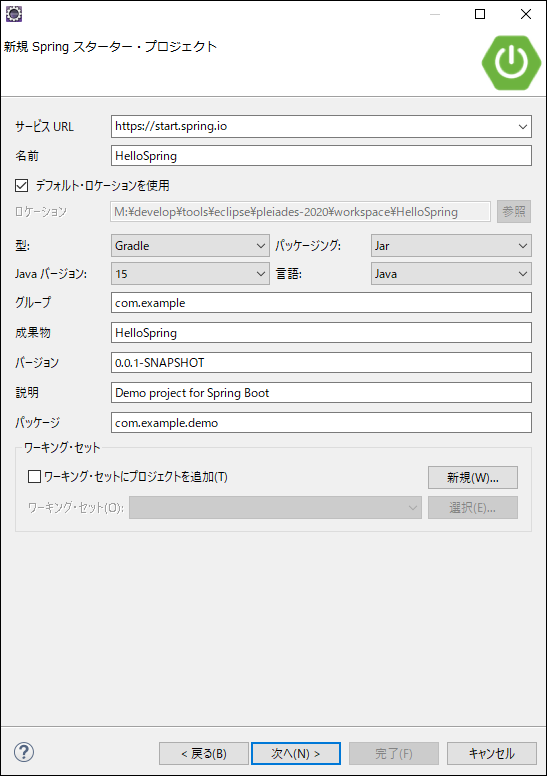
次にプロジェクト設定。
名前を「HelloSpring」にして、型にGradleを指定。
他、以下の通り。
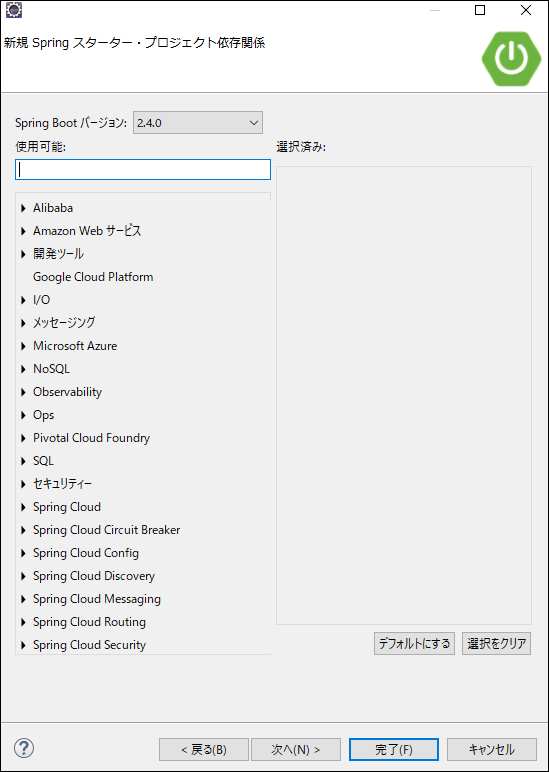
依存ライブラリの指定。
今回はHelloWorldを返すだけのREST APIなので
特に必要なライブラリは無し。
[完了]ボタンを押す。
すると、以下の構成のプロジェクトリソースが生成される。
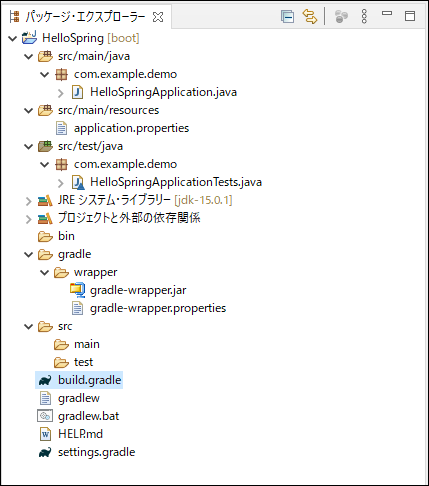
HelloSpringApplication.javaとbuild.gradleの中身はこんな感じ。
package com.example.demo;

import org.springframework.boot.SpringApplication;
import org.springframework.boot.autoconfigure.SpringBootApplication;

@SpringBootApplication
public class HelloSpringApplication {

	public static void main(String[] args) {
		SpringApplication.run(HelloSpringApplication.class, args);
	}

}
plugins {
	id 'org.springframework.boot' version '2.4.0'
	id 'io.spring.dependency-management' version '1.0.10.RELEASE'
	id 'java'
}

group = 'com.example'
version = '0.0.1-SNAPSHOT'
sourceCompatibility = '12'

repositories {
	mavenCentral()
}

dependencies {
	implementation 'org.springframework.boot:spring-boot-starter'
	testImplementation 'org.springframework.boot:spring-boot-starter-test'
}

test {
	useJUnitPlatform()
}
build.gradleにはSpringBootのプラグインやら依存関係が追加されている。
3. REST Controllerクラス作成
HTTPリクエストを受け付けて「Hello World!」と「Hello SpringBoot!」を返すユーザエンドポイントとなるControllerクラスを作る。
前回で作ったREST Controllerクラスを流用。
package com.example.demo;

@RestController
public class HelloController {

    @RequestMapping("/")
    public String home() {
    	return "Hello World!";
    }

    @RequestMapping("/sb")
    public String helloSp() {
        return "Hello SpringBoot!";
    }

}
すると、@RestControllerと@RequestMappingが参照できないエラーが出る。
Spring Boot単体では最低限のSpringアプリケーション用クラスしか入ってないということのようだ。
@RestControllerと@RequestMappingはSpringMVCのアノテーションとのこと。
REST APIを作成したいのであれば、ライブラリspring-boot-starter-webを依存関係に追加すれば良さそう。
上記のSpringMVCクラス群に加えてTomcatやJacksonのようなライブラリも付いてくるとのこと。
いかにもREST API作成のために必要なものが揃えられそうな感じのものなので早速Gradleの設定ファイルに依存関係を追加。
dependencies {
	implementation 'org.springframework.boot:spring-boot-starter'
	//↓これを追加
	implementation 'org.springframework.boot:spring-boot-starter-web'

	testImplementation 'org.springframework.boot:spring-boot-starter-test'
}
先ほどのHelloControllerクラスにimport文を追加して完成。
package com.example.demo;

import org.springframework.web.bind.annotation.RequestMapping;
import org.springframework.web.bind.annotation.RestController;

@RestController
public class HelloController {

    @RequestMapping("/")
    public String home() {
    	return "Hello World!";
    }

    @RequestMapping("/sb")
    public String helloSp() {
        return "Hello SpringBoot!";
    }

}
4. 実行
早速Springアプリケーションを動かしてみる。
gradleのbootRunタスクを実行。
Eclipse上から下記をダブルクリックすればいい。
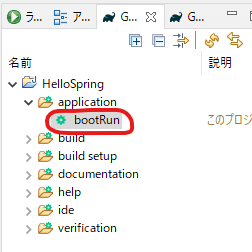
すると、コンソールに以下のように表示される。
> Task :compileJava UP-TO-DATE
> Task :processResources UP-TO-DATE
> Task :classes UP-TO-DATE
> Task :bootRunMainClassName UP-TO-DATE

> Task :bootRun

  .   ____          _            __ _ _
 /\\ / ___'_ __ _ _(_)_ __  __ _ \ \ \ \
( ( )\___ | '_ | '_| | '_ \/ _` | \ \ \ \
 \\/  ___)| |_)| | | | | || (_| |  ) ) ) )
  '  |____| .__|_| |_|_| |_\__, | / / / /
 =========|_|==============|___/=/_/_/_/
 :: Spring Boot ::                (v2.4.0)

2020-11-23 13:46:19.374  INFO 7004 --- [           main] com.example.demo.HelloSpringApplication  : Starting HelloSpringApplication using Java 12.0.2 on xxxxxxxx with PID 7004 (M:\develop\tools\eclipse\pleiades-2020-12\workspace\HelloSpring\build\classes\java\main started by xxxxx in M:\develop\tools\eclipse\pleiades-2020-12\workspace\HelloSpring)
2020-11-23 13:46:19.376  INFO 7004 --- [           main] com.example.demo.HelloSpringApplication  : No active profile set, falling back to default profiles: default
2020-11-23 13:46:20.040  INFO 7004 --- [           main] o.s.b.w.embedded.tomcat.TomcatWebServer  : Tomcat initialized with port(s): 8080 (http)
2020-11-23 13:46:20.045  INFO 7004 --- [           main] o.apache.catalina.core.StandardService   : Starting service [Tomcat]
2020-11-23 13:46:20.046  INFO 7004 --- [           main] org.apache.catalina.core.StandardEngine  : Starting Servlet engine: [Apache Tomcat/9.0.39]
2020-11-23 13:46:20.088  INFO 7004 --- [           main] o.a.c.c.C.[Tomcat].[localhost].[/]       : Initializing Spring embedded WebApplicationContext
2020-11-23 13:46:20.088  INFO 7004 --- [           main] w.s.c.ServletWebServerApplicationContext : Root WebApplicationContext: initialization completed in 689 ms
2020-11-23 13:46:20.177  INFO 7004 --- [           main] o.s.s.concurrent.ThreadPoolTaskExecutor  : Initializing ExecutorService 'applicationTaskExecutor'
2020-11-23 13:46:20.273  INFO 7004 --- [           main] o.s.b.w.embedded.tomcat.TomcatWebServer  : Tomcat started on port(s): 8080 (http) with context path ''
2020-11-23 13:46:20.279  INFO 7004 --- [           main] com.example.demo.HelloSpringApplication  : Started HelloSpringApplication in 1.115 seconds (JVM running for 1.335)
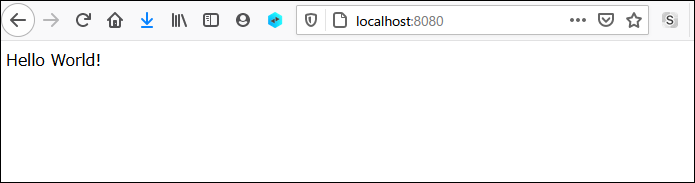
この状態で以下にアクセスしてみる。
-
http://localhost:8080/
-
http://localhost:8080/sb
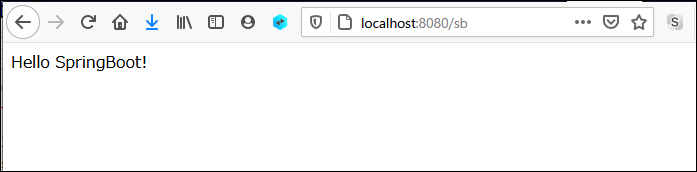
お~できた!やったぜ![]()
まとめ
今回はSpringBootとSpringMVCを使ってREST APIをさくっと作ったけど
どの部分がBootの部分でどういう役割を持っているかは
はっきりと理解した方がいいような気がした。
そこら辺はまた今度。