WWDCを前に過去のiOSバージョンの見直しをしようと思います。
関連記事:
[【Swift】この時期だから見直すiOS10の新機能 UIGraphicsImageRendererとUIViewPropertyAnimator]
(https://qiita.com/stzn/items/26d8c238e7055c523f80)
[【Swift】この時期だから見直すiOS10の新機能 UserNotificationsとNotification Content ExtensionとNotification Service Extension]
(https://qiita.com/stzn/items/ab39faae1ef3a758fc08)
なぜiOS10?
iPhoneの工場出荷時の初期バージョンが最新の2つ前に設定されている(はず?)なので、方針として2つ前のバージョンからサポートをするというようにしています。
(社内事情で端末のバージョンを上げることができない会社もあるようですので)
そのため今回のiOS12へのバージョンアップによってiOS10で使用できる機能が使えるようになり、改めて調べたことを定期的に記録しておくことにしました。
今回はAVFoundation周りの機能です。
シンプルに写真を撮影して保存するという場合、
UIImagePickerControllerをする方が簡単ですが、
写真の加工などを行う場合はAVFoundationを用いると思います。
iOS10では今まで使用していたAVCaptureStillImageOutputは非推奨となり、
AVCapturePhotoOutputを使うことでより多くの設定や処理ができるようになりました。
今回はこの変更に合わせて改めてAVFoundationの処理を調べてみました。
Appleのサンプルプログラミングの一部(主に写真撮影の部分)を見ながら処理を追っていきたいと思います。
https://developer.apple.com/library/content/samplecode/AVCam/Introduction/Intro.html
https://developer.apple.com/library/content/documentation/AudioVideo/Conceptual/PhotoCaptureGuide/index.html
※今回iOS10に焦点を当てているため、iOS11の新機能は外してあります。
(HEIV、Depth Data Deliveryの対応、jpegPhotoDataRepresentationの非推奨による変更など)
なお、途中で出て来る下記のメソッドはiOS10で登場し、iOS11では非推奨になっています。
(なぜAppleのプログラミングガイドに残っているのかはよくわかりません![]() )
)
今後削除される可能性がありますので、ご了承ください。
func photoOutput(_ captureOutput: AVCapturePhotoOutput,
                 didFinishProcessingPhoto photoSampleBuffer: CMSampleBuffer?,
                 previewPhoto previewPhotoSampleBuffer: CMSampleBuffer?,
                 resolvedSettings: AVCaptureResolvedPhotoSettings,
                 bracketSettings: AVCaptureBracketedStillImageSettings?,
                 error: Error?)
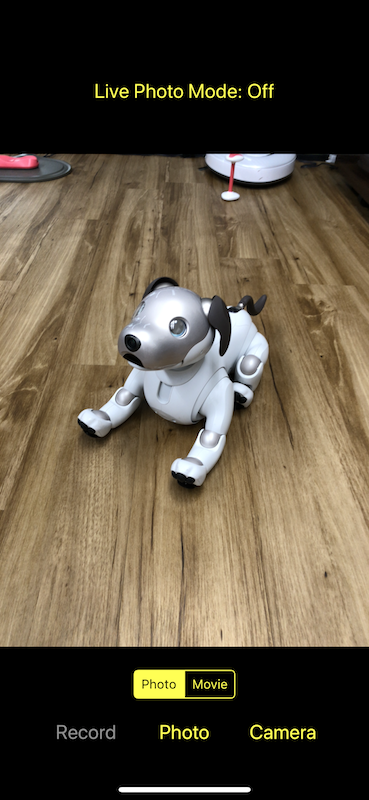
サンプルの中身を見てみる
画面は下記のような感じです。
許可の取得
viewDidLoadでカメラとマイクへのアクセス許可チェックをします。
override func viewDidLoad() {
    super.viewDidLoad()

    // Disable UI. The UI is enabled if and only if the session starts running.
    cameraButton.isEnabled = false
    recordButton.isEnabled = false
    photoButton.isEnabled = false
    livePhotoModeButton.isEnabled = false
    captureModeControl.isEnabled = false

    // Set up the video preview view.
    previewView.session = session

    /*
     カメラとマイクへのアクセス許可チェック、カメラアクセスの許可は必須、マイクへのアクセス許可は任意だが、
     許可しないと動画撮影の際に音声が録音されない
     */
    switch AVCaptureDevice.authorizationStatus(for: .video) {
    case .authorized:
        // すでに認証済みの場合は何もしない
        break

    case .notDetermined:
        /*
         まだアクセス許可が決定されていない場合はAVCaptureSessionのセットアップを一時止める。
         許可が確認されたのちに再開する
         マイクへのアクセス許可はaudioに対するAVCaptureDeviceInputを作成した時に
         暗黙的に要求される
         */

         // setupResultはsessionのセットアップ状況を示すenum
         // 初期値は.success
         // (private let sessionQueue = DispatchQueue(label: "session queue"))
        sessionQueue.suspend()
        AVCaptureDevice.requestAccess(for: .video, completionHandler: { granted in
            if !granted {
                self.setupResult = .notAuthorized
            }
            self.sessionQueue.resume()
        })

    default:
        // 以前にアクセス許可がされていなかった場合
        setupResult = .notAuthorized
    }

    /*
     AVCaptureSessionをセットアップする。
   マルチスレッドでsessionの値を操作するのは安全ではないが
     メインスレッドで実行するとAVCaptureSession.startRunning()が
   重い同期呼び出し処理のため画面がブロックされてしまう。
     そのためひとつのキュー(sessionQueue)を作成して
     メインスレッドをブロックしないようにする
     */
    sessionQueue.async {
        self.configureSession()
    }
}
sessionQueueはsessionのセットアップを制御するためのキューです。
private let sessionQueue = DispatchQueue(label: "session queue")
セットアップ
セットアップメソッドは下記のようになっています。
private func configureSession() {
    if setupResult != .success {
        return
    }

    // sessionはクラス変数として定義済
    // (private let session = AVCaptureSession())
    session.beginConfiguration()

    /*
     AVCaptureMovieFileOutputは
     AVCaptureSession.Preset.Photoでの動画録画に対応していないので
     AVCaptureMovieFileOutputインスタンスは
     sessionのセットアップ中に作成しない
     */
    session.sessionPreset = .photo

    // AVCaptureDeviceInput(カメラ)の設定
    do {
        var defaultVideoDevice: AVCaptureDevice?

        // Dualカメラが使えるなら選択する。デフォルトはwide angleカメラ。
        if let dualCameraDevice = AVCaptureDevice.default(.builtInDualCamera, for: .video, position: .back) {
            defaultVideoDevice = dualCameraDevice
        } else if let backCameraDevice = AVCaptureDevice.default(.builtInWideAngleCamera, for: .video, position: .back) {
            // デフォルトはwide angleカメラ。
            defaultVideoDevice = backCameraDevice
        } else if let frontCameraDevice = AVCaptureDevice.default(.builtInWideAngleCamera, for: .video, position: .front) {
            /*
             カメラが壊れたなどでbackカメラが使用できない場合、
             フロントのwide angleカメラをデフォルトに設定する
             */
            defaultVideoDevice = frontCameraDevice
        }

        let videoDeviceInput = try AVCaptureDeviceInput(device: defaultVideoDevice!)

        if session.canAddInput(videoDeviceInput) {
            session.addInput(videoDeviceInput)
            self.videoDeviceInput = videoDeviceInput

            DispatchQueue.main.async {
                /*
                 AVCaptureVideoPreviewLayerはUIViewのレイヤーなので
                 メインスレッドで処理をする
                 例外として画面の向きの変化はメインスレッドである必要はない
                 動画の向きの初期値はステータスバーの向きを設定する
                 その後はviewWillTransition(to:with:)で向きを変える
                 */
                let statusBarOrientation = UIApplication.shared.statusBarOrientation
                var initialVideoOrientation: AVCaptureVideoOrientation = .portrait
                if statusBarOrientation != .unknown {
                    if let videoOrientation = AVCaptureVideoOrientation(interfaceOrientation: statusBarOrientation) {
                        initialVideoOrientation = videoOrientation
                    }
                }

                self.previewView.videoPreviewLayer.connection?.videoOrientation = initialVideoOrientation
            }
        } else {
            print("Could not add video device input to the session")
            setupResult = .configurationFailed
            session.commitConfiguration()
            return
        }
    } catch {
        print("Could not create video device input: \(error)")
        setupResult = .configurationFailed
        session.commitConfiguration()
        return
    }

    // AVCaptureDeviceInput(マイク)を設定する
    do {
        let audioDevice = AVCaptureDevice.default(for: .audio)
        let audioDeviceInput = try AVCaptureDeviceInput(device: audioDevice!)

        if session.canAddInput(audioDeviceInput) {
            session.addInput(audioDeviceInput)
        } else {
            print("Could not add audio device input to the session")
        }
    } catch {
        print("Could not create audio device input: \(error)")
    }

    // AVCapturePhotoOutputの設定
    if session.canAddOutput(photoOutput) {
        session.addOutput(photoOutput)

        photoOutput.isHighResolutionCaptureEnabled = true
        photoOutput.isLivePhotoCaptureEnabled = photoOutput.isLivePhotoCaptureSupported
        livePhotoMode = photoOutput.isLivePhotoCaptureSupported ? .on : .off
    } else {
        print("Could not add photo output to the session")
        setupResult = .configurationFailed
        session.commitConfiguration()
        return
    }

    session.commitConfiguration()
}
AVCaptureSessionの設定の変更は
beginConfiguration
と
commitConfiguration
の間で行う必要があります。
previewViewにはカスタムビューを用意しており、下記のような実装になります。
layerにAVCaptureVideoPreviewLayerを設定し、
sessionをプロパティとして保持しています。
import UIKit
import AVFoundation

class PreviewView: UIView {
    var videoPreviewLayer: AVCaptureVideoPreviewLayer {
        guard let layer = layer as? AVCaptureVideoPreviewLayer else {
            fatalError("Expected `AVCaptureVideoPreviewLayer` type for layer. Check PreviewView.layerClass implementation.")
        }

        return layer
    }

	var session: AVCaptureSession? {
		get {
			return videoPreviewLayer.session
		}
		set {
			videoPreviewLayer.session = newValue
		}
	}

	// MARK: UIView
    override class var layerClass: AnyClass {
		return AVCaptureVideoPreviewLayer.self
	}
}
AVCaptureVideoOrientationの向きの設定には注意が必要で、
UIInterfaceOrientationとは向きが同じですが、
UIDeviceOrientationとは左右が逆になります。
サンプル内ではextensionでイニシャライザを定義しています。
extension AVCaptureVideoOrientation {
	init?(deviceOrientation: UIDeviceOrientation) {
		switch deviceOrientation {
			case .portrait: self = .portrait
			case .portraitUpsideDown: self = .portraitUpsideDown
			case .landscapeLeft: self = .landscapeRight
			case .landscapeRight: self = .landscapeLeft
			default: return nil
		}
	}

	init?(interfaceOrientation: UIInterfaceOrientation) {
		switch interfaceOrientation {
			case .portrait: self = .portrait
			case .portraitUpsideDown: self = .portraitUpsideDown
			case .landscapeLeft: self = .landscapeLeft
			case .landscapeRight: self = .landscapeRight
			default: return nil
		}
	}
}
カメラデバイスの取得
カメラデバイスを取得する場合、iOS10以前では
AVCaptureDevice.defaultDevice(withMediaType: AVMediaTypeVideo)
などを使用していましたが、
iOS10以降ではデュアルレンズが使用可能になっており、
使用するためには新しいAPIを使用しなればなりません。
AVCaptureDevice.default(.builtInDualCamera, for: .video, position: .back)
サンプルではデュアルレンズ使える場合は使用し、
使用できなければ広角レンズを使用するようになっています。
AVCapturePhotoOutputの設定では、
高精細静止画像が使用できるように設定できます。
また、LivePhotosの設定も可能になりました。
photoOutput.isHighResolutionCaptureEnabled = true
photoOutput.isLivePhotoCaptureEnabled = photoOutput.isLivePhotoCaptureSupported
※Live Photosとは
シャッターボタンを押す前後1.5秒ずつ、合計3秒間の映像と音声が保存される画像です。
gifみたいな感じです。
セットアップ後の処理
次にviewWillAppearでセットアップ後の処理を継続します。
override func viewWillAppear(_ animated: Bool) {
    super.viewWillAppear(animated)

    sessionQueue.async {
        switch self.setupResult {
        case .success:

            // setupが成功した場合のみsessionを処理を継続させる。
            self.addObservers()
            self.session.startRunning()
            self.isSessionRunning = self.session.isRunning

        case .notAuthorized:
            // アクセスの許可がされていなかった場合にアラートを出して端末の設定画面への遷移を促す

        case .configurationFailed:
            // セットアップに失敗した場合エラーメッセージ表示
        }
    }
}
addObserversでは以下のような通知を監視します。
色々ボタンが出てきますが、Appleのサンプルをご覧ください![]()
private func addObservers() {

    // isRunningプロパティを監視する
    let keyValueObservation = session.observe(\.isRunning, options: .new) { _, change in
        guard let isSessionRunning = change.newValue else { return }
        let isLivePhotoCaptureSupported = self.photoOutput.isLivePhotoCaptureSupported
        let isLivePhotoCaptureEnabled = self.photoOutput.isLivePhotoCaptureEnabled

        DispatchQueue.main.async {
            // 写真のシャッターボタンはsessionが開始され、
            // 使用可能なカメラデバイスが複数ある時に押せるようにする
            self.cameraButton.isEnabled = isSessionRunning && self.videoDeviceDiscoverySession.uniqueDevicePositionsCount > 1

            // 録音を開始するボタンはsessionが開始され、
            // movieFileOutputが設定されている時に押せるようにする
            self.recordButton.isEnabled = isSessionRunning && self.movieFileOutput != nil

            // 写真モードボタンはsessionが開始され、
            // movieFileOutputが設定されている時に押せるようにする
            self.photoButton.isEnabled = isSessionRunning

            // キャプチャモード変更ボタンはsessionが開始されている時に押せるようにする
            self.captureModeControl.isEnabled = isSessionRunning

            // LivePhotoモードOnOffボタンはsessionが開始され、
            // LivePhotoが利用可能な場合に押せるようにする
            self.livePhotoModeButton.isEnabled = isSessionRunning && isLivePhotoCaptureEnabled

            // LivePhotoモードOnOffボタンはsessionが開始され、
            // LivePhotoが利用可能な場合に表示する
            self.livePhotoModeButton.isHidden = !(isSessionRunning && isLivePhotoCaptureSupported)
        }
    }
    keyValueObservations.append(keyValueObservation)

    // カメラを急に動かしたりするなどカメラに大きな変化起きた際に通知される
    // フォーカスを再度合わせるなどに使用する
    NotificationCenter.default.addObserver(self, selector: #selector(subjectAreaDidChange), name: .AVCaptureDeviceSubjectAreaDidChange, object: videoDeviceInput.device)


    // session起動中にエラーが起きた時に通知される
    // sessionの再起動などを行う
    NotificationCenter.default.addObserver(self, selector: #selector(sessionRuntimeError), name: .AVCaptureSessionRuntimeError, object: session)

    /*
  sessionはアプリがフルスクリーンモードで表示している場合のみ起動する。
   iOS9から導入されたマルチアプリのレイアウト時は起動しない。
   また、コントロールセンターから音楽再生された場合なども中断される
   下記はこのようにsessionが途中で中断された場合に通知される
    */

    // sessionが中断された場合に通知される
    NotificationCenter.default.addObserver(self, selector: #selector(sessionWasInterrupted), name: .AVCaptureSessionWasInterrupted, object: session)

    // sessionが中断が終了した際に通知される
    NotificationCenter.default.addObserver(self, selector: #selector(sessionInterruptionEnded), name: .AVCaptureSessionInterruptionEnded, object: session)
}
例えばサンプルサプリでは、
session起動時にエラーが発生した場合に下記のように処理をしています。
@objc
func sessionRuntimeError(notification: NSNotification) {
    guard let error = notification.userInfo?[AVCaptureSessionErrorKey] as? AVError else { return }

    print("Capture session runtime error: \(error)")

    /*
     Media Servicesがリセットされ、
     エラーになる前にsessionが起動中であった場合に自動で再起動を試みる
     起動していなかった場合は再開ボタンを表示する
     */
    if error.code == .mediaServicesWereReset {
        sessionQueue.async {
            if self.isSessionRunning {
                self.session.startRunning()
                self.isSessionRunning = self.session.isRunning
            } else {
                DispatchQueue.main.async {
                    self.resumeButton.isHidden = false
                }
            }
        }
    } else {
        resumeButton.isHidden = false
    }
}
写真を撮影する
次に写真のシャッターボタンが押された際の処理です。
@IBAction private func capturePhoto(_ photoButton: UIButton) {
    /*
    previewLayerのAVCaptureVideoOrientationは
    UIElementsへのアクセスはメインスレッドで行っていることを保証するためにも
    sessionQueue内での処理の前に取得します。
     */
    let videoPreviewLayerOrientation = previewView.videoPreviewLayer.connection?.videoOrientation

    sessionQueue.async {
        // AVCapturePhotoOutputのAVCaptureVideoOrientationと
        // previewLayerのAVCaptureVideoOrientationを合わせる
        if let photoOutputConnection = self.photoOutput.connection(with: .video) {
            photoOutputConnection.videoOrientation = videoPreviewLayerOrientation!
        }

        // AVCapturePhotoSettingsの設定(iOS10新機能)
        let photoSettings = AVCapturePhotoSettings()

        // フラッシュモード
        if self.videoDeviceInput.device.isFlashAvailable {
            photoSettings.flashMode = .auto
        }

        // 高精細画像を可能にする
        photoSettings.isHighResolutionPhotoEnabled = true

        // 利用可能なPreviewPhotoPixelFormatTypesがあれば設定する
        if !photoSettings.__availablePreviewPhotoPixelFormatTypes.isEmpty {
            photoSettings.previewPhotoFormat = [kCVPixelBufferPixelFormatTypeKey as String: photoSettings.__availablePreviewPhotoPixelFormatTypes.first!]
        }

        // LivePhotoモードの場合
        // 一時的に動画を保存するためのパスを設定する
        if self.livePhotoMode == .on && self.photoOutput.isLivePhotoCaptureSupported { // Live Photo capture is not supported in movie mode.
            let livePhotoMovieFileName = NSUUID().uuidString
            let livePhotoMovieFilePath = (NSTemporaryDirectory() as NSString).appendingPathComponent((livePhotoMovieFileName as NSString).appendingPathExtension("mov")!)
            photoSettings.livePhotoMovieFileURL = URL(fileURLWithPath: livePhotoMovieFilePath)
        }

        /*
        キャプチャ中のライフサイクルイベント受け取るデリゲートを作成する
        それぞれのキャプチャのライフサイクルを別々に処理するために
        毎回インスタンスを作成し、キャプチャ中の場合は配列に弱参照を保持しておく
        */
        let photoCaptureProcessor = PhotoCaptureProcessor(with: photoSettings, willCapturePhotoAnimation: {
            DispatchQueue.main.async {
                self.previewView.videoPreviewLayer.opacity = 0
                UIView.animate(withDuration: 0.25) {
                    self.previewView.videoPreviewLayer.opacity = 1
                }
            }
        }, livePhotoCaptureHandler: { capturing in
            /*
            LivePhotoはシャッターボタンを押すと別々のLivePhotoが撮影される
            撮影中のラベルを表示し続けるために現在撮影中の数をカウントする
             */
            self.sessionQueue.async {
                if capturing {
                    self.inProgressLivePhotoCapturesCount += 1
                } else {
                    self.inProgressLivePhotoCapturesCount -= 1
                }

                let inProgressLivePhotoCapturesCount = self.inProgressLivePhotoCapturesCount
                DispatchQueue.main.async {
                    if inProgressLivePhotoCapturesCount > 0 {
                        self.capturingLivePhotoLabel.isHidden = false
                    } else if inProgressLivePhotoCapturesCount == 0 {
                        self.capturingLivePhotoLabel.isHidden = true
                    } else {
                        print("Error: In progress live photo capture count is less than 0")
                    }
                }
            }
        }, completionHandler: { photoCaptureProcessor in
            // キャプチャが完了したら参照を破棄する
            self.sessionQueue.async {
                self.inProgressPhotoCaptureDelegates[photoCaptureProcessor.requestedPhotoSettings.uniqueID] = nil
            }
        }
        )

        // デリゲートインスタンスを保持
        self.inProgressPhotoCaptureDelegates[photoCaptureProcessor.requestedPhotoSettings.uniqueID] = photoCaptureProcessor
        self.photoOutput.capturePhoto(with: photoSettings, delegate: photoCaptureProcessor)
    }
}
AVCapturePhotoSettings
キャプチャに対する設定をするためのクラスです。
フラッシュモードや高精細画像など色々な細かい設定が可能になっています。
self.photoOutput.capturePhoto(with: photoSettings, delegate: photoCaptureProcessor)
に渡すことでキャプチャが開始されます。
注意点としてAVCapturePhotoSettingsは使い回しができないということです。
AVCapturePhotoSettingsはuniqueIDが割り振られ、
過去に使用したuniqueIDが再度使用された場合エラーになります。
同じ設定を使い場合、
convenience init(from photoSettings: AVCapturePhotoSettings)
を使ってAVCapturePhotoSettingsからAVCapturePhotoSettingsを生成します。
デリゲートでキャプチャ中のライフサイクルイベントを処理する
デリゲートクラスは下記のようになっています。
import AVFoundation
import Photos

class PhotoCaptureProcessor: NSObject {
	private(set) var requestedPhotoSettings: AVCapturePhotoSettings

	private let willCapturePhotoAnimation: () -> Void

	private let livePhotoCaptureHandler: (Bool) -> Void

	private let completionHandler: (PhotoCaptureProcessor) -> Void

	private var photoData: Data?

	private var livePhotoCompanionMovieURL: URL?

	init(with requestedPhotoSettings: AVCapturePhotoSettings,
	     willCapturePhotoAnimation: @escaping () -> Void,
	     livePhotoCaptureHandler: @escaping (Bool) -> Void,
	     completionHandler: @escaping (PhotoCaptureProcessor) -> Void) {
		self.requestedPhotoSettings = requestedPhotoSettings
		self.willCapturePhotoAnimation = willCapturePhotoAnimation
		self.livePhotoCaptureHandler = livePhotoCaptureHandler
		self.completionHandler = completionHandler
	}

	private func didFinish() {
		if let livePhotoCompanionMoviePath = livePhotoCompanionMovieURL?.path {
			if FileManager.default.fileExists(atPath: livePhotoCompanionMoviePath) {
				do {
					try FileManager.default.removeItem(atPath: livePhotoCompanionMoviePath)
				} catch {
					print("Could not remove file at url: \(livePhotoCompanionMoviePath)")
				}
			}
		}

		completionHandler(self)
	}

}

extension PhotoCaptureProcessor: AVCapturePhotoCaptureDelegate {

    // AVCapturePhotoSettingsが解決(正常に設定)され、キャプチャが開始される直前に呼ばれる(LivePhotoで使用)
    func photoOutput(_ output: AVCapturePhotoOutput, willBeginCaptureFor resolvedSettings: AVCaptureResolvedPhotoSettings) {

        if resolvedSettings.livePhotoMovieDimensions.width > 0 && resolvedSettings.livePhotoMovieDimensions.height > 0 {
            livePhotoCaptureHandler(true)
        }
    }

    // 写真のキャプチャが開始される直前に呼ばれる
    // 今回はシャッターが押されたようなアニメーションが設定されている
    func photoOutput(_ output: AVCapturePhotoOutput, willCapturePhotoFor resolvedSettings: AVCaptureResolvedPhotoSettings) {
        willCapturePhotoAnimation()
    }

    // (iOS11で非推奨)端末内で処理されたフォーマットのキャプチャ画像が提供される
    func photoOutput(_ captureOutput: AVCapturePhotoOutput, didFinishProcessingPhoto photoSampleBuffer: CMSampleBuffer?, previewPhoto previewPhotoSampleBuffer: CMSampleBuffer?, resolvedSettings: AVCaptureResolvedPhotoSettings, bracketSettings: AVCaptureBracketedStillImageSettings?, error: Error?) {
        if let photoSampleBuffer = photoSampleBuffer {
            photoData = AVCapturePhotoOutput.jpegPhotoDataRepresentation(forJPEGSampleBuffer: photoSampleBuffer, previewPhotoSampleBuffer: previewPhotoSampleBuffer)
        } else {
            print("Error capturing photo: \(error)")
            return
        }
    }

    // LivePhotoの動画部分の録画が完了した際に呼ばれる
    func photoOutput(_ output: AVCapturePhotoOutput, didFinishRecordingLivePhotoMovieForEventualFileAt outputFileURL: URL, resolvedSettings: AVCaptureResolvedPhotoSettings) {
        livePhotoCaptureHandler(false)
    }

    // LivePhotoの動画部分の保存先を指定する
    func photoOutput(_ output: AVCapturePhotoOutput, didFinishProcessingLivePhotoToMovieFileAt outputFileURL: URL, duration: CMTime, photoDisplayTime: CMTime, resolvedSettings: AVCaptureResolvedPhotoSettings, error: Error?) {
        if error != nil {
            print("Error processing live photo companion movie: \(String(describing: error))")
            return
        }
        livePhotoCompanionMovieURL = outputFileURL
    }

    // キャプチャの完了直後に呼ばれる
    func photoOutput(_ output: AVCapturePhotoOutput, didFinishCaptureFor resolvedSettings: AVCaptureResolvedPhotoSettings, error: Error?) {
        if let error = error {
            print("Error capturing photo: \(error)")
            didFinish()
            return
        }

        guard let photoData = photoData else {
            print("No photo data resource")
            didFinish()
            return
        }

        // 写真を保存する、ライブラリへのアクセス許可を申請する
        PHPhotoLibrary.requestAuthorization { status in
            if status == .authorized {
                PHPhotoLibrary.shared().performChanges({
                    let options = PHAssetResourceCreationOptions()
                    let creationRequest = PHAssetCreationRequest.forAsset()
                    creationRequest.addResource(with: .photo, data: photoData, options: options)

                    if let livePhotoCompanionMovieURL = self.livePhotoCompanionMovieURL {
                        let livePhotoCompanionMovieFileResourceOptions = PHAssetResourceCreationOptions()
                        livePhotoCompanionMovieFileResourceOptions.shouldMoveFile = true
                        creationRequest.addResource(with: .pairedVideo, fileURL: livePhotoCompanionMovieURL, options: livePhotoCompanionMovieFileResourceOptions)
                    }

                    }, completionHandler: { _, error in
                        if let error = error {
                            print("Error occurered while saving photo to photo library: \(error)")
                        }

                        self.didFinish()
                    }
                )
            } else {
                self.didFinish()
            }
        }
    }
}
iOS11で非推奨のメソッドは下記のメソッドで代用されるようです。
func photoOutput(_ output: AVCapturePhotoOutput,
                 didFinishProcessingPhoto photo: AVCapturePhoto,
                 error: Error?) {

    if let error = error {
        print("Error capturing photo: \(error)")
    } else {
        photoData = photo.fileDataRepresentation()
    }
}
他の例ではiOS10で可能であったメソッドを活用して
サムネイル画像の取得などを行なっているものもあったのですが、
iOS11以降でどうやって同じようにできるのかが見つけられませんでした。
(知っている方いらっしゃいましたら教えて頂けましたらうれしいです![]() )
)
func photoOutput(_ captureOutput: AVCapturePhotoOutput, didFinishProcessingPhoto photoSampleBuffer: CMSampleBuffer?, previewPhoto previewPhotoSampleBuffer: CMSampleBuffer?, resolvedSettings: AVCaptureResolvedPhotoSettings, bracketSettings: AVCaptureBracketedStillImageSettings?, error: Error?) {
    if let photoSampleBuffer = photoSampleBuffer {
        photoData = AVCapturePhotoOutput.jpegPhotoDataRepresentation(forJPEGSampleBuffer: photoSampleBuffer, previewPhotoSampleBuffer: previewPhotoSampleBuffer)

        if let thumbnailCaptured = thumbnailCaptured,
            let previewPhotoSampleBuffer = previewPhotoSampleBuffer,
            let cvImageBuffer = CMSampleBufferGetImageBuffer(previewPhotoSampleBuffer) {

            let ciThumbnail = CIImage(cvImageBuffer: cvImageBuffer)
            let context = CIContext(options: [kCIContextUseSoftwareRenderer: false])
            let thumbnail = UIImage(cgImage: context.createCGImage(ciThumbnail, from: ciThumbnail.extent)!, scale: 2.0, orientation: .right)

            thumbnailCaptured(thumbnail)
        }


    } else {
        print("Error capturing photo: \(error)")
        return
    }
}
StackOverFlowには下記に似たような方法が記載されていました。
https://stackoverflow.com/questions/46478262/taking-photo-with-custom-camera-ios-11-0-swift-4-update-error
// iOS11以降で使用可能
func photoOutput(_ output: AVCapturePhotoOutput, didFinishProcessingPhoto photo: AVCapturePhoto, error: Error?) {

    if let error = error {
        print("Error capturing photo: \(error)")
    } else {
        photoData = photo.fileDataRepresentation()
    }

    // Check if UIImage could be initialized with image data
    guard let capturedImage = UIImage.init(data: photoData! , scale: 1.0) else {
        print("Fail to convert image data to UIImage")
        return
    }

    // Get original image width/height
    let imgWidth = capturedImage.size.width
    let imgHeight = capturedImage.size.height
    // Get origin of cropped image
    let imgOrigin = CGPoint(x: (imgWidth - imgHeight)/2, y: (imgHeight - imgHeight)/2)
    // Get size of cropped iamge
    let imgSize = CGSize(width: imgHeight, height: imgHeight)

    // Check if image could be cropped successfully
    guard let imageRef = capturedImage.cgImage?.cropping(to: CGRect(origin: imgOrigin, size: imgSize)) else {
        print("Fail to crop image")
        return
    }

    // Convert cropped image ref to UIImage
    let imageToSave = UIImage(cgImage: imageRef, scale: 1.0, orientation: .down)

    // 後ほど保存するためのData変数
    thumbnailData = UIImagePNGRepresentation(imageToSave)
}
※写真の保存処理はPhotosフレームワークを使用しています。
まとめ
普段の業務ではあまりカメラ機能を使わないので
iOS10の新機能を見ていく中でカメラの設定方法や処理の方法などを改めて学び、
知らなかったことが色々あるなと感じました。
Appleのサンプルは正直なかなか全部を見ることはあまりなかったのですが、
こうやって見ていくと学べることがたくさんあって楽しいですね![]()
AVFoundationの周りはiOS10からiOS11でも色々変わっているので、
iOS12ではまたどのように変わっているのかチェックしたいと思います。
何か間違いなどございましたらご指摘頂けましたら幸いです![]()