環境
この記事は以下の環境で動いています。
| 項目 | 値 |
|---|---|
| CPU | Core i5-8250U |
| Ubuntu | 20.04 |
| ROS | Noetic |
| Qt | 5.12.8 |
インストールについてはROS講座02 インストールを参照してください。
またこの記事のプログラムはgithubにアップロードされています。ROS講座11 gitリポジトリを参照してください。
概要
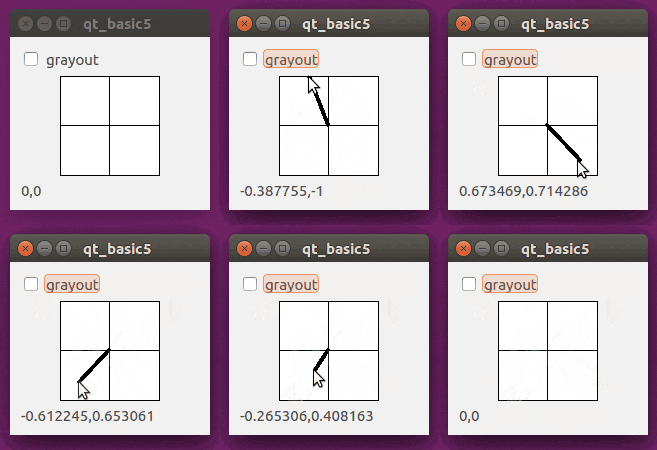
QtにはいろいろなWidgetがありますがタッチパッドは意外とありません。ロボットではtwistの送信などほしくなる場面は多いので実装してみます。
仕様
- 正方形に十字線が書いてある。
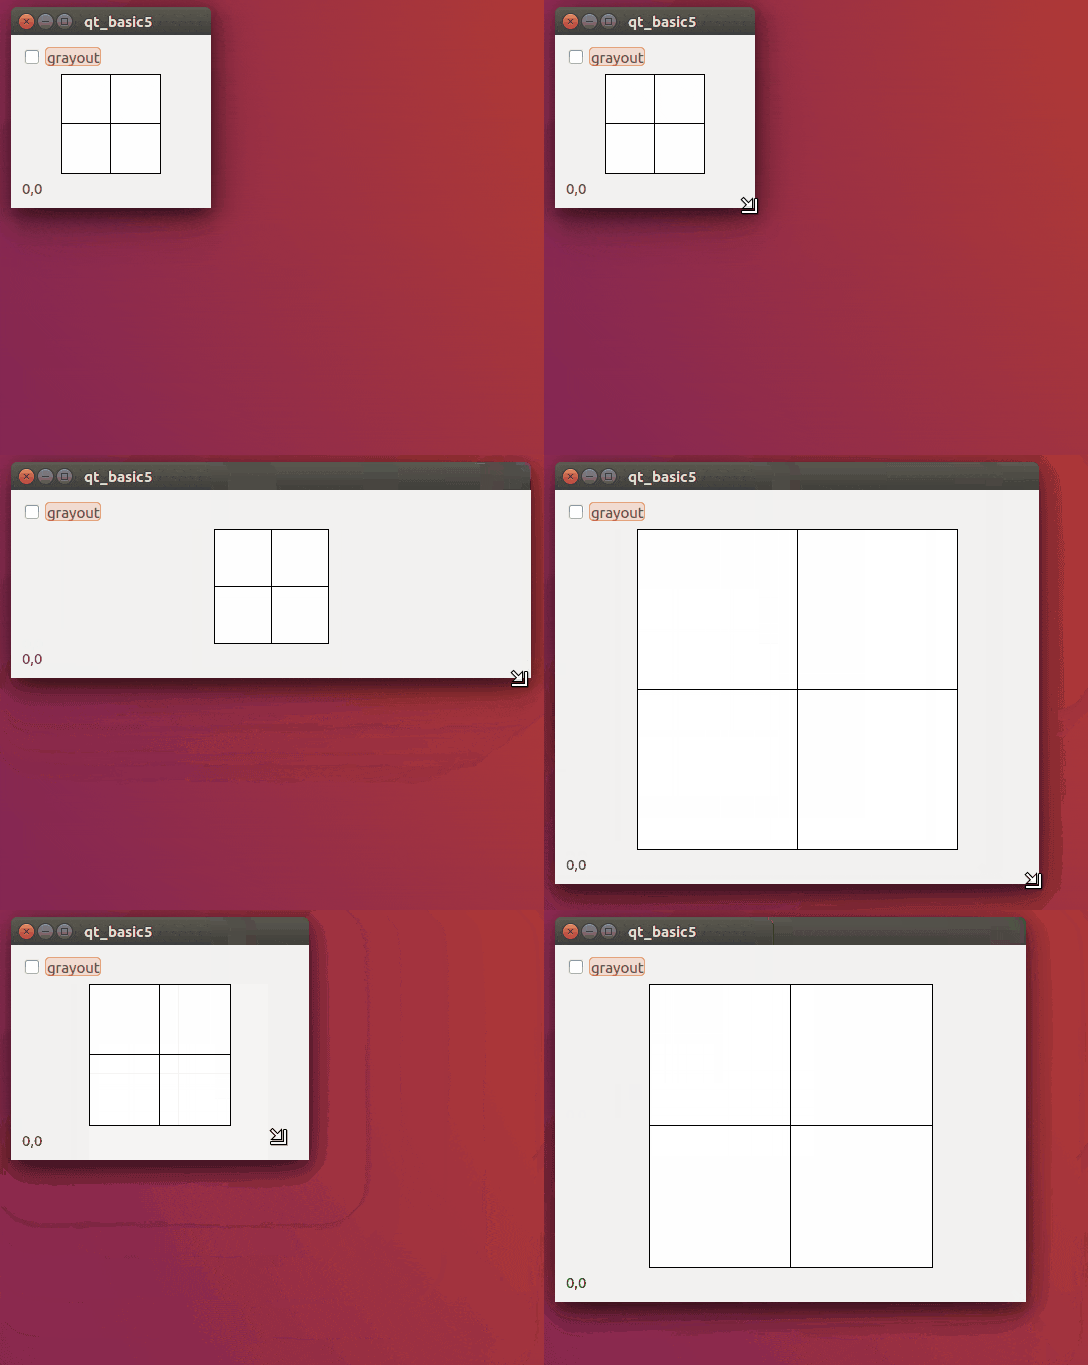
- ウィンドウの大きさが変わるとフィットする。
- 2次元でタッチ(=マウスでクリック&ドラッグ)できる。
- 値はそれぞれ-1~1
- SLOTでグレーアウトさせることができる。
- タッチイベントでSIGNALで座標を表す文字列を送る。
ソースコード
c++本体
# include <QApplication>
# include <QVBoxLayout>
# include <QLabel>
# include <QCheckBox>

# include "qt_touch.h"

int main(int argc, char** argv)
{
  QApplication app(argc,argv);
  QWidget* window = new QWidget;
  QVBoxLayout* layout  = new QVBoxLayout;

  QCheckBox* check = new QCheckBox("grayout");
  layout->addWidget(check);
  TouchWidget* touch = new TouchWidget(window);
  layout->addWidget(touch);
  QLabel* label = new QLabel("0,0");
  layout->addWidget(label);

  QObject::connect(check, SIGNAL(stateChanged(int)), touch, SLOT(checkGrayout(int)));
  QObject::connect(touch, SIGNAL(modifyPosition(QString)), label, SLOT(setText(QString)) );

  window->setLayout(layout);
  window->show();
  return app.exec();
}
特段変わったことはありません。Checkboxと今回製作するTouch、Labelを作って縦に並べます。
2つのconnectを定義しています。1つ目はチェックボックスの値が変わった時にtouchのグレーアウトの設定を変更します。2つ目はtouchの値が変わった時にそれをlabelに表示します。labelはQStringしか受け取れないのでtouchも数字をQStringに直してSIGNALを送ります。
ライブラリ宣言
# include <QWidget>

class TouchWidget : public QWidget
{
  Q_OBJECT
public:
  TouchWidget(QWidget* parent);
  //property
  bool grayout;
  float x_value;
  float y_value;

  int hcen;
  int vcen;
  int rsize;

  //event
  virtual void paintEvent( QPaintEvent* event );

  virtual void mouseMoveEvent( QMouseEvent* event );
  virtual void mousePressEvent( QMouseEvent* event );
  virtual void mouseReleaseEvent( QMouseEvent* event );
  virtual void leaveEvent( QEvent* event );
  void set_value(float x, float y);

public Q_SLOTS:
  void checkGrayout(int state);
Q_SIGNALS:
  void modifyPosition( QString );
};
Qwidgetから派生させて
paintEventからleaveEventまでの5つの関数は基底クラスにある関数です。
そのあとにSLOTとSIGNALを宣言しています。Q_SIGNALの前にアクセス指定子を書いてはいけません。
ライブラリ実装
# include <string>
# include <sstream>
# include <iostream>
# include <QPainter>
# include <QMouseEvent>
# include <QSizePolicy>

# include "qt_touch.h"

TouchWidget::TouchWidget(QWidget* parent): QWidget( parent )
{
  setMinimumSize(100,100);
  setSizePolicy(QSizePolicy(QSizePolicy::Expanding, QSizePolicy::Expanding));
  grayout=false;
}

void TouchWidget::paintEvent( QPaintEvent* event )
{
  int w = width();
  int h = height();
  int size = (( w > h ) ? h : w) - 1;
  int hpad = ( w - size ) / 2;
  int vpad = ( h - size ) / 2;
  hcen = hpad + size/2;
  vcen = vpad + size/2;
  rsize=size/2;

  QColor background;
  QColor crosshair;
  if(!grayout){
    background = Qt::white;
    crosshair  = Qt::black;;
  }
  else{
    background = Qt::lightGray;
    crosshair = Qt::darkGray;
  }
  QPainter painter( this );
  painter.setBrush( background );
  painter.setPen( crosshair );

  painter.drawRect( QRect( hpad, vpad, size, size ));
  int rline=size/2;
  painter.drawLine( hcen, vcen-rline, hcen, vcen+rline );
  painter.drawLine( hcen-rline, vcen, hcen+rline, vcen );

  if(!grayout){
    QPen arrow;
    arrow.setWidth( size/20 );
    arrow.setColor( Qt::black );
    arrow.setCapStyle( Qt::RoundCap );
    arrow.setJoinStyle( Qt::RoundJoin );
    painter.setPen( arrow );

    const int step_count = 2;
    QPointF arrows[ step_count ];
    arrows[0].setX(hcen);
    arrows[0].setY(vcen);
    arrows[1].setX((int)(hcen+x_value*rsize));
    arrows[1].setY((int)(vcen+y_value*rsize));
    painter.drawPolyline( arrows, 2 );
  }
}

void TouchWidget::checkGrayout(int state){
  if(state>0)grayout=true;
  else grayout=false;
  update();
}


void TouchWidget::mouseMoveEvent( QMouseEvent* event )
{
  float tmp_x=1.0*(event->x()-hcen)/rsize;
  float tmp_y=1.0*(event->y()-vcen)/rsize;
  if(tmp_x<-1.0)tmp_x=-1.0;
  else if(tmp_x>1.0)tmp_x=1.0;
  if(tmp_y<-1.0)tmp_y=-1.0;
  else if(tmp_y>1.0)tmp_y=1.0;
  set_value(tmp_x, tmp_y);
  update();
}
void TouchWidget::mousePressEvent( QMouseEvent* event )
{
  float tmp_x=1.0*(event->x()-hcen)/rsize;
  float tmp_y=1.0*(event->y()-vcen)/rsize;
  if(tmp_x<-1.0)tmp_x=-1.0;
  else if(tmp_x>1.0)tmp_x=1.0;
  if(tmp_y<-1.0)tmp_y=-1.0;
  else if(tmp_y>1.0)tmp_y=1.0;
  set_value(tmp_x, tmp_y);
  update();
}
void TouchWidget::leaveEvent( QEvent* event )
{
  set_value(0, 0);
  update();
}
void TouchWidget::mouseReleaseEvent( QMouseEvent* event )
{
  set_value(0, 0);
  update();
}
void TouchWidget::set_value(float x, float y){
  if(!grayout){
    x_value=x;
    y_value=y;
    std::ostringstream stm ;
    stm << x << ","<<y;
    QString text=QString::fromStdString(stm.str());
    Q_EMIT modifyPosition(text);
  }
}
コンストラクタの中の以下ではリサイズの設定をしています。最低サイズは100x100で親のWidgetが大きくなったらそれに合わせて大きくなります。
  setMinimumSize(100,100);
  setSizePolicy(QSizePolicy(QSizePolicy::Expanding, QSizePolicy::Expanding));
paintEventは画面が再描画されるたびに実行します。width()とheight()でwidgetのサイズを取得してそれに合わせて枠を描画します。
mouseXXXXEventはマウス系のイベントで発生したときにcallbackされます。event->x()やevent->y()でマウス位置が取れます。マウスイベントの後に画像を更新したいのでupdate()を呼んで更新します。set_value()はマウスイベントの本体です。ここでQ_EMIT modifyPosition(text);と書くことでSIGNALを送信します。
CMakeList.txt
add_executable(qt_touch_app src/qt_touch_app.cpp src/qt_touch.cpp)

target_link_libraries(qt_touch_app
  ${catkin_LIBRARIES}
  ${QT_LIBRARIES}
)
ビルド
cd ~/catkin_ws
catkin build
実行
各ターミナルごとに実行前にsource ~/catkin_ws/devel/setup.bashを実行する必要があります。
rosrun qt_lecture qt_touch_app
参考
New Dockable Panel
Widgetのサイズのフィット

