契約異なるテナンシどうしを Local VCN Peering することができ、これを クロステナンシ・ピアリング(Cross-Tenancy Peering) と言います。
Local Peering Gateway接続を使用する代わりに、同じリージョン内の2つ以上の Virtual Cloud Networks (VCNs)を共通の Dynamic Routing Gateway (DRG)に接続することにより、Private Network通信を確立できます。
ということで、契約異なる ABC社と XYZ社の VCN どうしを Cross-Tenancy Peering VCNs して On-PremisesからABC社へVPN接続を行い、On-PremisesからXYZ社へ直接疎通できるように構成設定します。
■ 構成
VCN間のルーティングに関するIAMポリシー要件どおりに各テナントの権限を設定することで可能になります。
お互いの Tenancyへ権限を付与してPeeringを確立できるように、それぞれの2箇所のテナンシの管理者の内、片側の DRG管理者を Requestor、もう一方の VCN管理者を Acceptorとして指定して必要な IAMポリシーを実装します。

XYZ-Tenancy の ②Route Table について、ABC-Tenancy の DRG へのルート・ルール追加は Acceptor-VCN-Policy が必要です。ない場合は、異なる Tenancy への DRG アクセス権限がないため ルート・ルール追加はできません。
■ 事前準備
各テナンシの Computeインスタンス、VCN、Route Table, Security List等や
On-Premisesと ABC-Tenancyテナンシへ、IPSec VPN接続はあらかじめ疎通できるよう設定しておきます。
・ 参考: NEC IXルーターを冗長構成でIKEv2 IPSec VPN接続してみてみた
今回は、IDCSユーザーで作業するため次の情報を使用して各テナンシへ IAM Policy と Group作成を行い Cross-Tenancy Peering VCNsします
IAMユーザーで作業する場合は、IDCSグループ作成は不要です。
| Tenancy Name | ABC-Tenancy | XYZ-Tenancy |
|---|---|---|
| Tenancy OCID | ocid1.tenancy.oc1..aaaaaaaa4rljlv6dfuvi2qc6gjnx7 | ocid1.tenancy.oc1..aaaaaaaai4sy6qyo2aa6wnofmtzir4 |
| IDCS Group Name | OCI_DRG-Admin | OCI_VCN-Admin |
| IAM Group Name | DRG-Admin | VCN-Admin |
| IAM Group OCID | ocid1.group.oc1..aaaaaaaaa4r456s7km26u72em2bf5c2jdn4 | ocid1.group.oc1..aaaaaaaaeqc6nudajz7zkt6xxzrjiuw5 |
| Policy Name | Requestor-DRG-Policy | Acceptor-VCN-Policy |
| Policy Statements | define tenancy XYZ-Tenancy as ocid1.tenancy.oc1..aaaaaaaai4sy6qyo2aa6wnofmtzir4 define group VCN-Admin as ocid1.group.oc1..aaaaaaaaeqc6nudajz7zkt6xxzrjiuw5 endorse group DRG-Admin to manage drg-attachment in tenancy XYZ-Tenancy admit group VCN-Admin of tenancy XYZ-Tenancy to manage drg in tenancy |
define tenancy ABC-Tenancy as ocid1.tenancy.oc1..aaaaaaaa4rljlv6dfuvi2qc6gjnx7 define group DRG-Admin as ocid1.group.oc1..aaaaaaaaa4r456s7km26u72em2bf5c2jdn4 admit group DRG-Admin of tenancy ABC-Tenancy to manage drg-attachment in tenancy endorse group VCN-Admin to manage drg in tenancy ABC-Tenancy |
■ ABC-Tenancy作業(DRG側テナンシ)
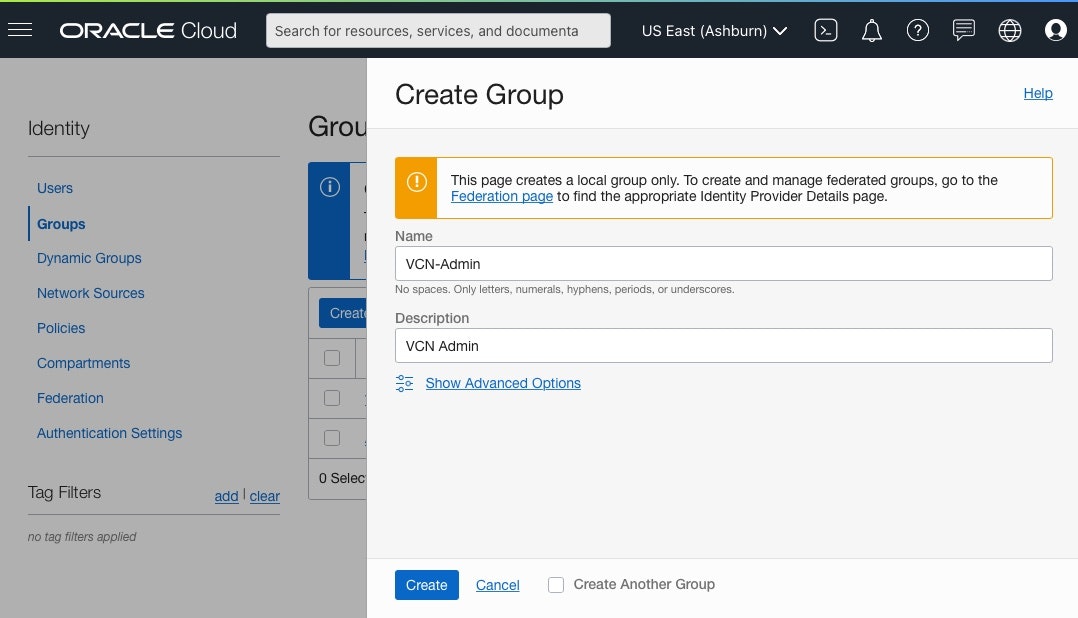
● IAMグループ: DRG-Admin作成
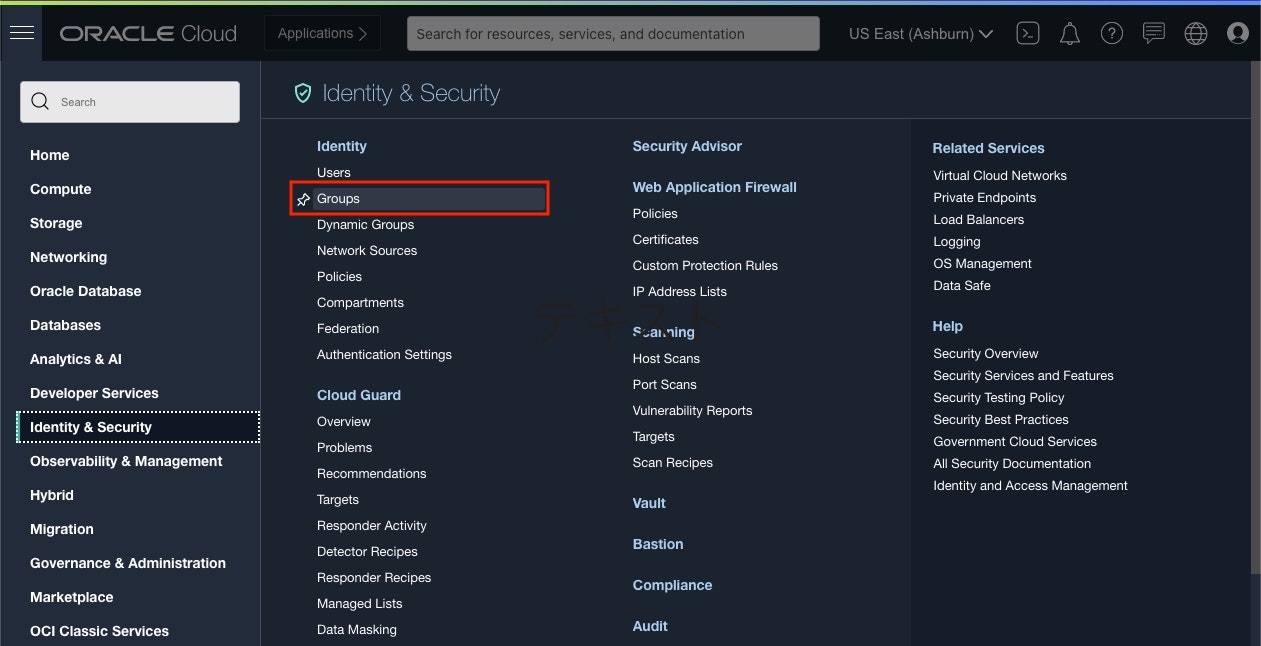
1) OCI コンソール画面
[Identity & Security] > Identity項目 の [Groups] をクリック
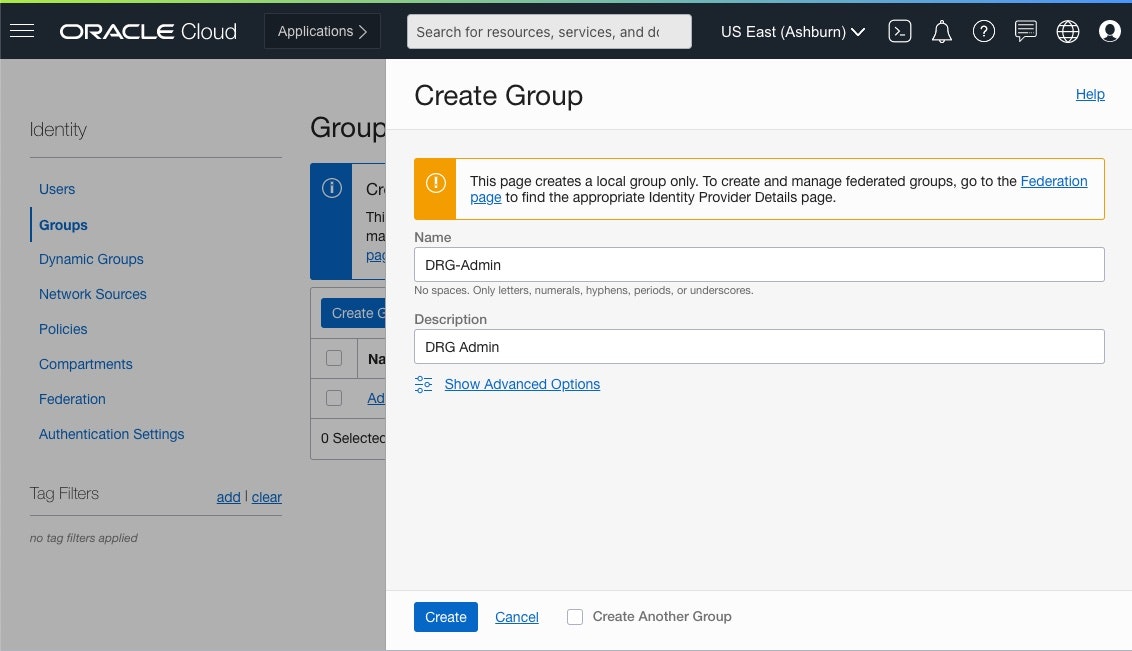
2) Group画面
[Create Group] をクリックし、以下項目をクリックして [Create Group] をクリック
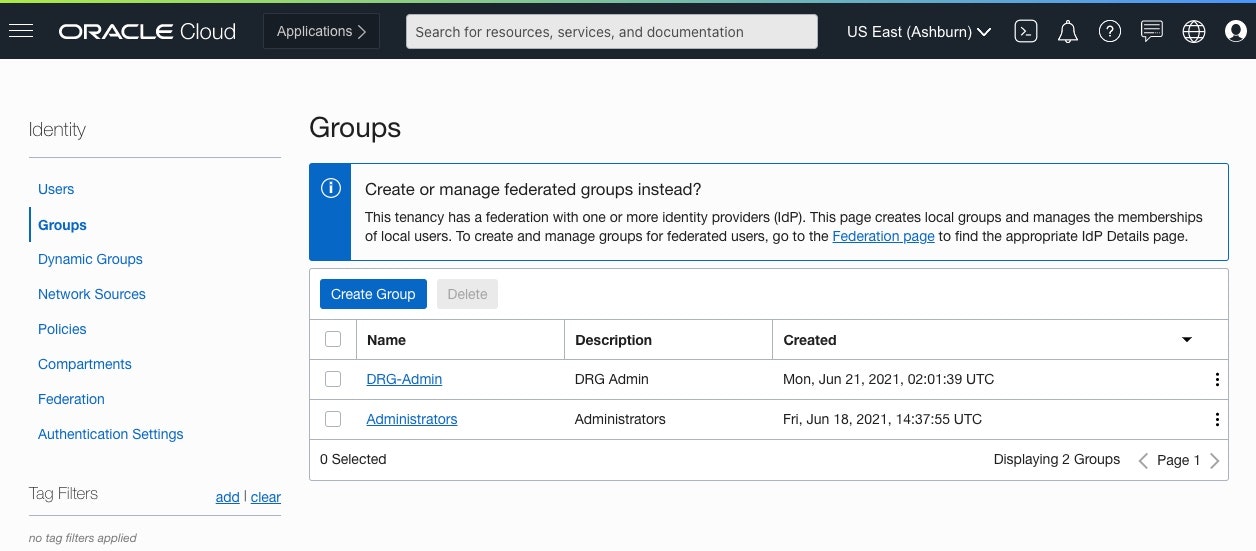
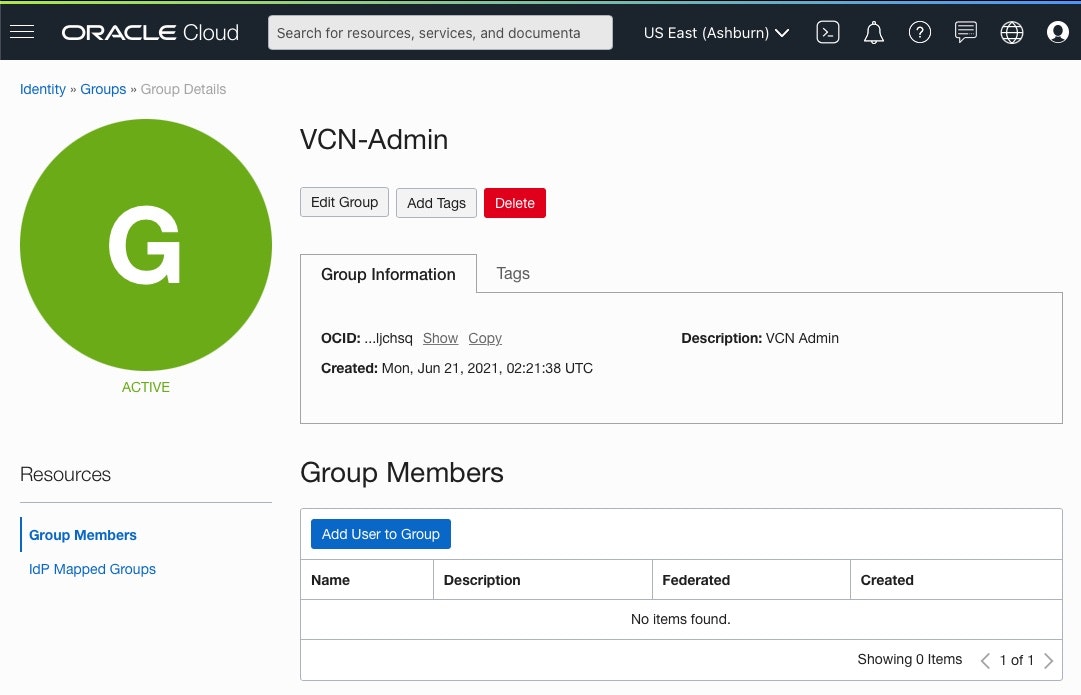
3) 作成完了
● IDCSグループ: OCI_DRG-Admin作成
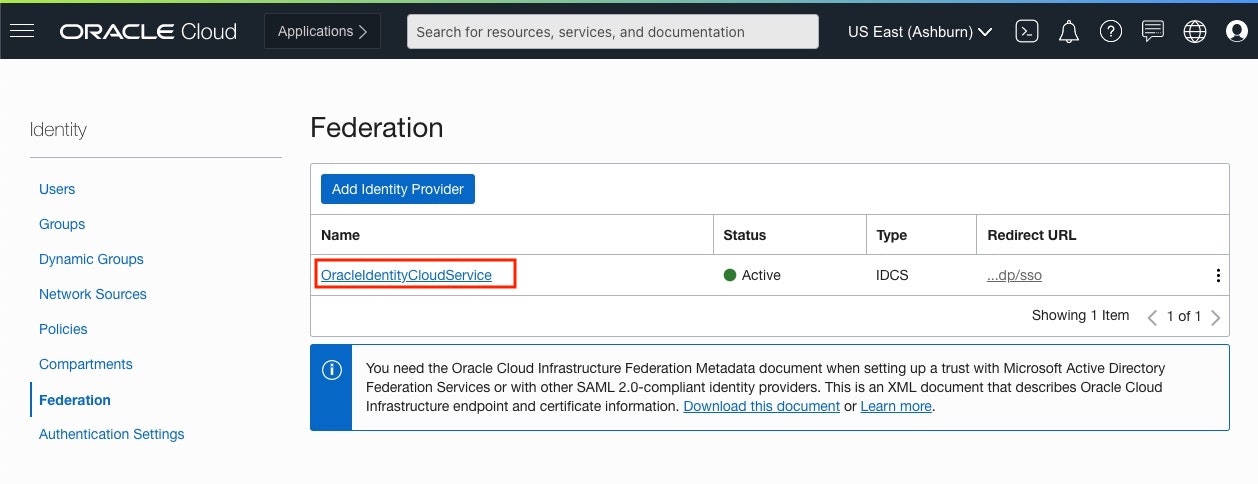
1) Federation画面
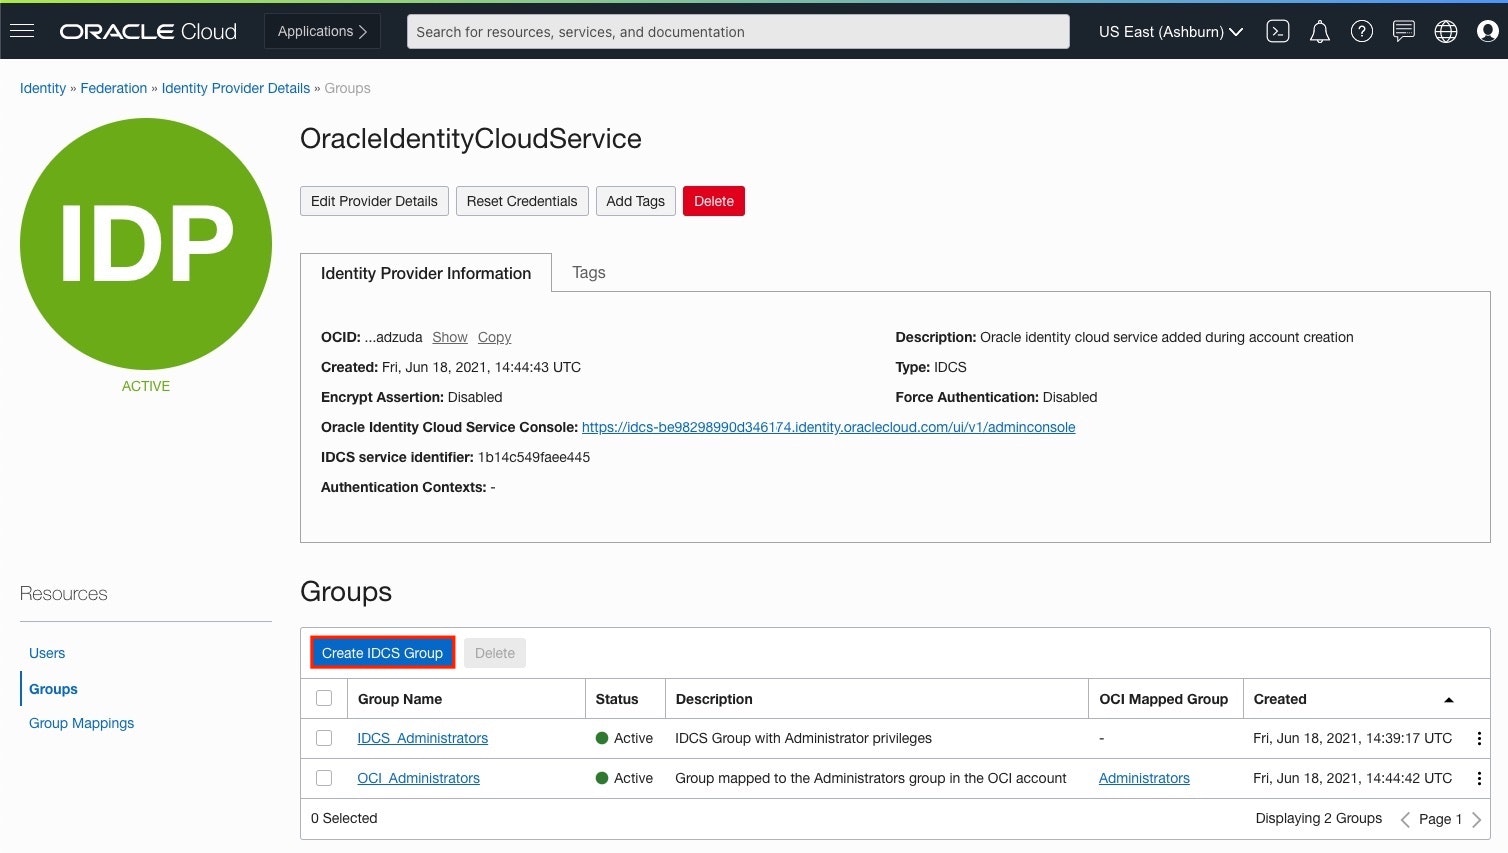
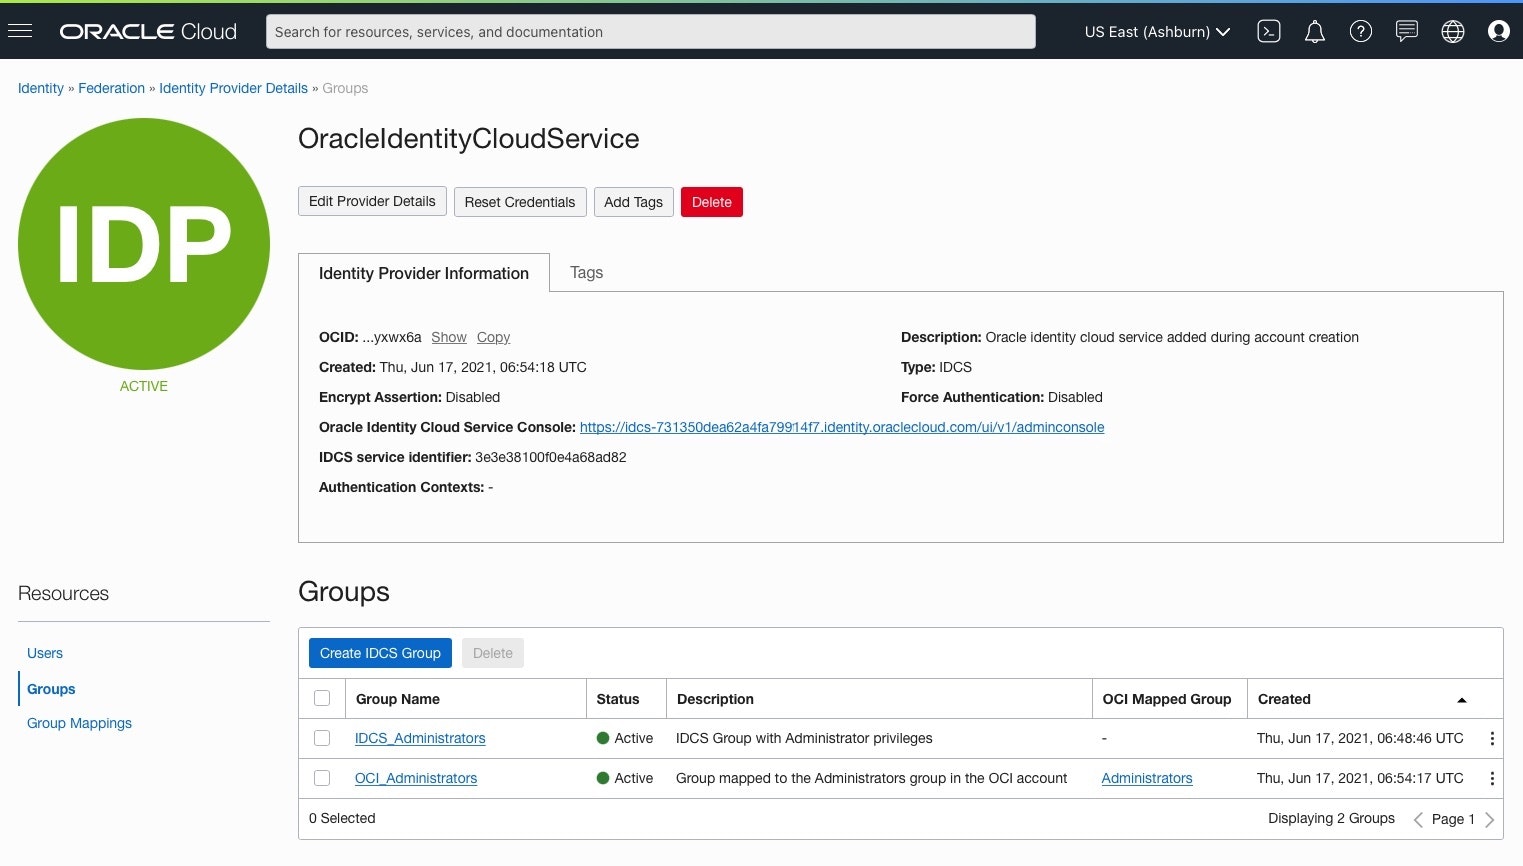
Identity > Federation画面にある、OracleIdentityCloudService をクリック
2) OracleIdentityCloudService画面
[Resources] > [Groups] 画面にある、[Create IDCS Group]をクリック
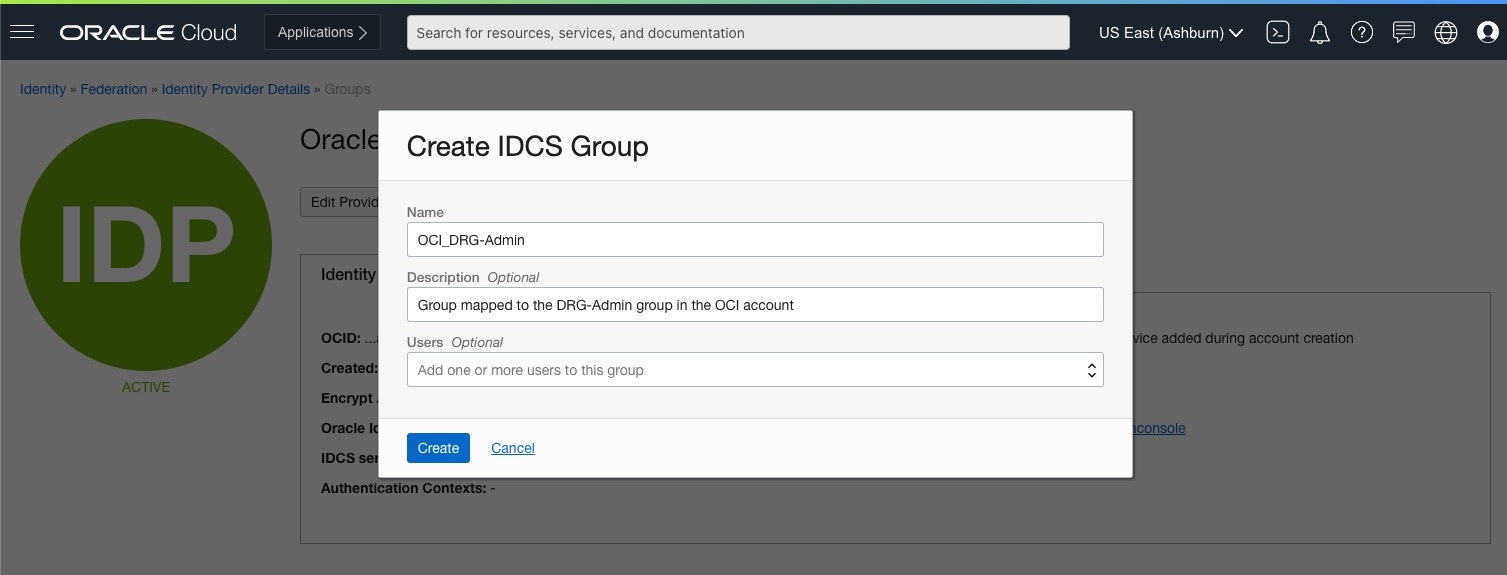
3) Create IDCS Group画面
以下項目をクリックし、[Create]をクリック
・ Name: 任意のIDCS Group名を入力
・ Users: 付与するユーザーを選択
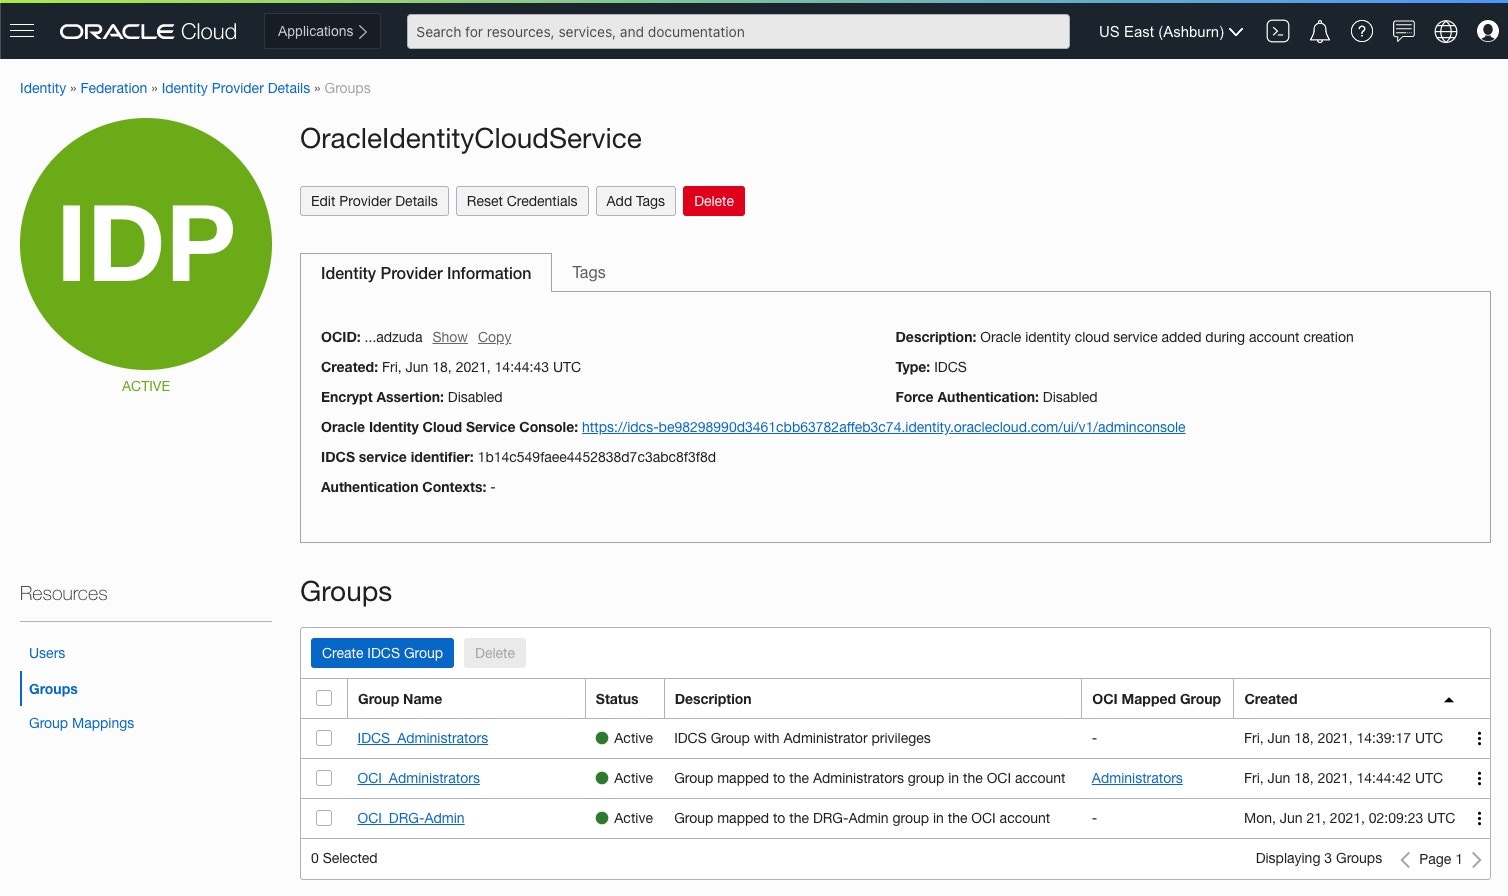
4) 作成完了
● IAMグループと IDCSグループマッピング
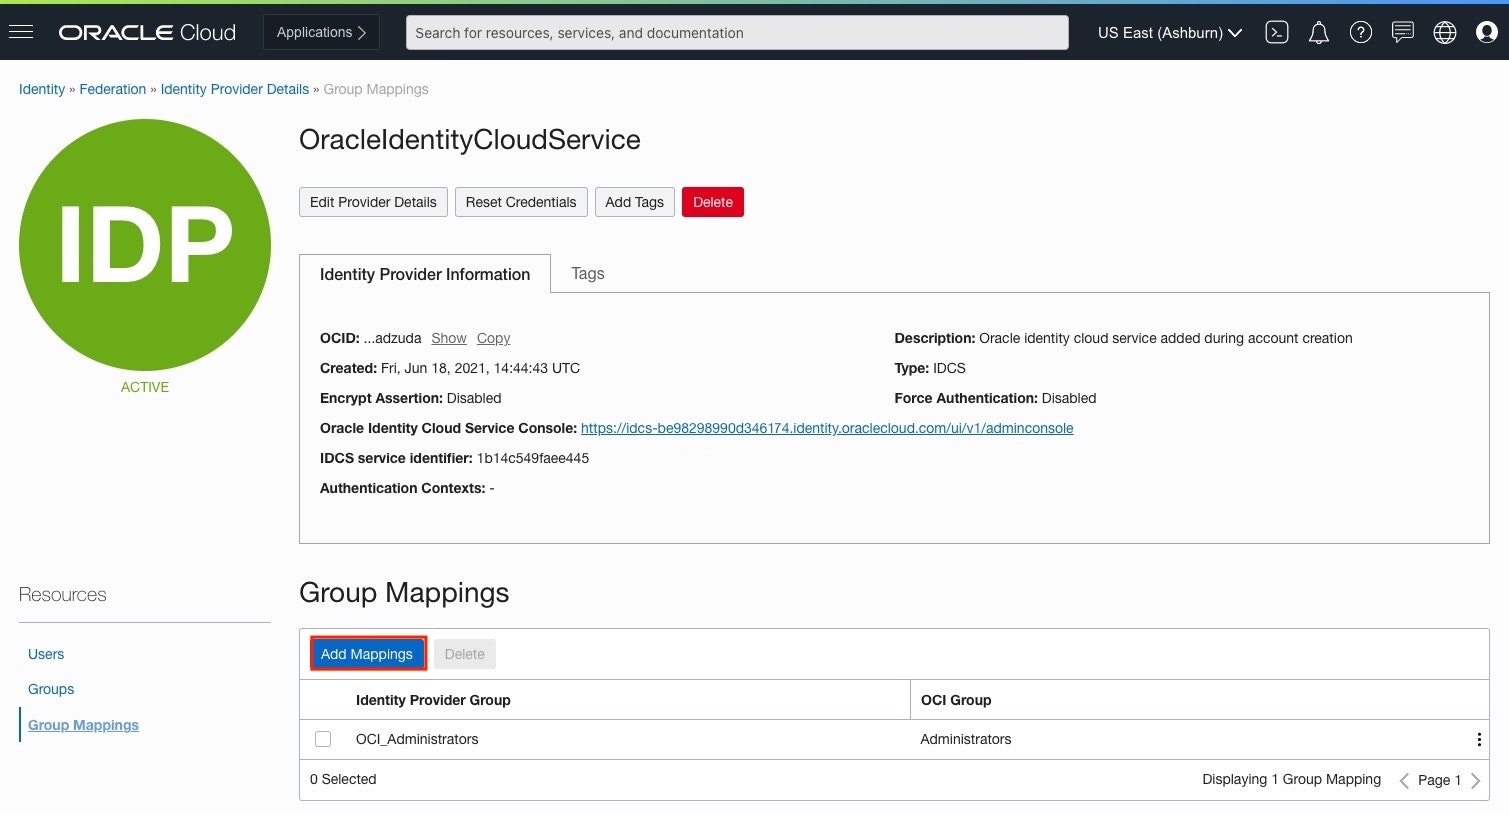
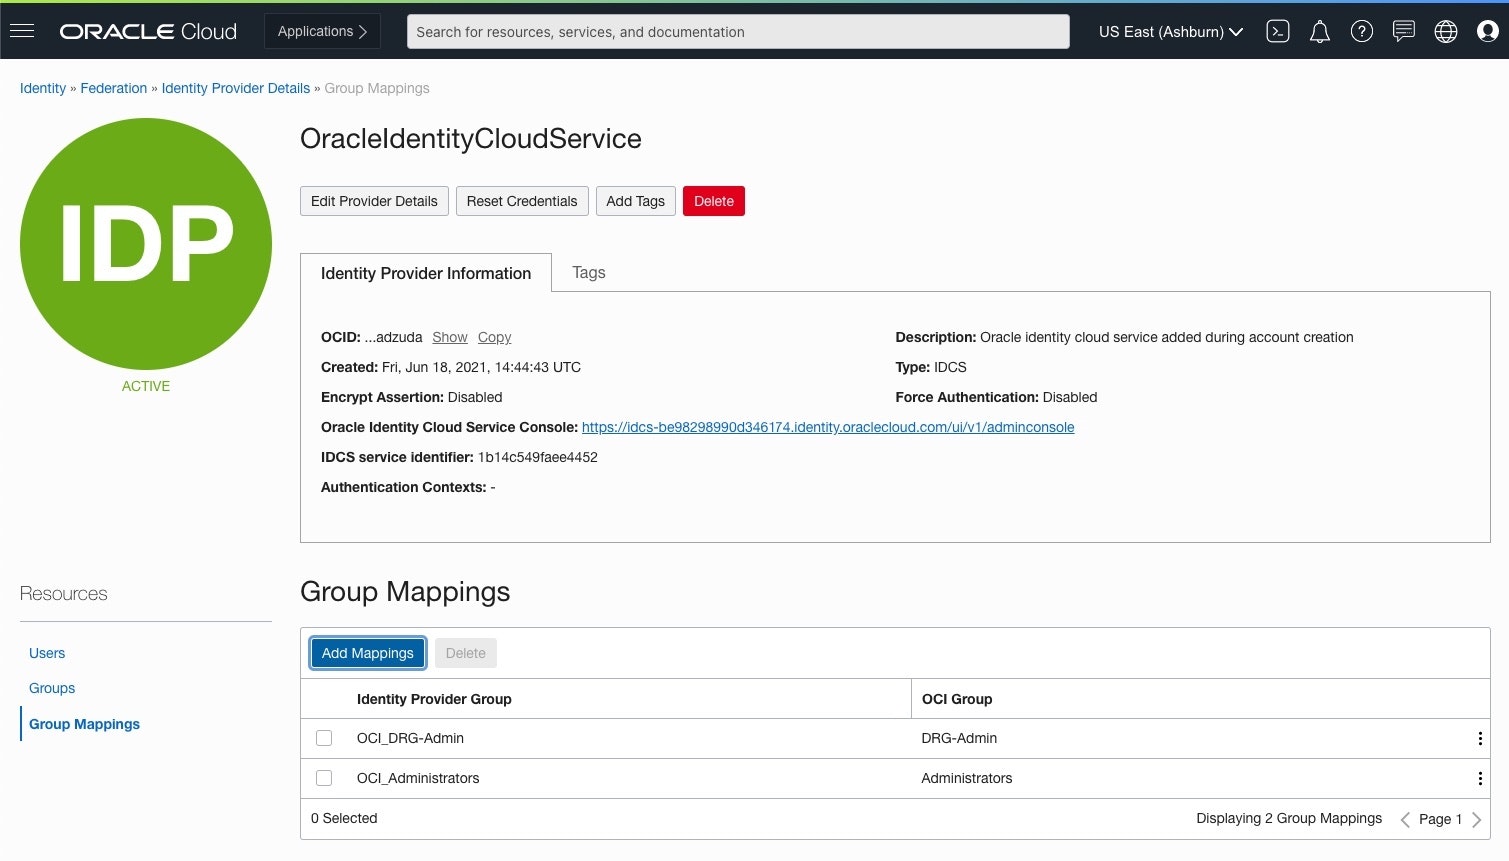
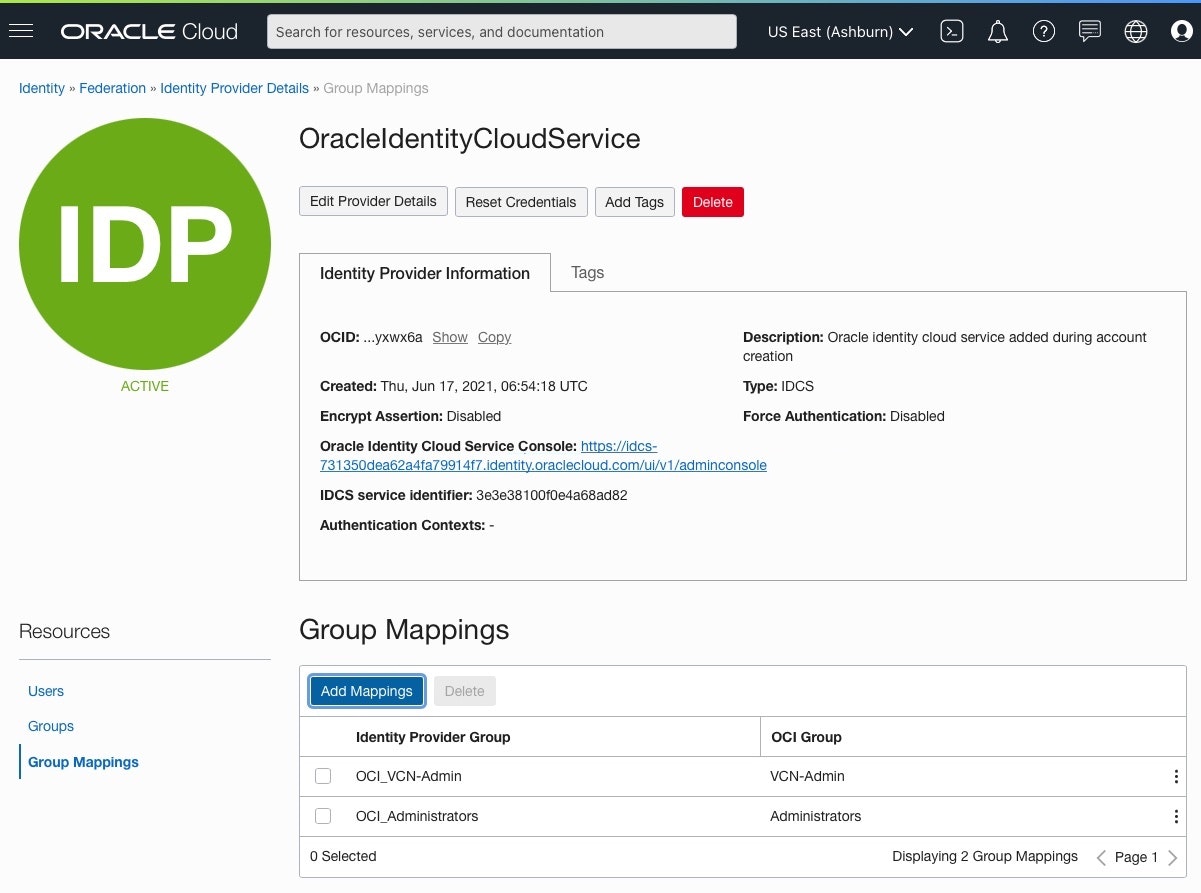
1) Group Mappings画面
[Resources] > [Group Mappings] 画面にある、[Add Mappings]をクリック
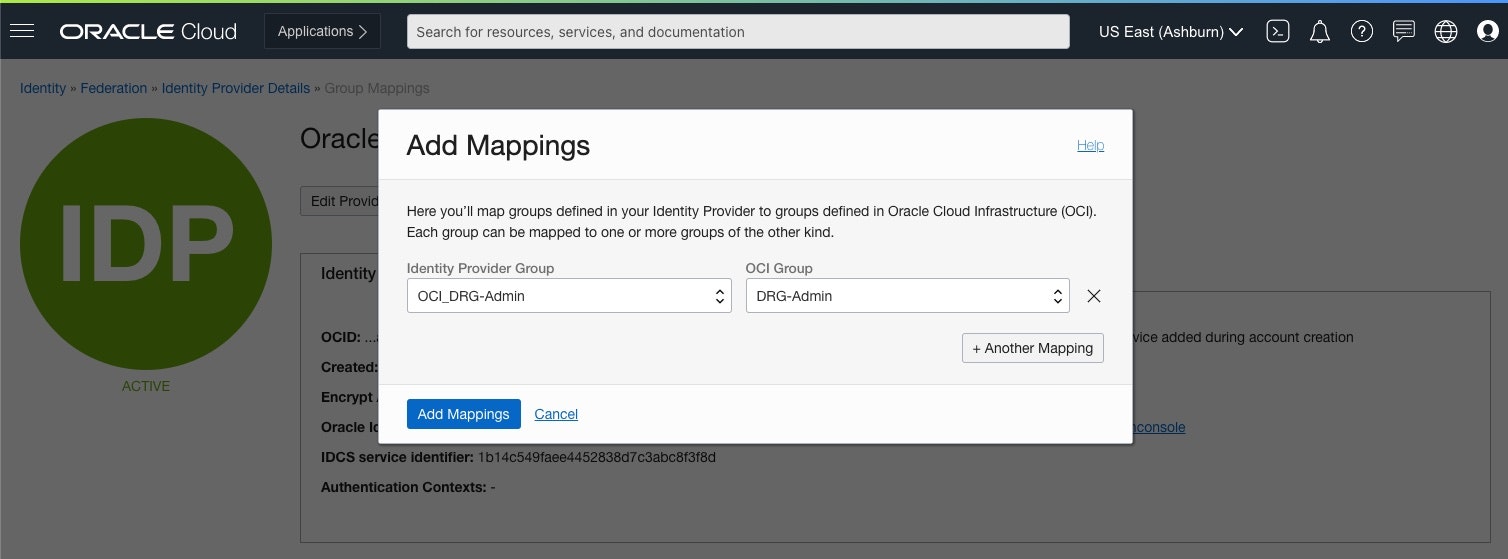
2) Add Mappings画面
以下項目をクリックし、[Create]をクリック
・ Identity Provider Group: 作成した IDCSグループを選択
・ OCI Group: 作成した IAMグループを選択
3) Mapping完了
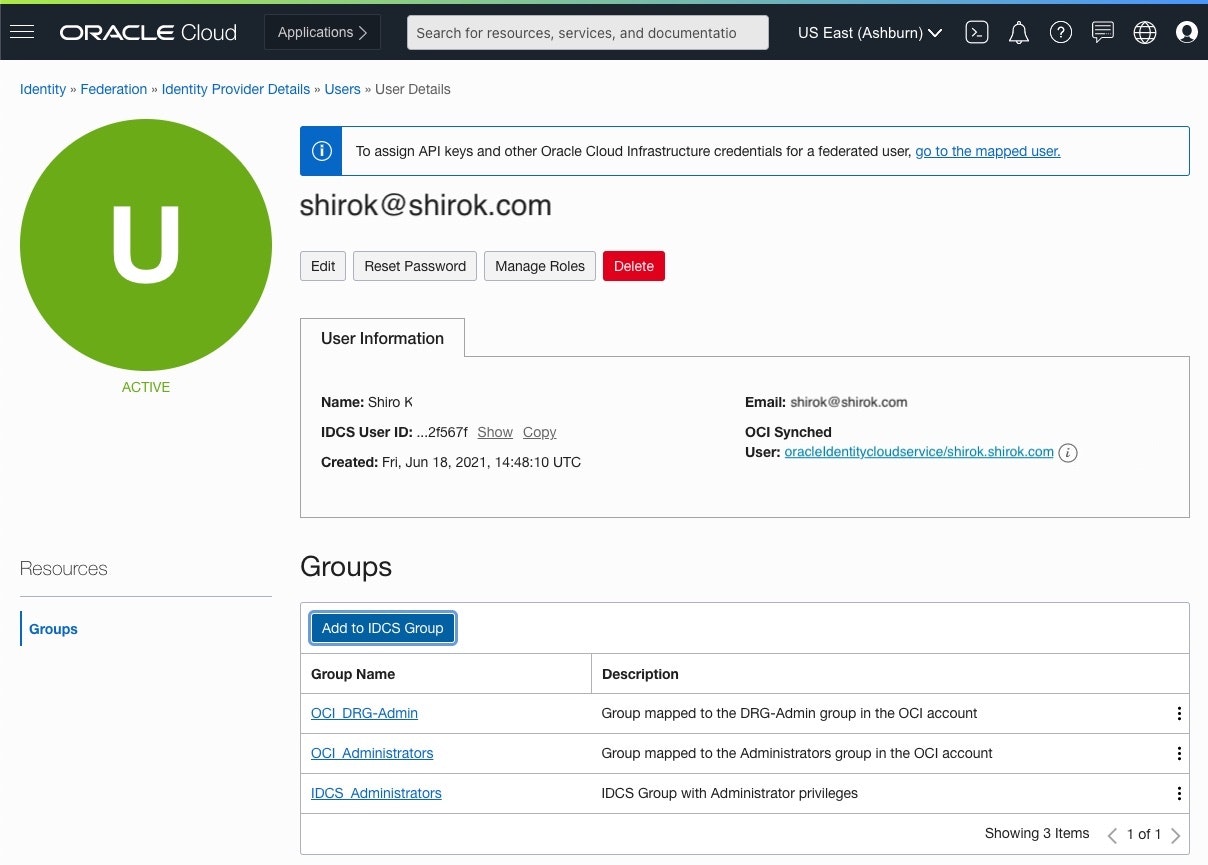
● IDCSユーザーへ IDCSグループ追加
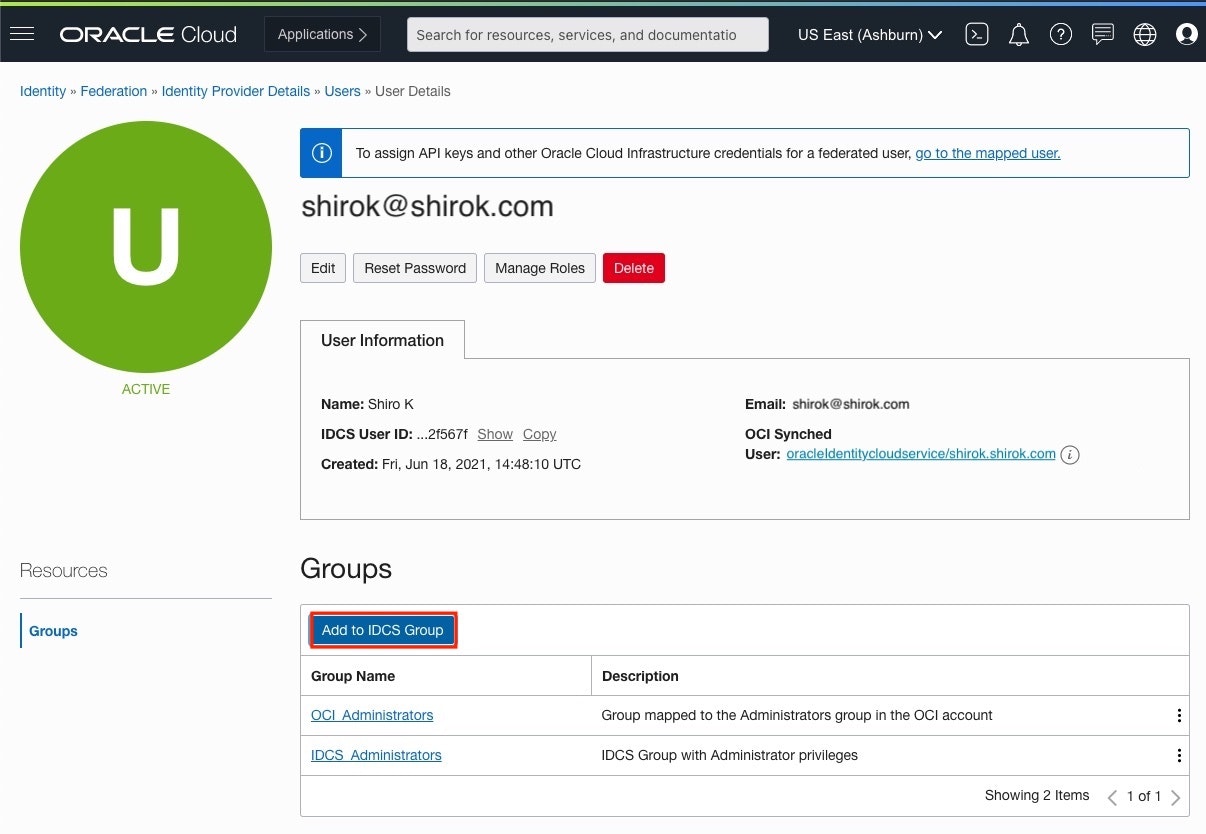
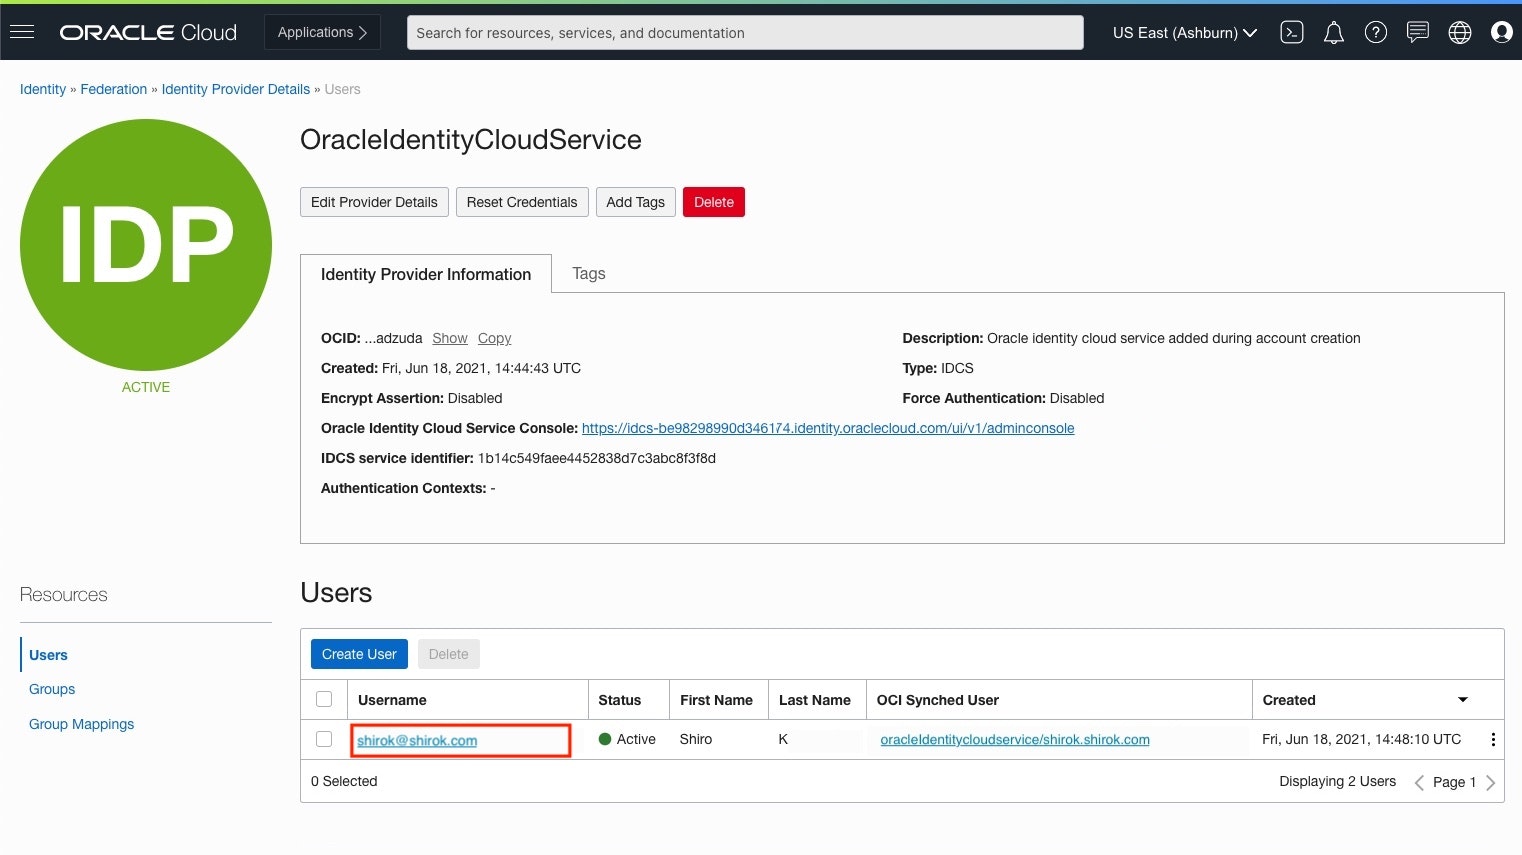
1) OracleIdentityCloudService: Users画面
[Resources] > [Users] 画面にある、権限を付与するユーザーを選択

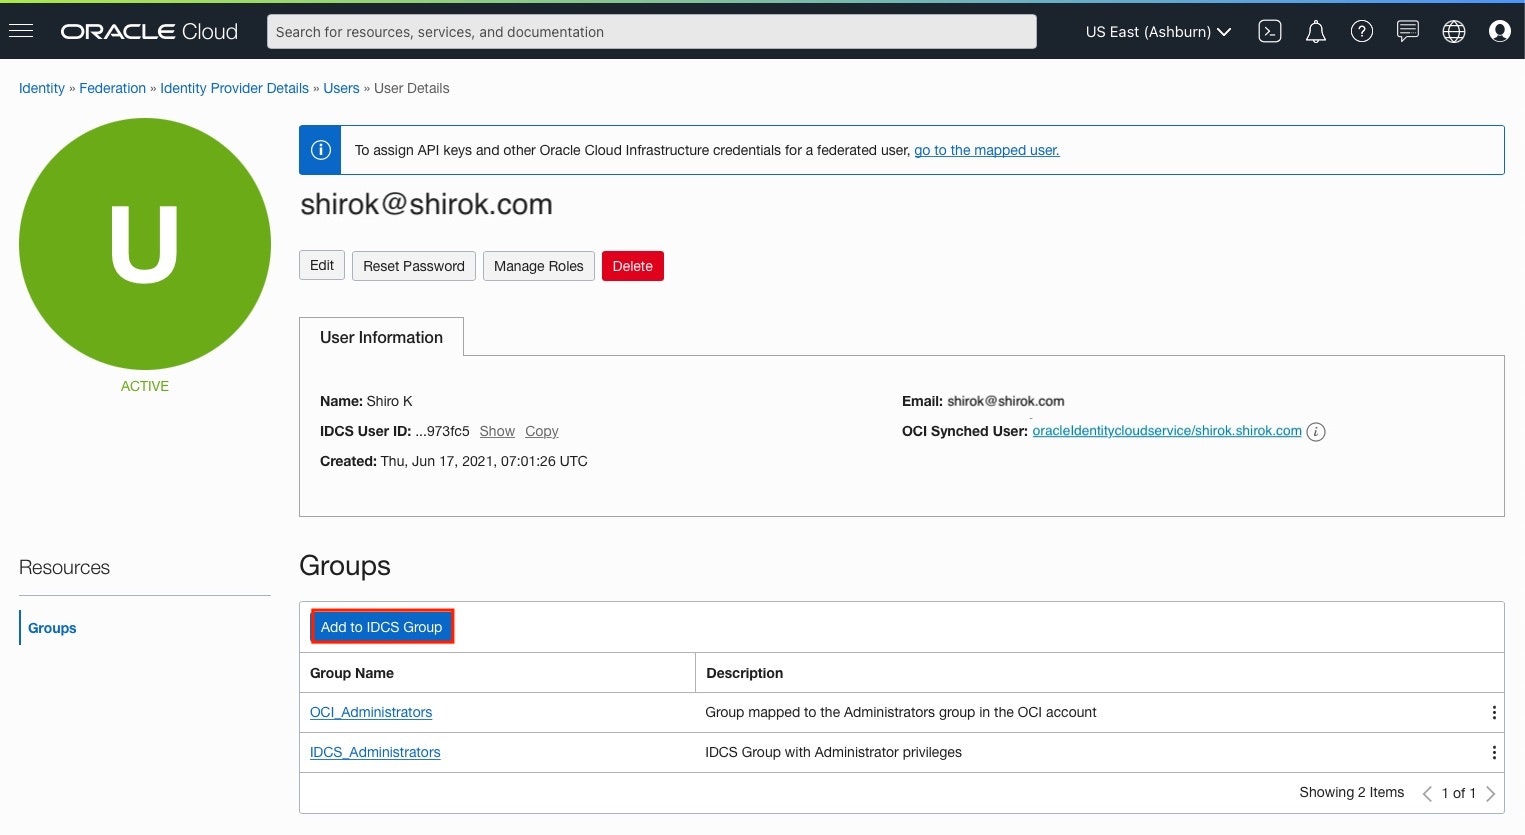
2) ユーザー名: Groups画面
[Add to IDCS Group]をクリック
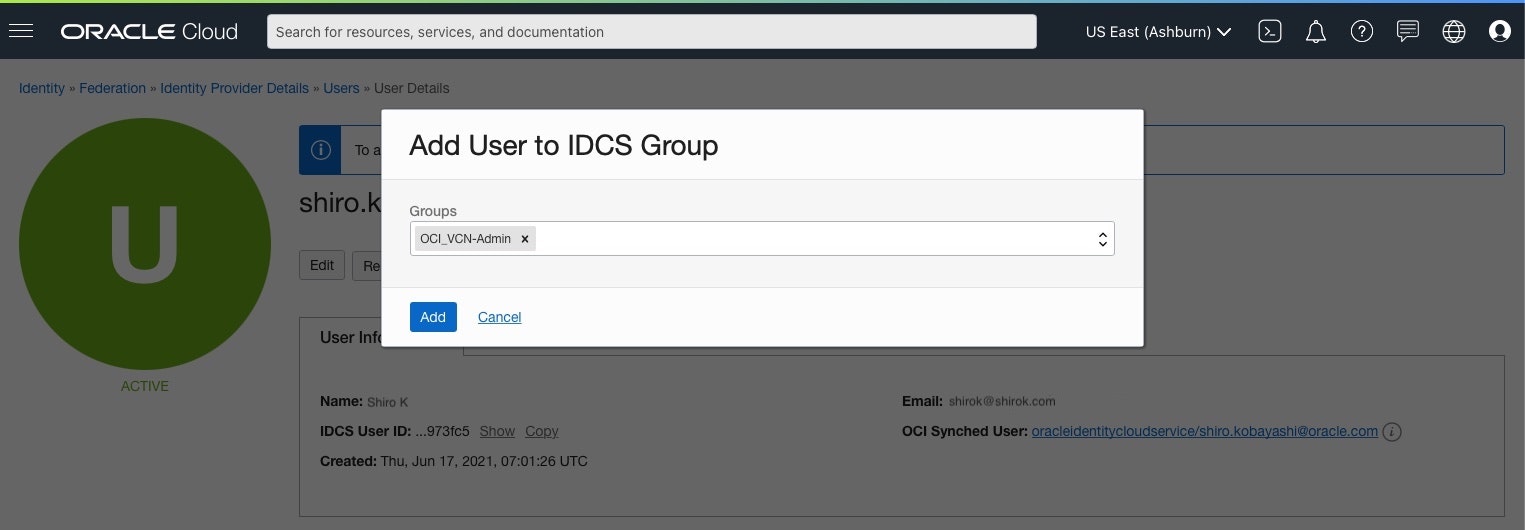
3) Add User to IDCS Group画面
以下項目をクリックし、[Add]をクリック
・ Groups: 作成したIDCSグループを選択
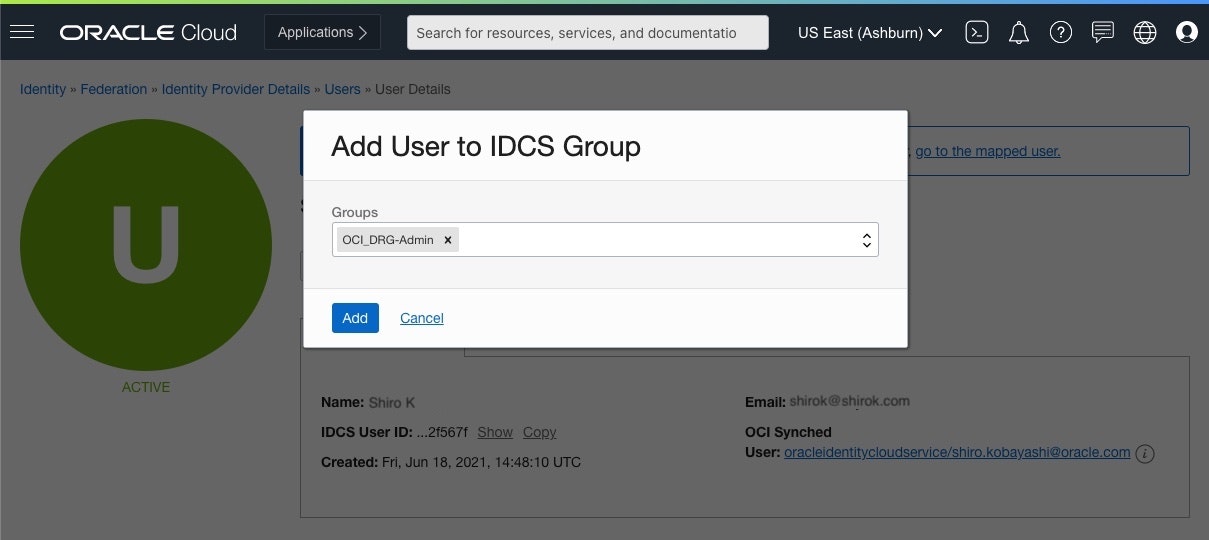
4) Add完了
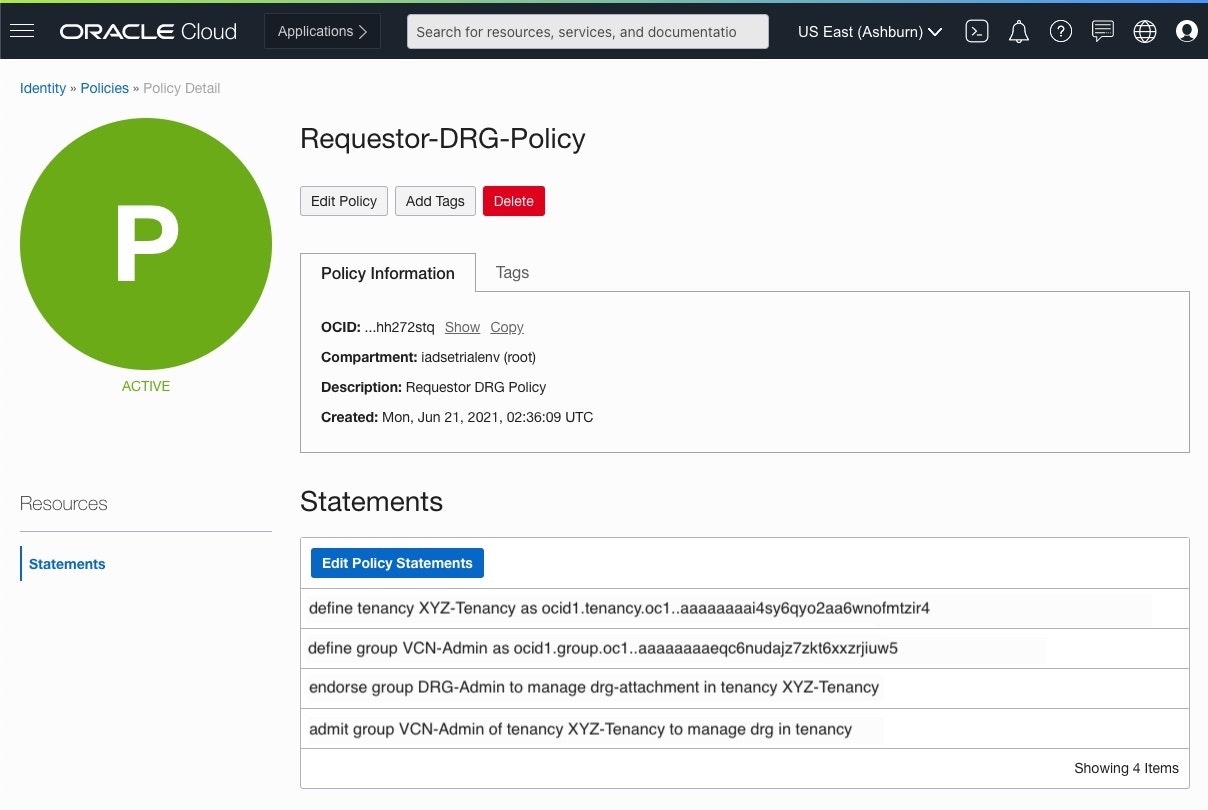
● ポリシー:Requestor-DRG-Policy追加
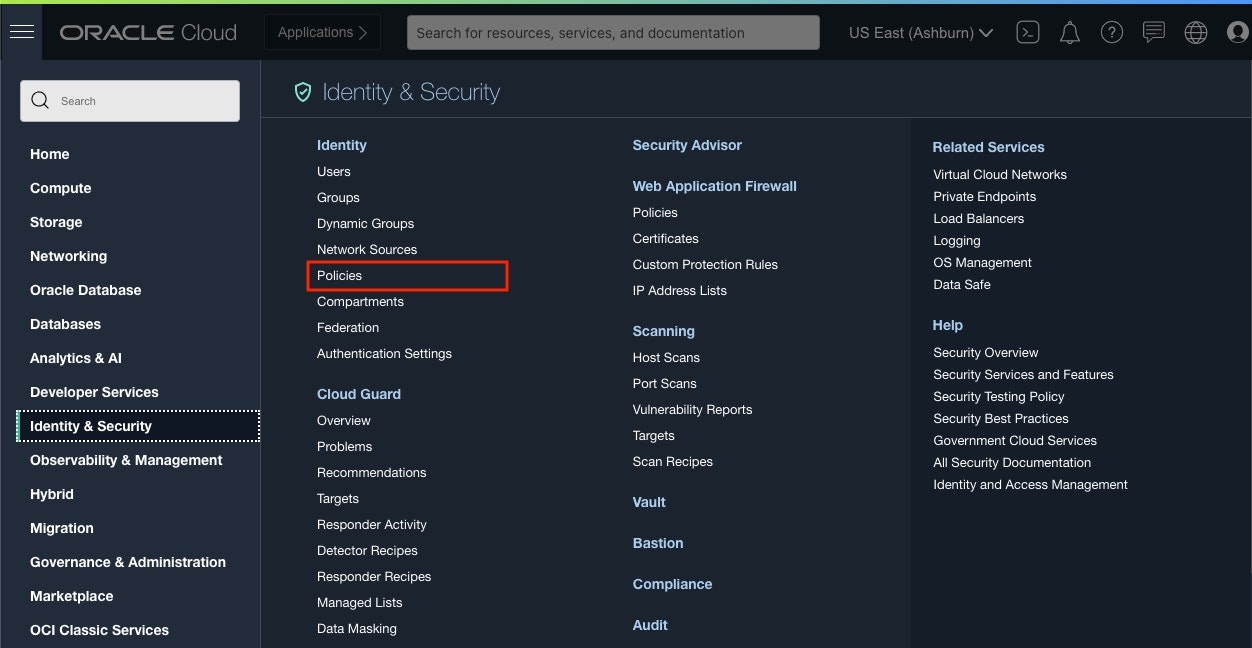
1) OCI コンソール画面
Identity & Security > Policies をクリック
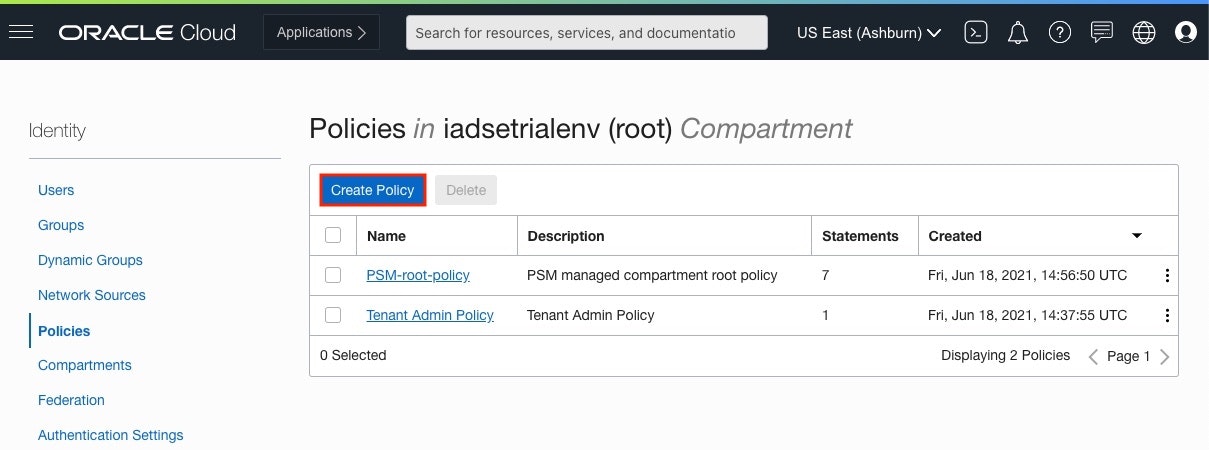
2) Policies画面
[Create Policy]をクリック
3) Create Policy画面
以下項目をクリックし、[Create]をクリック
・ Name: 任意の名前を設定
・ Compartment: rootコンパートメントを選択
・ Policy Builder: [Show manual editor]をONにして、以下入力
	define tenancy XYZ-Tenancy as ocid1.tenancy.oc1..aaaaaaaai4sy6qyo2aa6wnofmtzir4
	define group VCN-Admin as ocid1.group.oc1..aaaaaaaaeqc6nudajz7zkt6xxzrjiuw5
	endorse group DRG-Admin to manage drg-attachment in tenancy XYZ-Tenancy
	admit group VCN-Admin of tenancy XYZ-Tenancy to manage drg in tenancy
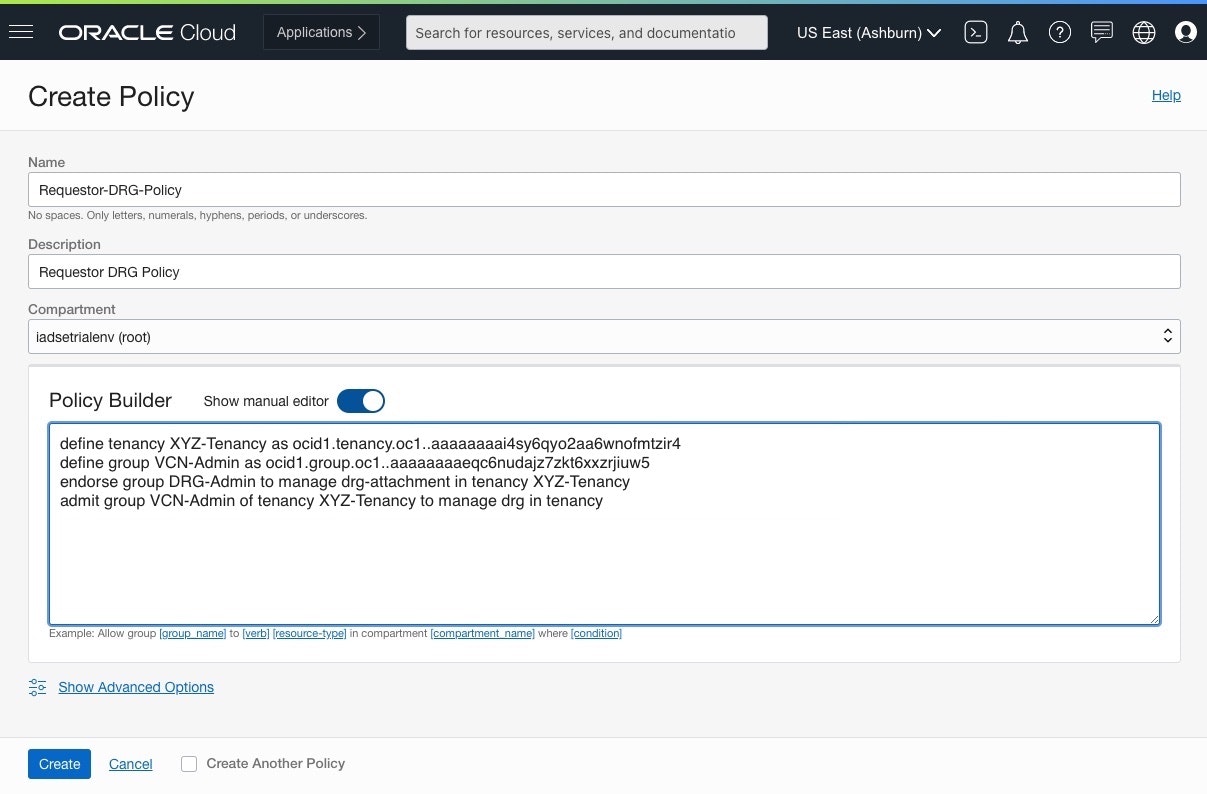
4) Create完了
■ XYZ-Tenancy 側作業(DRGと異なる側テナンシ)
● IAMグループ: VCN-Admin作成
1) OCI コンソール画面
[Identity & Security] > Identity の [Groups] をクリック

2) Group画面
[Create Group] をクリックし、以下項目をクリックして [Create Group] をクリック
3) 作成完了
● IDCSグループ: OCI_VCN-Admin作成
1) Federation画面
Identity > Federation画面にある、OracleIdentityCloudService をクリック
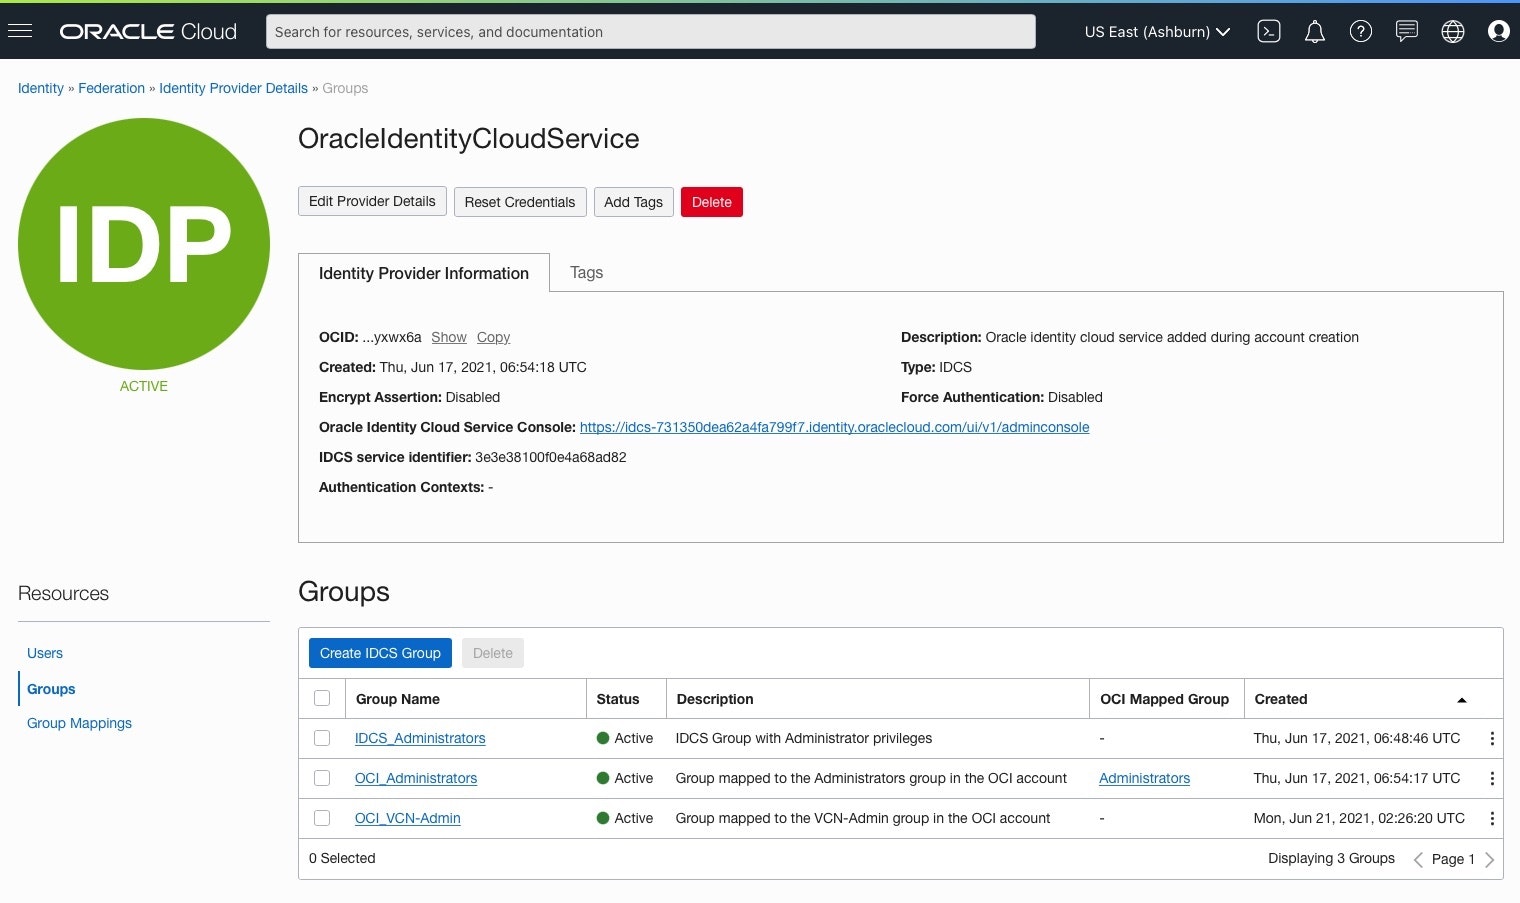
2) OracleIdentityCloudService画面
[Resources] > [Groups] 画面にある、[Create IDCS Group]をクリック
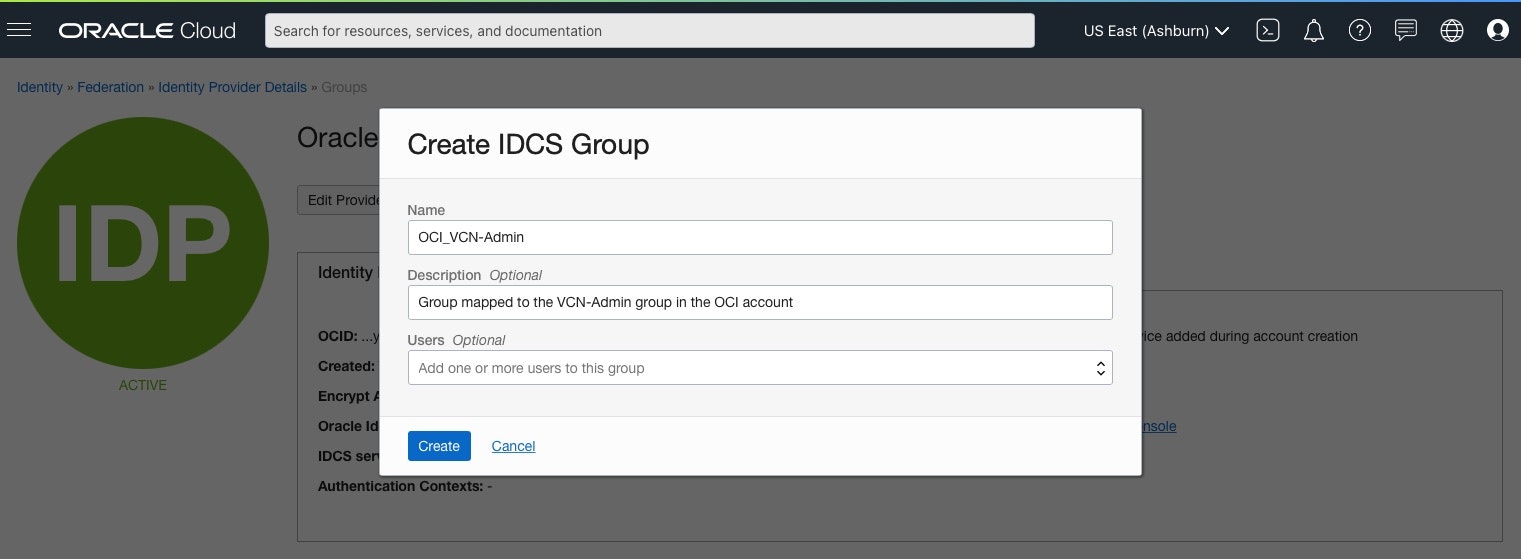
3) Create IDCS Group画面
以下項目をクリックし、[Create]をクリック
・ Name: 任意のIDCS Group名を入力
・ Users: 付与するユーザーを選択
4) 作成完了
● IAMグループとIDCSグループマッピング
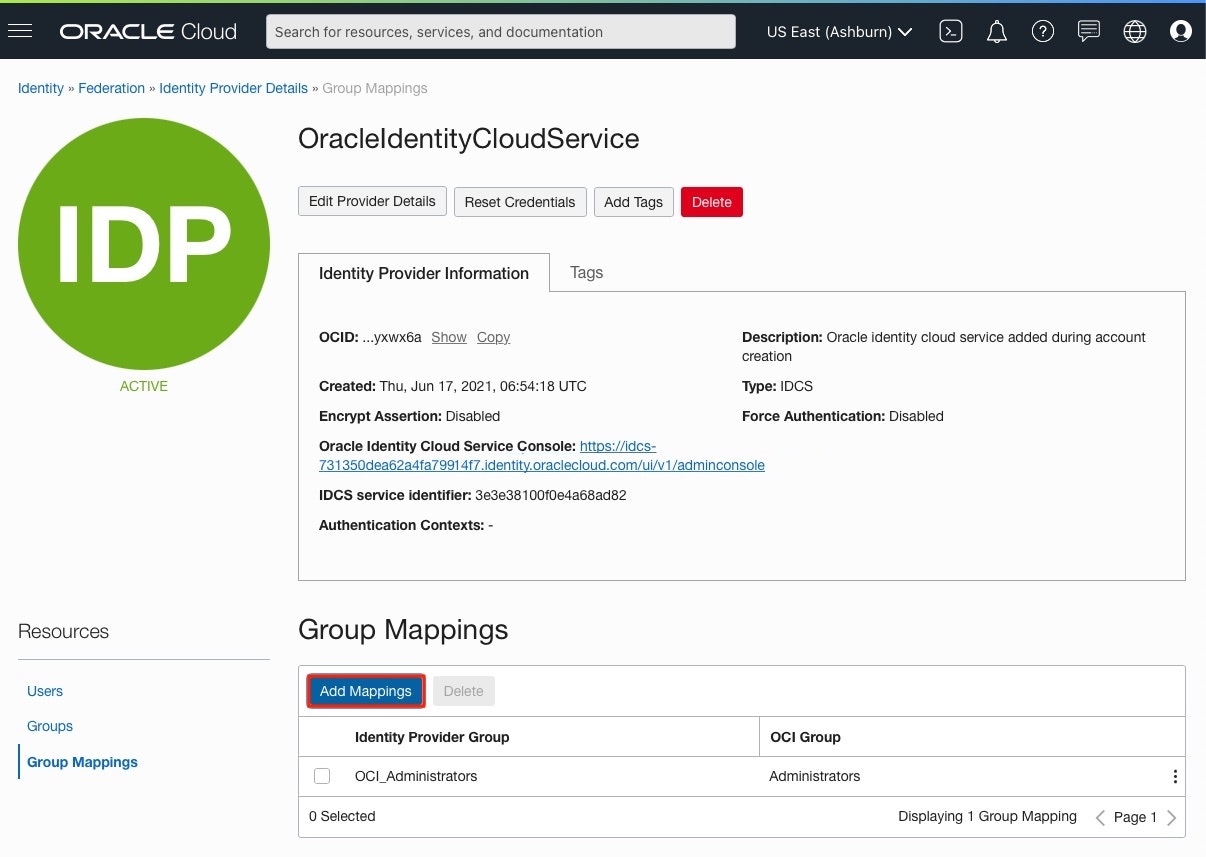
1) Group Mappings画面
[Resources] > [Group Mappings] 画面にある、[Add Mappings]をクリック
2) Add Mappings画面
以下項目をクリックし、[Create]をクリック
・ Identity Provider Group: 作成した IDCSグループを選択
・ OCI Group: 作成した IAMグループを選択
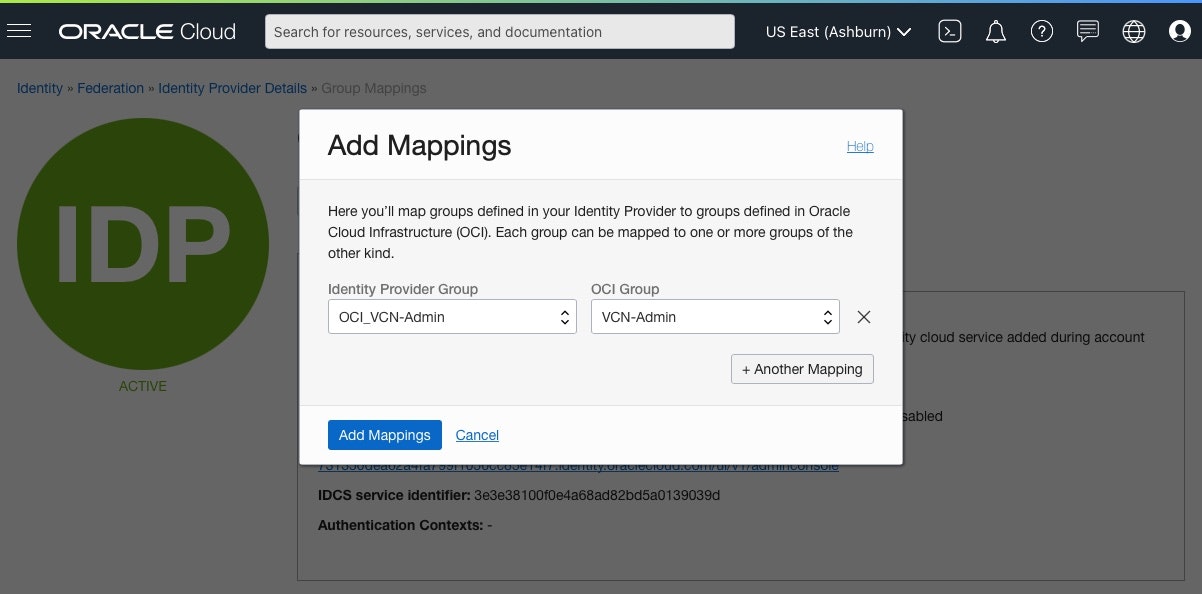
3) Mapping完了
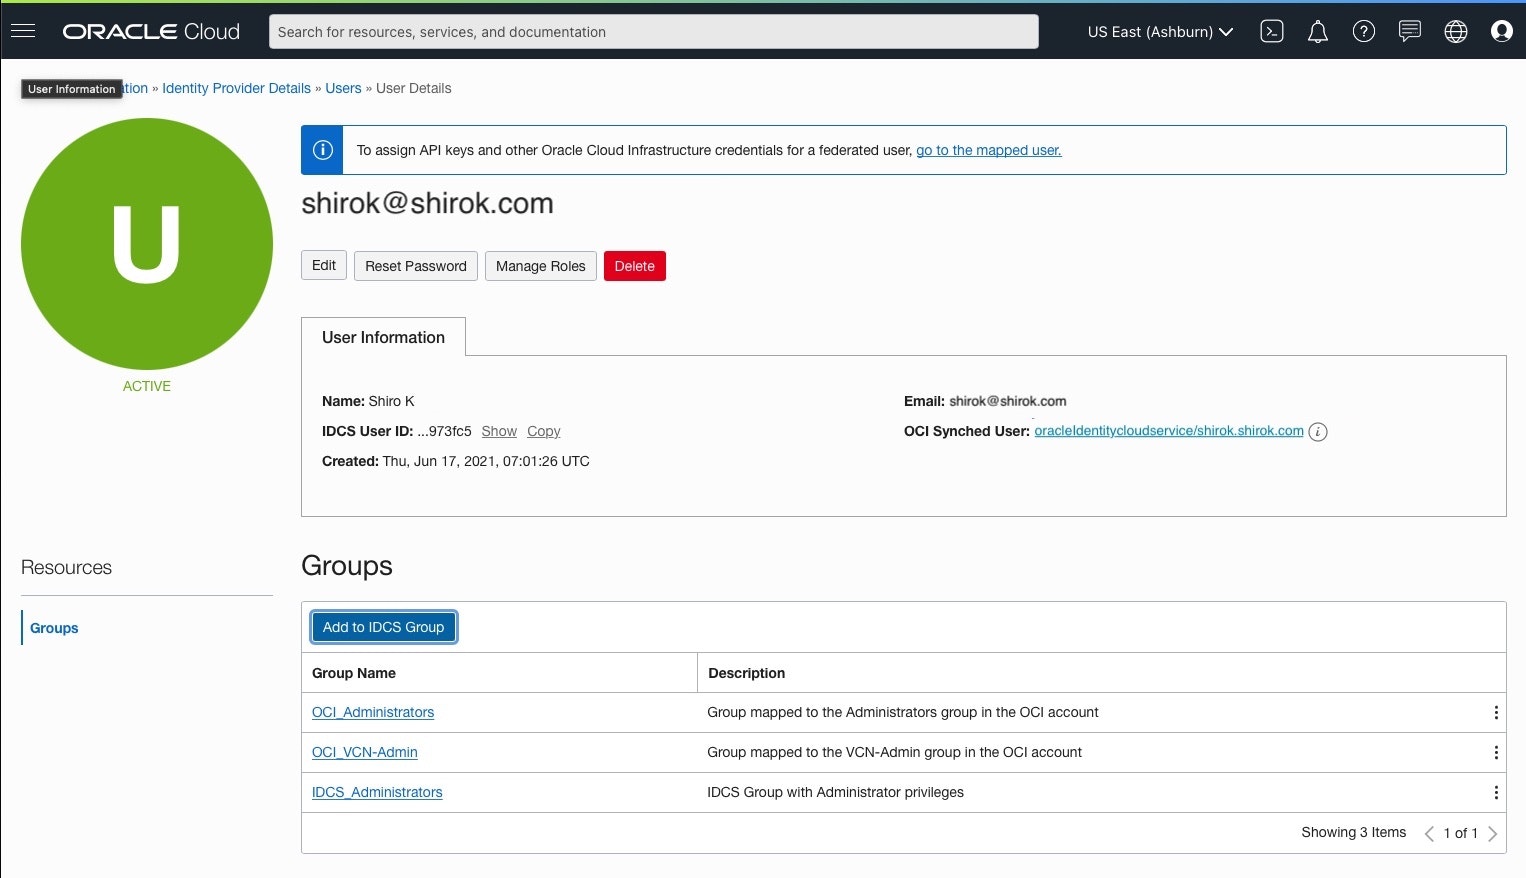
● IDCSユーザーへIDCSグループ追加
1) OracleIdentityCloudService: Users画面
[Resources] > [Users] 画面にある、権限を付与するユーザーを選択
- ユーザー名: Groups画面
[Add to IDCS Group]をクリック
2) CAdd User to IDCS Group画面
以下項目をクリックし、[Add]をクリック
・ Groups: 作成した IDCS Groupを選択
3) Add完了
● ポリシー:Acceptor-VCN-Policy追加
1) OCI コンソール画面
Identity & Security > Policies をクリック

2) Policies画面
[Create Policy]をクリック
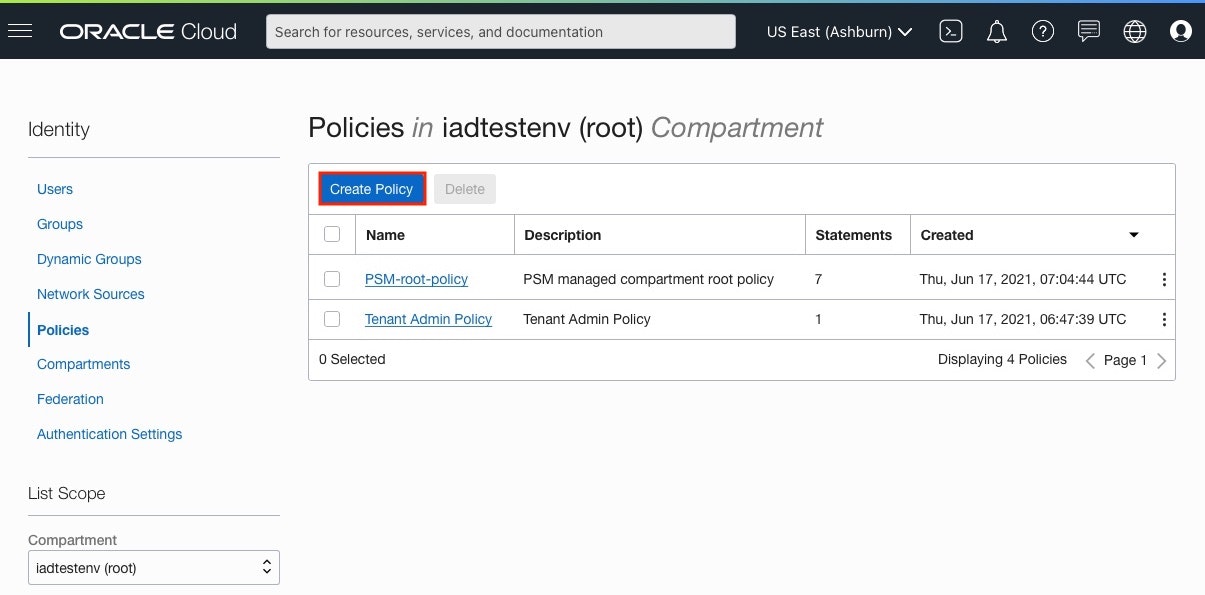
3) Create Policy画面
以下項目をクリックし、[Create]をクリック
・Name: 任意の名前を設定
・Compartment: rootコンパートメント を選択
・Policy Builder: [Show manual editor]をONにして、以下入力
	define tenancy ABC-Tenancy as ocid1.tenancy.oc1..aaaaaaaa4rljlv6dfuvi2qc6gjnx7
	define group DRG-Admin as ocid1.group.oc1..aaaaaaaaa4r456s7km26u72em2bf5c2jdn4
	admit group DRG-Admin of tenancy ABC-Tenancy to manage drg-attachment in tenancy
	endorse group VCN-Admin to manage drg in tenancy ABC-Tenancy
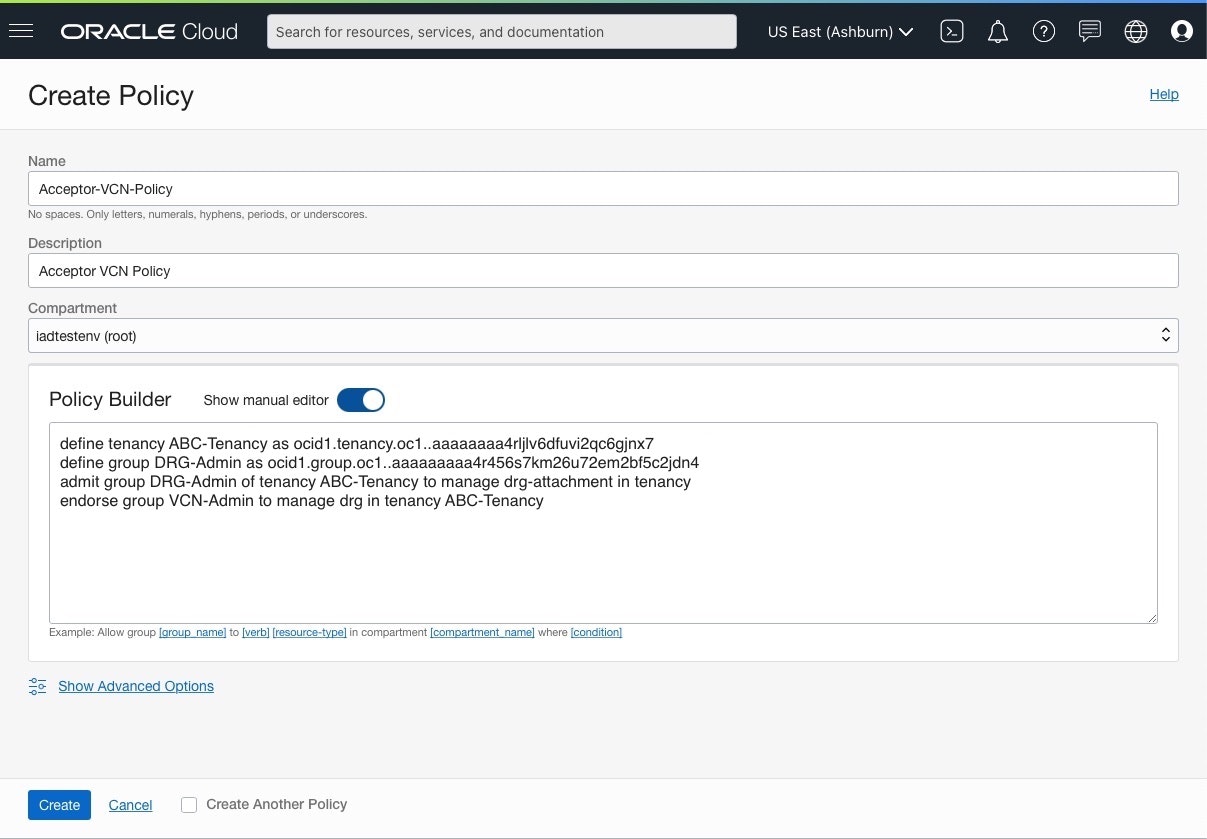
4) Create完了
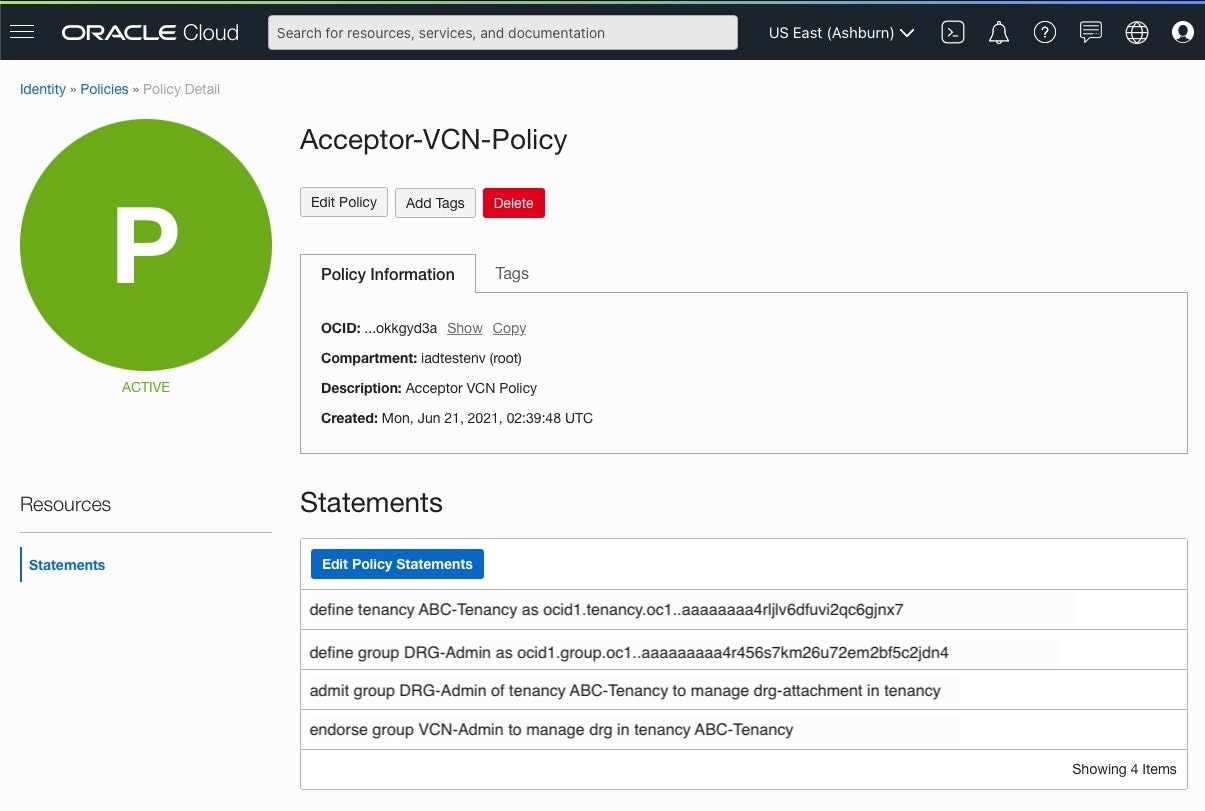
■ Cross-Tenancy Peering
作成したポリシーのグループが付与されているユーザーで実行します
● XYZ-Tenancy 側作業
1) OCIコンソール画面
[Networking] > [Virtual Cloud Networks]をクリックし、対象のVCNを選択

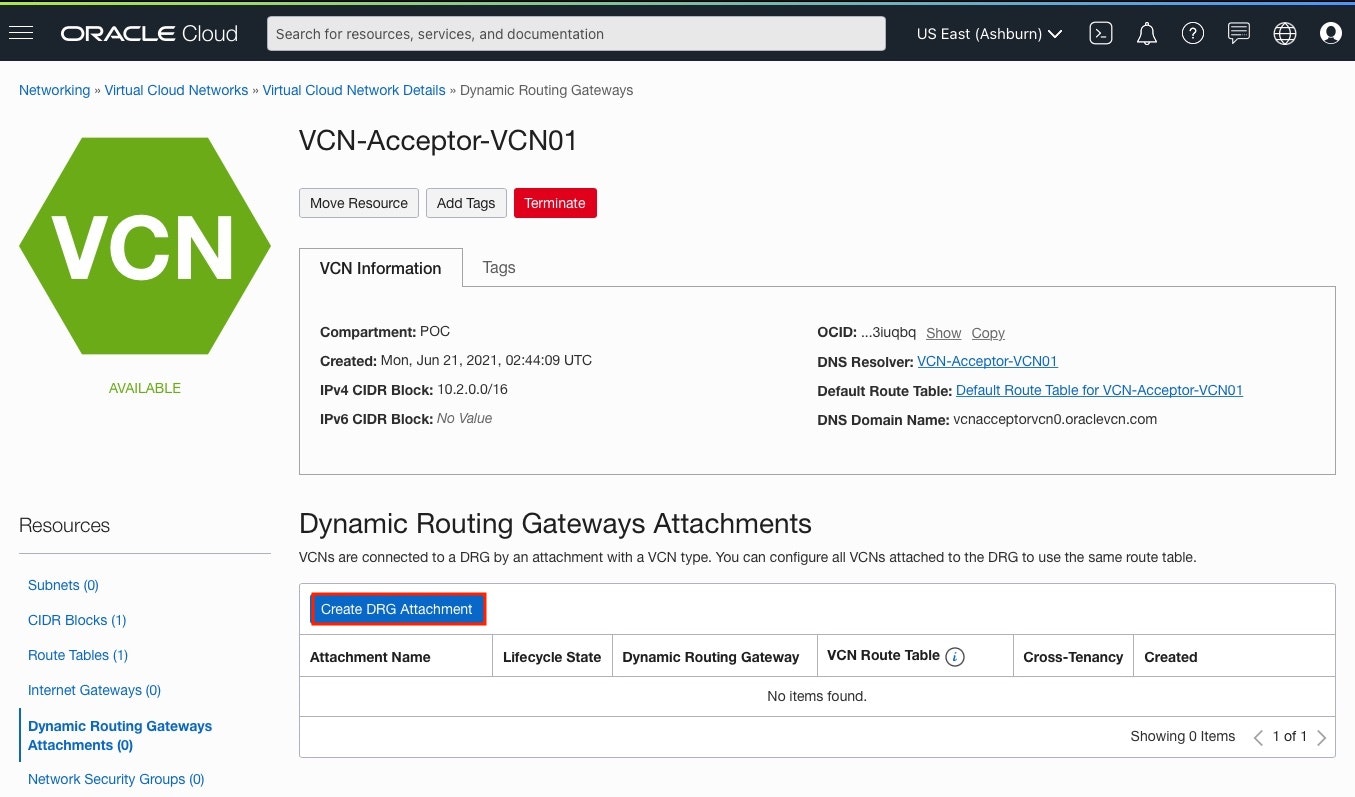
2) VCN画面
[Resources] > [Dynamic Routing Gateways Attachments]をクリックし、[Create DRG Attachment]をクリック
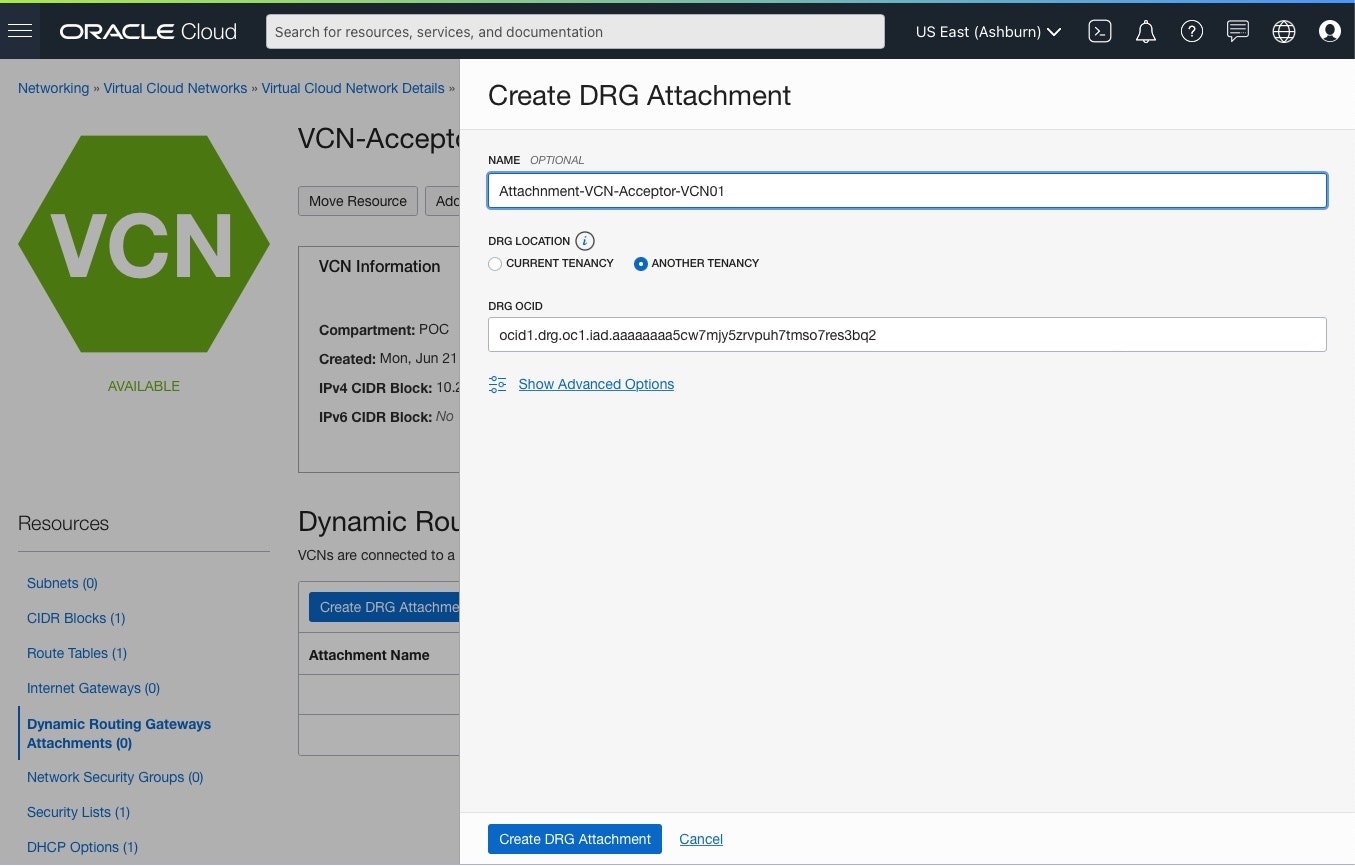
3) Resources画面
以下項目をクリックし、[Create DRG Attachment]をクリック
・ Name: 任意の名前を設定
・ DRG LOCATION: ANOTHER TENANCY を選択
・ DRG OCID: DRG OCIDを入力
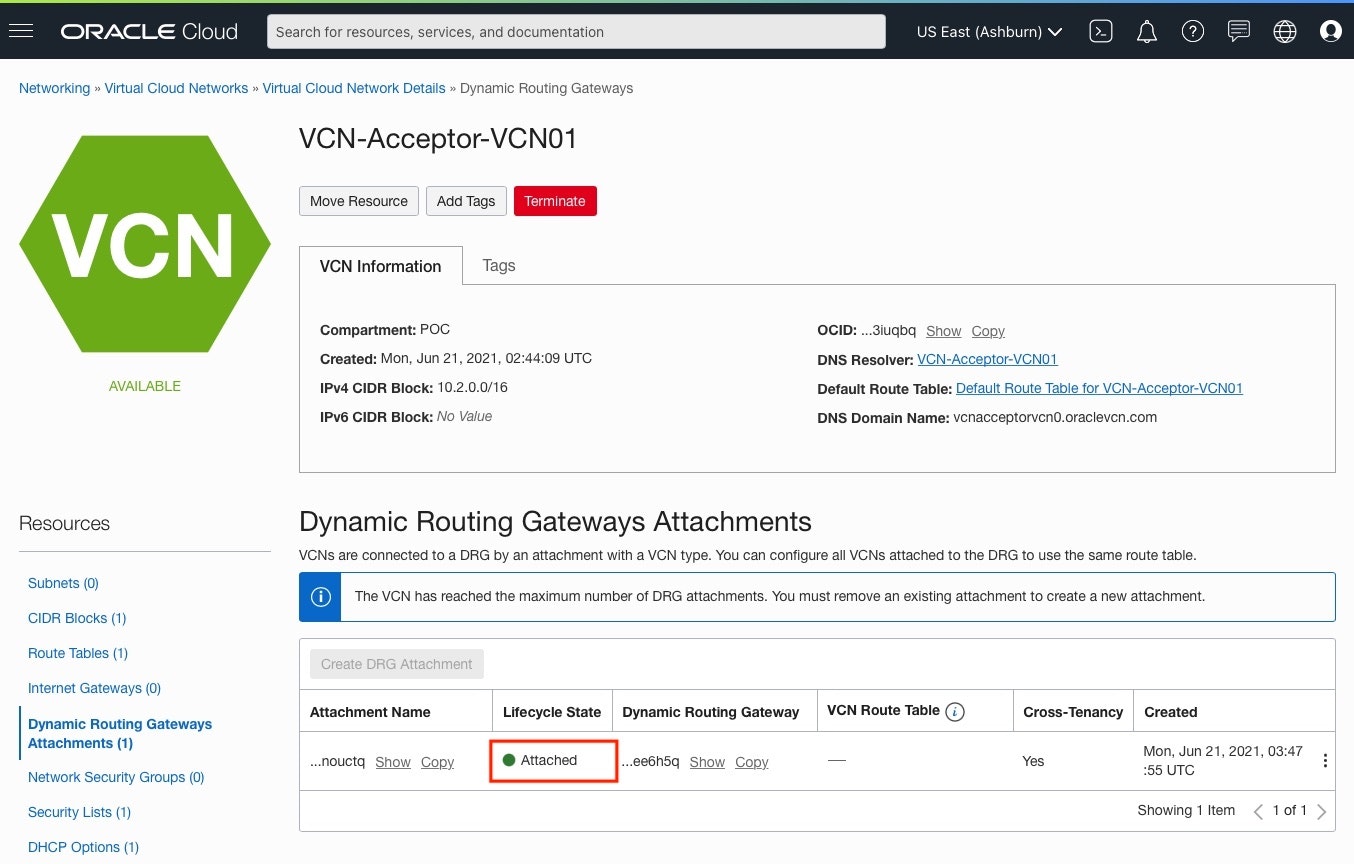
4) Cross-Tenancy Peering完了
作成した Attachmentの Lifecycle State が "Attached" になればOK
● ABC-Tenancy側ステータス確認
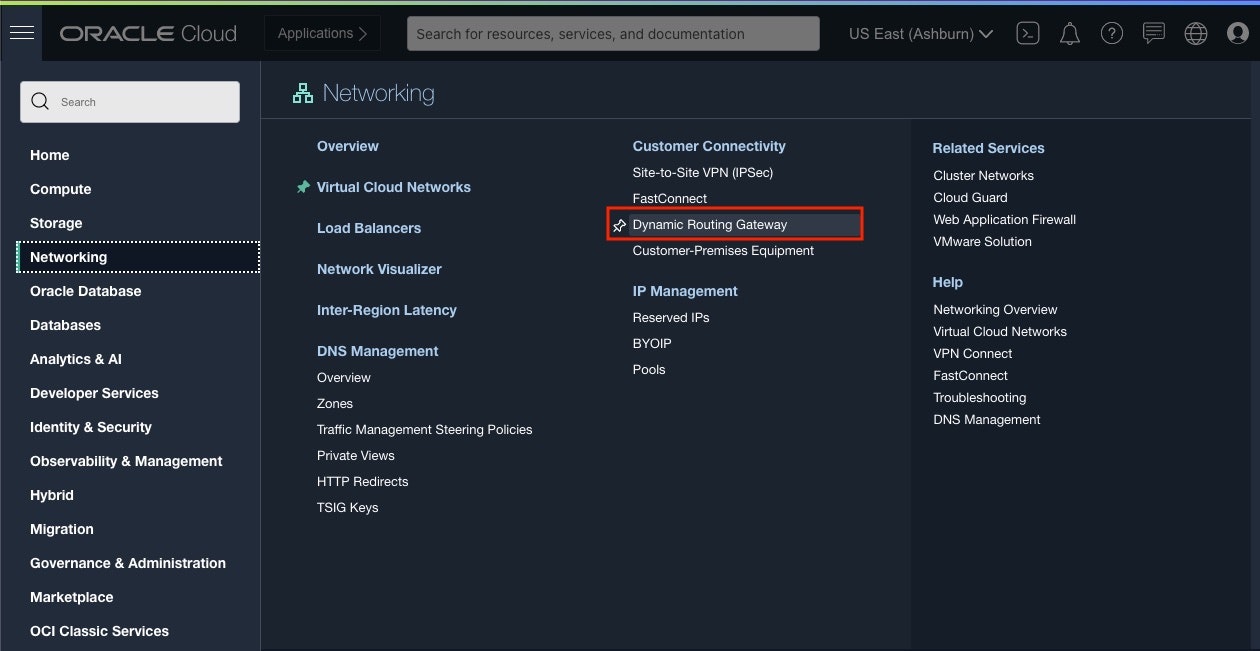
1) OCIコンソール画面
[Networking] > [Dynamic Routing Gateways]をクリックし、対象のDRGを選択
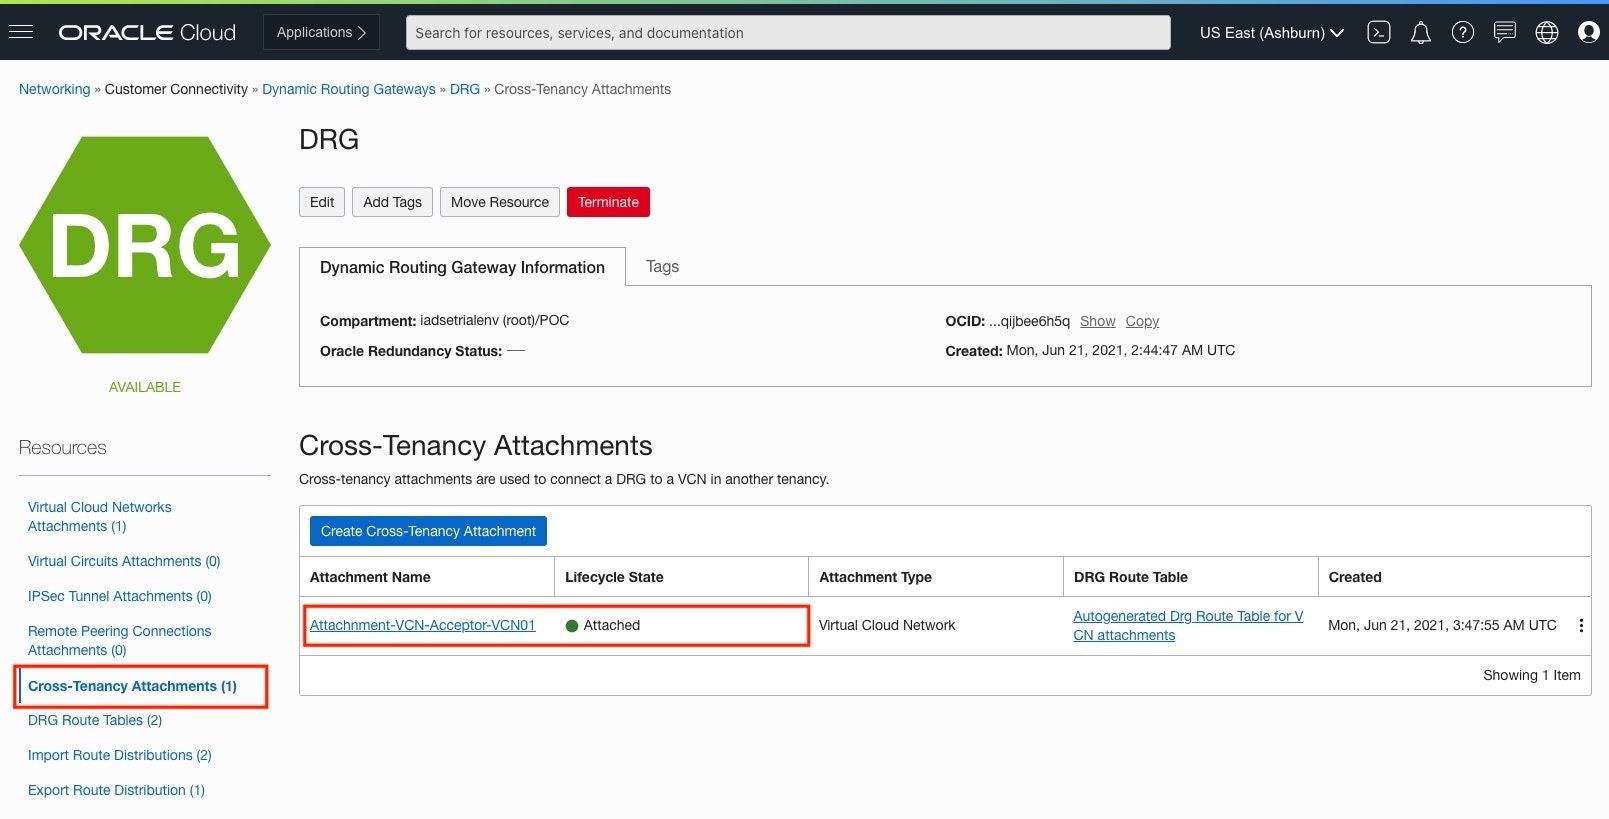
2) DRG画面:Cross-Tenancy Attachments画面
[Resources] > [Cross-Tenancy Attachments]をクリック
XYZ-Tenancy 側で作成した、Attachment名が追加され、Lifecycle Stateが、"Attached" になればOK
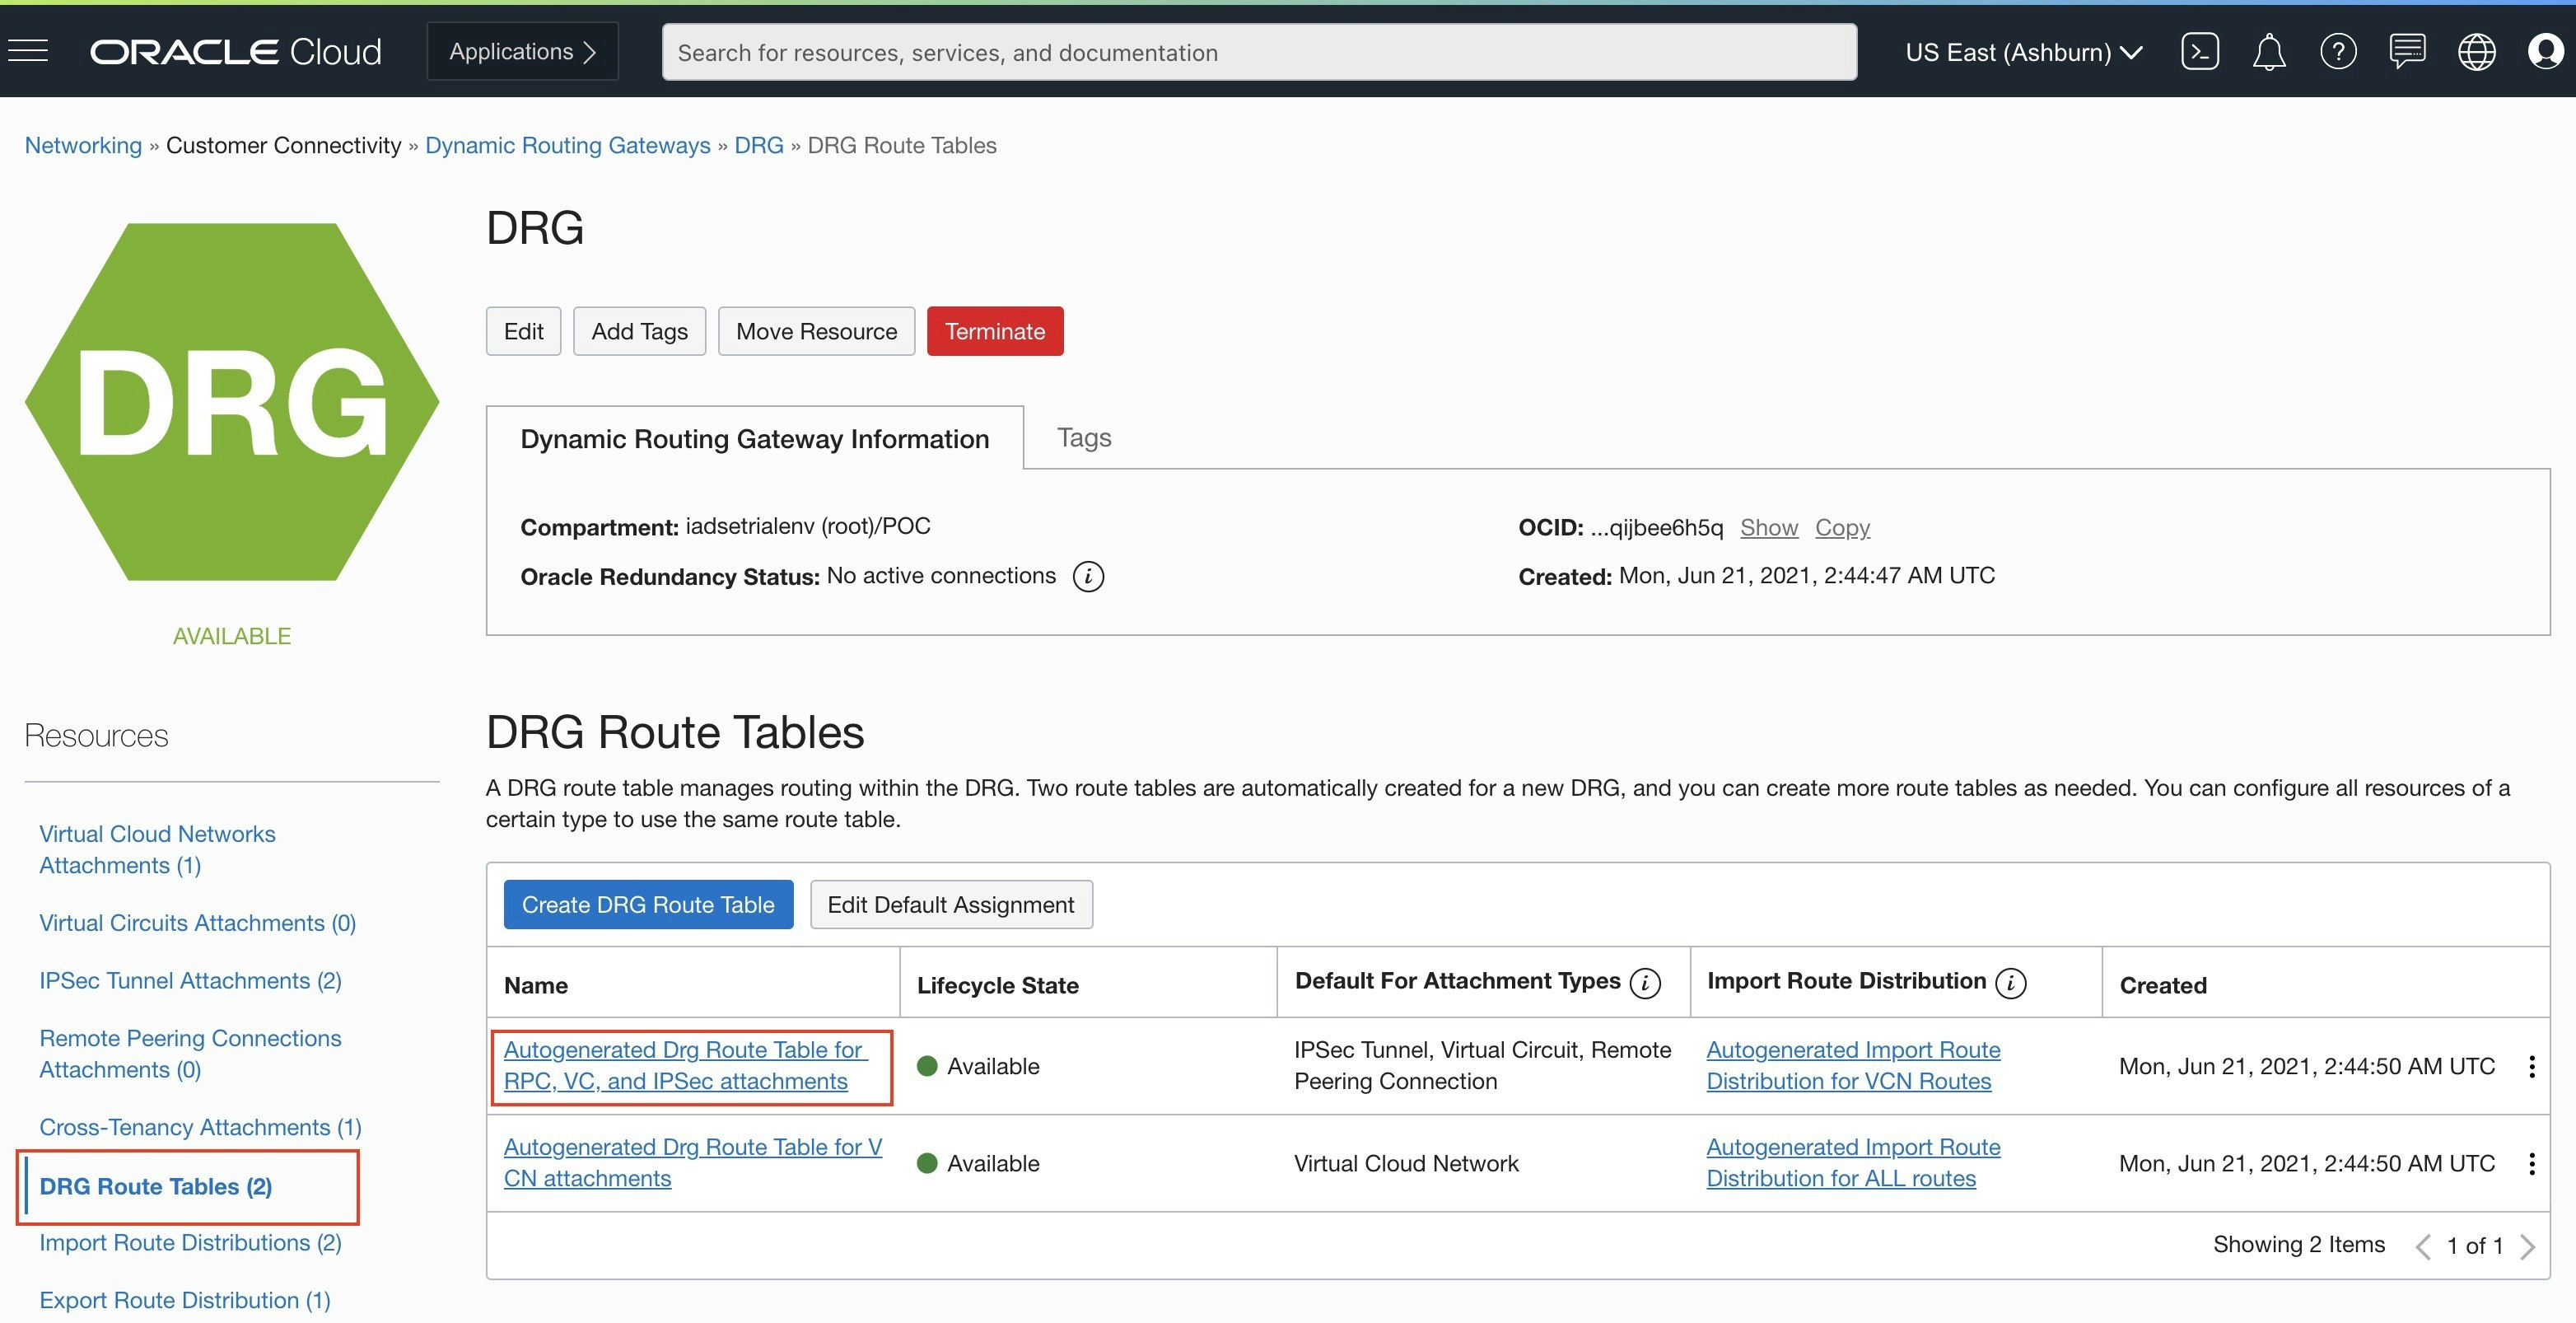
● DRG Route Table確認
1) DRG Route Tables画面
DRGの Resources欄にある [DRG Route Tables] をクリックし、DRG Route Tables
の [Autogenerated Drg Route Table for VCN attachments] をクリック
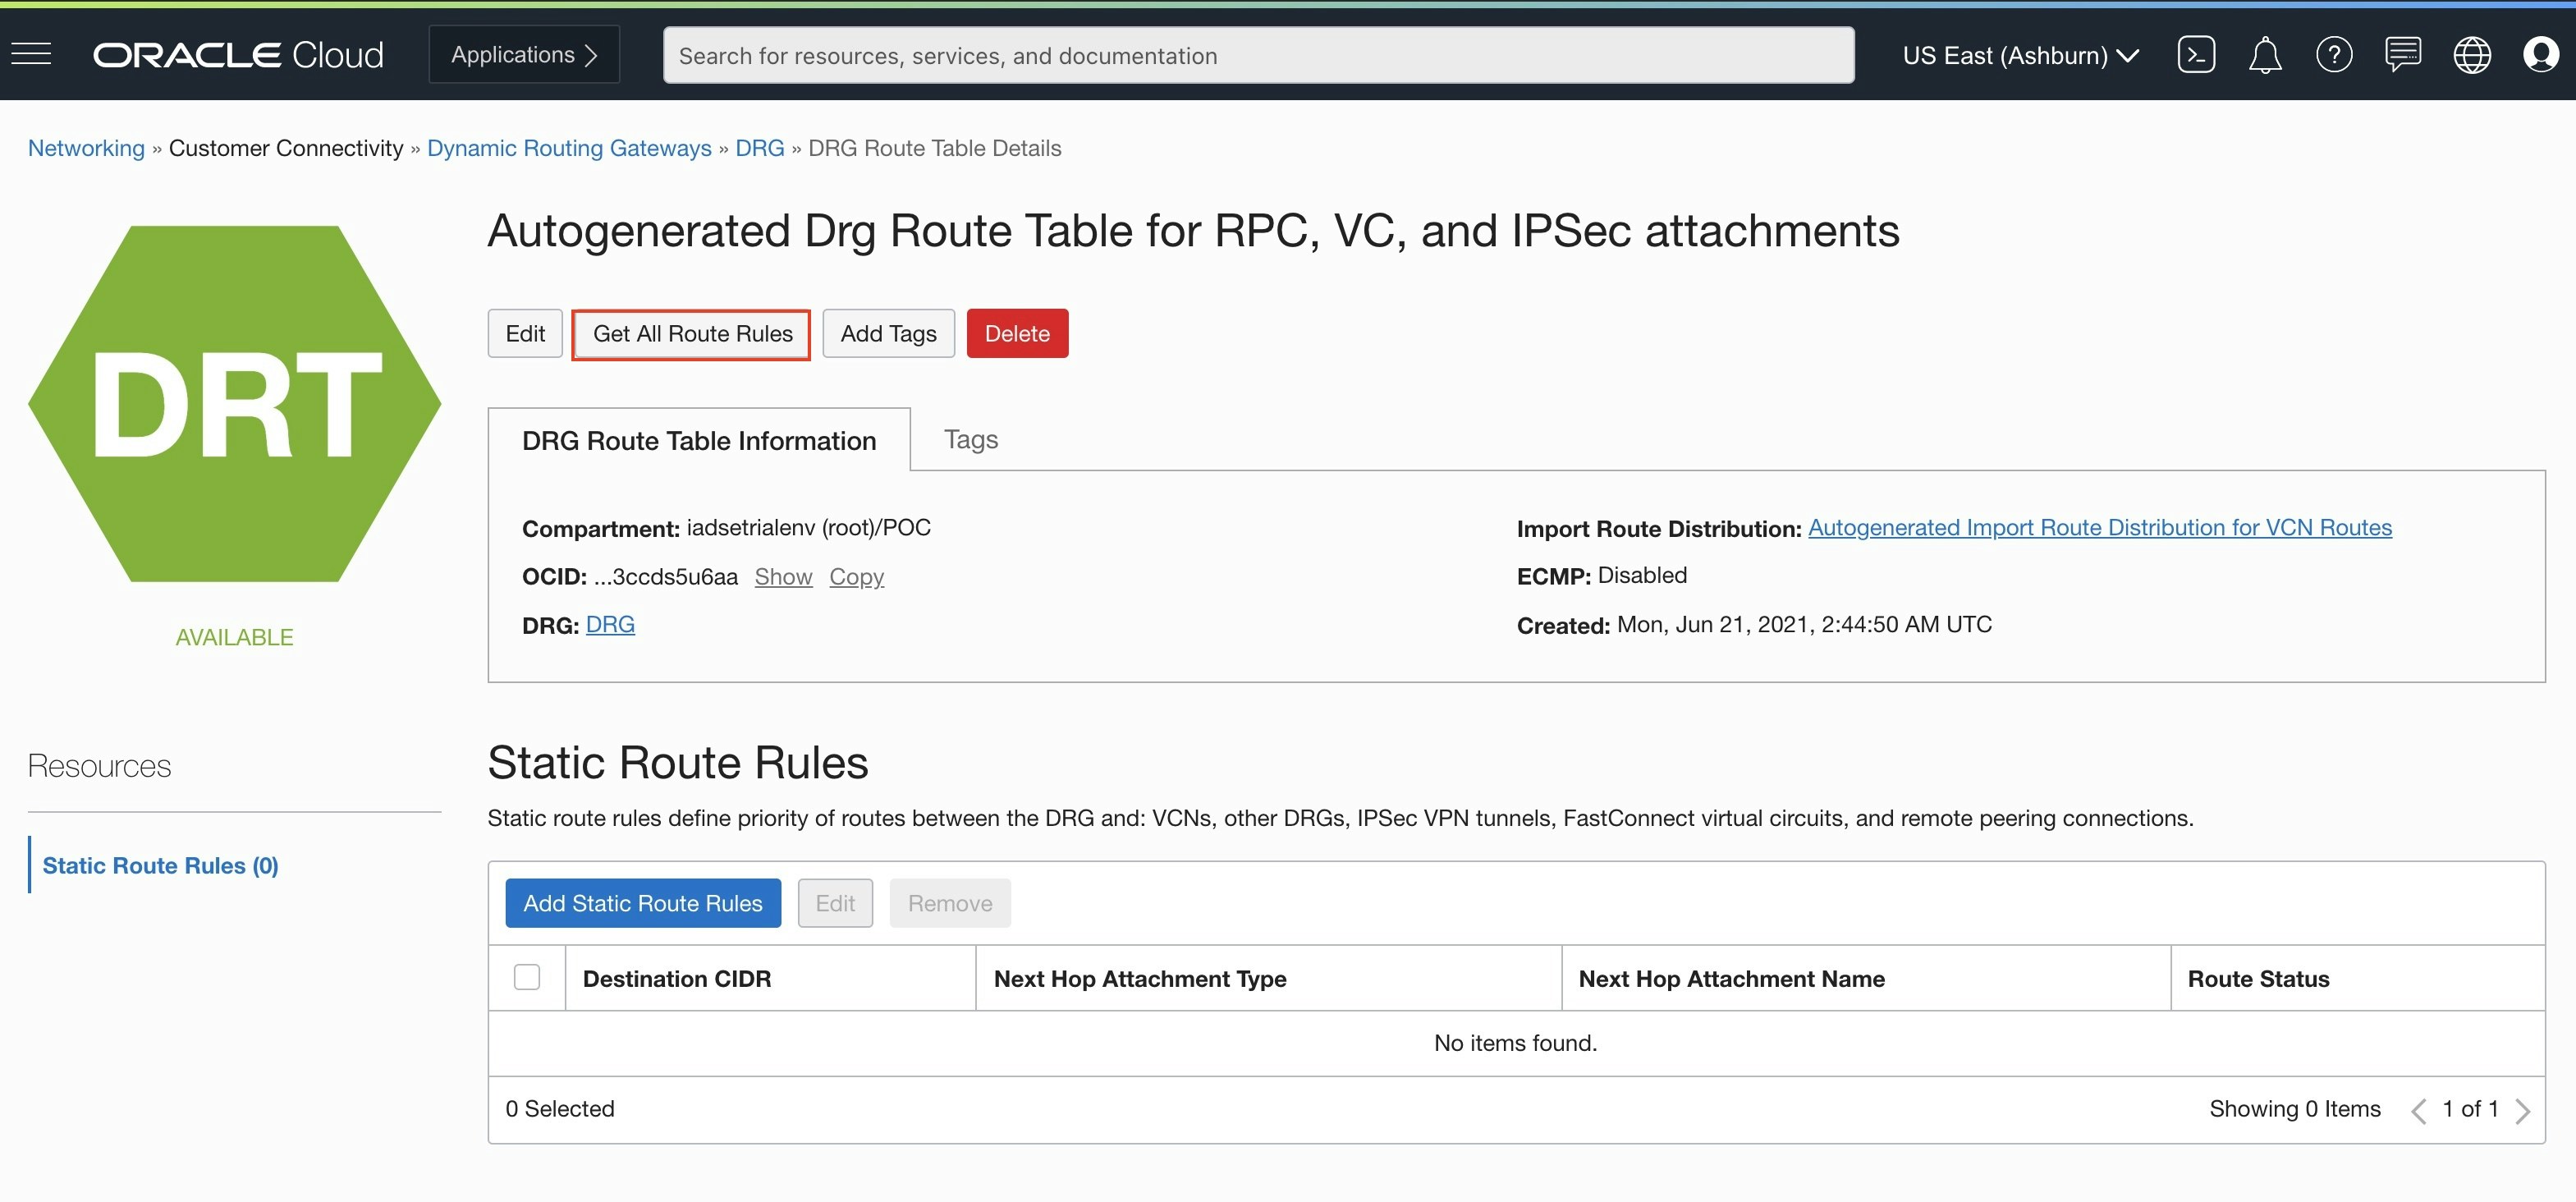
2) Autogenerated Drg Route Table for RPC, VC, and IPSec attachments
画面
[Get All Route Roule]をクリック
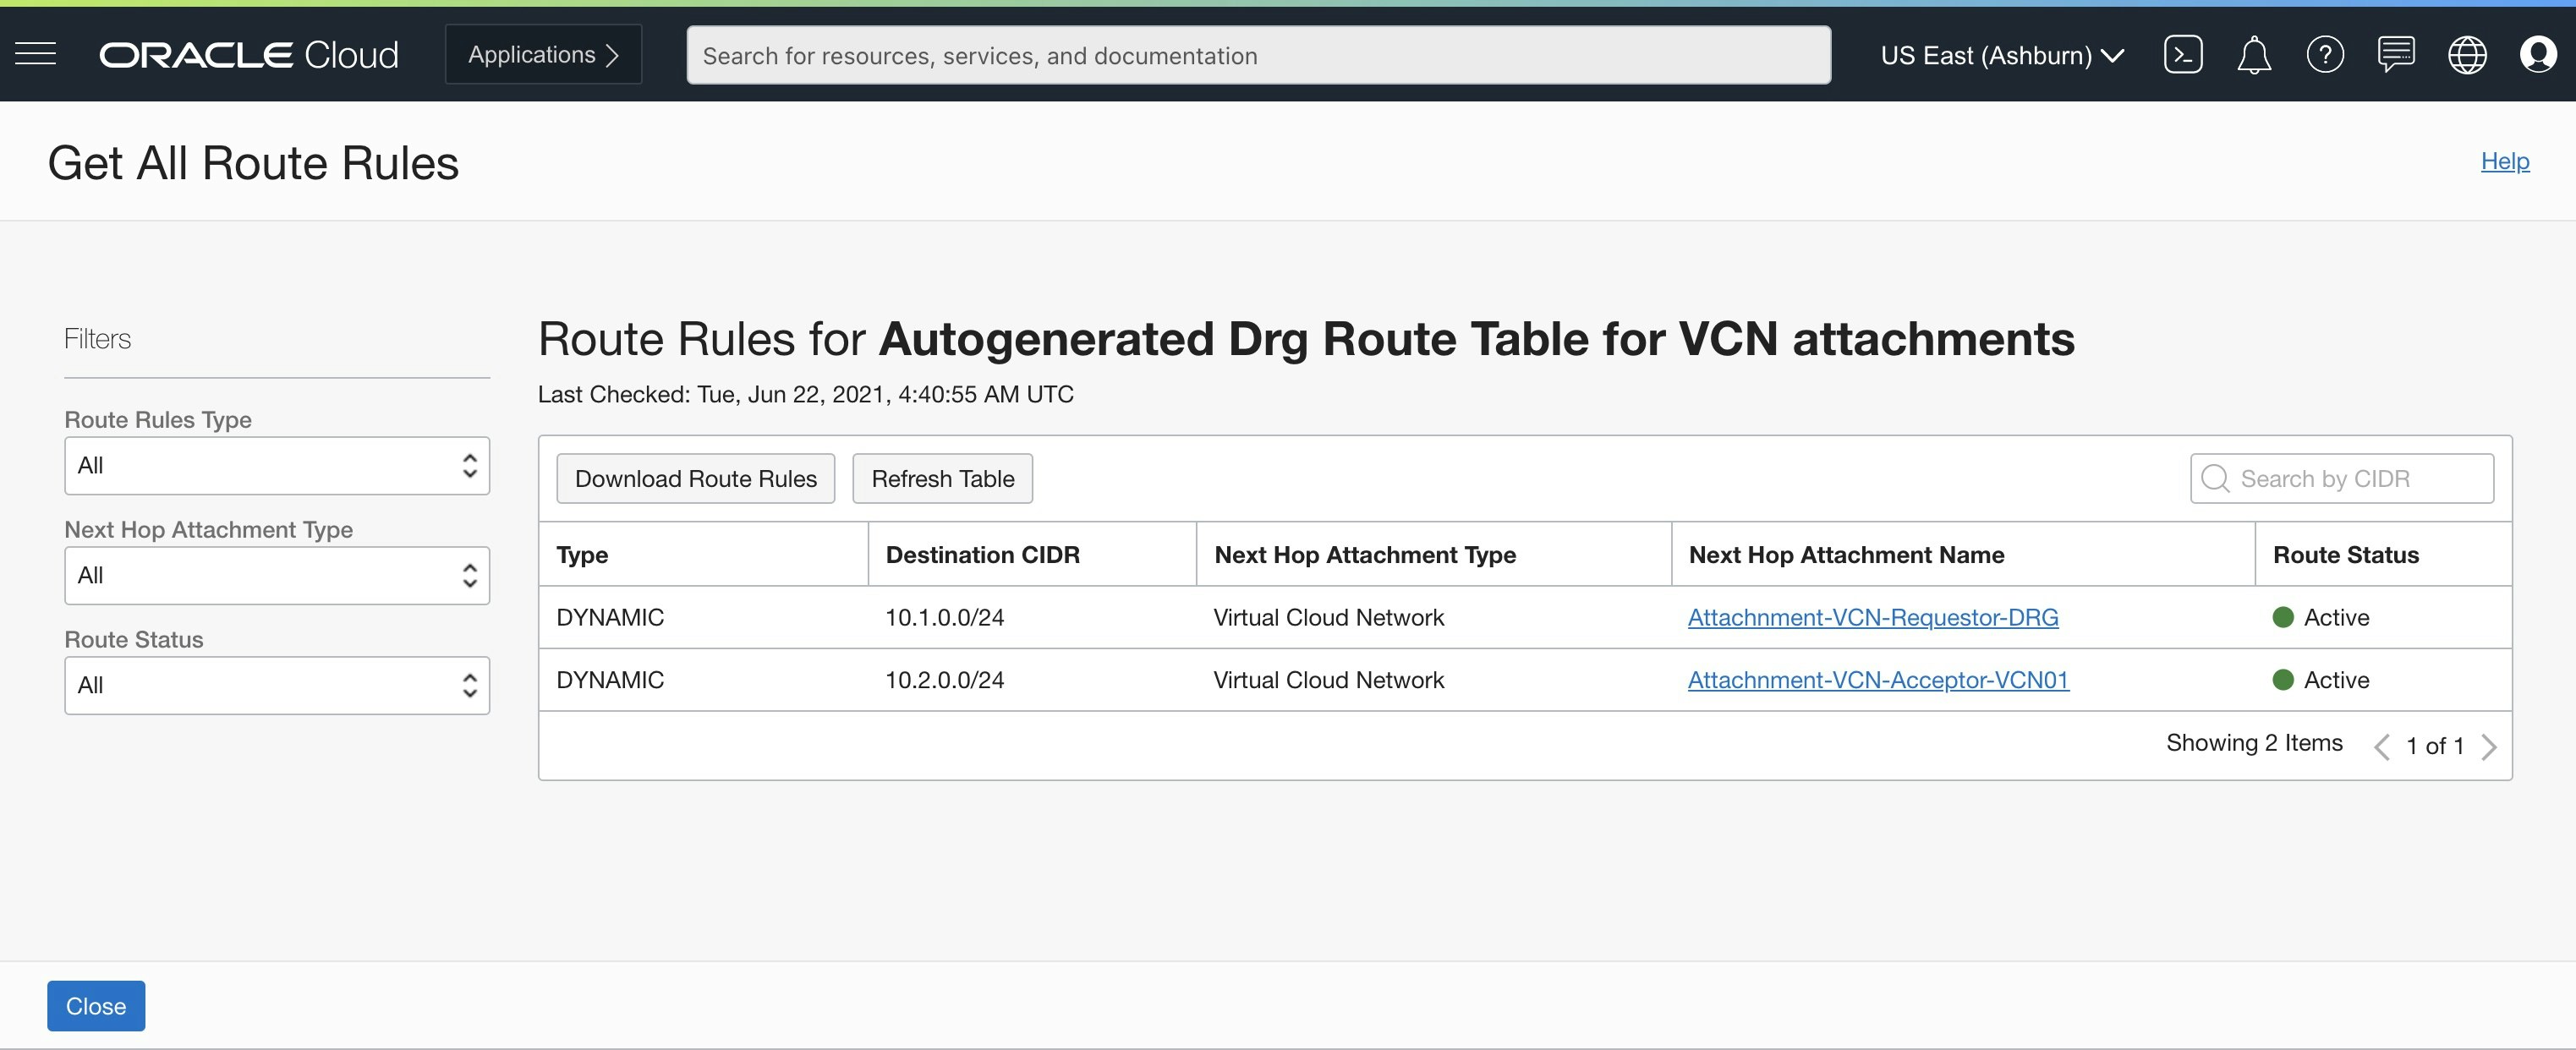
3) Get All Route Rules画面
DRGに伝わっている Route一覧を確認
■ CPE BGP通信確認
● BGP ESTABLISHED 確認
Router(config)# show ip bgp summary
	BGP router ID 192.168.254.17, local AS number 65000
	2 BGP AS-PATH entries

	Neighbor         V    AS    MsgRcvd MsgSent Up/DownTime   State
	192.168.254.14  4    31898 805     809     2:13:12       ESTABLISHED
	192.168.254.18  4    31898 798     798     2:12:31       ESTABLISHED

	Total number of neighbors 2
● BGP Table確認
Router(config)# show ip bgp
	BGP table version is 133, local router ID is 192.168.254.17
	Local AS number 65000
	Status codes: s - suppressed, * - valid, h - history
				> - best, i - internal
	Origin codes: i - IGP, e - EGP, ? - incomplete

	Network            Next Hop            Metric     LocPrf  Path
	*> 10.1.0.0/24        192.168.254.18                         31898 i
	*                     192.168.254.14                         31898 i
	*> 10.2.0.0/24        192.168.254.18                         31898 i
	*                     192.168.254.14                         31898 i
	192.168.0.0/24   0.0.0.0                  1             i
	*> 192.168.0.0/24 0.0.0.0                  1             i

	Total number of prefixes 6
● BGP Neighbors Received-Routes確認
Router(config)# show ip bgp neighbors 192.168.254.14 received-routes
	BGP table version is 133, local router ID is 192.168.254.17
	Local AS number 65000
	Status codes: s - suppressed, * - valid, h - history
				> - best, i - internal
	Origin codes: i - IGP, e - EGP, ? - incomplete

	Network            Next Hop            Metric     LocPrf  Path
	*  10.1.0.0/24        192.168.254.14                         31898 i
	*  10.2.0.0/24        192.168.254.14                         31898 i

	Total number of prefixes 2
● BGP Neighbors Advertised-Routes確認
Router(config)# show ip bgp neighbors 192.168.254.14 advertised-routes
	BGP table version is 133, local router ID is 192.168.254.17
	Local AS number 65000
	Status codes: s - suppressed, * - valid, h - history
				> - best, i - internal
	Origin codes: i - IGP, e - EGP, ? - incomplete

	Network            Next Hop            Metric     LocPrf  Path
	*> 192.168.0.0/24 192.168.254.13           1             i

	Total number of prefixes 1
■ Tenancy間 疎通確認
● ABC-Tenancy --> XYZ-Tenancy
・ traceroute確認
[opc@drg-admin-inst ~]$ sudo traceroute -I 10.2.0.2
	traceroute to 10.2.0.2 (10.2.0.2), 30 hops max, 60 byte packets
	1  140.91.197.1 (140.91.197.1)  0.169 ms  0.116 ms  0.111 ms
	2  10.2.0.2 (10.2.0.2)  0.349 ms * *
・ ping疎通確認
[opc@drg-admin-inst ~]$ ping 10.2.0.2 -c 3
	PING 10.2.0.2 (10.2.0.2) 56(84) bytes of data.
	64 bytes from 10.2.0.2: icmp_seq=1 ttl=63 time=0.371 ms
	64 bytes from 10.2.0.2: icmp_seq=2 ttl=63 time=0.380 ms
	64 bytes from 10.2.0.2: icmp_seq=3 ttl=63 time=0.382 ms

	--- 10.2.0.2 ping statistics ---
	3 packets transmitted, 3 received, 0% packet loss, time 2061ms
	rtt min/avg/max/mdev = 0.371/0.377/0.382/0.022 ms
・ ssh接続確認
[opc@drg-admin-inst ~]$ ssh -i id_rsa opc@10.2.0.2 hostname
	vcn-admin-inst
● XYZ-Tenancy --> ABC-Tenancy
・ traceroute確認
[opc@vcn-admin-inst ~]$ sudo traceroute -I 10.1.0.2
	traceroute to 10.1.0.2 (10.1.0.2), 30 hops max, 60 byte packets
	1  140.91.197.7 (140.91.197.7)  0.237 ms  0.189 ms  0.185 ms
	2  10.1.0.2 (10.1.0.2)  0.359 ms * *
・ ping疎通確認
[opc@vcn-admin ~]$ ping 10.1.0.2 -c 3
	PING 10.1.0.2 (10.1.0.2) 56(84) bytes of data.
	64 bytes from 10.1.0.2: icmp_seq=1 ttl=63 time=0.361 ms
	64 bytes from 10.1.0.2: icmp_seq=2 ttl=63 time=0.397 ms
	64 bytes from 10.1.0.2: icmp_seq=3 ttl=63 time=0.393 ms

	--- 10.1.0.2 ping statistics ---
	3 packets transmitted, 3 received, 0% packet loss, time 2071ms
	rtt min/avg/max/mdev = 0.361/0.383/0.397/0.027 ms
・ ssh接続確認
[opc@vcn-admin-inst ~]$ ssh -i id_rsa opc@10.1.0.2 hostname
	drg-admin-inst
● On-Premises --> ABC-Tenancy
・ traceroute確認
user-mac:~ user$ traceroute -I 10.1.0.2
	traceroute to 10.1.0.2 (10.1.0.2), 64 hops max, 72 byte packets
	1  * * *
	2  * * *
	3  * * *
	4  10.1.0.2 (10.1.0.2)  178.476 ms  266.040 ms  209.405 ms
・ ssh接続確認
user-mac:~ user$ ssh -i id_rsa opc@10.1.0.2 hostname
	drg-admin-inst
● On-Premises --> XYZ-Tenancy
・ traceroute確認
user-mac:~ user$ traceroute -I 10.2.0.2
	traceroute to 10.2.0.2 (10.2.0.2), 64 hops max, 72 byte packets
	1  * * *
	2  * * *
	3  * * *
	4  10.2.0.2 (10.2.0.2)  197.093 ms  267.809 ms  206.149 ms
・ ssh接続確認
user-mac:~ user$ ssh -i id_rsa opc@10.2.0.2 hostname
	vcn-admin
■ 参考
・Documents
- Peering VCNs in the same region through a DRG
- IAM policies related to DRG peering
- VCN間のルーティングに関するIAMポリシー:他のテナンシのVCNへのアタッチ
- 別のテナンシ内のVCNへのDRGのアタッチ
・A-Team Chronicles
-Cross-Tenancy VCN peering using DRG Attachment