
はじめに
本記事では、Databricks Lakebase に対して PostgreSQL 用 MCP Server である pg-mcp-server を接続し、その MCP Server を Azure Container Apps にホストします。
さらに、Azure Container Apps 上の MCP Server を Databricks Unity AI Gateway の MCP Service として登録し、MCP Inspector から呼び出すところまで試しました。
最終的な構成は以下です。
Databricks Lakebase は Free Edition で構成し、Databricks Unity AI Gateway は別テナントで構成しています。
MCP Inspector
      |
      | OAuth / Streamable HTTP
      v
Databricks Unity AI Gateway
      |
      | MCP Service
      v
Unity Catalog HTTP Connection
      |
      | HTTPS
      v
Azure Container Apps
      |
      | pg-mcp-server
      v
Databricks Lakebase
今回使用した pg-mcp-server は、PostgreSQL に対して query ツールやテーブル情報を提供する MCP Server です。
HTTP モードでは Streamable HTTP を使用し、デフォルトでは 3000 ポートの /mcp に MCP Endpoint を公開します。また、PostgreSQL の接続先は DATABASE_URL で指定します。
環境
今回の環境は以下です。
ローカル
- Windows
- VS Code
- WSL
- Azure CLI

Azure
- Azure Container Registry
- Azure Container Apps

Databricks
- Azure Databricks
- Lakebase
- Unity Catalog
- Unity AI Gateway

MCP Client
- MCP Inspector
Container Apps 自体の作成・設定は Azure Portal から行い、コンテナイメージのビルドのみ WSL から az acr build を使用します。
PostgreSQL MCP Server について
PostgreSQL 向けの MCP Server はいくつかありますが、今回の検証では ericzakariasson/pg-mcp-server (コミュニティ製のOSS) を利用します。
主な候補は以下です。
| 実装 | 特徴 |
|---|---|
ericzakariasson/pg-mcp-server |
Streamable HTTP 対応、リモート MCP として公開しやすい |
stuzero/pg-mcp-server |
スキーマ探索や EXPLAIN など PostgreSQL 分析機能が充実 |
microsoft/postgres-mcp |
Microsoft 提供、現状は主に stdio transport 前提 |
MCP の代表的な Transport には次の2つがあります。
-
stdio
MCP Client が MCP Server のプロセスを起動し、標準入力・標準出力で通信する方式。VS CodeやClaude Desktopなど、ローカル利用に向いている。 -
Streamable HTTP
HTTP(S) 経由で MCP Server へ接続する方式。Container Apps などに MCP Server を配置し、リモートから利用する構成に向いている。
本検証では Streamable HTTP 接続が必要となるため、ericzakariasson/pg-mcp-server を利用しました。
1. Lakebase の準備
Lakebase のサンプルデータを用意するため、以下を実施しました。
エンドポイントのエラー
Lakebase を準備する際に以下のエラーが発生しました。
The endpoint has been disabled. Enable it using the API and retry.
こちらはエンドポイントを再有効化することで解決しました。
from databricks.sdk import WorkspaceClient
from databricks.sdk.service.postgres import (
    Endpoint,
    EndpointSpec,
    EndpointType,
    FieldMask
)

w = WorkspaceClient()

endpoint_name = "projects/my-project/branches/production/endpoints/primary"

endpoint_spec = EndpointSpec(
    endpoint_type=EndpointType.ENDPOINT_TYPE_READ_WRITE,
    disabled=False
)

result = w.postgres.update_endpoint(
    name=endpoint_name,
    endpoint=Endpoint(
        name=endpoint_name,
        spec=endpoint_spec
    ),
    update_mask=FieldMask(
        field_mask=["spec.disabled"]
    )
).wait()

print("Endpoint enabled")

endpoint = w.postgres.get_endpoint(
    name=endpoint_name
)

print("disabled:", endpoint.status.disabled)
print("state:", endpoint.status.current_state)
次に、Lakebase に MCP Server から接続する PostgreSQL ユーザーを用意します。
Auth Type は Native PostgreSQL Password を使用しました。

接続情報は Lakebase の Connect 画面から確認します。
postgresql://<USER>:<PASSWORD>@<DATABASE>?sslmode=require

次に、作成したユーザーに権限を付与します。
GRANT CONNECT
ON DATABASE databricks_postgres
TO mcp_user;

GRANT USAGE
ON SCHEMA public
TO mcp_user;

GRANT SELECT
ON ALL TABLES IN SCHEMA public
TO mcp_user;

ALTER DEFAULT PRIVILEGES
IN SCHEMA public
GRANT SELECT ON TABLES TO mcp_user;
pg-mcp-server 自体は、デフォルトでは書き込み操作が無効になっています。書き込みを許可する場合は DANGEROUSLY_ALLOW_WRITE_OPS の設定が必要です。
2. Dockerfile を作成する
WSL に作業フォルダを作成します。
mkdir -p ~/lakebase-mcp
cd ~/lakebase-mcp

code .
作業フォルダ配下に Dockerfile を作成します。
lakebase-mcp/
└── Dockerfile
Dockerfile の中身は以下とします。
FROM node:22-alpine

RUN npm install -g pg-mcp-server@0.3.0

# pg-mcp-server 0.3.0 の HTTP transport を
# stateless から stateful へ変更
RUN MCP_FILE="$(npm root -g)/pg-mcp-server/lib/src/mcp-server-http.js" \
    && grep -q "sessionIdGenerator: undefined" "$MCP_FILE" \
    && sed -i \
       's/sessionIdGenerator: undefined/sessionIdGenerator: () => globalThis.crypto.randomUUID()/' \
       "$MCP_FILE" \
    && grep "sessionIdGenerator" "$MCP_FILE"

ENV PORT=3000

EXPOSE 3000

CMD ["pg-mcp-server", "--transport=http"]
pg-mcp-server --transport=http とすることで Streamable HTTP モードになります。
stateless から stateful へ変更について、本記事の下部に記載している注意事項をご確認ください。
3. Azure Container Registry を作成する
Azure Portal から Azure Container Registry を作成します。
レジストリ名: acrxxxxx
場所: Japan East
SKU: Basic

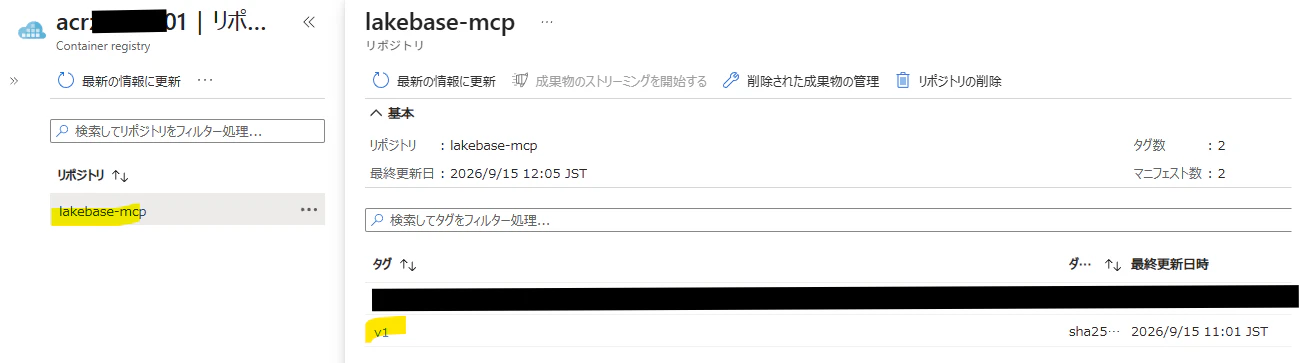
1つの ACR に複数の Repository を作ることができます。
例えば、
acrxxxxx
├── sql-mcp-server
│   └── v1
└── lakebase-mcp
    └── v1
のように複数の MCP Server をまとめて管理できます。
4. ローカルで az acr build を実行する
今回はローカルで docker build / docker push は実行せず、Azure Container Registry 側でビルドします。
まず Azure にログインして、サブスクリプションを設定します。
# インストール
curl -sL https://aka.ms/InstallAzureCLIDeb | sudo bash

# ログイン
az login
az account set \
  --subscription "<Subscription Name>"
Dockerfile のあるディレクトリで以下を実行します。
az acr build \
  --registry <ACR名> \
  --image lakebase-mcp:v1 \
  --file Dockerfile \
  .
az acr build はローカルのビルドコンテキストを ACR Tasks に送り、Azure 側でコンテナイメージをビルドして、そのまま Registry に Push します。
正常終了すると、Azure Container Registry でリポジトリを確認できます。
5. Azure Container Apps を作成する
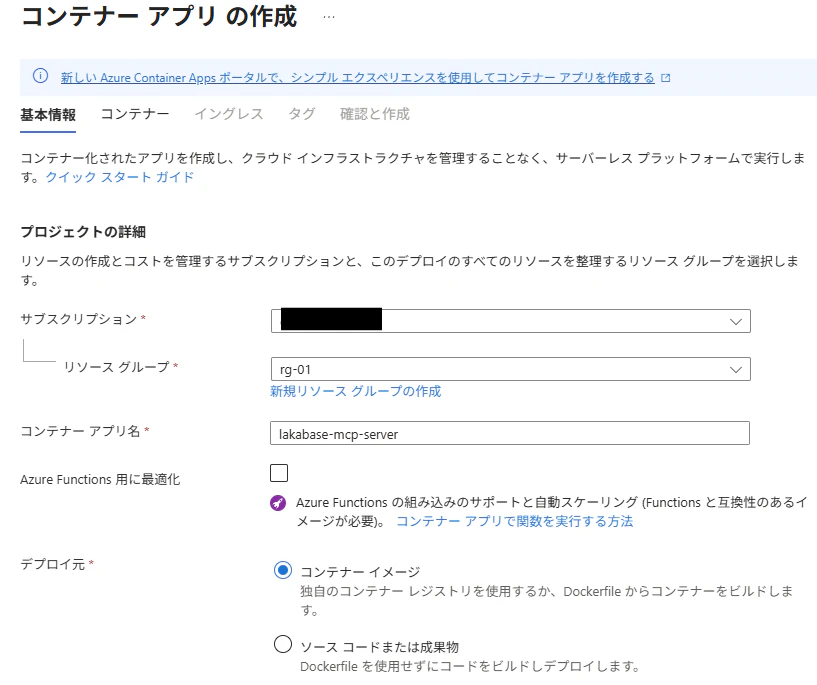
Azure Portal から Container Apps を作成します。
コンテナー アプリの作成
以下のように作成します。
コンテナー アプリ名: lakebase-mcp-server
デプロイ元: コンテナー イメージ
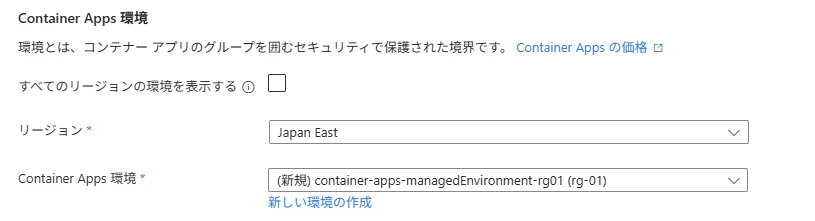
Container Apps 環境:
    リージョン: Japan East
    Container Apps 環境: <既存環境が無い場合は新規作成>
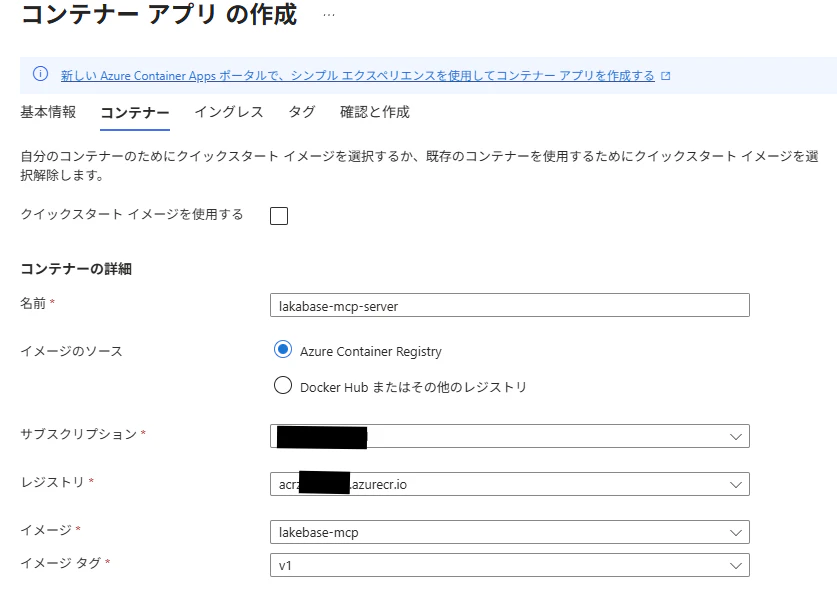
コンテナー設定で ACR のイメージを指定します。
イメージのソース: Azure Container Registry
レジストリ: acrxxxxx.azurecr.io
イメージ: lakebase-mcp
イメージ タグ: v1
イングレスを有効化します。
イングレス: Enabled
イングレス トラフィック: どこからでもトラフィックを受け入れます
イングレス タイプ: HTTP
転送: Auto
ターゲット ポート: 3000
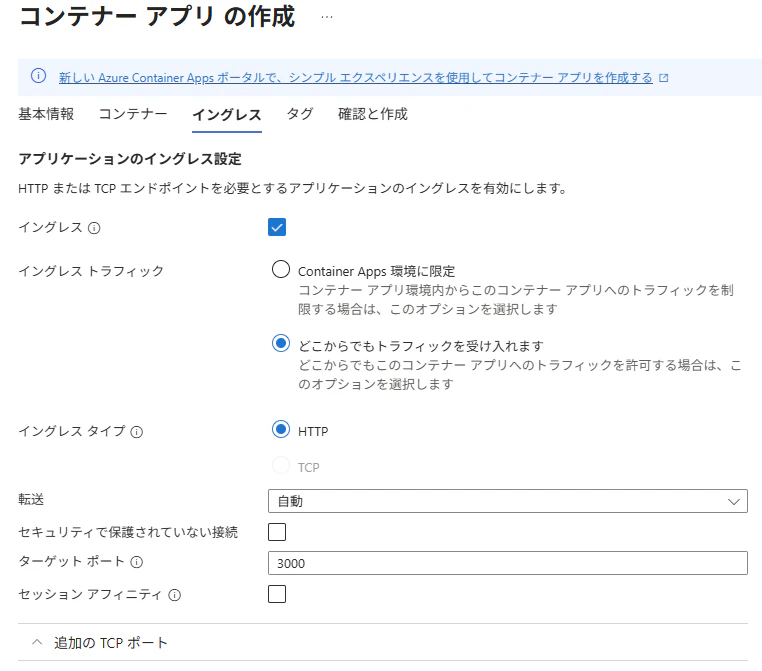
今回の場合、以下のような転送となります。
Internet
   |
   | HTTPS :443
   v
Azure Container Apps
   |
   | HTTP :3000
   v
pg-mcp-server
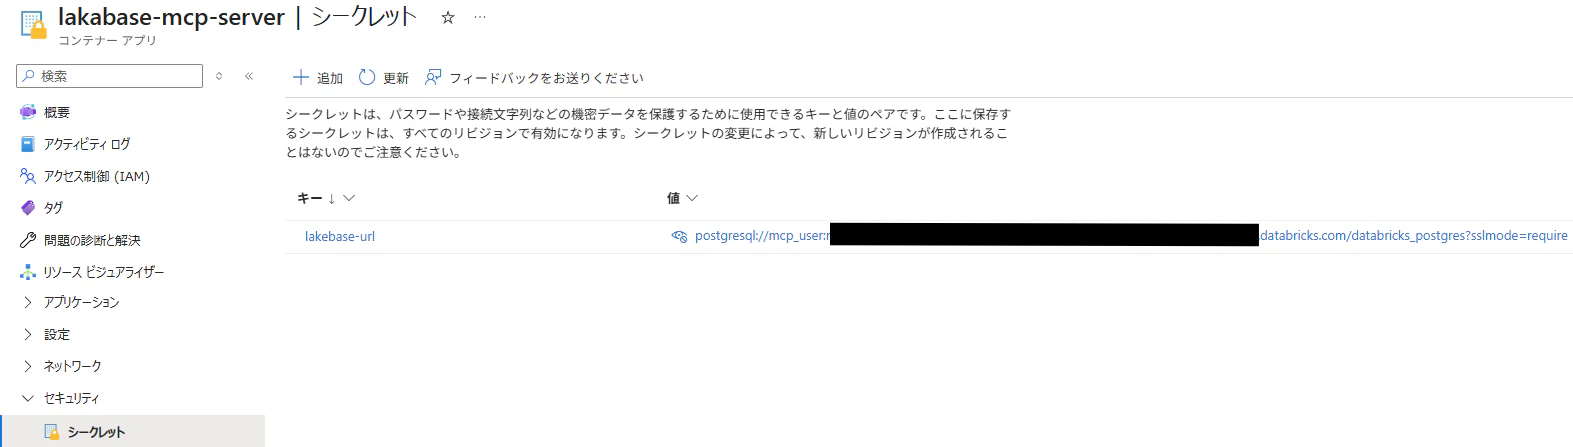
Lakebase 接続文字列をシークレットに登録する
コンテナー アプリ作成後、
Container App
→ セキュリティ
→ シークレット
からシークレットを追加します。
Lakebase の Connect 画面から接続文字列を取得し、シークレットに登録します。
キー: lakebase-url
値: postgresql://mcp_user:<PASSWORD>@<DATABASE>?sslmode=require
環境変数を設定する
コンテナー アプリのリビジョンを編集し、環境変数を設定します。
1つ目:
    名前: DATABASE_URL
    ソース: シークレットの参照
    値: lakebase-url
2つ目:
    名前: PORT
    ソース: 手動入力
    値: 3000

リビジョンとは
Azure Container Apps のリビジョンは、
Container App の「ある時点のコンテナイメージ + 設定」をまとめた1世代分の実行バージョン
です。
例えば、
Container App
└── Revision 1
    ├── image: lakebase-mcp:v1
    ├── DATABASE_URL
    ├── PORT=3000
    └── CPU / Memory
となります。
イメージや環境変数などを変更すると、新しいリビジョンが作成されます。
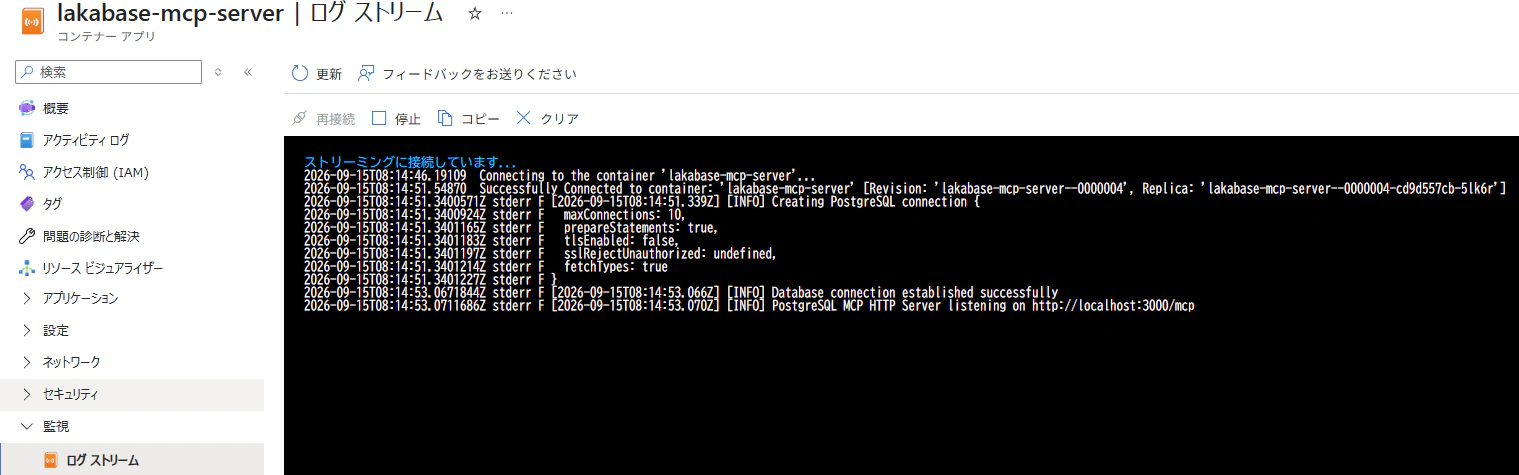
Container Apps のログを確認する
Azure Portal から、
Container Apps
→ 監視
→ ログ ストリーム
を確認します。
正常時には以下のようなログが確認できます。
6. Unity AI Gateway に MCP Server を登録する
次に Container Apps 上の MCP Server を Databricks に登録します。
Databricks の外部 MCP Server 登録では、
External MCP Server
      ↓
Unity Catalog Connection
      ↓
MCP Service
という構成になります。
MCP Service として登録することで、Unity Gateway が外部 MCP Server への呼び出しを仲介でき、Unity Catalog の権限管理も利用できます。
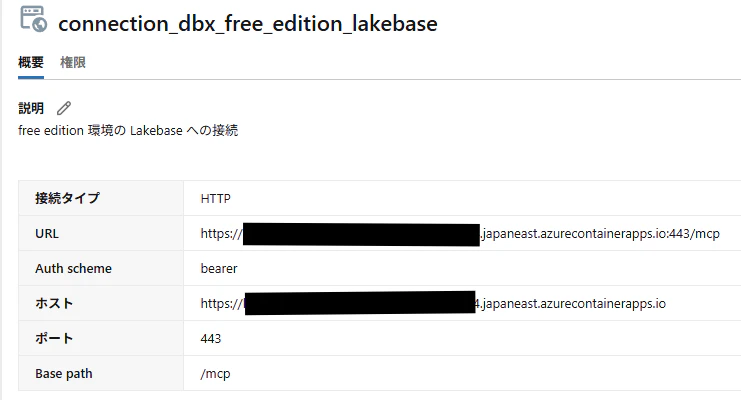
HTTP 接続の作成
まずは、HTTP 接続を作成します。
本検証では、Container Apps への認証は設定していないので、bearer_token は任意の文字列を設定しています。
ノートブックで以下を実行します。
from databricks.sdk import WorkspaceClient
from databricks.sdk.service import catalog

w = WorkspaceClient()

connection = w.connections.create(
    name="connection_dbx_free_edition_lakebase",
    connection_type=catalog.ConnectionType.HTTP,
    parent="schemas/enomoto_demo.mcp_demo",
    options={
        "host": "<Container Apps のアプリケーション URL>",
        "port": "443",
        "base_path": "/mcp",
        "bearer_token": "test-token",
    },
    comment="free edition 環境の Lakebase への接続",
)
print(connection.full_name)
MCP サービスの作成
次に MCP サービスを作成します。
ノートブックで以下を実行します。
from databricks.sdk.service import catalog as c

w = WorkspaceClient()
mcp_service = w.ai_gateway.create_mcp_service(
    parent="schemas/enomoto_demo.mcp_demo",
    mcp_service_id="mcp_dbx_free_edition_lakebase",
    mcp_service=c.McpService(
        comment="free edition 環境の Lakebase MCP サービス",
        config=c.McpServiceConfig(
            source_connection=c.McpServiceConfigSourceConnection(
                name="connections/enomoto_demo.mcp_demo.connection_dbx_free_edition_lakebase"
            ),
        ),
    ),
)
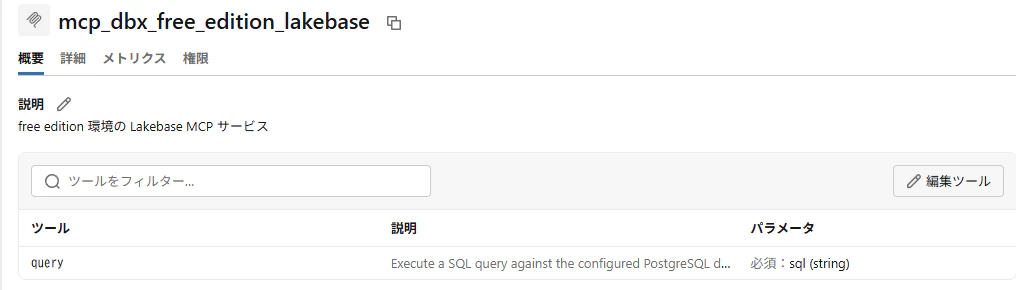
7. Unity AI Gateway 経由で MCP Inspector から呼ぶ
MCP Client から Databricks MCP へは Streamable HTTP と OAuth / PAT などを使用して接続できます。
MCP Inspector のサーバー登録方法はこちらの記事をご参照ください。
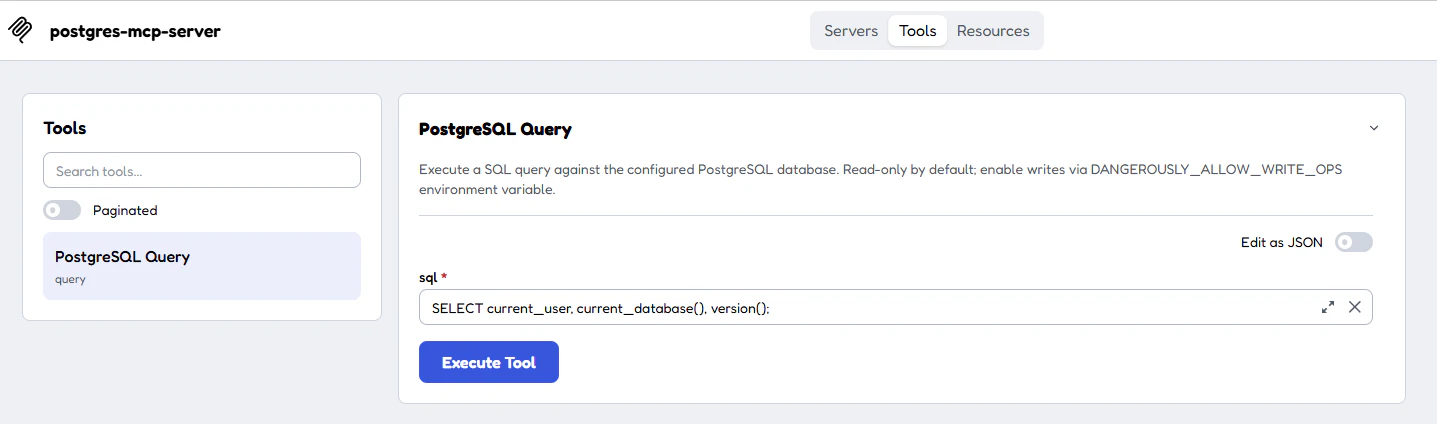
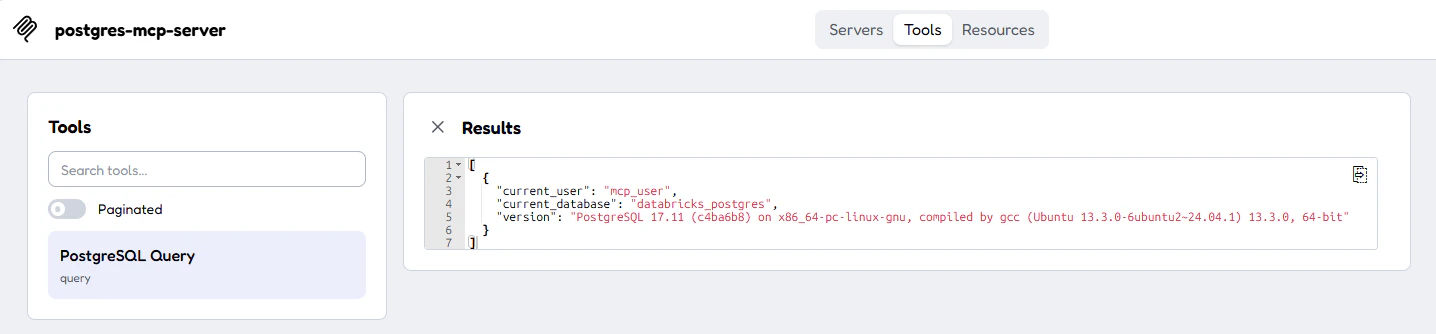
登録完了後、正常に実行できるか確認します。
SELECT current_user, current_database(), version();
Databricks の Ingress/Egress 制限について
本検証では、Databricks の Ingress/Egress 制限は何も設定せずに実施しています。
ネットワーク制限がある場合、MCP クライアントの IP 等を許可する必要があると考えられます。
注意事項
pg-mcp-server を Streamable HTTP で利用した際、initialize は成功するものの、その後のリクエストで 500 Internal Server Error や以下のエラーが発生することがありました。
Invalid Request: Server already initialized
そのため本検証では、以下のように Mcp-Session-Id を発行する Stateful 構成へ変更しています。
sessionIdGenerator: () => globalThis.crypto.randomUUID()
これにより、initialize 以降の tools/list や tools/call を同じ MCP セッションとして扱えるようになります。
ただし、上記の変更だけでは別クライアントから再度 initialize すると Server already initialized になることがあります。
Client A
  ↓ initialize
McpServer A

Client B
  ↓ initialize
同じ McpServer A
  ↓
Server already initialized
MCP Inspector で発生したエラーの例
[
  {
    "id": "1789463501100-xxx",
    "timestamp": "2026-09-15T09:11:41.100Z",
    "method": "POST",
    "url": "https://adb-12345678.9.azuredatabricks.net/ai-gateway/mcp-services/enomoto_demo.mcp_demo.mcp_dbx_free_edition_lakebase",
    "requestHeaders": {
      "accept": "application/json, text/event-stream",
      "authorization": "[REDACTED]",
      "content-type": "application/json"
    },
    "requestBody": "{\"method\":\"initialize\",\"params\":{\"protocolVersion\":\"2025-11-25\",\"capabilities\":{\"sampling\":{},\"elicitation\":{\"form\":{},\"url\":{}},\"roots\":{\"listChanged\":true},\"tasks\":{\"list\":{},\"cancel\":{},\"requests\":{\"sampling\":{\"createMessage\":{}},\"elicitation\":{\"create\":{}}}},\"extensions\":{\"io.modelcontextprotocol/tasks\":{},\"io.modelcontextprotocol/ui\":{\"mimeTypes\":[\"text/html;profile=mcp-app\"],\"elicitation\":{}}}},\"clientInfo\":{\"name\":\"mcp-inspector\",\"version\":\"0.0.0\"}},\"jsonrpc\":\"2.0\",\"id\":0}",
    "responseStatus": 200,
    "responseStatusText": "OK",
    "responseHeaders": {
      "alt-svc": "h3=\":443\"; ma=86400, h3-29=\":443\"; ma=86400",
      "content-encoding": "gzip",
      "content-type": "application/json",
      "date": "Tue, 15 Sep 2026 09:11:41 GMT",
      "server": "databricks",
      "server-timing": "request_id;dur=0;desc=\"13ba80be-xxx\", client_protocol;dur=0;desc=\"HTTP/1.1\"",
      "strict-transport-security": "max-age=31536000; includeSubDomains; preload",
      "transfer-encoding": "chunked",
      "vary": "Accept-Encoding",
      "x-content-type-options": "nosniff",
      "x-databricks-org-id": "12345678",
      "x-request-id": "13ba80be-xxx"
    },
    "duration": 402,
    "category": "transport",
    "responseBody": "{\"jsonrpc\":\"2.0\",\"id\":0,\"error\":{\"code\":-32603,\"message\":\"{\\\"jsonrpc\\\":\\\"2.0\\\",\\\"error\\\":{\\\"code\\\":-32600,\\\"message\\\":\\\"Invalid Request: Server already initialized\\\"},\\\"id\\\":null}\",\"data\":{\"upstream_status\":400}}}"
  }
]
initialize は基本的に各 MCP セッションの開始時に1度だけ実行します。そのため、curl で initialize した直後に MCP Inspector から接続する、といったテストをすると上記エラーが発生します。
検証では、Container Apps のリビジョンを再起動すると解決しました。
本番環境では、複数クライアントや Unity AI Gateway から利用する場合は、最終的には Mcp-Session-Id ごとに McpServer と Transport を分離して管理する実装が必要と考えられます。