【Phoenix Channel】(1) WebSocketとChannel - Qiita
【Phoenix Channel】(2) PhoenixClient - Qiita
今回は簡単なチャットアプリを作ります。次にElixirのGenServerをChannelのクライアントとしてチャットに参加させます。このGenServerはTwitterの「ラーメン」の書き込みを監視してチャットに流し込みます。
これは以下の過去記事をPhoenix1.5とPhoenixClientで構築し直したものとなります。過去記事ではPhoenixChannelClientを使っていたのですが、現在うまく動作しないのでPhoenixClientで動作するようにしました。またPhoenix1.5にあわせてReactの設定方法を変更してあります。
Phoenix Channelで作る最先端Webアプリ - Reactチャット編 - Qiita
Phoenix Channelで作る最先端Webアプリ - Elixier Application編 - Qiita
*備忘メモ VSCodeのTerminal(cmd)で漢字を表示させるときは、以下のコマンドを打つべし
chcp 65001
1.ReactChat のサーバ設定 - Phoenix
プロジェクトを作成し、ReactChat Applicationを作っていきます。
mix phx.new react_chat --no-ecto
cd react_chat
さてmix.exsファイルで、このプロジェクトのスタート地点を確認します。modはこのApplicationのトップのmoduleを示しています。(ちなみにextra_applicationsはこのApplicationが実行されるときに、すでに動作している必要があるApplicationのリストです。動作していなければ起動されます。)
#
  def application do
    [
      mod: {ReactChat.Application, []},
      extra_applications: [:logger, :runtime_tools]
    ]
  end
#
Phoenix channelにはPresenceという機能があります。これはchannelのtopicをsubscribeしているクライアントを記録するためのものです。つまりチャットに参加しているクライアントを記録します。一般的には分散環境などでも安全に記録するためにPresenceが提供されているようです。以下のコマンドでlib/react_chat_web/channels/presence.exが作成されます.Generates a Presence tracker.
mix phx.gen.presence
作成されたファイルの中身です。ReactChatWeb.Presence が定義されています。
defmodule ReactChatWeb.Presence do
  use Phoenix.Presence, otp_app: :react_chat,
                        pubsub_server: ReactChat.PubSub
end
modで指定されたReactChat.Applicationを確認してみましょう。今回はPresence機能を使いたいので、childrenにReactChatWeb..Presenceを追加します。これでReactChatWeb.ApplicationはsupervisorとしてReactChatWeb.EndpointとReactChatWeb.Presenceをスタートするようになります。Presenceはあるchannelのあるtopicに参加しているユーザをtrackし続ける機能です。ReactChatWeb.Presenceを追加したことにより、join後にpresencesがtrackされるようになります。
defmodule ReactChat.Application do
  use Application

  def start(_type, _args) do
    children = [
      # Start the Telemetry supervisor
      ReactChatWeb.Telemetry,
      # Start the PubSub system
      {Phoenix.PubSub, name: ReactChat.PubSub},
      ReactChatWeb.Presence,    # 追加
      # Start the Endpoint (http/https)
      ReactChatWeb.Endpoint
    ]
#
次にReactChatWeb.Endpointをみてみます。このプロジェクトのEndpointで、socketへのrouteがReactChatWeb.UserSocketへ振り分けられていることを確認します。
defmodule ReactChatWeb.Endpoint do
  use Phoenix.Endpoint, otp_app: :react_chat
#
  socket "/socket", ReactChatWeb.UserSocket,
    websocket: true,
    longpoll: false

#
次にReactChatWeb.UserSocketを確認します。以下のようにchannel行のコメントを外します。これで"room:"ではじまるtopicに関連したメッセージは全てReactChatWeb.RoomChannelを通るようになります。ここはクライアントからのsocket接続のリクエストが必ず通る関数です。この関数は認証などを行う場所として適しています。connect/2とid/1の実装が要求されます。今回はデフォルトのままです。
defmodule ReactChatWeb.UserSocket do
  use Phoenix.Socket

  ## Channels
  channel "room:*", ReactChatWeb.RoomChannel

  @impl true
  def connect(_params, socket, _connect_info) do
    {:ok, socket}
  end
  @impl true
  def id(_socket), do: nil
end
さて最後にChannel moduleを作ります。room_channel.exですが、これは記事「Phoenix Channelとelm-phoenixについて - Qiita」のものと全く同じです。チャットプログラムのコードとしては汎用性があります。
defmodule ReactChatWeb.RoomChannel do
  use ReactChatWeb, :channel
  alias ReactChatWeb.Presence

  def join("room:lobby", %{"user_name" => user_name}, socket) do
    send(self(), {:after_join, user_name})
    {:ok, socket}
  end

  def handle_in("new_msg", %{"msg" => msg}, socket) do
    user_name = socket.assigns[:user_name]

    broadcast(socket, "new_msg", %{msg: msg, user_name: user_name})
    {:reply, :ok, socket}
  end

  def handle_info({:after_join, user_name}, socket) do
    push(socket, "presence_state", Presence.list(socket))
    {:ok, _ref} = Presence.track(socket, user_name, %{online_at: now()})
    {:noreply, assign(socket, :user_name, user_name)}
  end

  def terminate(_reason, socket) do
    {:noreply, socket}
  end

  defp now do
    System.system_time(:seconds)
  end
end
2.ReactChat のクライアント設定 - React
assetsディレクトリで、reactに必要なパッケージをインストールします。
cd assets
yarn add react react-dom @babel/preset-react material-ui
.babelrcを編集してreactが使えるようにします。
{
    "presets": [
        "@babel/preset-env",
        "@babel/preset-react"  // 追加
    ]
}
これでPhoenixでReactを開発するための環境が整いました。プログラムを作成していきます。
まず、テンプレートファイルを修正します。Reactアプリにマウントポイントを作ります。
<div id="app"></div>
次にReactアプリのメインを作ります。通常のReactの作法通りですが、Material-UIを使うように設定しています。
import "phoenix_html";
import React from "react";
import ReactDOM from "react-dom";
import lightBaseTheme from 'material-ui/styles/baseThemes/lightBaseTheme';
import MuiThemeProvider from 'material-ui/styles/MuiThemeProvider';
import getMuiTheme from 'material-ui/styles/getMuiTheme';

import Chat from "./Chat";

class App extends React.Component {
  render() {
    return (
      <Chat />
    )
  }
}

const target = document.getElementById('app');
const node =(
  <MuiThemeProvider muiTheme={getMuiTheme(lightBaseTheme)}>
    <App />
  </MuiThemeProvider>
);

ReactDOM.render( node, target )
最後にReactアプリの本体であるChat.jsを示します。channelに関する設定はほとんど handleJoin()で行っています。コメントを付けてありますので、ちょっと長いですが、理解しやすいのではないでしょうか?
import React from "react";
import {Socket, Presence} from "phoenix"
import RaisedButton from 'material-ui/RaisedButton';
import Paper from 'material-ui/Paper';
import Divider from 'material-ui/Divider';
import TextField from 'material-ui/TextField';
class Chat extends React.Component {
constructor() {
super();
this.state = {
isJoined: false, //joinしているかどうか。画面を切り替える。
inputUser: "", //ユーザ名の入力
inputMessage: "", //メッセージの入力
messages: [], //受け取ったメッセージの配列
presences: {} //presence(参加ユーザ)の状態
}
}
handleInputUser(event) {
this.setState({
inputUser: event.target.value
})
}
handleInputMessage(event) {
this.setState({
inputMessage: event.target.value
})
}
// join処理
handleJoin(event) {
event.preventDefault();
if(this.state.inputUser!="") {
// assets/js/socket.jsのデフォルトの定義と同じ
this.socket = new Socket("/socket", {params:
{token: window.userToken}
});
this.socket.connect();
this.channel = this.socket.channel("room:lobby", {user_name: this.state.inputUser});
// Presences:現在のサーバの状態を初期状態として設定
this.channel.on('presence_state', state => {
let presences = this.state.presences;
presences = Presence.syncState(presences, state);
this.setState({ presences: presences })
console.log('state', presences);
});
// Presences:初期状態からの差分を更新していく
this.channel.on('presence_diff', diff => {
let presences = this.state.presences;
presences = Presence.syncDiff(presences, diff);
this.setState({ presences: presences })
console.log('diff', presences);
});
// メッセージを受け取る処理
this.channel.on("new_msg", payload => {
let messages = this.state.messages;
messages.push(payload)
this.setState({ messages: messages })
})
// channelにjoinする
this.channel.join()
.receive("ok", response => { console.log("Joined successfully", response) })
.receive('error', resp => { console.log('Unable to join', resp); });
this.setState({ isJoined: true })
}
}
// 退室の処理 socketを切断するだけ。これでいいのか?
handleLeave(event) {
event.preventDefault();
this.socket.disconnect();
this.setState({ isJoined: false })
}
// メッセージ送信の処理
handleSubmit(event) {
event.preventDefault();
this.channel.push("new_msg", {msg: this.state.inputMessage})
this.setState({ inputMessage: "" })
}
// 画面表示
render() {
const style1 = { margin: '16px 32px 16px 16px', padding: '10px 32px 10px 26px',};
const style2 = { display: 'inline-block', margin: '1px 8px 1px 4px',};
const messages = this.state.messages.map((message, index) => {
return (
<div key={index}>
<p><strong>{message.user_name}</strong> > {message.msg}</p>
</div>
)
});
let presences = [];
Presence.list(this.state.presences, (name, metas) => {
presences.push(name);
});
let presences_list = presences.map( (user_name, index) =>
<li key={index} style={style2}>{user_name}</li>
);
let form_jsx;
if(this.state.isJoined===false) {
form_jsx = (
<form onSubmit={this.handleJoin.bind(this)} >
<label>ユーザ名を指定してJoin</label>
<TextField hintText="ユーザ名" value = {this.state.inputUser} onChange = {this.handleInputUser.bind(this)} />
<RaisedButton type="submit" primary={true} label="Join" />
</form>
);
} else {
form_jsx = (
<div>
<Paper style={style1}>
<label>参加者 : {this.state.inputUser}</label>
<ul>
{presences_list}
</ul>
<div align="right">
<form onSubmit={this.handleLeave.bind(this)} >
<RaisedButton type="submit" primary={true} label="Leave" />
</form>
</div>
</Paper>
<Paper style={style1}>
<form onSubmit={this.handleSubmit.bind(this)}>
<label>チャット</label>
<TextField hintText="Chat Text" value = {this.state.inputMessage} onChange = {this.handleInputMessage.bind(this)} />
<RaisedButton type="submit" primary={true} label="Submit" />
</form>
<Divider />
<br />
<div>
{messages}
</div>
</Paper>
</div>
);
}
return (
<div>
{form_jsx}
</div>
)
}
}
export default Chat
3.ReactChatの動作確認
cd react_chat
iex -S mix phx.server
以下のURLにアクセスします。
http://localhost:4000/
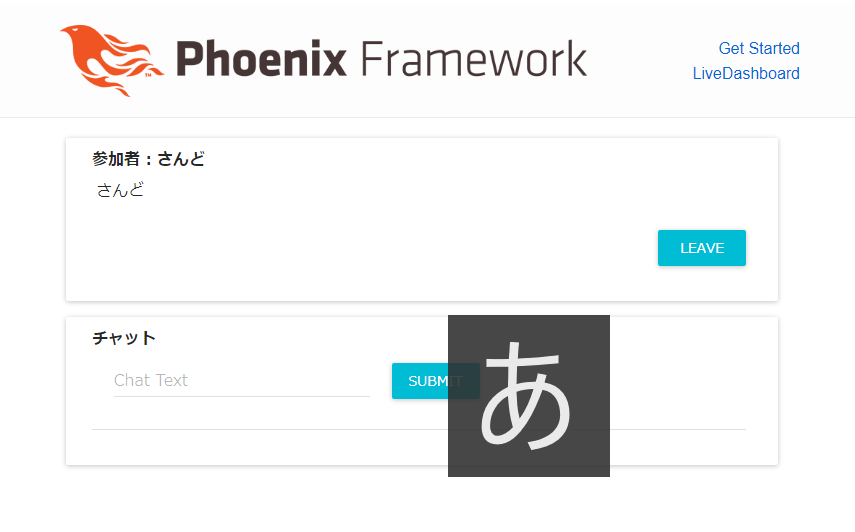
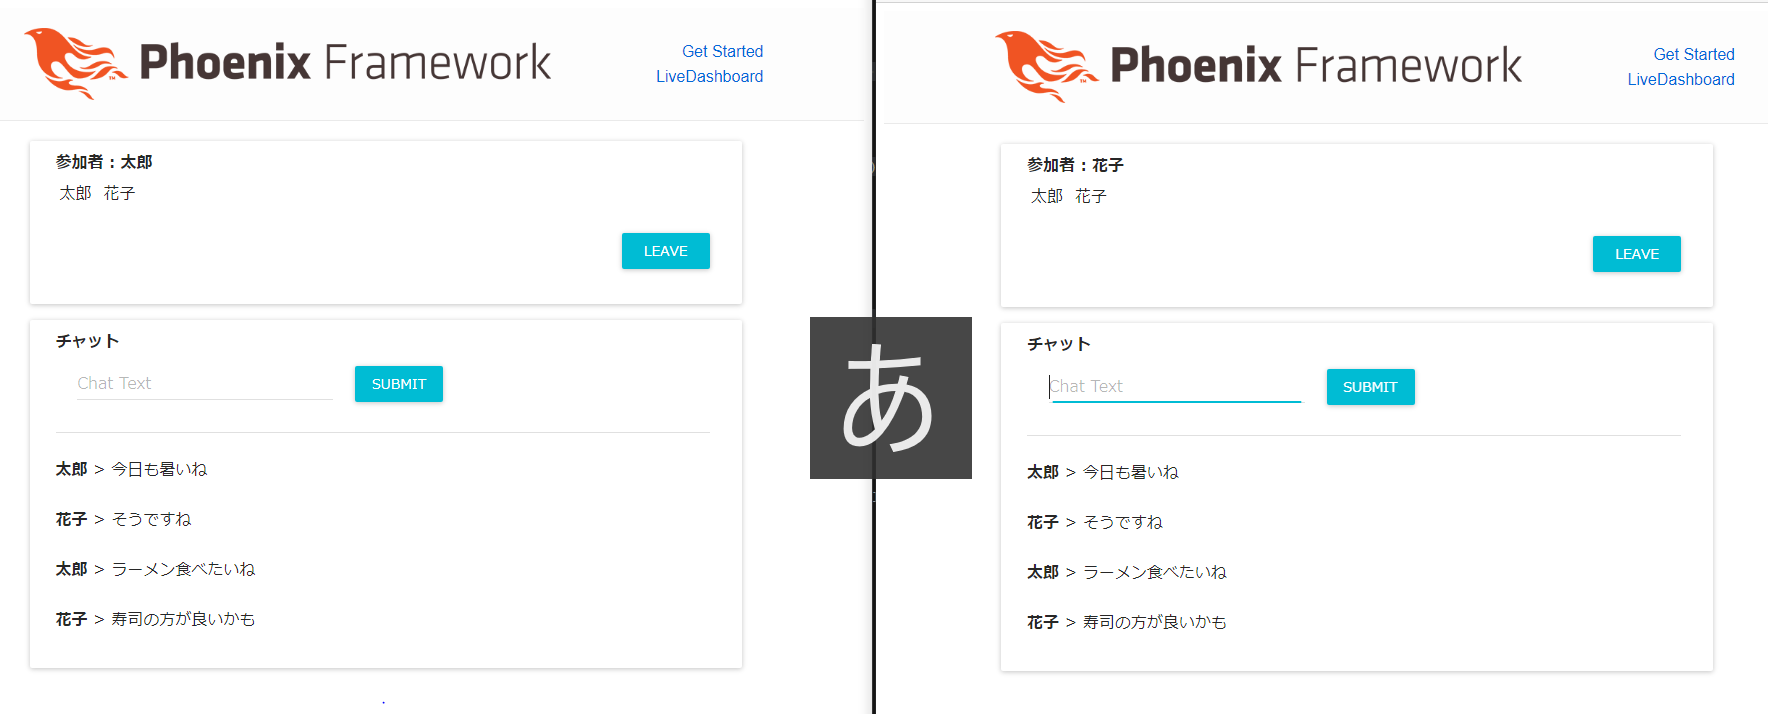
太郎と花子のチャットです。メッセージがちゃんと同期します。
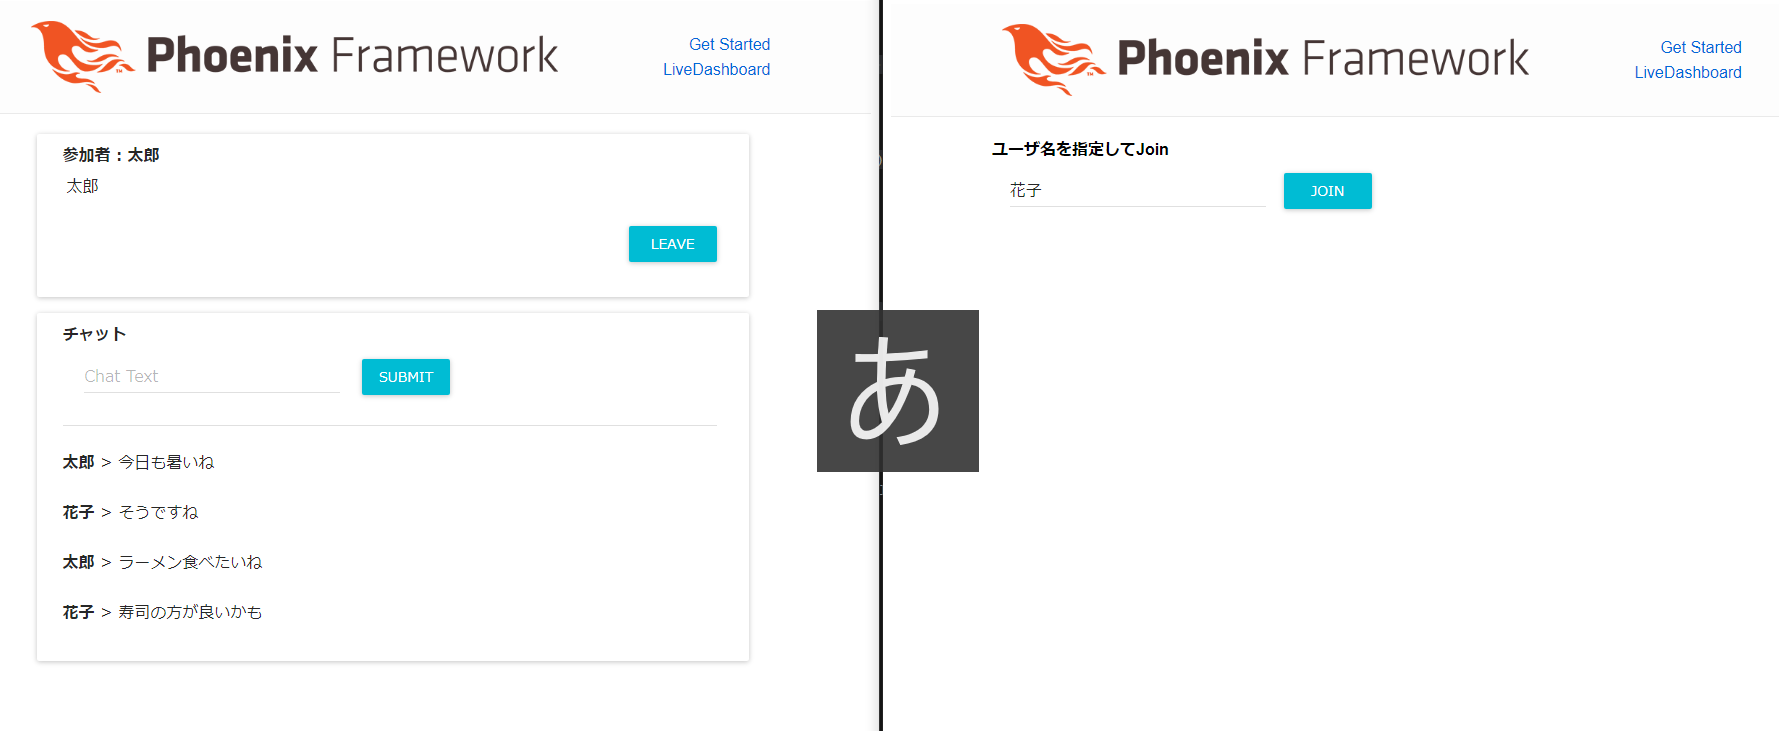
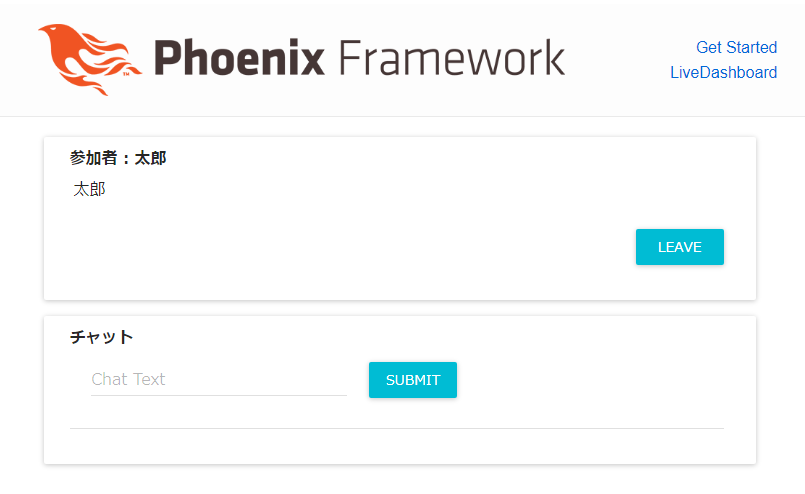
presence機能を確認します。花子がLEAVEボタンで退出すると、太郎側の参加者リストから花子が消えました。いいですね。
以上で動作確認終了です。
4.Elixir のクライアント設定 - PhoenixClient
ここではListenTweetsというElixir アプリケーションを作ります。これはElixirのGenServerで、「ラーメン」というキーワードを含むTweetsを監視していて、見つけたらReactChatのChannelに流し込みます。GenServerがブラウザのクライアントと同じポジションで、Socketを作りCHannelにJOINします。PhoenixClientがGenServerにクライアント機能を与えます。
PhoenixClient
Channel client for connecting to Phoenix from Elixir
さてlisten_tweetsプロジェクトを開始します。--supオプションに注意してください。lib/listen_tweets/application.exが自動作成されます。
mix new listen_tweets --sup
cd listen_tweets
「mix new」コマンドでconfig/config.exsが自動生成されなくなりました。以下のファイルを手動で作成します。
No longer generate config for mix new #8932 - echo "use Mix.Config" > config/config.exs
use Mix.Config

config :extwitter, :oauth, [
   consumer_key: "xxxxx",
   consumer_secret: "xxxxx",
   access_token: "xxxxx",
   access_token_secret: "xxxxx"
]
さて、mix.exsにphoenix_clientと、twitter関連のライブラリを追加します。
#
  defp deps do
    [
      {:phoenix_client, "~> 0.3"},
      {:jason, "~> 1.0"},
      {:oauther, "~> 1.1"},
      {:extwitter, "~> 0.8"}
    ]
  end
#
次のコマンドでライブラリをインストールします。
mix deps.get
さてmix.exsファイルで、このプロジェクトのスタート地点を確認します。modはこのApplicationのトップのmoduleを示しています。(ちなみにextra_applicationsはこのApplicationが実行されるときに、すでに動作している必要があるApplicationのリストです。動作していなければ起動されます。)
#
  def application do
    [
      extra_applications: [:logger],
      mod: {ListenTweets.Application, []}
    ]
  end
#
サーバが予期せぬエラーでクラッシュした場合の対処法として、Elixir(OTP)はSupervisorという機能を提供してくれます。Supervisorはプロセスを監視して、クラッシュしたときに再起動してくれる機能です。
プロセスをLInk processとしてstart(start_link)すると、そのプロセスが死んだときに親にシグナルを返します。このシグナルを受け取ると親も死んでしまいますが、:trap_exitフラグをtrueにセットしておくと( Process.flag(:trap_exit, true) )、シグナルを通常のプロセスのメッセージに変換してくれますので、親は死ぬことはなくなり、子プロセスが死んだときに子プロセスを再起動できるようになります。このようにしてSupervisorは子プロセスを監視します。
application.exのstart/2は、このApplicationのSupervisor treeのトップになります。use Application 行でApplication Behaviourが追加されます。ListenTweets.Supervisorとして子プロセス ListenTweets.ListenerとPhoenixClientを起動・監視します。Socketはこのタイミングでの起動が安心で、後にChannelから参照できるように「name: PhoenixClient.Socket」とnameを指定しておきます。
defmodule ListenTweets.Application do
  # See https://hexdocs.pm/elixir/Application.html
  # for more information on OTP Applications
  @moduledoc false

  use Application

  def start(_type, _args) do
    socket_opts = [
      url: "ws://localhost:4000/socket/websocket"
    ]
    children = [
      # Starts a worker by calling: ListenTweets.Worker.start_link(arg)
      { ListenTweets.Listener, "ラーメン" },
      { PhoenixClient.Socket, { socket_opts, name: PhoenixClient.Socket } }
    ]

    # See https://hexdocs.pm/elixir/Supervisor.html
    # for other strategies and supported options
    opts = [strategy: :one_for_one, name: ListenTweets.Supervisor]
    Supervisor.start_link(children, opts)
  end
end
子プロセスの再起動の仕方は、:one_for_oneというstrategyを用います。Supervisorが子プロセスを再起動するときに、strategy以外にも指定項目がいくつかあって、Child Specificationと呼ばれています。それぞれ:id, :restart, :shutdown, :start, :typeの値を指定する必要があります。今回はListenTweets.Listenerにuse GenServer を指定していますので、GenServerが持つChild Specificationのデフォルト値を使うことができます。つまり明示的な指定は行いません。
defmodule ListenTweets.Listener do
  use GenServer #child_spec
  alias PhoenixClient.{Socket, Channel, Message}

  #公開関数 start_link - プロセスの起動
  def start_link(key) do
    GenServer.start_link(__MODULE__, key, name: __MODULE__)
  end

  # 公開関数 start_listen - channelに参加する
  def start_listen() do
    GenServer.call __MODULE__, :start
  end

  # start_linkのcallback - 状態 key="ラーメン"の初期化
  def init(key) do
    IO.puts('aaaaaa22222')
    { :ok, %{key: key} }
  end

  # start_listenのcallback
  def handle_call(:start, _from, %{key: key}) do
    {:ok, _response, channel} = PhoenixClient.Channel.join(Socket, "room:lobby", %{user_name: "User9"})

    pid = spawn(fn ->
       stream = ExTwitter.stream_filter(track: key)
       for tweet <- stream do
         IO.puts tweet.text
         Channel.push(channel, "new_msg", %{msg: tweet.text})
      end
    end)
    { :reply, %{key: key}, %{key: key} }
  end

  # 未使用
  def handle_cast({ :update, new_state }, _current_key) do
    { :noreply, new_state }
  end

  # 重要:予期せぬメッセージを受け止め、出力します。
  def handle_info(mess, state) do
    IO.inspect mess
    { :noreply, state }
  end
end
ListenTweets.ListenerはGenServerとして定義されています。GenServerは次の仕事を行ってくれます。
(1)別プロセスをSpawnする。
(2)プロセスを無限ループ状態にする。
(3)プロセスの状態(state)を維持する
(4)messagesに反応する
(5)messageの送信者に返答を返す
GenServerの書き方として、外に公開する関数を頭に書きます。start_link/1とstart_listen/0がそれにあたります。
init/1はGenServer.start_link/3のcallbackとして呼ばれ、主に状態(state)の初期化を行います。returnは{ :ok, %{key: key} }で、stateがkey(="ラーメン")で初期化されます。
メインは handle_call(:start, _from, %{key: key}) です。これはsocketとchannelを初期化し、joinしています。そしてTwitterをlistenし、"ラーメン"を含むtweetsが現れたら、このチャットchannelに流し込みます。Stream APIを使っているのでリアルタイムに処理できます。
PhoenixClient.Channel.joinはinit/1の中で書くように、公式ドキュメントにはありますが、Socketの準備ができていないせいかエラーとなります。ここではstart_listenのcallbackでjoinするようにしました。
以上でListenTweets Applicationの構築を終わります。
5.ReactChatにListenTweets Applicationを追加
ここからはReactChat Application側で操作します。ReactChat Application側からListenTweets Applicationにアクセスしていきます。
さてListenTweets Applicationが構築できたので、Reactチャット編のReactChat ApplicationのDependencyとして追加します。これでReactChat Applicationが自由にListenTweets Applicationにアクセスできるようになります。追加は簡単です。
Elixirで言うApplicationは、通常の意味では使われていません。Erlangから受け継いでいるのですが、特別な意味で使われています。ここで変に自己流の解釈を述べて誤解を与えることは避けておきます。ググってください。ちなみにElixirではApplication-Module-Functionの階層になっています。
まずReactChatプロジェクトのトップに行きます。
cd react_chat
次にListenTweetsでも行いましたが、ここの環境でもTwitterを使うのでconfig.exsにAPIのkeyを設定します。
#
config :extwitter, :oauth, [
   consumer_key: "xxxxx",
   consumer_secret: "xxxxx",
   access_token: "xxxxx",
   access_token_secret: "xxxxx"
]
#
さて、mix.exsを編集してdeps にlisten_tweetsを追加します。
#
  defp deps do
    [
      {:phoenix, "~> 1.5.3"},
      {:phoenix_html, "~> 2.11"},
      {:phoenix_live_reload, "~> 1.2", only: :dev},
      {:phoenix_live_dashboard, "~> 0.2.0"},
      {:telemetry_metrics, "~> 0.4"},
      {:telemetry_poller, "~> 0.4"},
      {:gettext, "~> 0.11"},
      {:jason, "~> 1.0"},
      {:plug_cowboy, "~> 2.0"},
      {:listen_tweets, path: "../listen_tweets"}  # 追加
    ]
  end
#
以下のコマンドでListenTweets Applicationを取り込めます。phoenixサーバを立ち上げます。
mix deps.get
iex -S mix phx.server
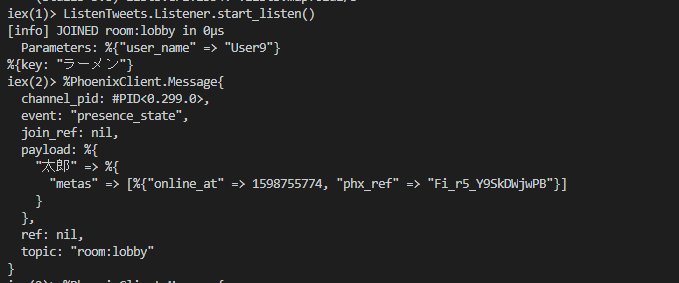
さて、ここが重要なのですが、phoenixのiexシェルを立ち上げただけで、ListenTweets Applicationが既にスタートしています。しかもphoenixのiexシェルからListenTweets Applicationにアクセスできます。**ListenTweets.Listener.start_listen()**でListenTweets Applicationをchannelにjoinさせてみましょう
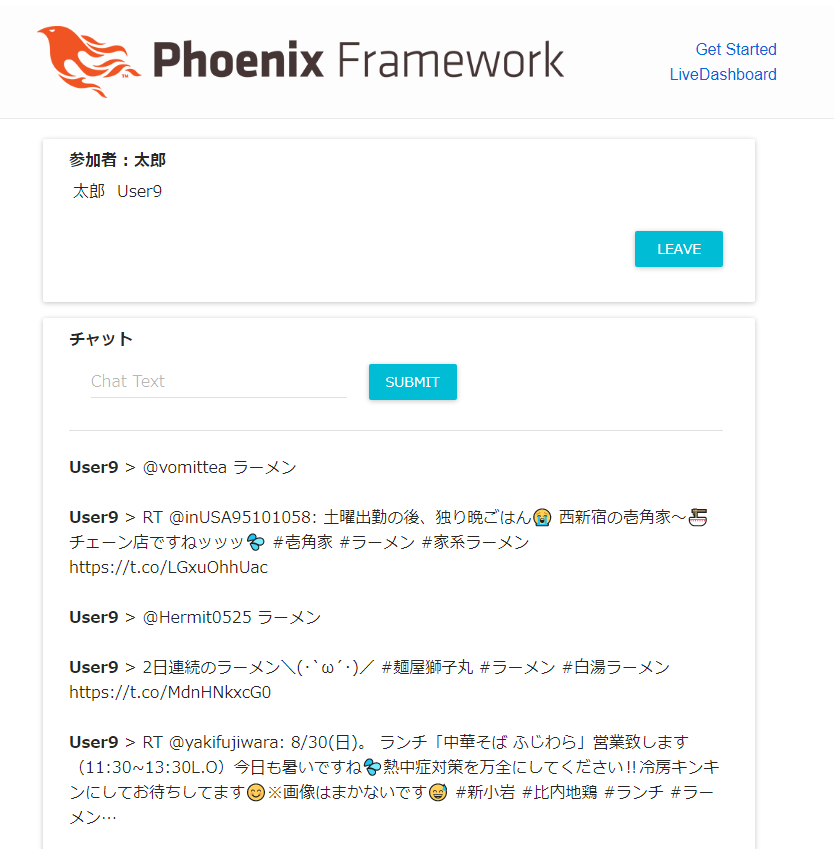
シェルの返答はうまくいったようです。ブラウザを見ると、参加者にUser9が追加され、ラーメンに関するTweetsが流れてきます。
これでListenTweets ApplicationをReactChat ApplicationのDependencyとして追加できたのが確認できました。ポイントは簡単に追加できたことです。しかもListenTweets ApplicationとReactChat Applicationは全く独立したApplicationであることも重要です。このように独立したApplicationを複数作成し、それらを組み合わせることによって、全体のシステムを構築するやり方が、便利ですね。
今回は以上です。

