Phoenix Channelで作る最先端Webアプリ - topic-subtopic編 - Qiita
Phoenix Channelで作る最先端Webアプリ - ETS編 - Qiita
Phoenix Channelで作る最先端Webアプリ - Fault Tolerance編 - Qiita
Phoenix Channelで作る最先端Webアプリ - 地図(Geo)拡張編 - Qiita
Phoenix Channelで作る最先端Webアプリ - DynamicSupervisor編 - Qiita
Phoenix Channelで作る最先端Webアプリ - Elixier Application編 - Qiita
Phoenix Channelで作る最先端Webアプリ - Reactチャット編 - Qiita
今回の技術的なポイントは以下の通りです。
1.Elixir Applicationを作成する(ListenTweets Application)
2.Channel Applicationに新ApplicationをDependencyとして追加する(重要)
Elixier Application編は、Reactチャット編で構築したチャットシステム(ReactChat Application)に、Elixir クライアントを参加させます。普通にブラウザのReactチャットに、Elixirのクライアントを参加させる試みです。ElixirのクライアントはElixir Applicationとして構築し、TwitterのTweetsを読み取ってチャットchannelに書き込みます。Elixir Applicationなので、前回作成したReactチャットのPhoenixプロジェクトのDependencyとして組み込むことが可能になります。このApplicationの合成が、革新的であると言われています。この点は重要なので後で繰り返します。
1.ListenTweets Applicationの構築
さてlisten_tweetsプロジェクトを開始します。--supオプションに注意してください。lib/listen_tweets/application.exが自動作成されます。
mix new listen_tweets --sup
cd listen_tweets
次にapplication environmentを利用して初期設定を行います。すなわちmix newで作成されたconfig/config.exsファイルにTwitter APIのキーを設定します。以下の項目をファイルの末尾に追加します。
#
config :extwitter, :oauth, [
   consumer_key: "xxxxx",
   consumer_secret: "xxxxx",
   access_token: "xxxxx",
   access_token_secret: "xxxxx"
]
#
さて、mix.exsにphoenixchannelclientと、twitter関連のライブラリを追加します。
#
defp deps do
  [
    {:phoenixchannelclient, "~> 0.1.0"},
    {:oauther, "~> 1.1"},
    {:extwitter, "~> 0.8"}
  ]
end
#
次のコマンドでライブラリをインストールします。
mix deps.get
さてmix.exsファイルで、このプロジェクトのスタート地点を確認します。modはこのApplicationのトップのmoduleを示しています。(ちなみにextra_applicationsはこのApplicationが実行されるときに、すでに動作している必要があるApplicationのリストです。動作していなければ起動されます。)
#
  def application do
    [
      extra_applications: [:logger],
      mod: {ListenTweets.Application, []}
    ]
  end
#
サーバが予期せぬエラーでクラッシュした場合の対処法として、Elixir(OTP)はSupervisorという機能を提供してくれます。Supervisorはプロセスを監視して、クラッシュしたときに再起動してくれる機能です。
プロセスをLInk processとしてstart(start_link)すると、そのプロセスが死んだときに親にシグナルを返します。このシグナルを受け取ると親も死んでしまいますが、:trap_exitフラグをtrueにセットしておくと( Process.flag(:trap_exit, true) )、シグナルを通常のプロセスのメッセージに変換してくれますので、親は死ぬことはなくなり、子プロセスが死んだときに子プロセスを再起動できるようになります。このようにしてSupervisorは子プロセスを監視します。
application.exのstart/2は、このApplicationのSupervisor treeのトップになります。use Application 行でApplication Behaviourが追加されます。ListenTweets.Supervisorとして子プロセス ListenTweets.Listenerを起動し監視します。
defmodule ListenTweets.Application do
  use Application

  def start(_type, _args) do
    # List all child processes to be supervised
    children = [
      { ListenTweets.Listener, "ラーメン"},
    ]

    opts = [strategy: :one_for_one, name: ListenTweets.Supervisor]
    Supervisor.start_link(children, opts)
  end
end
子プロセスの再起動の仕方は、:one_for_oneというstrategyを用います。Supervisorが子プロセスを再起動するときに、strategy以外にも指定項目がいくつかあって、Child Specificationと呼ばれています。それぞれ:id, :restart, :shutdown, :start, :typeの値を指定する必要があります。今回はListenTweets.Listenerにuse GenServer を指定していますので、GenServerが持つChild Specificationのデフォルト値を使うことができます。つまり明示的な指定は行いません。
defmodule ListenTweets.Listener do
  use GenServer #child_spec

  #公開関数 start_link - プロセスの起動
  def start_link(key) do
    GenServer.start_link(__MODULE__, key, name: __MODULE__)
  end

  # 公開関数 start_listen - channelに参加する
  def start_listen() do
    GenServer.call __MODULE__, :start
  end

  # start_linkのcallback - 状態 key="ラーメン"の初期化
  def init(key) do
    { :ok, key }
  end

  # start_listenのcallback
  def handle_call(:start, _from, key) do
    channel =
        get_pid()
        |> get_socket()
        |> get_channel()

    if channel == :error do
      IO.puts("error!!!")
    else
       PhoenixChannelClient.join(channel)
       pid = spawn(fn ->
           stream = ExTwitter.stream_filter(track: key)
           for tweet <- stream do
             IO.puts tweet.text
             PhoenixChannelClient.push(channel, "new_msg", %{msg: tweet.text})
           end
       end)
    end
    { :reply, key, key }
  end

  # 未使用
  def handle_cast({ :update, new_key }, _current_key) do
    { :noreply, new_key }
  end

  # 重要:予期せぬメッセージを受け止め、出力します。
  def handle_info(mess, key) do
    IO.inspect mess
    { :noreply, key }
  end

  defp get_pid do
    res_pid = PhoenixChannelClient.start_link()
    case res_pid do
      {:ok, pid} -> pid
      _ -> :error
    end
  end


  defp get_socket (:error) do
    :error
  end
  defp get_socket (pid) do
     res_socket = PhoenixChannelClient.connect(pid,
        host: "localhost",
        port: 4000,
        path: "/socket/websocket",
        secure: false,
        heartbeat_interval: 30_000)
      case res_socket do
        {:ok, socket} -> socket
        _ -> :error
      end
  end

  defp get_channel(:error) do
    :error
  end
  defp get_channel(socket) do
    channel = PhoenixChannelClient.channel(socket, "room:lobby", %{user_name: "User9"})
    channel
  end
end
ListenTweets.ListenerはGenServerとして定義されています。GenServerは次の仕事を行ってくれます。
(1)別プロセスをSpawnする。
(2)プロセスを無限ループ状態にする。
(3)プロセスの状態(state)を維持する
(4)messagesに反応する
(5)messageの送信者に返答を返す
GenServerの書き方として、外に公開する関数を頭に書きます。start_link/1とstart_listen/0がそれにあたります。
init/1はGenServer.start_link/3のcallbackとして呼ばれ、主に状態(state)の初期化を行います。returnは{ :ok, key }で、stateがkey(="ラーメン")で初期化されます。
メインは handle_call(:start, _from, key) です。これはsocketとchannelを初期化し、joinしています。そしてTwitterをlistenし、"ラーメン"を含むtweetsが現れたら、このチャットchannelに流し込みます。Stream APIを使っているのでリアルタイムに処理できます。
以上でListenTweets Applicationの構築を終わります。
2.新DependencyとしてListenTweets Applicationを追加する
ここからはReactChat Application側で操作します。ReactChat Application側からListenTweets Applicationにアクセスしていきます。
さてListenTweets Applicationが構築できたので、Reactチャット編のReactChat ApplicationのDependencyとして追加します。これでReactChat Applicationが自由にListenTweets Applicationにアクセスできるようになります。追加は簡単です。
Elixirで言うApplicationは、通常の意味では使われていません。Erlangから受け継いでいるのですが、特別な意味で使われています。ここで変に自己流の解釈を述べて誤解を与えることは避けておきます。ググってください。ちなみにElixirではApplication-Module-Functionの階層になっています。
まずReactChatプロジェクトのトップに行きます。
cd react_chat
次にListenTweetsでも行いましたが、ここの環境でもTwitterを使うのでconfig.exsにAPIのkeyを設定します。
#
config :extwitter, :oauth, [
   consumer_key: "xxxxx",
   consumer_secret: "xxxxx",
   access_token: "xxxxx",
   access_token_secret: "xxxxx"
]
#
さて、mix.exsを編集してdeps にlisten_tweetsを追加します。
#
  defp deps do
    [
      {:phoenix, "~> 1.3.0"},
      {:phoenix_pubsub, "~> 1.0"},
      {:phoenix_html, "~> 2.10"},
      {:phoenix_live_reload, "~> 1.0", only: :dev},
      {:gettext, "~> 0.11"},
      {:cowboy, "~> 1.0"},
      {:listen_tweets, path: "../listen_tweets"}
    ]
  end
#
以下のコマンドでListenTweets Applicationを取り込めます。phoenixサーバを立ち上げます。
mix deps.get
iex -S mix phx.server
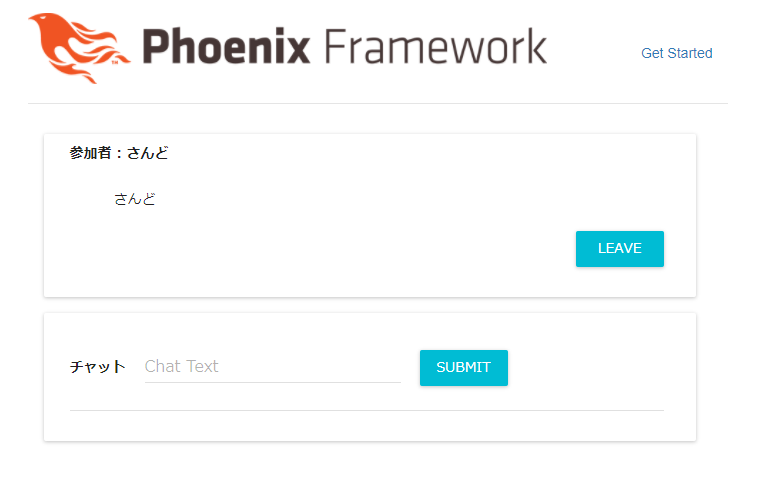
ブラウザを開いて、joinします。
さて、ここが重要なのですが、phoenixのiexシェルを立ち上げただけで、ListenTweets Applicationが既にスタートしています。しかもphoenixのiexシェルからListenTweets Applicationにアクセスできます。ListenTweets.Listener.start_listen()でListenTweets Applicationをchannelにjoinさせてみましょう
iex(2)> ListenTweets.Listener.start_listen()
[info] JOIN "room:lobby" to ReactChatWeb.RoomChannel
  Transport:  Phoenix.Transports.WebSocket (1.0.0)
  Serializer:  Phoenix.Transports.WebSocketSerializer
  Parameters: %{"user_name" => "User9"}
[info] Replied room:lobby :ok
シェルの返答はうまくいったようです。ブラウザを見ると、参加者にUser9が追加され、ラーメンに関するTweetsが流れてきます。
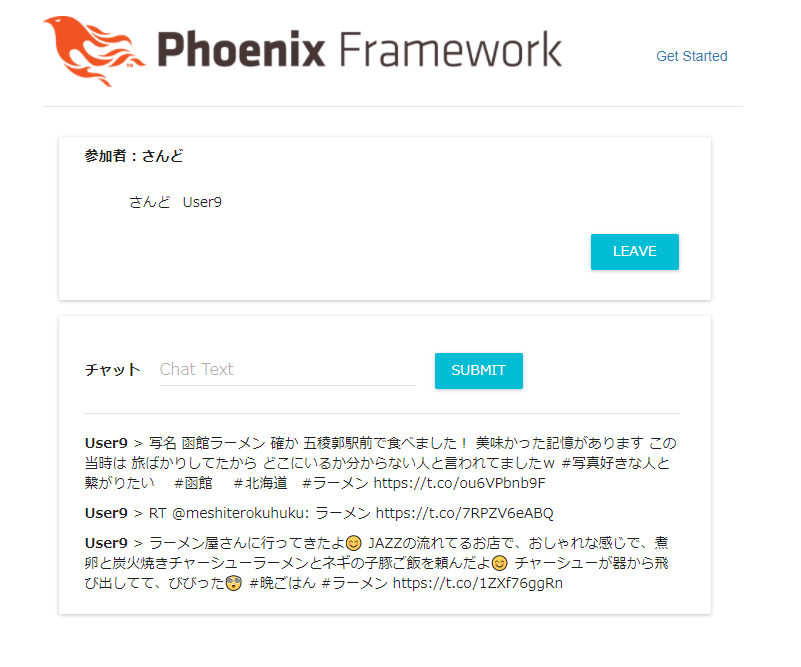
これでListenTweets ApplicationをReactChat ApplicationのDependencyとして追加できたのが確認できました。ポイントは簡単に追加できたことです。しかもListenTweets ApplicationとReactChat Applicationは全く独立したApplicationであることも重要です。このように独立したApplicationを複数作成し、それらを組み合わせることによって、全体のシステムを構築するやり方が、革新的と言われているようです。
次回も、今回のシステムを調整することで、ApplicationやSupervisorやプロセス周りを探っていきたいと思います。