RxSwift用gitignore
Pod を使えるようにする
-bash: pod: command not found
$ sudo gem install cocoapods
$ pod setup
参考
pip installが通らない
$ pod init
-bash: /usr/local/bin/pod: /System/Library/Frameworks/Ruby.framework/Versions/2.3/usr/bin/ruby: bad interpreter: No such file or directory
解決策
$ sudo gem update --system
$ sudo gem uninstall cocoapods
$ sudo gem install -n /usr/local/bin cocoapods
無事通りました!
参考
Xibのインスタンス化方法まとめ
Cocoa Touch Classを選択する.
https://medium.com/@shiba1014/xibとコードの紐付け方まとめ-200da7766306
TabBar
AppDelegate.swiftの最初のViewを定める
UISearchBarにキャンセルを加える
【Swift4】UISearchBarをNavigation Barに表示させる
https://qiita.com/orimomo/items/739faab9af856877ed8e
UISearchBarの基本
https://www.swift-study.com/uisearchbar-basic/
xibファイルでViewを作成してStoryboardで使用する方法
https://program-life.com/559
https://www.ukeyslabo.com/development/iosapplication/swift/how_to_use_xib/
Protocolごとにextensionで分けてコードを書く
delegateメソッドの使い所
ページ遷移などそのファイル(例えばXib)では処理が書けないものを他のファイルの委託する。
依頼元でprotocol, delegateを設定し、委託先でdelegateを受け、メソッドの内容を定義する。
https://qiita.com/narukun/items/326bd50a78cf34371169
Swiftの列挙型(enum)おさらい
https://qiita.com/hachinobu/items/392c96820588d1c03b0c
https://qiita.com/techiromen0/items/db034aae31445ac7cf1e
classとstaticの挙動の違い
Codable
Swift4でナビゲーションバーの色を変更する
.xibを用いたUITableViewCellの実装方法
class ViewController: UIViewController {
  @IBOutlet weak var tableView: UITableView!
  private let viewModel = ViewModel()
  private let disposeBag = DisposeBag()

  override func viewDidLoad() {
    super.viewDidLoad()
    self.tableView.register(UINib(nibName: "TableViewCell", bundle: nil), forCellReuseIdentifier: "TableViewCell")
    self.bindViewModel()
  }

    private func bindViewModel()
    {
      self.viewModel.list
        .bind(to: tableView.rx.items) { tableView, index, item in
          let cell: TableViewCell = tableView.dequeueReusableCell(withIdentifier: "TableViewCell")! as! TableViewCell
          cell.textLabel?.text = item
        return cell
      }
      .disposed(by: disposeBag)
    }
}
class ViewModel: UIViewController {
  let list = BehaviorRelay<Array>(value: ["1", "2", "3", "4", "5", "6", "7", "8"])

  override func viewDidLoad() {
      super.viewDidLoad()
  }
}
インスタンスかする際に以下のエラーが出る
以下のエラー
Missing argument for parameter 'from' in call when creating instance of Codable class
原因: init()が存在しなかった.
https://stackoverflow.com/questions/56828197/missing-argument-for-parameter-from-in-call-when-creating-instance-of-codable
NavigationBar, TabBarが灰色になってしまう
edgesForExtendedLayout = []
これが原因でした.
addSubViewしたらViewがNavigationBarの下に潜り込む
CGRect(x: 0, y: !isNavBarHidden() ? statusBarHeight() + navBarHeight() : statusBarHeight(), width: UIScreen.main.bounds.size.width, height: UIScreen.main.bounds.size.width)

extension CameraViewController {
//    func viewWidth() -> CGFloat { return self.view.frame.width }
//    func viewHeight(includeNavBarHeight: Bool = true, includeStatusBarHeight: Bool = true) -> CGFloat {
//        return self.view.frame.height - (includeStatBarHeight ? statusBarHeight() : 0) - (includeNavBarHeight ? navBarHeight() : 0)
//    }
//
//    func navBarWidth() -> CGFloat { return self.navigationController?.navigationBar.frame.size.width ?? 0 }
    func navBarHeight() -> CGFloat { return self.navigationController?.navigationBar.frame.size.height ?? 0 }

//    func statusBarWidth() -> CGFloat { return UIApplication.shared.statusBarFrame.width }
    func statusBarHeight() -> CGFloat { return view.window?.windowScene?.statusBarManager?.statusBarFrame.height ?? 0 }

    func isNavBarHidden() -> Bool { return self.navigationController?.isNavigationBarHidden ?? true }
}
https://qiita.com/tc_minami/items/3676d63847c0caef5234
statusBarFrameはiOS13以降では廃止されているらしいので以下を参照した.
https://stackoverflow.com/questions/57023899/how-to-get-the-status-bar-height-in-ios-13
[UIKit][UILabel] 背景色、枠線、角丸の設定をするには?
システムカラーを使う
self.label.layer.borderColor = UIColor(red: 0, green: 122 / 255, blue: 1, alpha: 1).cgColor
Viewがフルスクリーンにならない
ViewのinspectorでPresentationをOver Full Screenに設定する。
カメラが利用できるかチェックする方法
アプリのアイコン設定
https://rara-world.com/swift-ios-app-icon/
https://blog.piyo.tech/posts/2018-09-24-make-mobile-app-icon/
AVFoundationのCameraを2回以上使おうとするとエラーが出る
error文:
Settings may not be re-used swift
原因: AVCapturePhotoSettingsは繰り返して使うことができないらしい。
解決: そのページを開くたびにイニシャライズしてあげるとよい。
// fields
var settings: AVCapturePhotoSettings! = nil

override func viewWillAppear(_ animated: Bool) {
  super.viewWillAppear(animated)
  if UIImagePickerController.isSourceTypeAvailable(.camera)
  {
    self.settings = .init()
    startCapture()
  }
}
[参考文献]
https://stackoverflow.com/questions/54084683/avcapturephotooutput-settings-may-not-be-reused
スプラッシュ画面生成
LaunchScreenの表示時間を変更する方法
選択された Cell の背景色を変更
Refresh(UIRefreshControl)
class ViewController: UIViewController {
  @IBOutlet weak var tableView: UITableView!
  fileprivate let refreshCtl = UIRefreshControl()

  override func viewDidLoad() {
    super.viewDidLoad()
    self.tableView.refreshControl = self.refreshCtl
    refreshCtl.addTarget(self, action: #selector(SearchViewController.refresh(sender:)), for: .valueChanged)
  }

  @objc func refresh(sender: UIRefreshControl) {
    print("refresh!")
    refreshCtl.endRefreshing()
  }
}
Segmented Controlの使い方
import UIKit

class SignViewController: UIViewController {

    @IBOutlet weak var segment: UISegmentedControl!
    let signUpVC = SignUpViewController.init(nibName: nil, bundle: nil)
    let loginVC = LoginViewController.init(nibName: nil, bundle: nil)


    @IBOutlet weak var segmentView: UIView!
    override func viewDidLoad() {
        super.viewDidLoad()
        // UIViewを作ってその上にaddSubviewする
        self.segmentView.addSubview(signUpVC.view)
        self.segmentView.addSubview(loginVC.view)
        self.loginVC.view.isHidden = true
    }

    @IBAction func segmentButton(_ sender: Any) {
        switch (sender as AnyObject).selectedSegmentIndex {
        case 0:
            self.addFirstView()
        case 1:
            self.addSecondView()
        default:
            print("error")
        }
    }

    func addFirstView() {
        loginVC.view.isHidden = true
        signUpVC.view.isHidden = false
    }

    func addSecondView() {
        signUpVC.view.isHidden = true
        loginVC.view.isHidden = false
    }
}
参考
http://somen.site/2018/02/05/segmented-control%E3%81%AE%E4%BD%BF%E3%81%84%E6%96%B9-swift4-0/
iOS13で、presentで画面遷移をした際に遷移前の画面に戻れてしまう問題
self.VC.modalPresentationStyle = .fullScreen
を設定する。
https://qiita.com/hiesiea/items/2884ebe22687ad639975
UIPickerView
UIPickerViewのはじめに表示する項目を指定
picker.selectRow(1, inComponent: 0, animated: true)
コードでUILabelのテキストを中央寄せにする
self.lbl.textAlignment = NSTextAlignment.center
参考
https://qiita.com/osamu1203/items/c1f92aee94f37fb96116
Alamofireで非同期
RxSwiftでUIPickerViewのテキストをバインドする
        self.pickerView.rx.modelSelected(String.self)
            .map { strs in
                return strs.first!
            }
            .bind(to: self.ViewModel.old)
            .disposed(by: disposeBag)
参考
https://culumn.hatenablog.com/entry/2018/06/07/120000
protocolエラー
Type "xxx" does not confirm to protocol 'NSObjectProtocol
解決法
NSObjectを追加する
class xxx: NSObject, testDelegate {
}
参考
tapでキーボードを下げる
override func viewDidLoad() {
    super.viewDidLoad()
    let singleTapGesture = UITapGestureRecognizer(target: self, action: #selector(singleTap(_:)))
    self.view.addGestureRecognizer(singleTapGesture)
}

@objc func singleTap(_ gesture: UITapGestureRecognizer){
    self.view.endEditing(true)
    return
}
RxSwiftのDebounceとThrottle
インクリメンタルサーチでAPIを叩きすぎないようにする際に使えそう。
https://qiita.com/dekatotoro/items/be22a241335382ecc16e
PodでインストールしたObjectiveCのライブラリをimportする
該当箇所
# import "????.h"
エラー文
Expected identifier in import declaration
試していること
Build SettingでObjective-Cのファイルを読み込めるように設定するところがある気がしてその周辺をいじっています。
ここに以下のような記述があったので、Objective-C Bridging Headerに関して調べてみる。
SDKのメインヘッダファイルをインポートする
現在のiOS SDKはObjective-Cでネイティブに記述されています。シンボルにアクセスするには、メインヘッダファイルをインポートする必要があります。 Swiftコードを含むプロジェクトで作業している場合は、Objective-C Bridging Headerでこのファイルをインポートする必要があります。詳細については、Appleのページ「Objective-CコードのSwiftへの移行 」を参照してください。
Objective-C Bridging Headerの欄がない
ここを参考にしながら、Build Settingsを見ていると、Swift Compiler - Code GenerationにObjective-C Bridging Headerがなかった。
解決しかけた
新しく.hファイルを作成すると出てきた。
上記の通りにしてもまだ読み込めなかったので、
ここに記載されているように、
BuildSettings→Search Paths→User Header Search PathsにPods/**を設定してみた。
しかしダメでした。。。
解決
AppDelegate.swiftでimportしようとしていたが、既にBridging-Header.swiftで読み込まれていた。
よって、AppDelegate.swiftのimport文をコメントアウトしたらビルド成功しました。
因みにimportは読み込みたいヘッダーファイルのLocationを設定しました。
# import "KochavaTrackeriOS/Classes/KochavaTracker.h"
NavigationItemをコードで書く
class ViewController: UIViewController {
    override func viewDidLoad() {
        super.viewDidLoad()
        self.setUpNav()
    }

    func setUpNav()
    {
        self.title = "Main"
        self.navigationItem.rightBarButtonItem = UIBarButtonItem(title: "遷移", style: UIBarButtonItem.Style.plain, target: self, action:#selector(self.move))
    }

    @objc func move(){
        let homeVC = HomeViewController.init(nibName: nil, bundle: nil)
        self.navigationController?.pushViewController(homeVC, animated: true)//遷移する
    }
}
参考
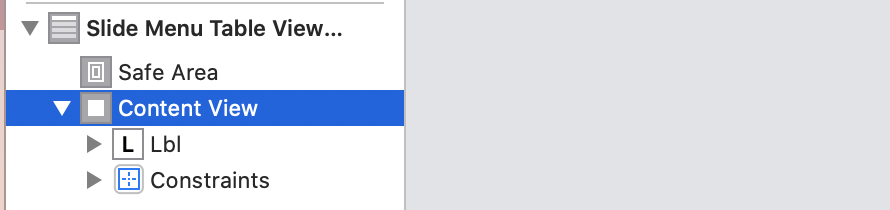
カスタムセルのレイアウトが崩れる
原因
間違って下記のContent Viewにclassとidを設定してしまっていた
参考
Imgaeの角を丸くする
image.layer.masksToBounds = true
image.layer.cornerRadius = image.bounds.width / 2
参考
tablecellのboerderを消す
cell.separatorInset = UIEdgeInsets(top: 0, left: 0, bottom: 0, right: .greatestFiniteMagnitude)
SlideMenu
https://github.com/fukami421/SideMenu_Learning
動きが鈍いところがありますが作ってみました
参考
https://qiita.com/takehiro224/items/dc5903ae42f288ccd5f7
https://qiita.com/a_jike/items/7ef99bbc9e69c73353f7
小数点を切り捨て、切り上げ、四捨五入し整数にする方法
double型を100倍して小数第1桁まで表示する
let percentage = floor(output.classLabelProbs[classLbl]! * 1000) / 10
参考
NavigationItemにBar Buttonをつける
Navigation ItemにButtonを挿入すると、Left Bar ButtonとRight Bar Buttonが使えるようになる。
iOSのversion問題で実機でデバッグできない
This iPhone ~~ (Model AXXXX, AXXXX, AXXXX) is running iOS 12.2 (16E227), which may not be supported by this version of Xcode.
Transform: CGAffineTransform
NavigationBarを透過させる
navigationController?.navigationBar.isTranslucent = true
navigationController?.navigationBar.setBackgroundImage(UIImage(), for: .default)
When to use UIView animation, CABasicAnimation and UIViewPropertyAnimator?