Swift4 + iOSの勉強を初めて見たところ、何やらナビゲーションバーにViewが隠れてしまい色々と苦戦したため、解決方法をメモっておきます。
注:iOS初心者なため、情報に不備がある可能性があります。御了承お願いいたします。
また、この実装はStoryboardを一切使わずにコードのみで実装しています。
(Storyboardの削除についてはこちらの生地参考にさせて頂きました)
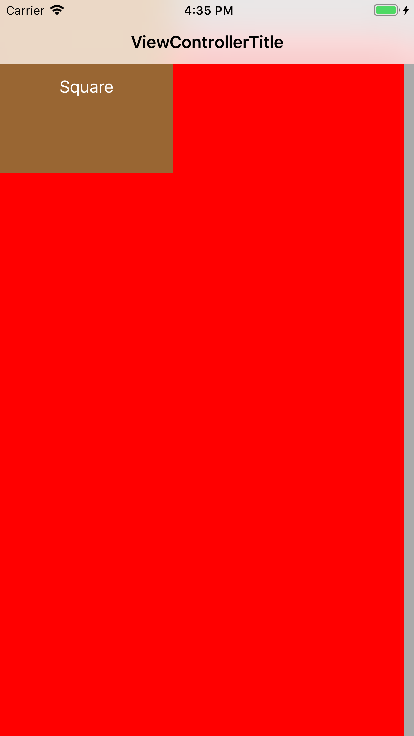
求めていた結果
- ナビゲーションバー表示時:ナビゲーションバー直下に正方形のViewを配置
- ナビゲーションバー非表示時:ステータスバー直下に正方形のViewを配置


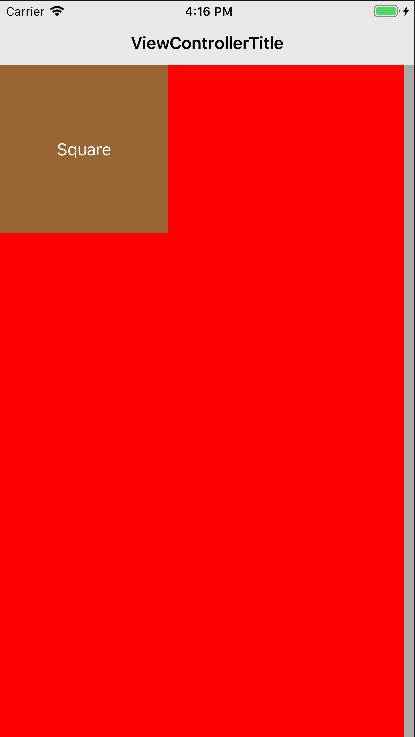
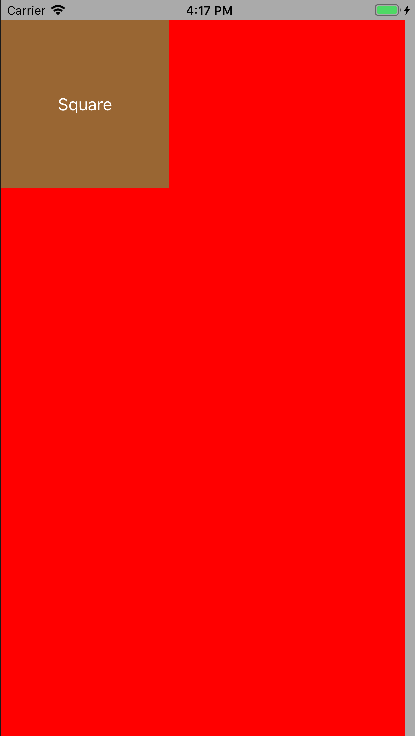
実際の結果
- ナビゲーションバー表示時:ナビゲーションバーの裏に正方形のViewが配置される
- ナビゲーションバー非表示時:ステータスバーの上に正方形のViewを配置される
Viewの表示レイヤーが同じではない原因は今回調べていませんが、結果として端末の画面の一番上の座標に表示されているようでした。


原因
- 大前提として、Storyboardを使用していない。(全てコードで記述している)
-
View.frameのy座標に0を指定している。 -
self.edgesForExtendedLayout = UIRectEdgeNone;の対応を入れていない。
※3番についての補足
どうやらiOS7以降ではナビゲーションバーにViewが隠れてしまう現象は発生しているようで、軽く調べたところ以下の対応をする方が多いようでした。
self.edgesForExtendedLayout = UIRectEdgeNone;
ただここにもあるように上記対応にも良く無い所があるようでした。
ので、今回は別の方向(ゴリ押し)で対応してみています。
失敗時の実装内容
    var window: UIWindow?
    var navController: UINavigationController?

    func application(_ application: UIApplication, didFinishLaunchingWithOptions launchOptions: [UIApplicationLaunchOptionsKey: Any]?) -> Bool {
        self.window = UIWindow(frame: UIScreen.main.bounds)

        navController = UINavigationController(rootViewController: ViewController())
        // Manually show UINavigationBar
        navController?.isNavigationBarHidden = true
        self.window?.rootViewController = navController
        self.window?.makeKeyAndVisible()

        return true
    }
// Setup view
view.backgroundColor = UIColor.lightGray
title = "ViewControllerTitle"

let label = UILabel()
// ここのYが0になっているため、画面最上部に配置される
label.frame = CGRect(x: 0, y: 0, width: viewHeight() / 4, height: viewHeight() / 4)
label.backgroundColor = UIColor.brown
label.text = "Square"
label.textColor = .white
label.textAlignment = .center
view.addSubview(label)
extension ViewController {
    func viewWidth() -> CGFloat { return self.view.frame.width }
    func viewHeight() -> CGFloat { return self.view.frame.height }
}
対応方針
edgesForExtededLayoutやConstraintsなど色々と便利な設定があるようでしたが、iOS初心者な自分はアナログでシンプルな方法で進めています。
また、Android開発時はデフォルトでステータスバー、アクションバーの下にViewが設置されており、ここを意識しながら開発することに違和感があるため、なるべくここを意識せず開発できるよう実装してみました。
やったこと
-
StatusBar,UINavigationBarの高さを取得し、手動でViewの座標をUINavigationBar以下に設置する。 - 毎回設定するのはだるいので、各
UIViewControllerで一度だけ上記設定を行い、以降は意識せずにすむようにする。 -
UINavigationBarの表示ステータスによって自動的に配置を調整する。
実装内容
(AppDelegate.swiftは変更なしなため、省略)
// Setup view
view.backgroundColor = UIColor.lightGray
title = "ViewControllerTitle"

// 各種UIの親Viewを、フルスクリーン(UINavigationBar, StatusBarにかぶらないように)定義する。
// 他のViewは全てcontentsの子Viewとして登録する。
let contents = UIView()
contents.frame = CGRect(
    x: 0,
    y: !isNavBarHidden() ? statBarHeight() + navBarHeight() : statBarHeight(),
    width: viewWidth() - 10, // -10 just to check if boundary is set as expected.
    height: viewHeight(includeNavBarHeight: !isNavBarHidden()))
contents.backgroundColor = UIColor.red
// Add contents to view.
view.addSubview(contents)

let label = UILabel()
// labelの設定は変更なし
label.frame = CGRect(x: 0, y: 0, width: viewHeight() / 4, height: viewHeight() / 4)
label.backgroundColor = UIColor.brown
label.text = "Square"
label.textColor = .white
label.textAlignment = .center
// Add all other views to contents view.
contents.addSubview(label)
extension ViewController {
    func viewWidth() -> CGFloat { return self.view.frame.width }
    func viewHeight(includeNavBarHeight: Bool = true, includeStatBarHeight: Bool = true) -> CGFloat {
        return self.view.frame.height - (includeStatBarHeight ? statBarHeight() : 0) - (includeNavBarHeight ? navBarHeight() : 0)
    }

    func navBarWidth() -> CGFloat { return self.navigationController?.navigationBar.frame.size.width ?? 0 }
    func navBarHeight() -> CGFloat { return self.navigationController?.navigationBar.frame.size.height ?? 0 }

    func statBarWidth() -> CGFloat { return UIApplication.shared.statusBarFrame.width }
    func statBarHeight() -> CGFloat { return UIApplication.shared.statusBarFrame.height }

    func isNavBarHidden() -> Bool { return self.navigationController?.isNavigationBarHidden ?? true }
}
結果
上記対応を行うことで、無事UINavigationBar表示時、及び非表示時に求めていたレイアウトを表示することができました。
かなりアナログでゴリ押しな設定ですが、どの設定をいじれば良いか分からないという方の参考に少しでもなれば幸いです。