簡単にハンバーガーメニューを作る(Swift)
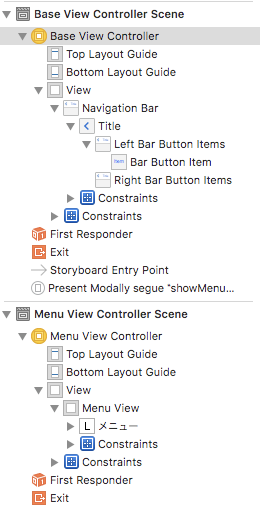
Storyboard設定
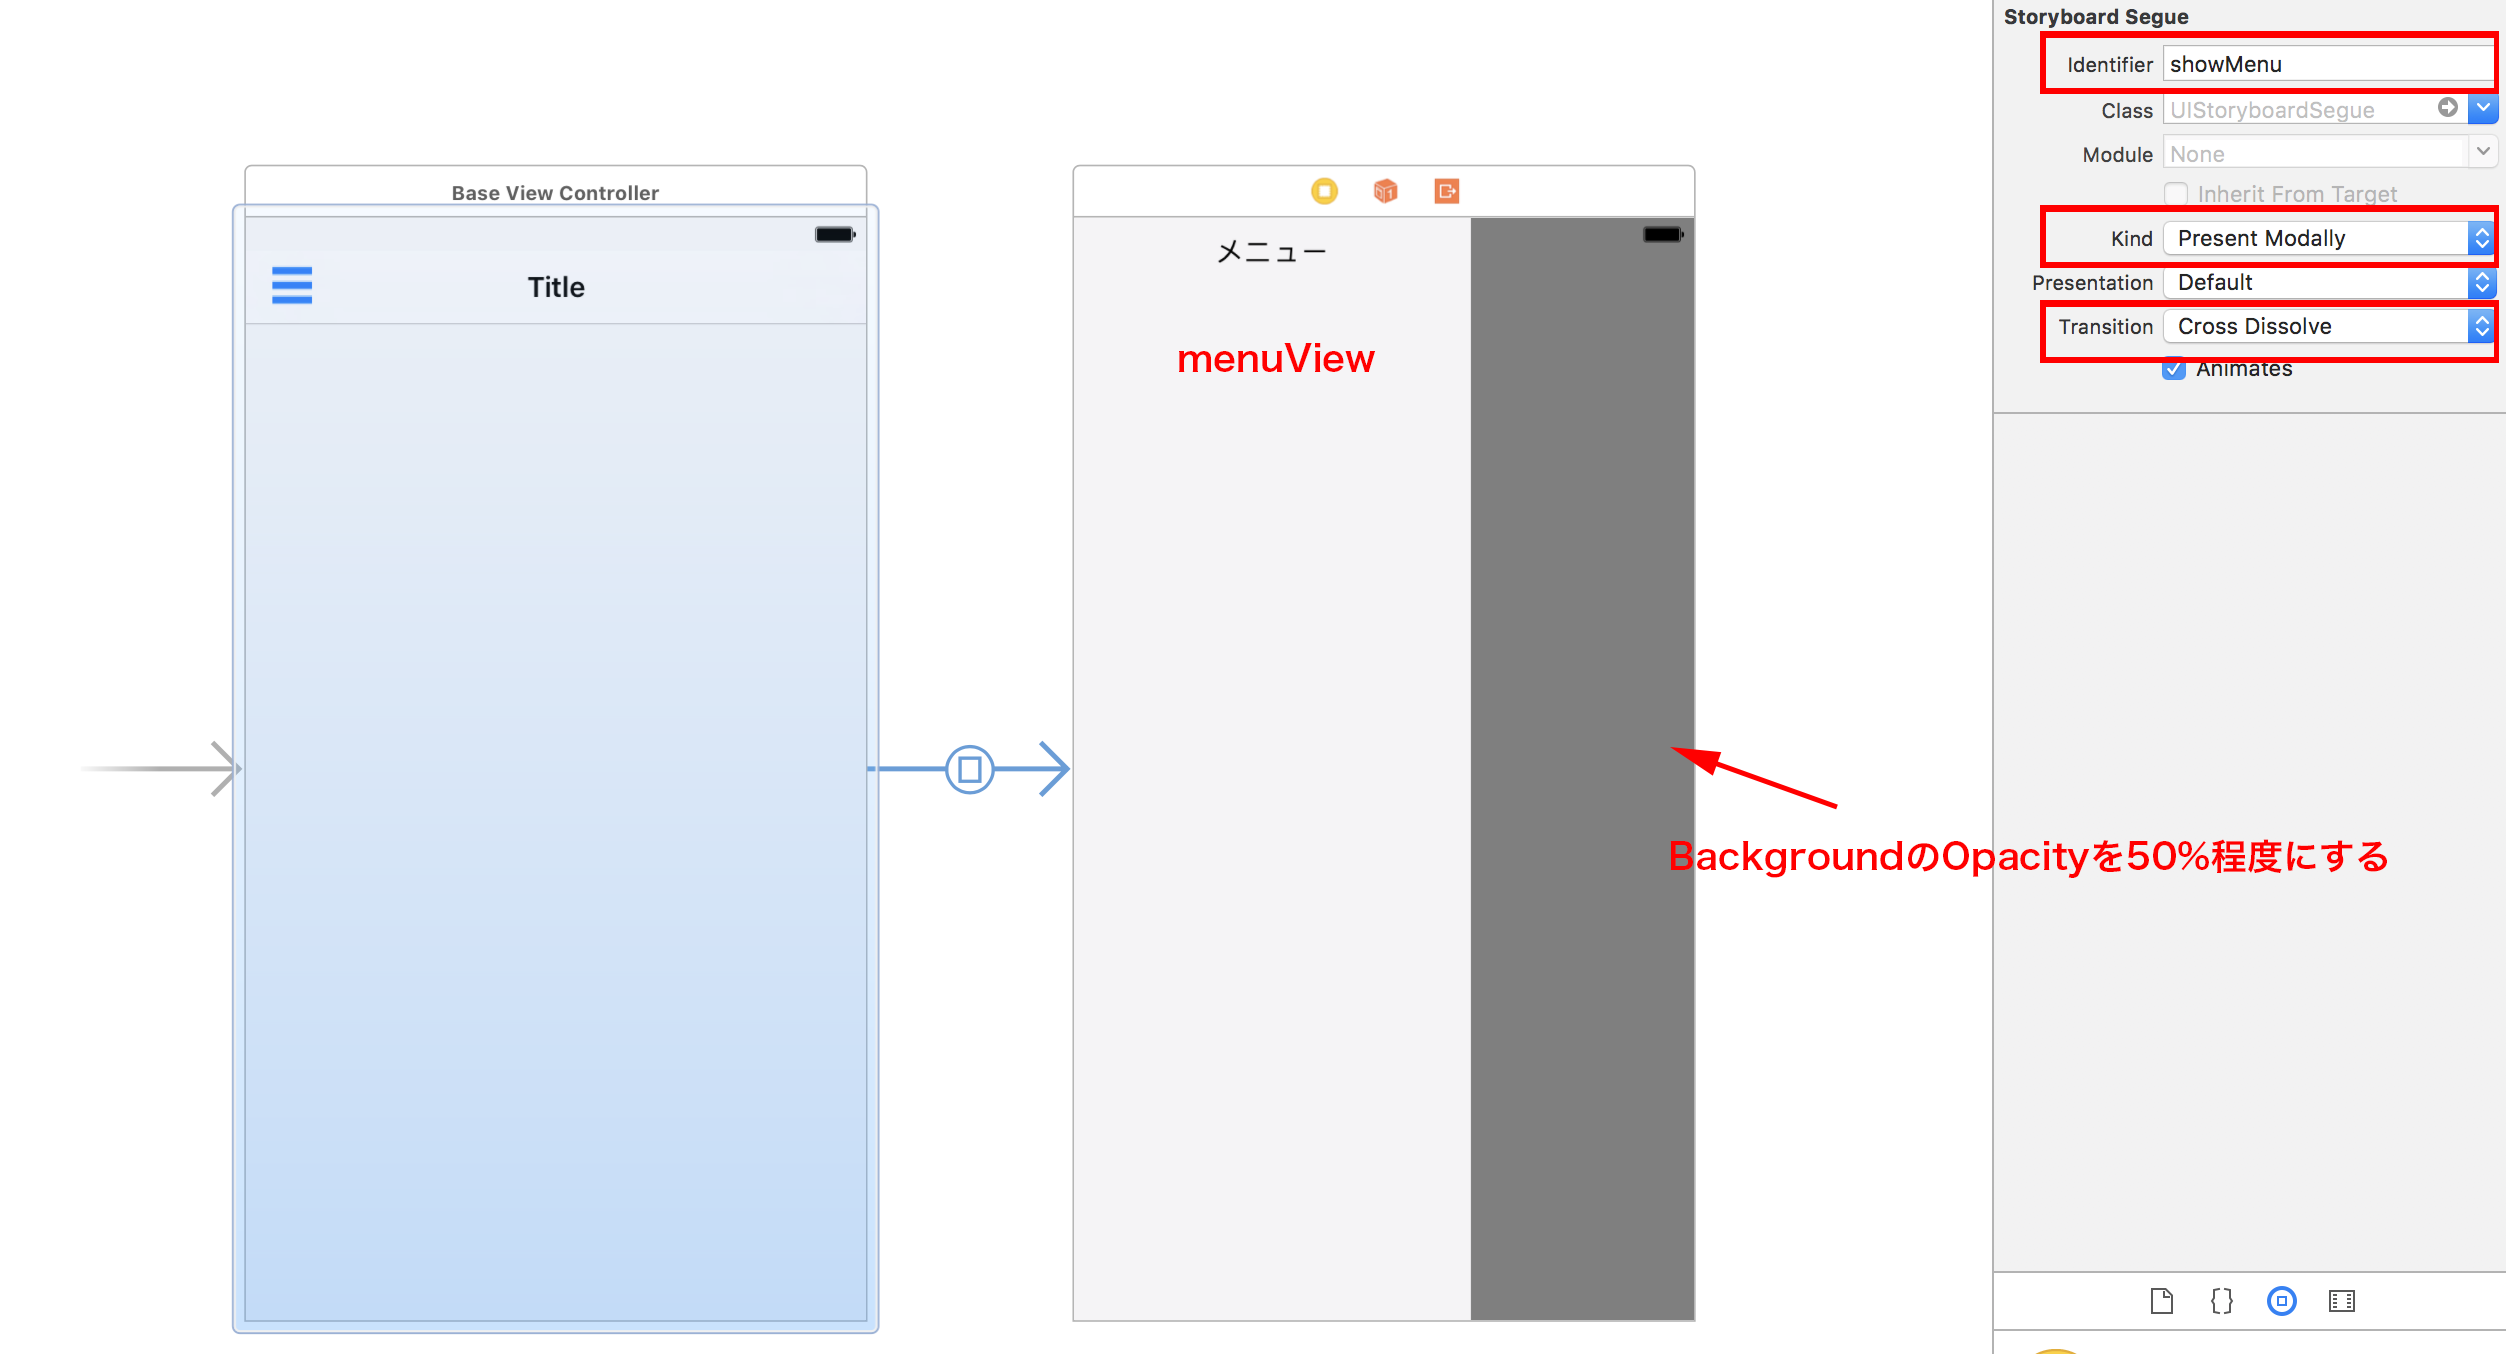
(1)ビューコントローラをsegueで「Present Modally」を選択して結ぶ。
(2)segueの「Identifier」をshowMenuに設定する。
(3)segueの「Transition」をCross Dissolveに設定する。
(4)メニュー画面のグレー部分(View)のBackgroundを「Opacity」50%程度に設定する。
(5)グレー部分(View)の「tag」を1に設定


コード
呼び出し元
import UIKit

class BaseViewController: UIViewController {

    override func viewDidLoad() {
        super.viewDidLoad()
    }

    override func didReceiveMemoryWarning() {
        super.didReceiveMemoryWarning()
    }

    // ハンバーガーメニューボタンタップ処理
    @IBAction func tapMenu(_ sender: UIBarButtonItem) {
        self.performSegue(withIdentifier: "showMenu", sender: nil)
    }

}
ハンバーガーメニュー
import UIKit

class MenuViewController: UIViewController {

    @IBOutlet weak var menuView: UIView!

    override func viewDidLoad() {
        super.viewDidLoad()
    }

    override func viewWillAppear(_ animated: Bool) {
        super.viewWillAppear(animated)
        // メニュー画面の位置
        let menuPosition = self.menuView.layer.position
        // 初期位置設定
        self.menuView.layer.position.x = -self.menuView.frame.width
        // 表示アニメーション
        UIView.animate(
            withDuration: 0.1,
            delay: 0,
            options: .curveEaseOut,
            animations: {
                self.menuView.layer.position.x = menuPosition.x
        },
            completion: { bool in
        })

    }

    // メニュー外をタップした場合に非表示にする
    override func touchesEnded(_ touches: Set<UITouch>, with event: UIEvent?) {
        super.touchesEnded(touches, with: event)
        for touch in touches {
            if touch.view?.tag == 1 {
                UIView.animate(
                    withDuration: 0.2,
                    delay: 0,
                    options: .curveEaseIn,
                    animations: {
                        self.menuView.layer.position.x = -self.menuView.frame.width
                },
                    completion: { bool in
                        self.dismiss(animated: true, completion: nil)
                }
                )
            }
        }
    }

    override func didReceiveMemoryWarning() {
        super.didReceiveMemoryWarning()
    }

}