このページ / About this page
このページはMini Pupperを動かそうの5/6ページです。
This is page 5 of How to get Mini Pupper walking.
オフィシャルな手順書(英語版)はこちらです。
The official software instruction is here.
工具 / Tools
キットに同梱されている工具の他に、セットアップには以下の物が必要です。
In addition to the tools included in the kit, the following items are required for setup
- USB キーボード / USB keyboard
- USB マウス / USB mouse
- PC
- microSDカードリーダ / microSD card interface
- HDMI ディスプレイ / HDMI Display
- HDMI⇔microHDMI変換 / HDMI microHDMI convertor
- microUSB ケーブル / microUSB cable
- USB charger
ソフトセットアップ / Software setup
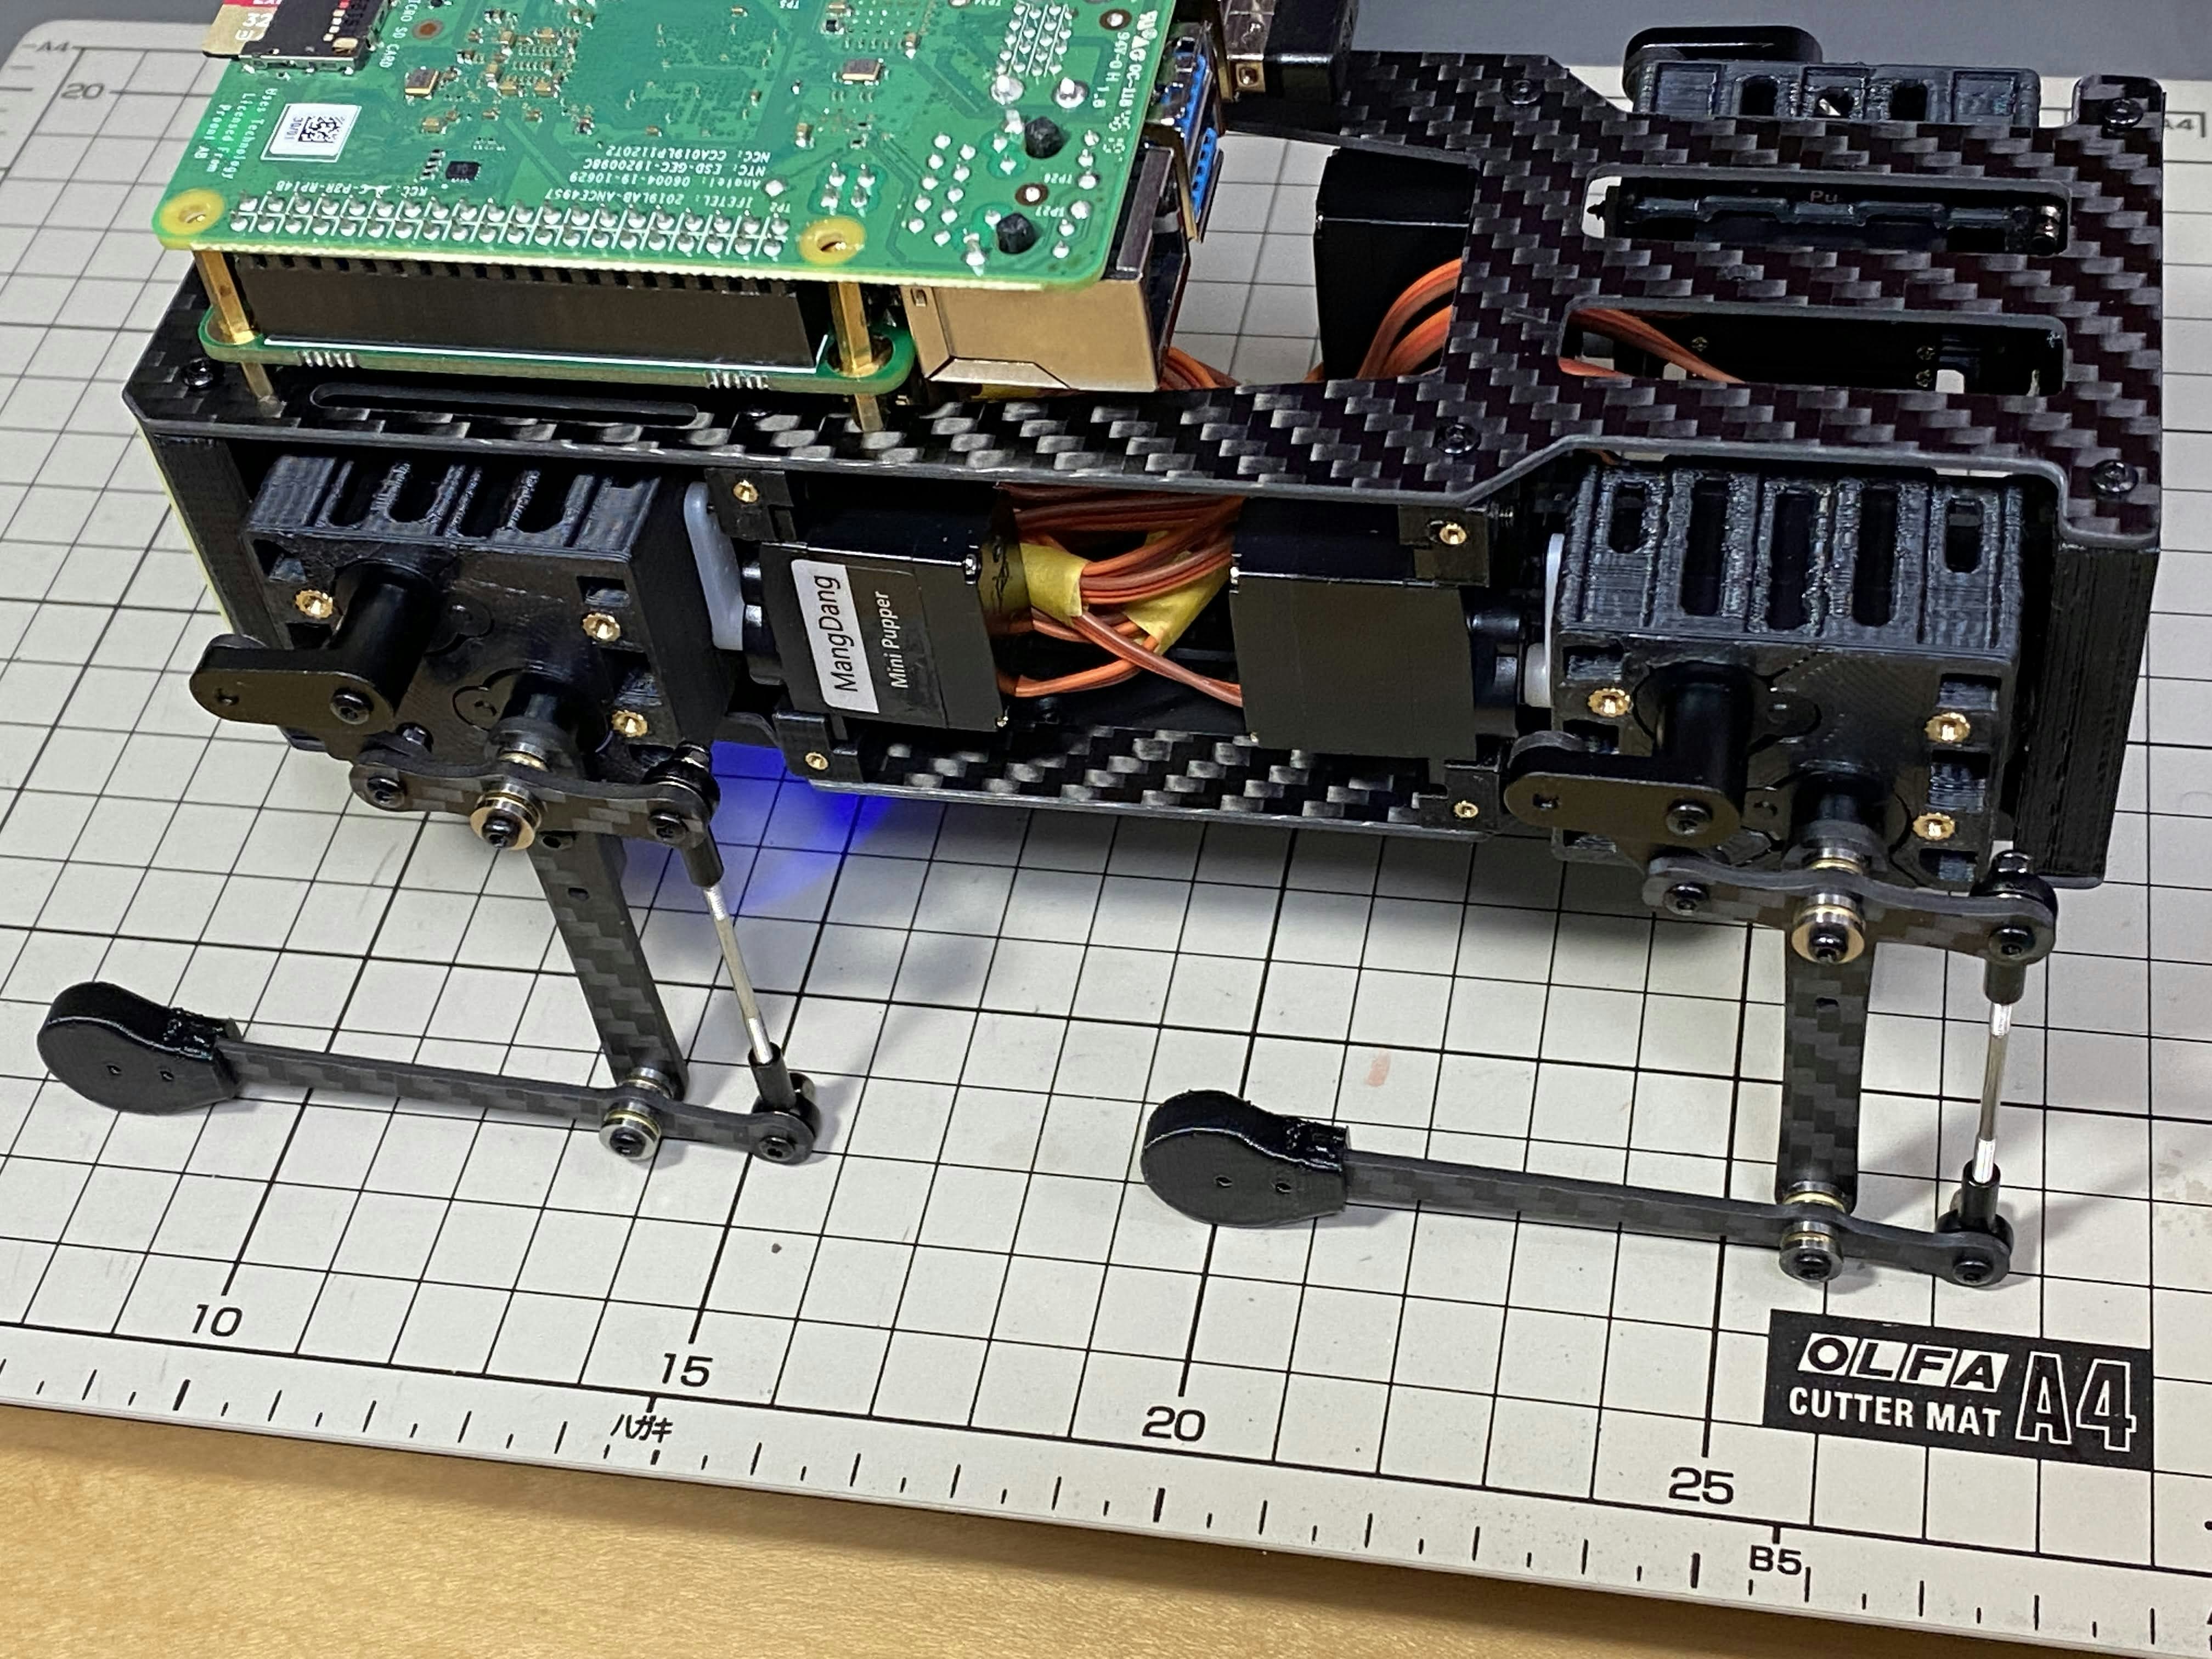
充電 / Charging the battery
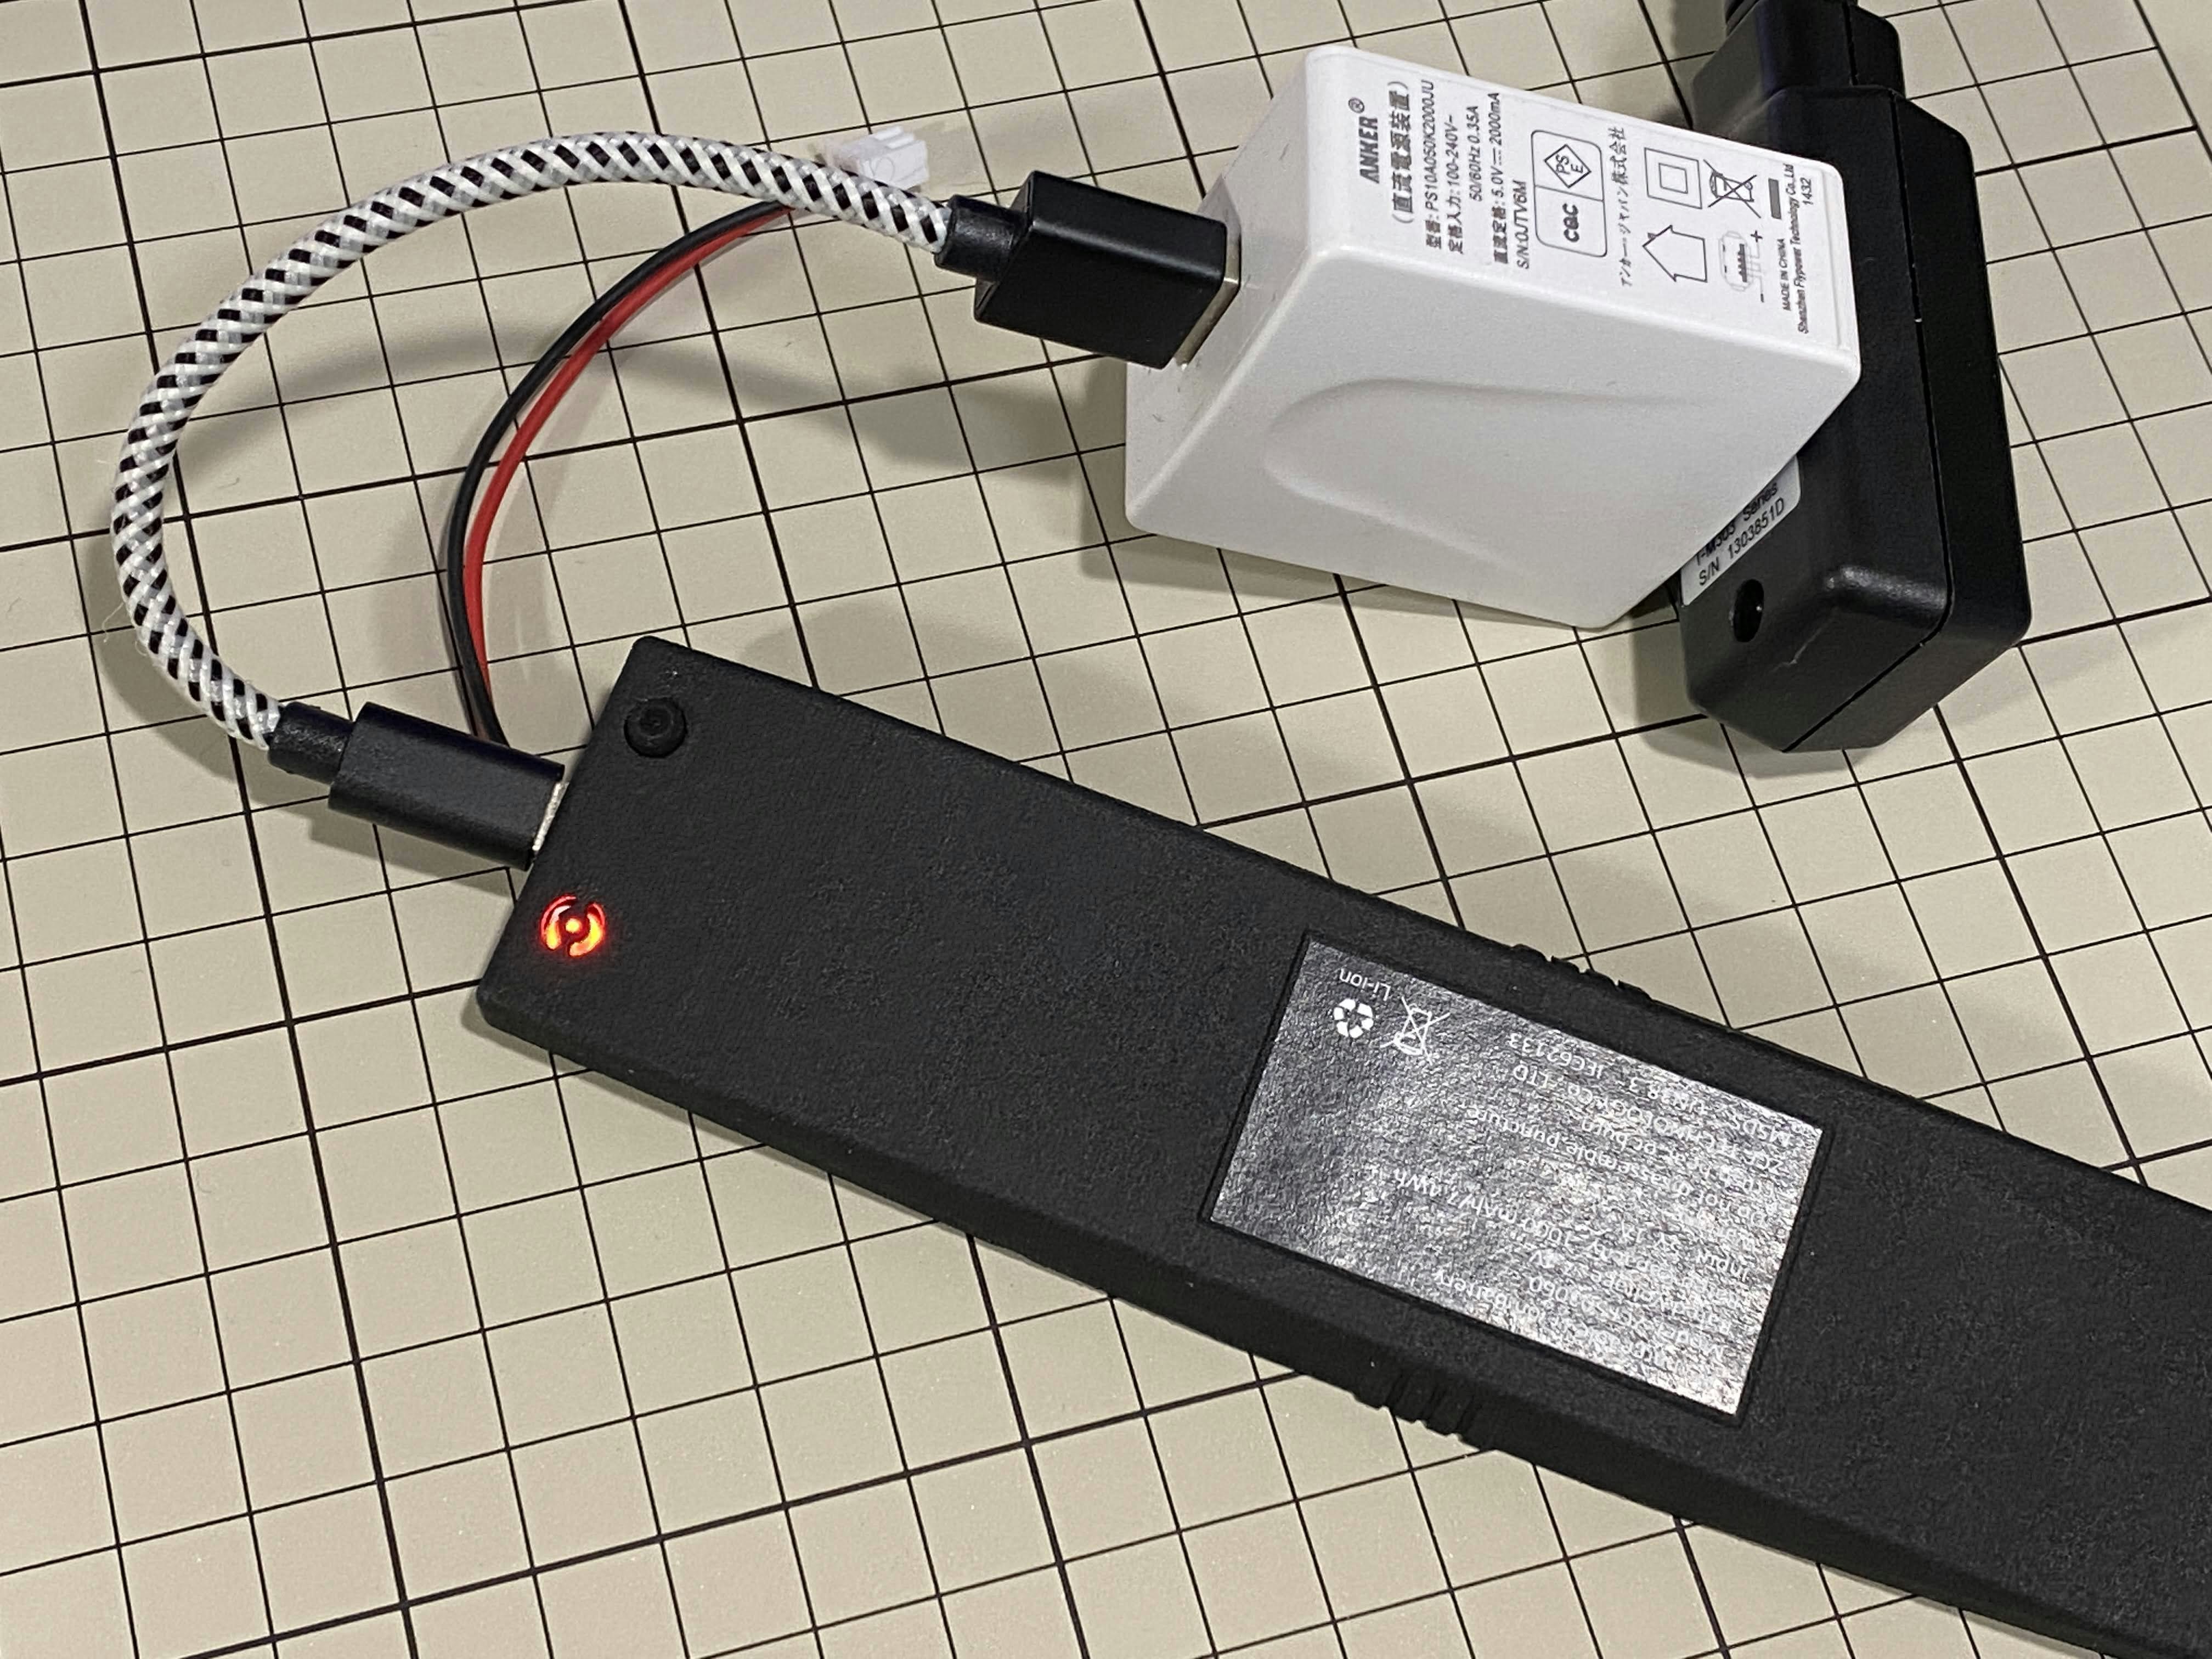
準備としてバッテリーをUSBで充電しておきます。USBの差込口は写真を参照。Mini Pupperに取り付けたままでも充電できます。
The battery is charged via USB, see picture for USB socket, and can be charged while still attached to the Mini Pupper body.
イメージのダウンロード / Download the image
PCでMangDangからラズパイ4用イメージをダウンロードします。
Download the image for Raspi 4 from MangDang on your PC.
20220109_v1.7.0_MiniPupper_V2_PS4_Ubuntu_21.10.0_Baseline.img.zip
(注:2022/02/15現在。今後updateなどにより変更される可能性あり)
microSDにイメージを書く / Write the image into microSD
PCのSDカードリーダにmicroSDカードを入れて、イメージを書き込みます。イメージ作成ツール balenaEtcherが簡単かつ確実なのでおすすめです。オフィシャルマニュアルやリンク先を参考に書き込みましょう。完了までかなり時間がかかります。
Insert the microSD card into your PC's SD card reader and pwrite the image. I recommend the image creation tool balenaEtcher as it is easy and reliable. Please refer to the official manual and below link. It may take a while to complete.
参考: 簡単な 3 ステップで使えるブートUSB 作成ツール!「balenaEtcher」
ラズパイの起動 / Startup raspberry pi
- PCからSDカードを抜いて、ラズパイに挿す / Remove the SD card from the PC and insert it into the Raspberry pi
- ラズパイとディスプレイの間をmicroHDMIケーブルで繋ぐ / Connect the Raspberry pi to the display with a microHDMI cable
- USBのキーボードとマウスをラズパイに繋ぐ/ Connect a USB keyboard and mouse to the Raspberry pi
Mini Pupperの底にあるボタンを長押しして、起動します。
Press and hold the button on the bottom of the Mini Pupper to start Raspberry pi.
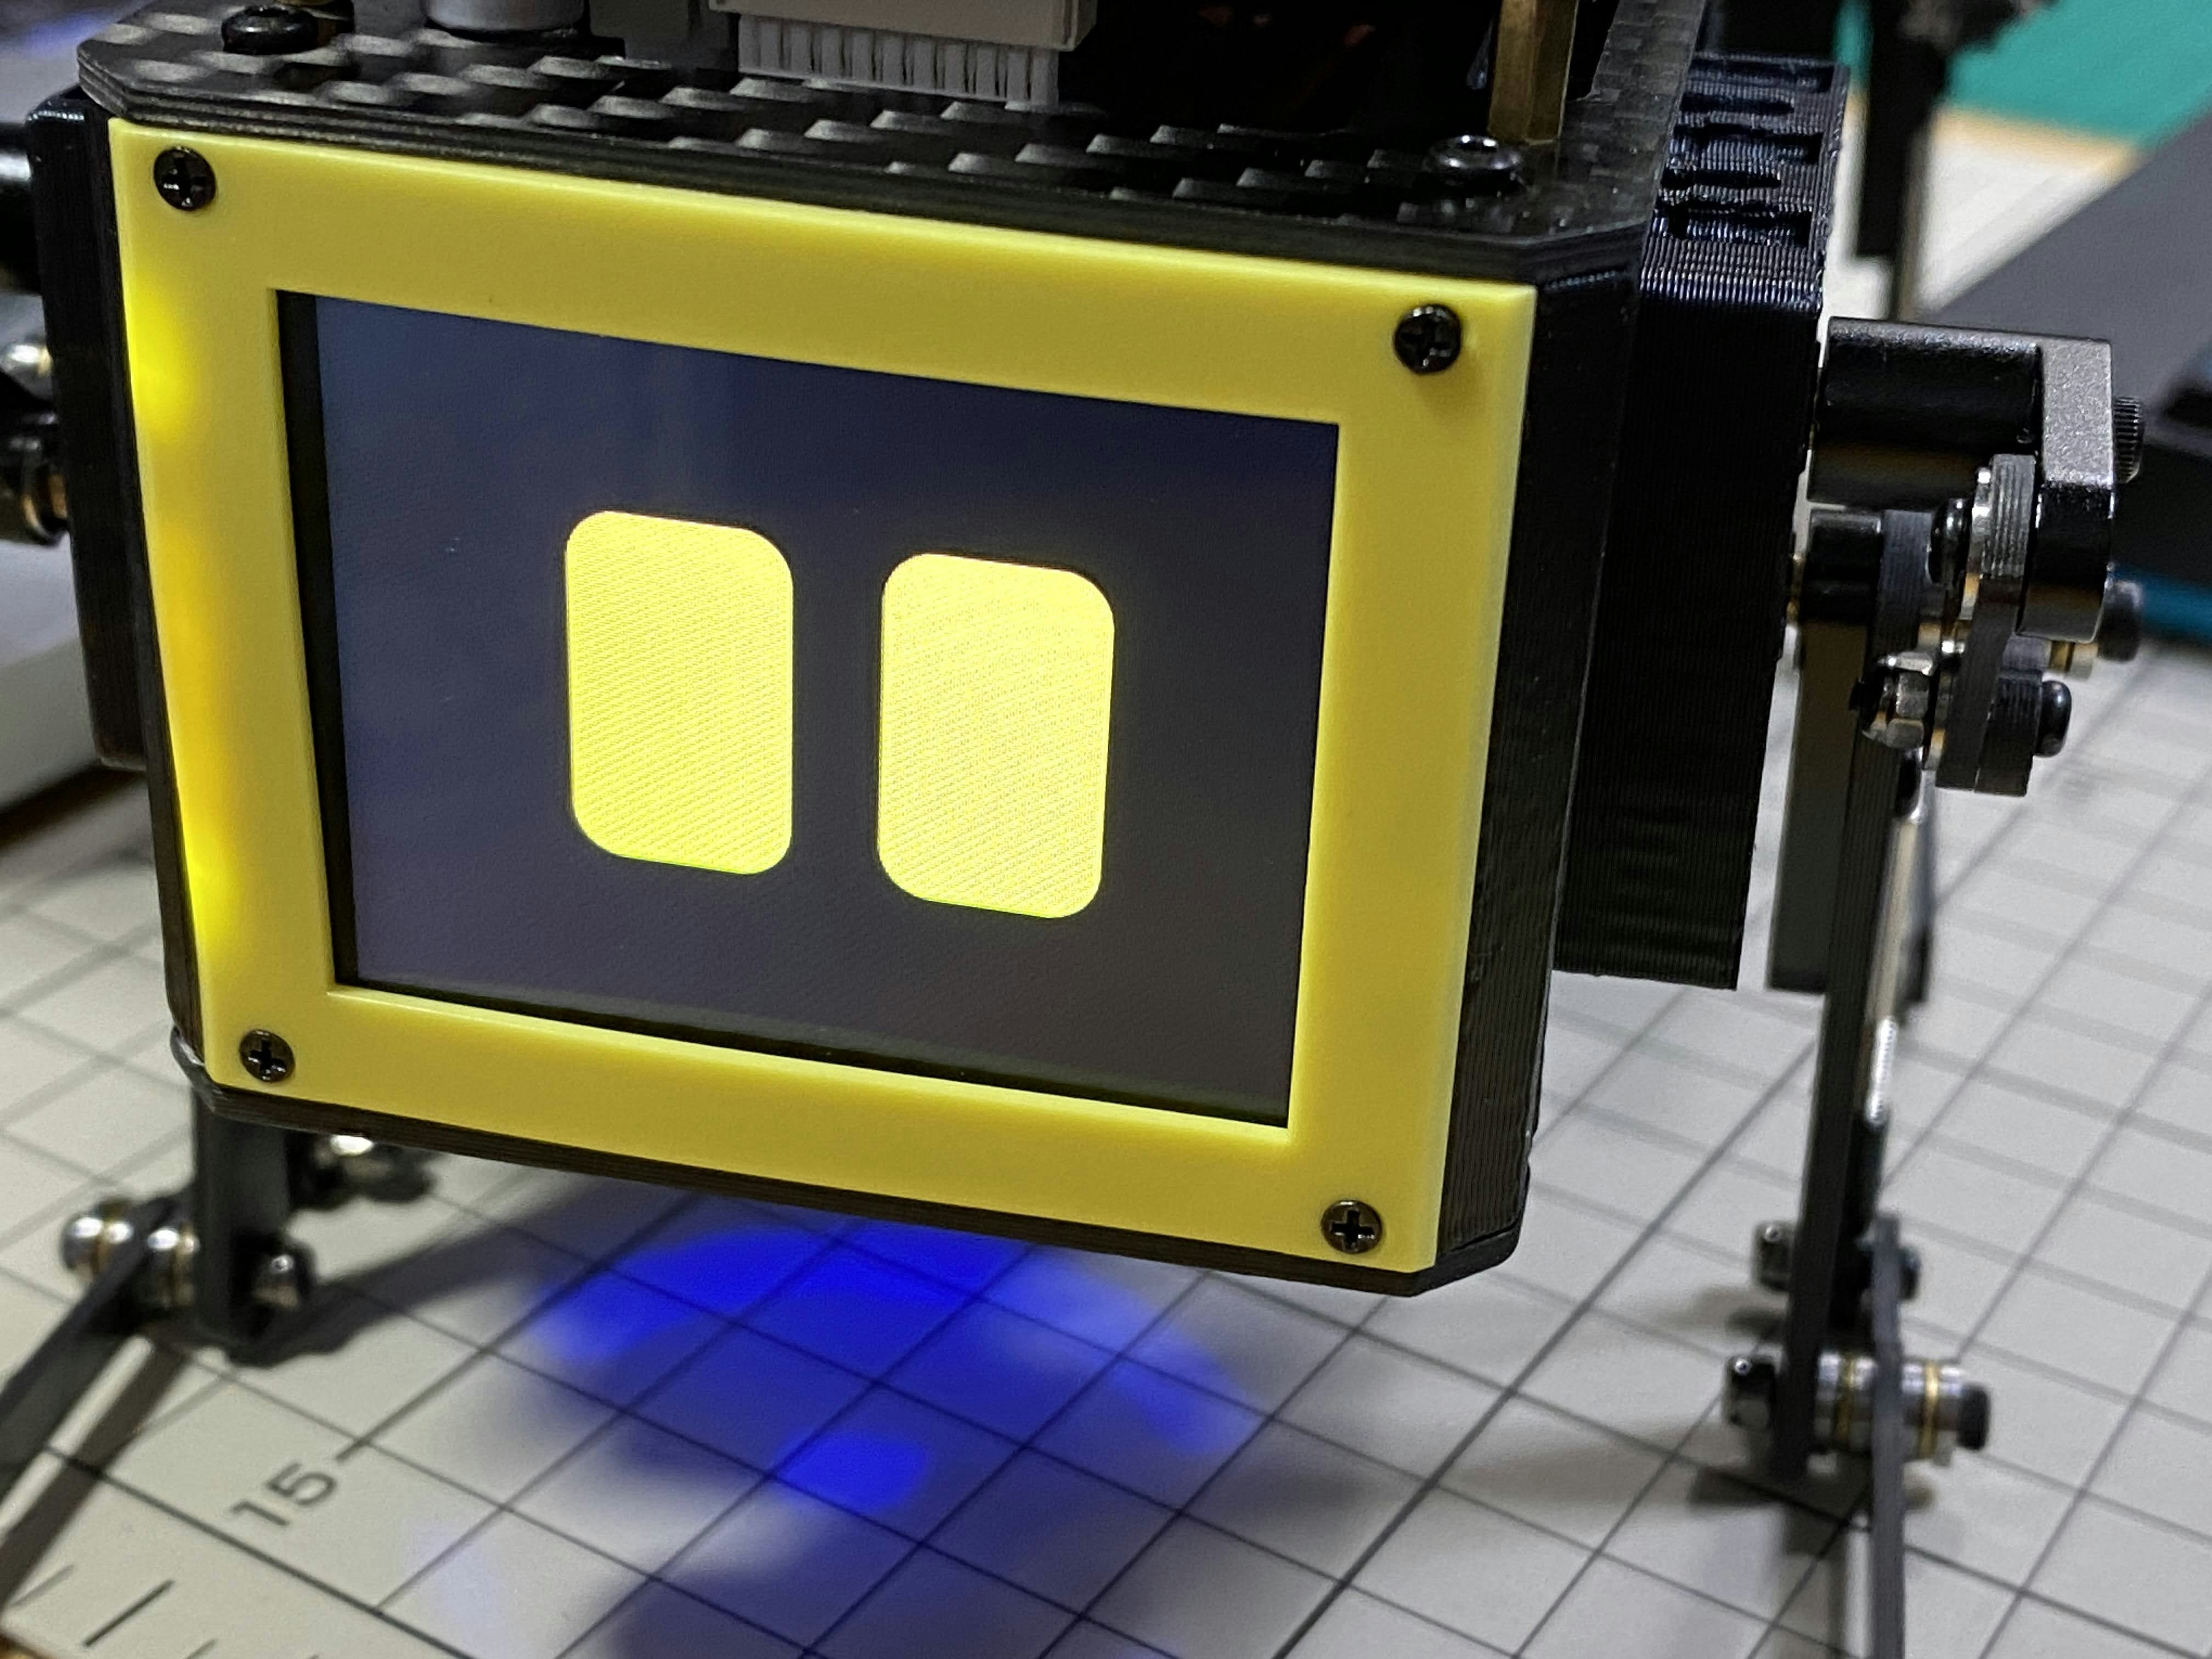
画面にUbuntuの起動している様子が映れば成功です。さらに、Mini Pupperの画面も表示されます。もし表示されない場合は、これまで行った手順に誤りがあります。
If you can see Ubuntu running on your screen, you have succeeded. You should also see the face on Mini Pupper display. If you don't see both screen, then you have followed the instructions incorrectly.
ログイン (※必要な人だけ) / Log in (only for those who need it)
※必要な人だけ
紫の画面でubuntuを押してログインします。
Press ubuntu on the purple screen to log in.
初期ユーザ名:ubuntu
初期パスワード:mangdang
パスワードは各自変更しましょう。
You should change your password.
キーボードの設定 (※必要な人だけ) / Set keyboard (only for those who need it)
※必要な人だけ
日本語キーボードを使ってる場合、この設定が必要です。
左下のメニューボタンを押し、 settings とタイプして設定を起動します。
If you are using a Japanese keyboard, you will need this setting.
Press the menu button in the bottom left corner and type settings to bring up settings.
Region & Language を選択し、Input Sourcesの+を押します。出てきた画面で点3つを選ぶとotherが出るので、 Japanese とタイプして選択します。English(US)はゴミ箱マークを押して消してしまってもOKです。
Select Region & Language and press + for Input Sources. On the screen that comes up, select the three dots for other and type Japanese to select it. Type Japanese to select it.
Ubuntu20の古いImageを使う場合のWifi有効化
Wifiの有効化 / Enable wifi
左下のメニューボタンを押し、 terminal とタイプしてターミナルを起動します。ターミナルで、設定ファイルを開きます。
Press the menu button at the bottom left and type terminal to start the terminal. In the terminal, open the configuration file.
sudo gedit /boot/firmware/syscfg.txt
syscfg.txtには
dtoverlay=disable-wifi
と書かれているので、#を付けてコメントアウトします。
Type # to enable disabled wifi on syscfg.txt.
# dtoverlay=disable-wifi
ここで一度再起動して、設定を反映しましょう。
Reboot Ubuntu to enable wifi.
Wifiの設定 (※必要な人だけ) / Wifi setting (only for those who need it)
※必要な人だけ
再び起動したら、settingsを開いてWifiの設定をします。自分のWifiアクセスポイントのSSIDを選び、パスワードを入れましょう。
When you start up again, open settings and set up your wifi settings. Choose your wifi access point SSID and enter your password.
IPアドレスの確認 (※必要な人だけ) / Ip address (only for those who need it)
※必要な人だけ
ターミナルで ip a とタイプし、ラズパイに割り振られたIPアドレスを確認します。PCからsshで接続するときに必要になるのでメモしておきましょう。Ubuntu内の設定はこれで完了です。
Type ip a. See and make a note of IP address. This will be necessary when you connect to your PC via ssh. The configuration within Ubuntu is now complete.
ssh接続のためのポート開放 (※必要な人だけ) / Open ports for ssh connection (only for those who need it)
※必要な人だけ
PCからUbuntuにssh接続を試みます。
Attempt to make an ssh connection from your PC to Ubuntu.
ssh ubuntu@192.168.x.x -p 22
PCからssh接続できない場合、下記の設定が必要です。
If you are unable to make an ssh connection from your PC, you will need to configure the following, maybe.
$sudo ufw allow 22
$sudo ufw reload
もしファイアーウォールが起動してないと言われたら以下を実行します。
If firewall is not running, do the following
$sudo ufw enable
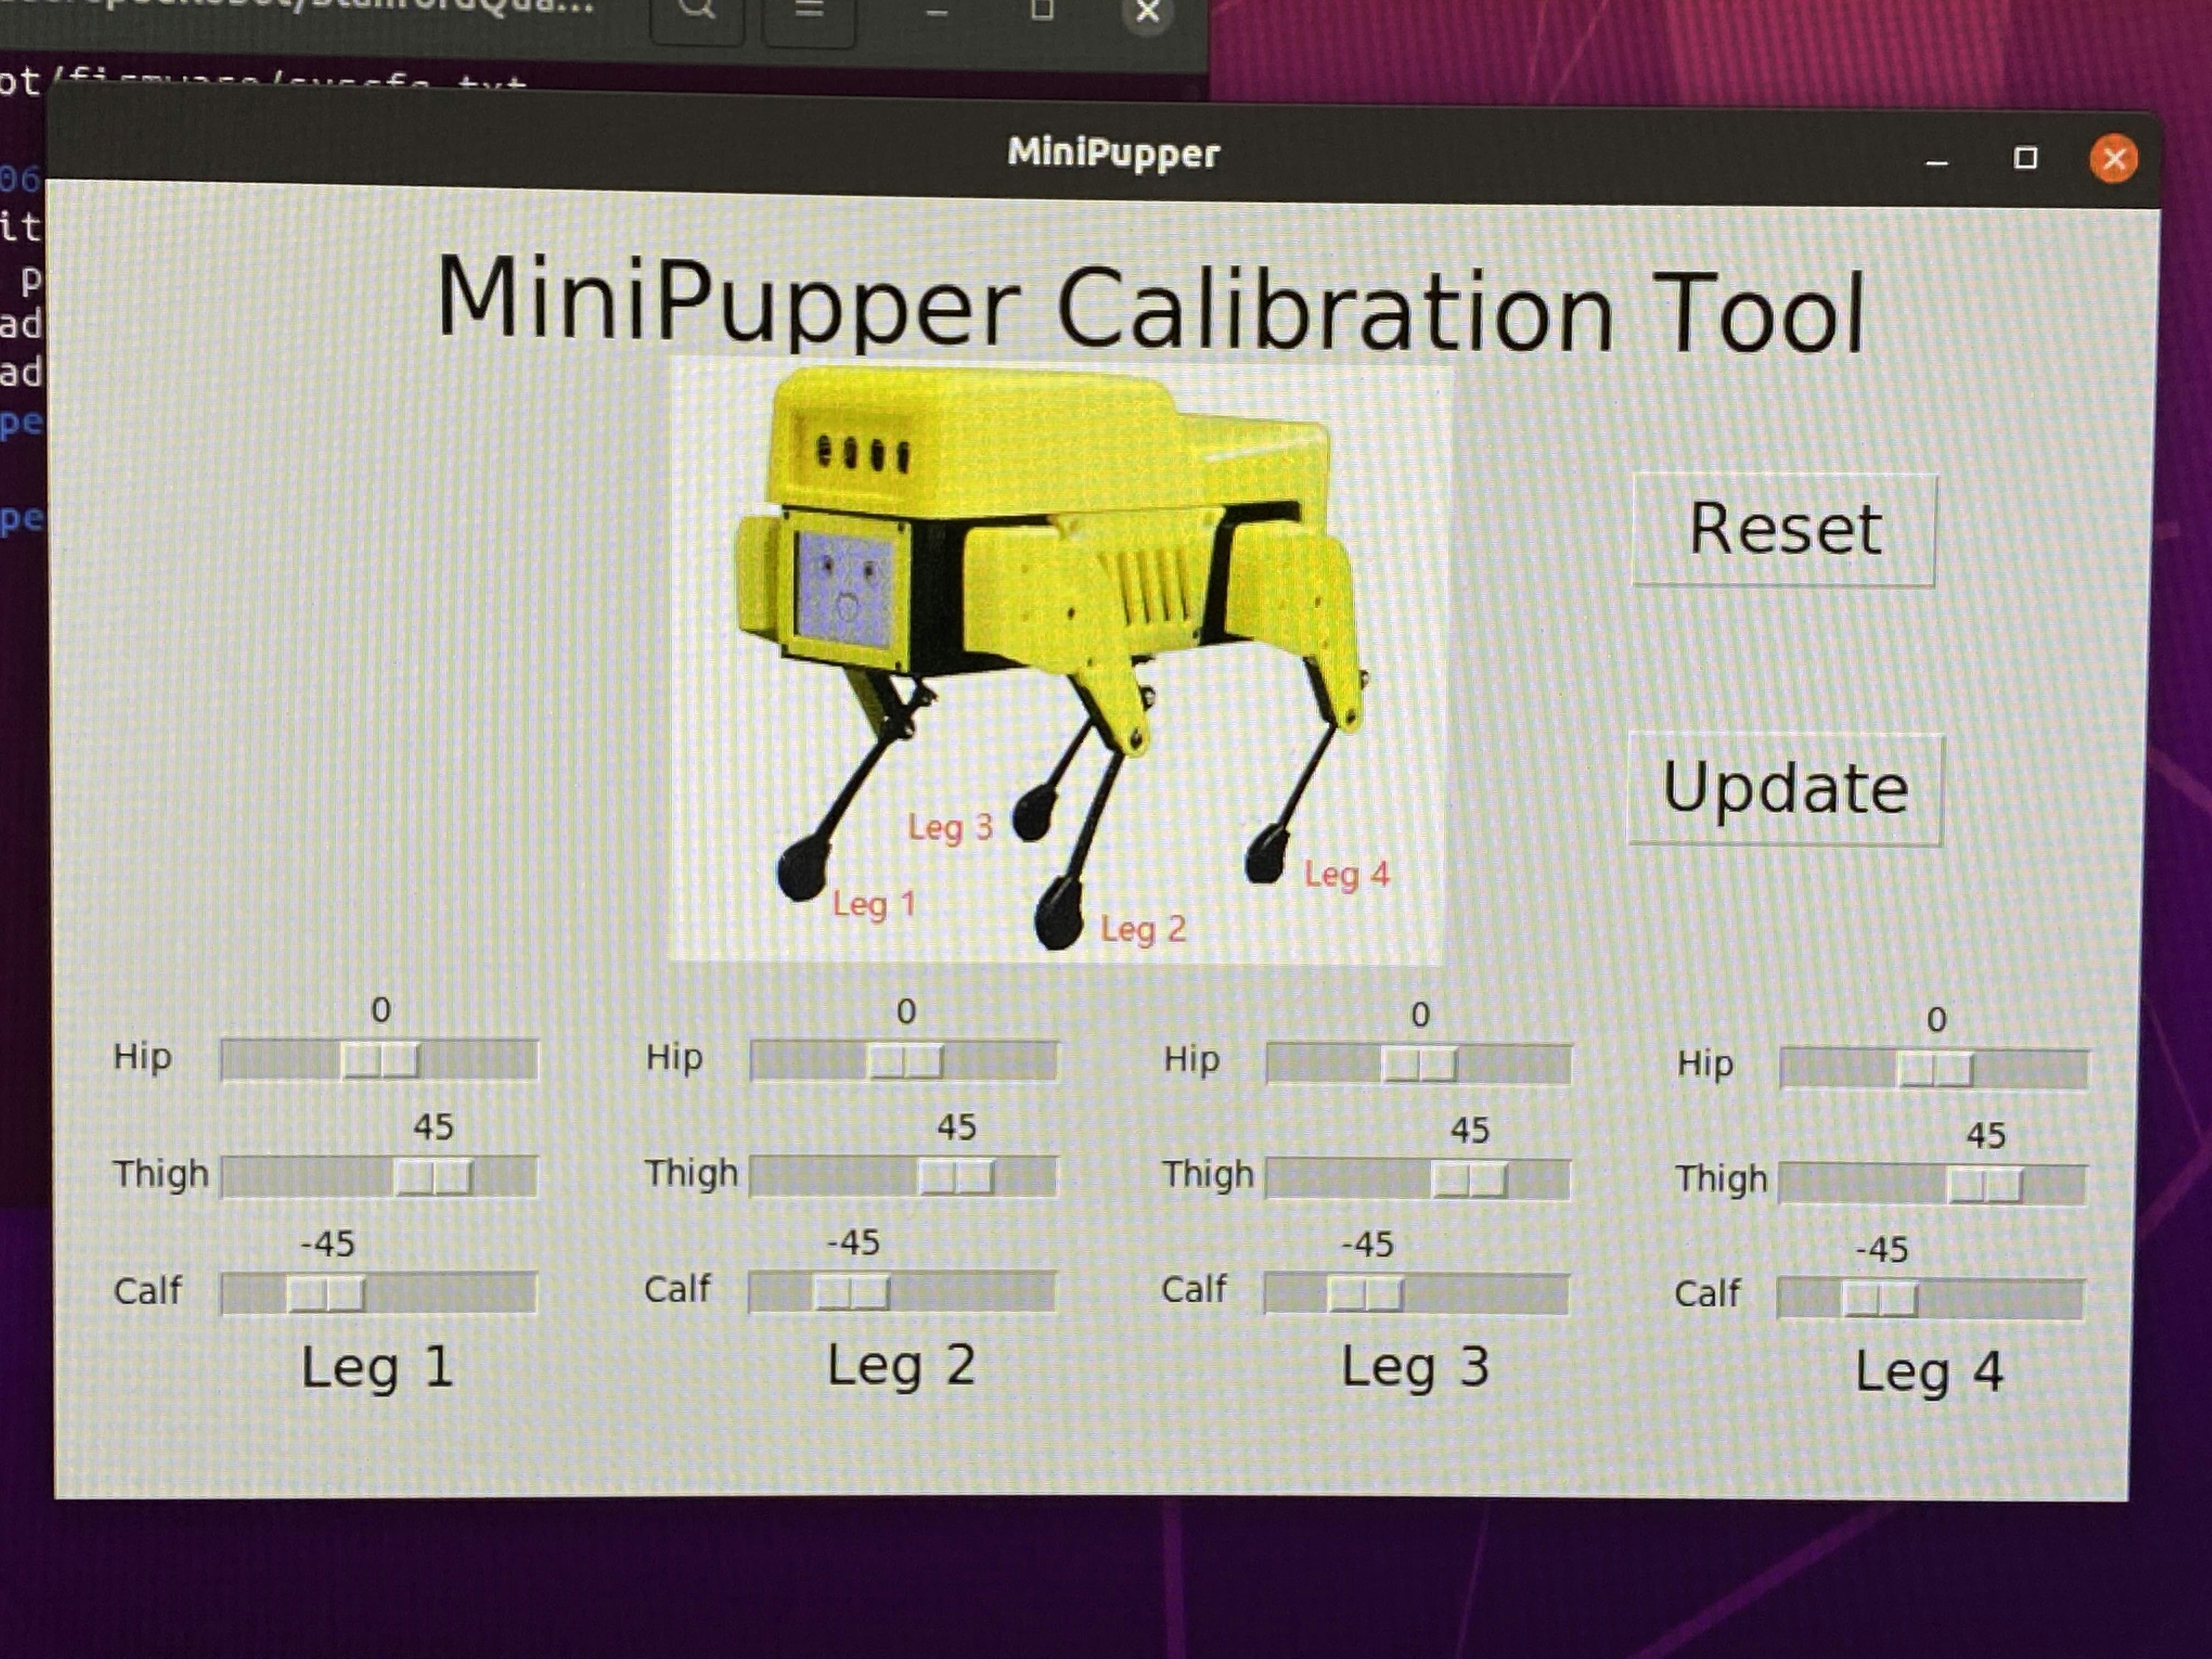
キャリブレーション / Leg servos calibration
まずMini Pupperのすべての脚が床に触れるように立たせます。
The first step is to make the Mini Pupper stand up, so that legs touch the floor.
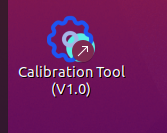
デスクトップのCalibration Toolアイコンをダブルクリックして起動します。アプリを起動したら、脚が動くので注意です。
Double-click on the Calibration Tool icon on your desktop to launch it. Note that the legs will move when you run above python script.
次に、それぞれの脚について、ThighとCalfのバーを動かし、写真のように90度の角度になるように調整します。画面のスライドバーの位置に連動して脚の角度が変化します。しかし、動かない場合は、これまで行った手順に誤りがあります。
Next, for each leg, move the Thigh and Calf bars so that they are at 90 degree angle. The angle of the legs will change in conjunction with the position of the slide bar on the screen. However, if it does not move, then the steps you have followed are incorrect
すべての脚を写真のように90の傾きになったら、Update を押して設定を保存します。×ボタンを押してキャリブレーションアプリを閉じます。
When all legs are at 90° degrees as shown, press Update to save the settings. Press × to close the calibration application.
古いバージョンのキャリブレーションツールを使う場合
次に、それぞれの脚について、ThighとCalfのバーを動かし、45度の角度になるように調整します。要は > > の形にします。画面のスライドバーの位置に連動して脚の角度が変化します。しかし、動かない場合は、これまで行った手順に誤りがあります。
Next, for each leg, move the Thigh and Calf bars so that they are at a 45 degree angle. The angle of the legs will change in conjunction with the position of the slide bar on the screen. However, if it does not move, then the steps you have followed are incorrect.
なお、私はiPhoneの傾きセンサーアプリで角度を測りました。あと、定規と分度器も使いました。
I used the iPhone's tilt sensor app to measure the angle. I also used a ruler and a protractor.

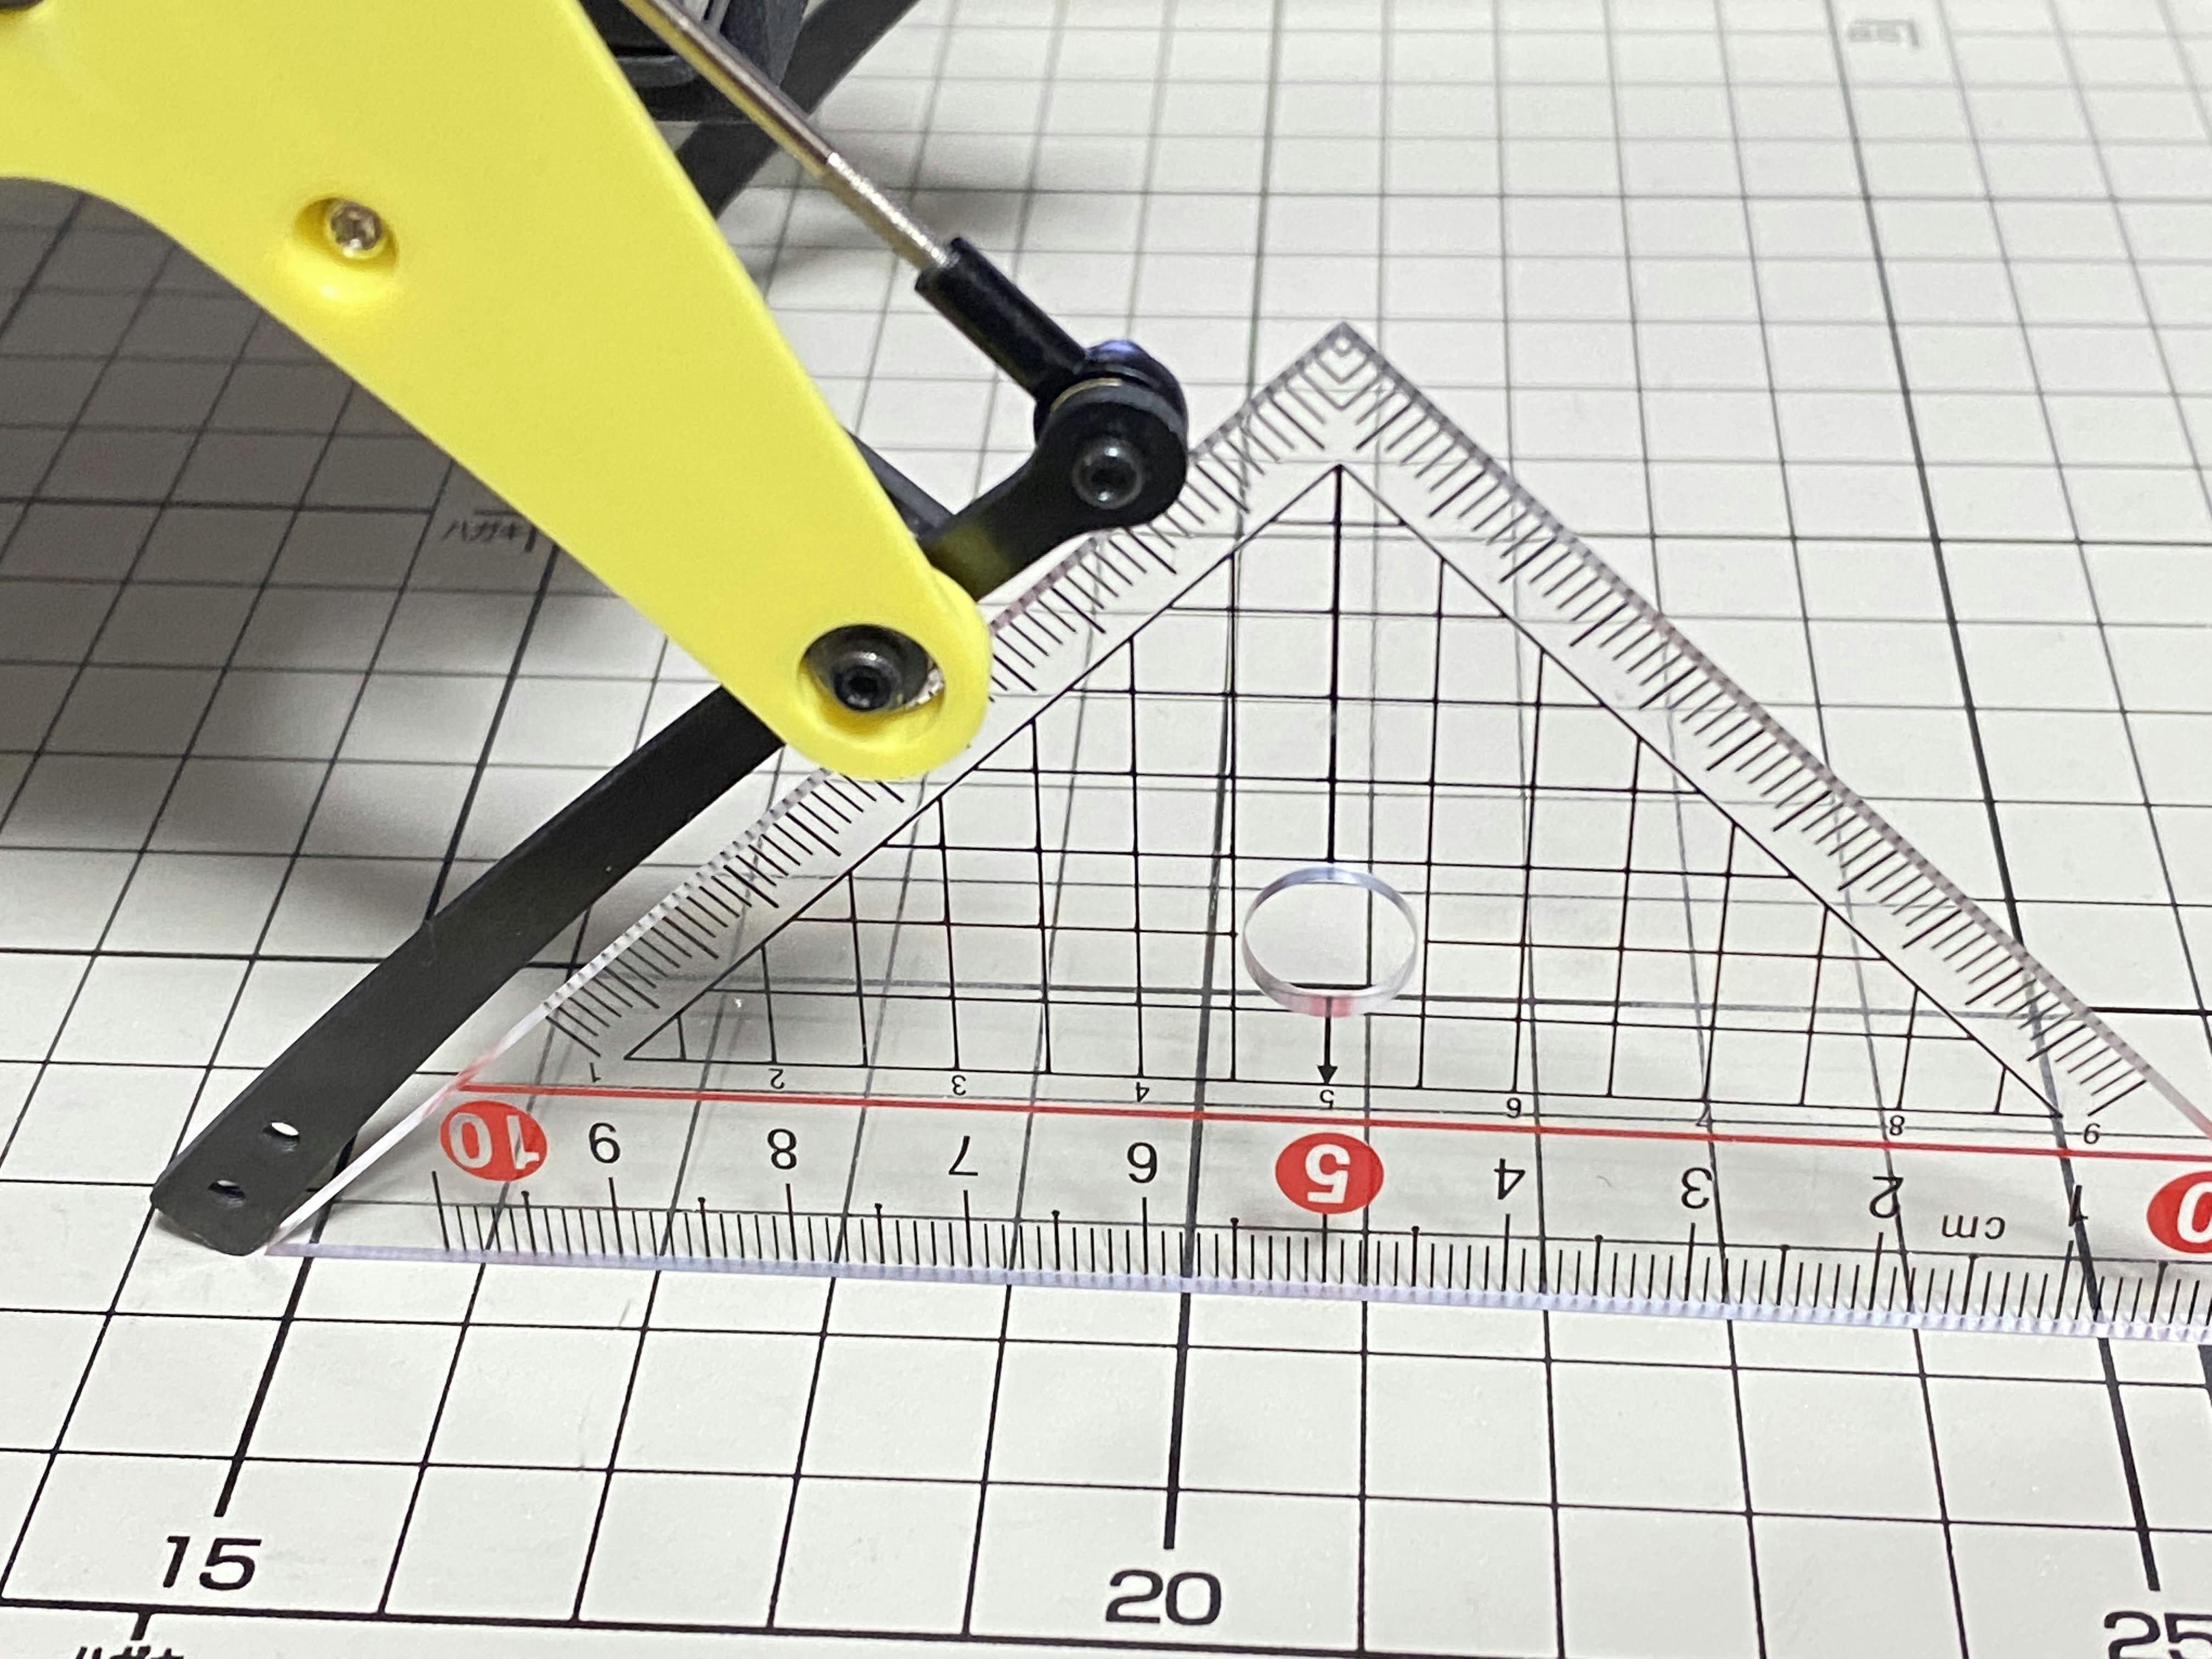
傾きの測定だけでは脚の位置が揃わないので、方眼紙のようなマス目に脚を置いて、前後左右の位置が一致しているか、確認し最終調整しましょう。
It is not enough to measure the inclination of the legs, so it is important to place the legs on a grid, like a piece of graph paper, to check that they are in the same position from front to back and from side to side, and to make any final adjustments.
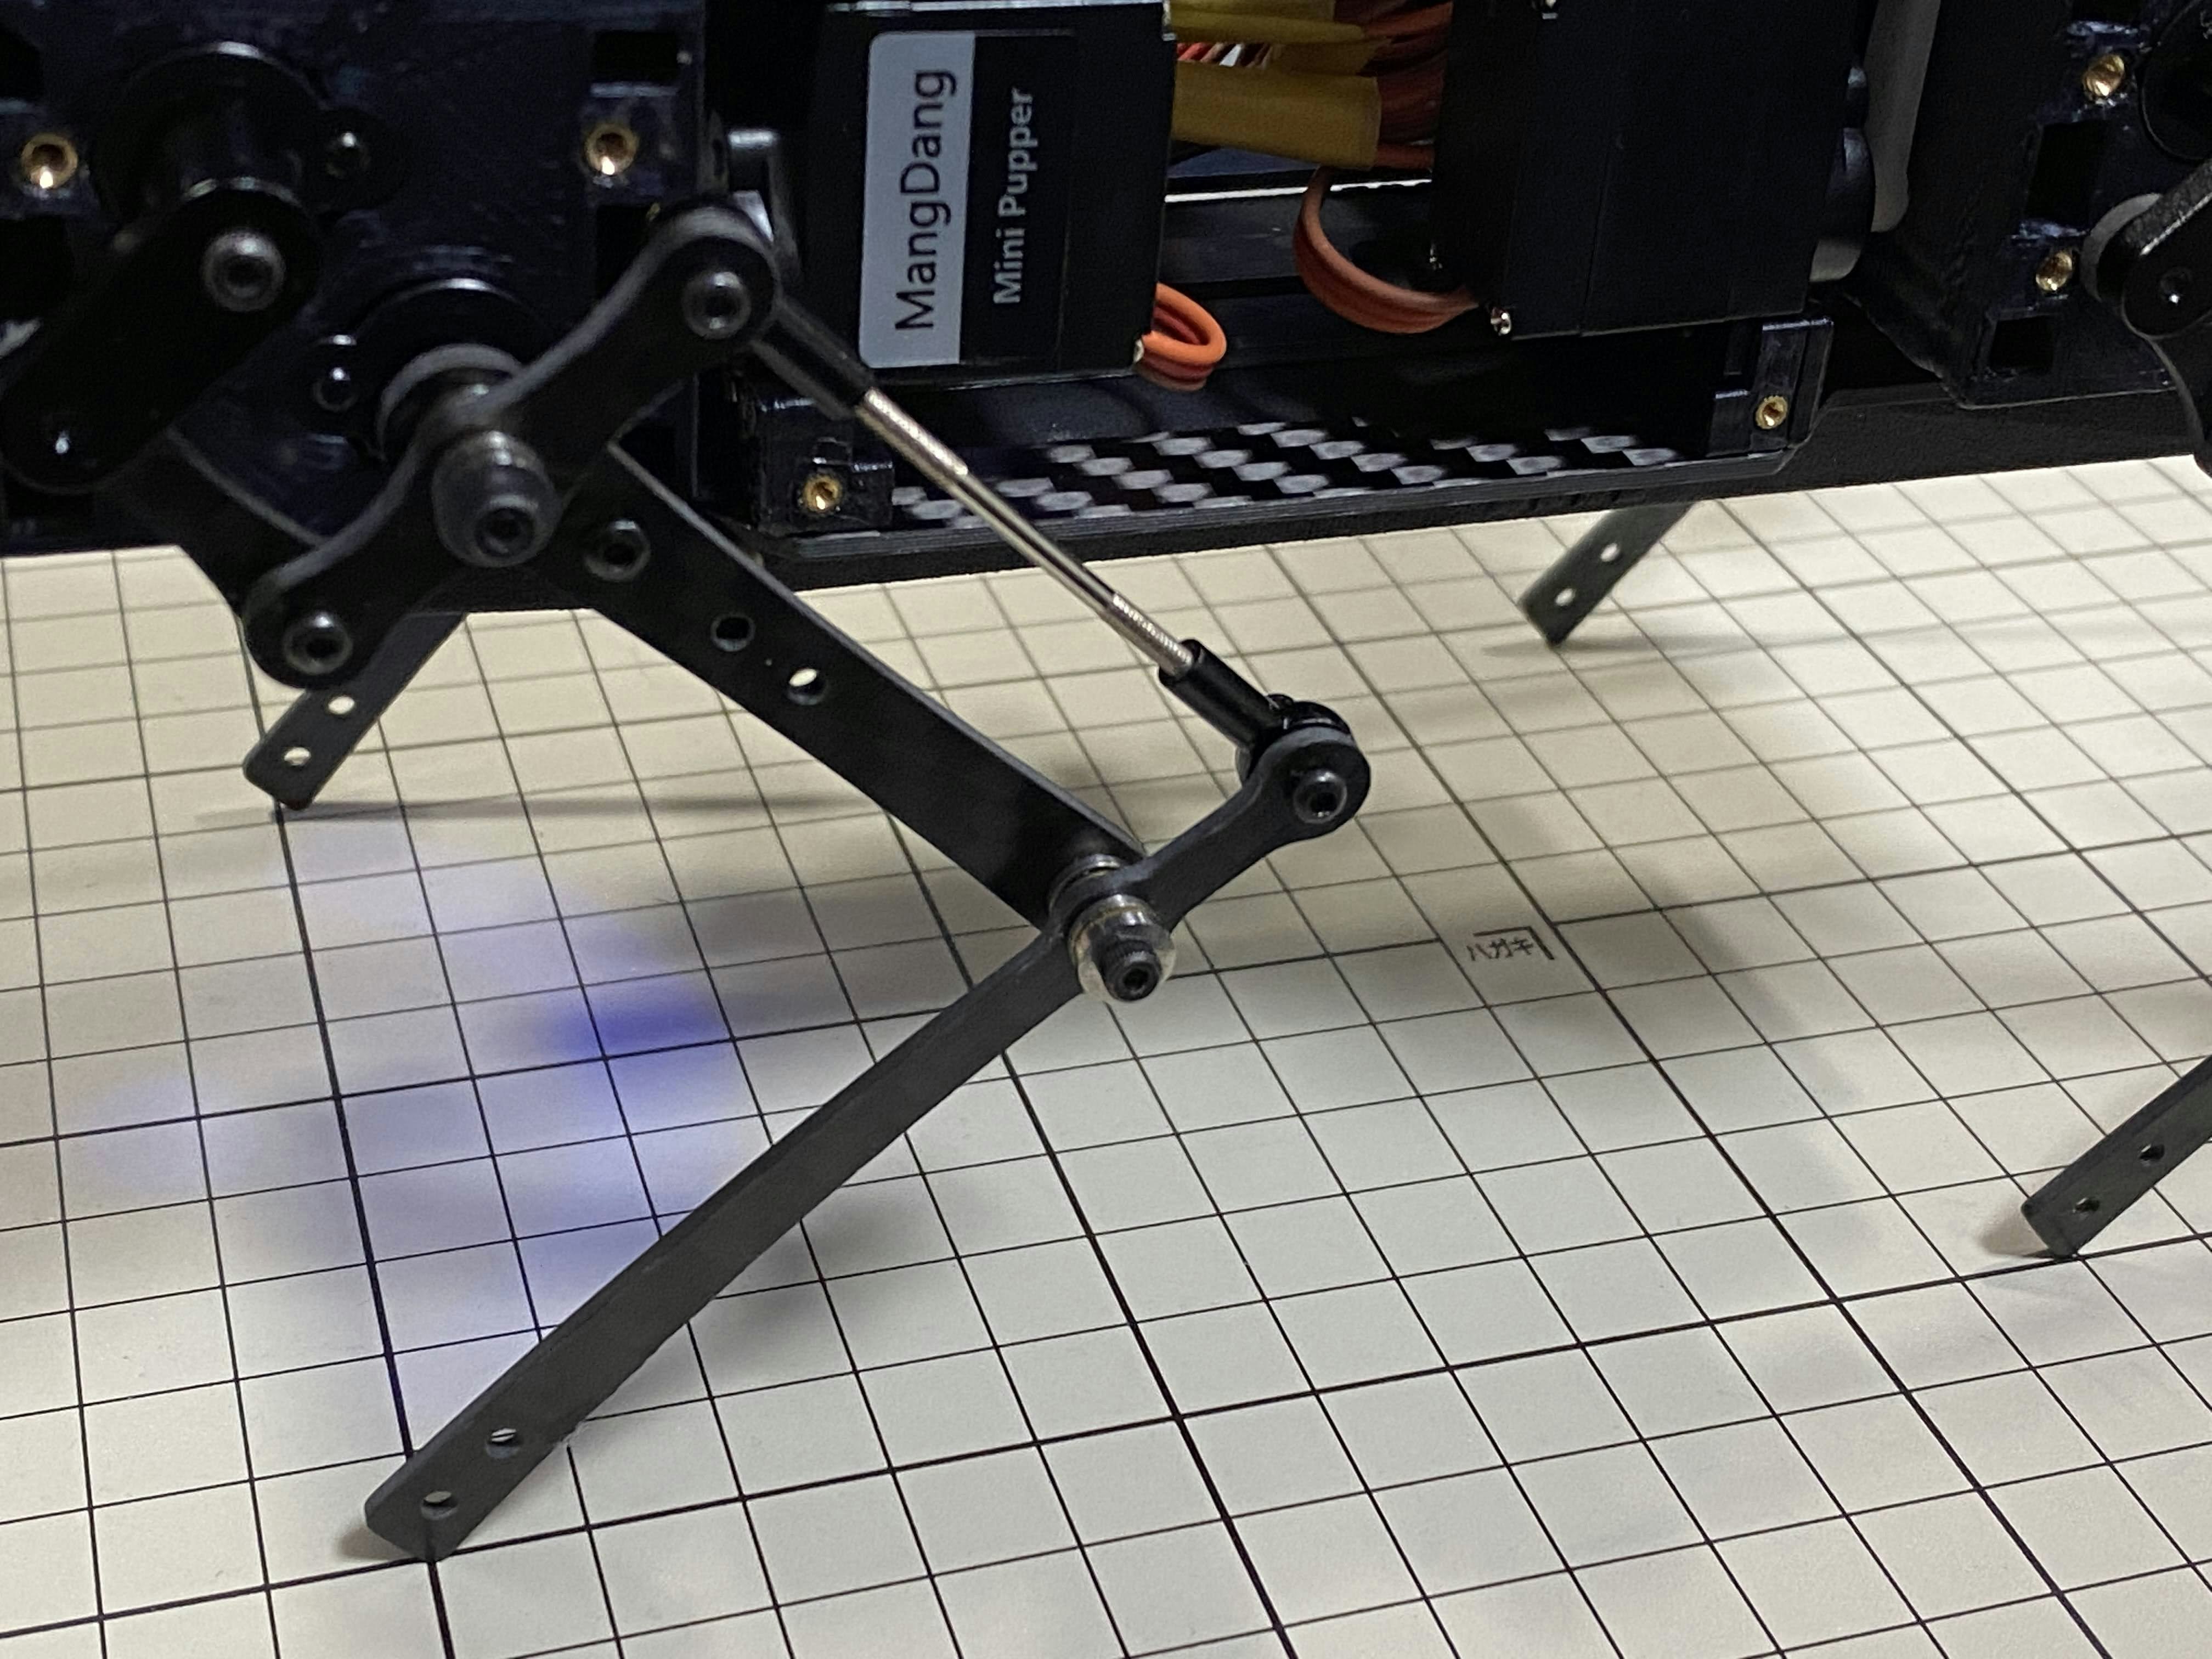
すべての脚を図のように45度の傾きになったら、Update を押して設定を保存します。×ボタンを押してキャリブレーションアプリを閉じます。
When all legs are at 45° inclination as shown, press Update to save the settings. Press × to close the calibration application.
補足ですが、キャリブレーションはGUIが必要なのでsshでは実行出来ませんでした。
As a tip, the calibration requires GUI and could not be done via ssh.
Playstation4コントローラの接続 / Connect PS4 controller
ロボット「ミニぷぱ」 操作 を参照ください。
See this.
ps4コントローラで操作できればOKです。
If you can control it with a ps4 controller, it's OK.
ラズパイ&Ubuntuのシャットダウン / Shutdown Raspberry pi & Ubuntu
下面にあるボタン長押しで突然電源供給を止めると、SDカードが破壊されるリスクがあります。正しい手順でシャットダウンする必要があります。
If you suddenly stop the power supply by pressing and holding the button on the underside of battery, there is a risk of destroying the SD card. You need to follow the correct procedure to shutdown.
2つの方法があります。
There are two ways to shutdown it.
- PS4コントローラが接続されているなら、△ボタンを長押しする / If a PS4 controller is connected, press and hold the △ button.
- 画面とマウスが接続されているなら、Ubuntuの画面でシャットダウンを選ぶ。 / If you have a screen and mouse connected, select Shutdown on the Ubuntu screen.
古いバージョンのpythonスクリプトを使う場合
下面にあるボタン長押しで突然電源供給を止めると、SDカードが破壊されるリスクがあります。Ubuntu上でシャットダウンする必要があります。画面+キーボードを接続しているなら直接、繋いでいないならPCからssh接続で下記のコマンドを打ちます。
You will need to shut down on Ubuntu. If you have a screen + keyboard connected, type the following command directly, or if not, type the following command from your PC via ssh connection.
sudo shutdown -h now
30秒ほどすればシャットダウン完了しますので、底面のボタンを長押しして電源を止めます。
After about 30 seconds, it will shut down and you can press and hold the button on the bottom to turn it off.
壊れたSDカードは元に戻りません…。面倒ですが、コマンドで終了しましょう。
Note that a broken SD card will not be restored... It's a bit of a pain, but you can end it with a command.
2022/01/02現在、現在MangDangではシャットダウン機能の開発中です。このコミットがイメージに反映されるのを待ちましょう。△ボタンを長押しでUbuntuをシャットダウンできます。
As of 2022/01/02, the shutdown feature is currently under development in MangDang. Wait for this commit to be reflected in released image. Then, you can shutdown Ubuntu by pressing and holding the triangle button.
次工程 / next step
最後は【Mini Pupper 6】外装の組み立て方です。
The final step is on 【Mini Pupper 6】 Cover Assembly.
分からないことがあったらここにコメントを書くか、 #minipupper #ミニぷぱ を付けてツイートすれば、優しい人が教えてくれますよ。
If you have any questions, write a comment here or tweet it with #minipupper #minipupa and tech friends will be happy to help.