続きです。
今回は SharePoint Online のデータへのアクセスが含まれるので、SPFxっぽいかもです。
毎度ながら内容に関して React も TypeScript もあまり上手に使えるわけではないですので、そのあたりご容赦ください。。。
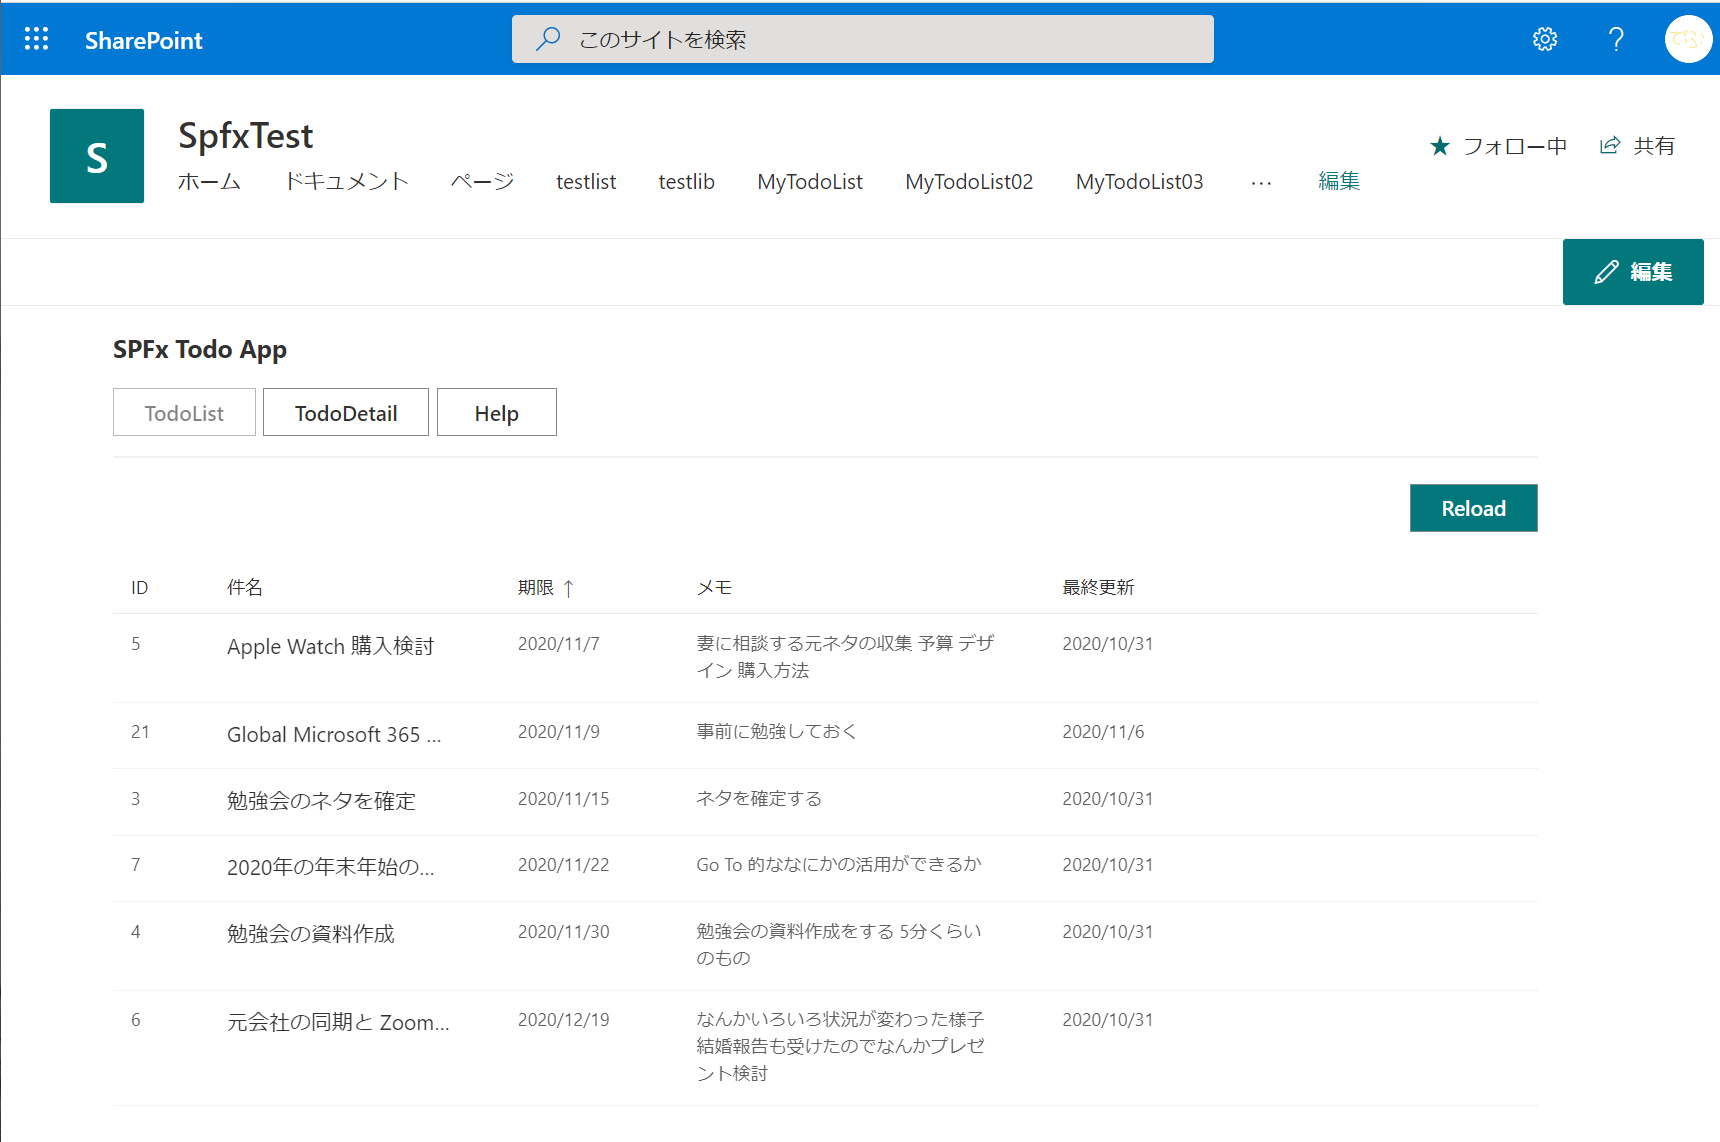
完成イメージ(4/4)
下は画像が荒いですね。
来週の Global Microsoft 365 Developer Bootcamp 前に SharePoint Framework を予習しよう!Teams のタブにもなるよ!
— nan_oka (@nanoka7o8) November 6, 2020
Qiita用にツイート。#OfficeDev #SharePointOnline #SharePointFramework #MicrosoftTeams pic.twitter.com/m4oSyYCAP3
もちろん SharePoint Online のページとしても使えます。

関連記事
Webパーツ初期設定編 1/4
https://qiita.com/nanoka/items/834ee5216a5437dc04bc
画面レイアウトと画面遷移編 2/4
https://qiita.com/nanoka/items/35dea4791ad767497ed6
一覧画面編 3/4
https://qiita.com/nanoka/items/fbda2f09796a445dd9e2
詳細画面編 4/4
https://qiita.com/nanoka/items/92093ca05096728e2deb
手順
1. SharePoint Online でデータソースの作成
2. データ取得用関数の作成
3. 一覧画面用コンポーネントからの関数の呼び出し
4. 一覧画面用コンポーネントの見た目の作成
手順の説明
1. SharePoint Online でデータソースの作成
今回は一覧画面を作成するのですが、そこに表示するデータを用意します。
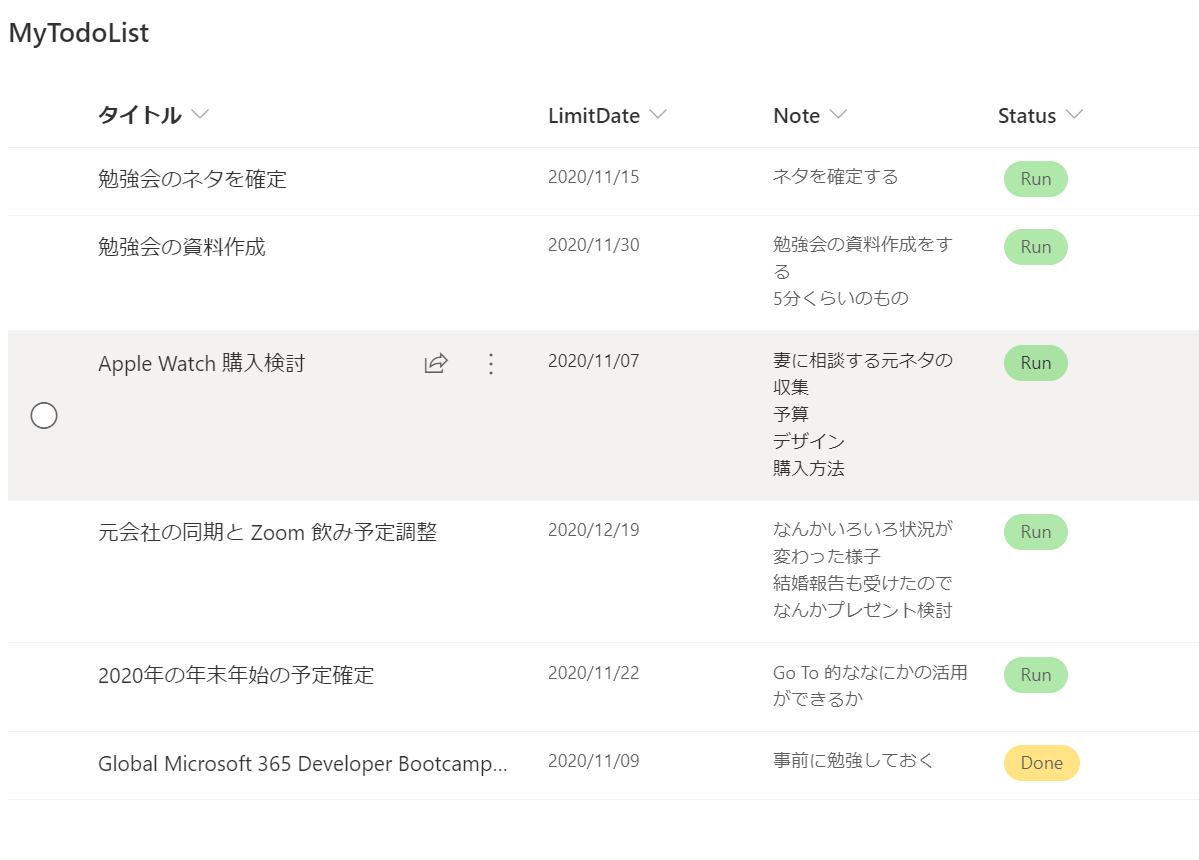
以下のようなカスタムリストを作成し、適当なデータを準備します。
- Title : デフォルトのタイトル列。文字通りタイトルを入力。 型は1行テキスト。
- LimitDate : 期限を入力。 型は日付。
- Note : メモを入力。 型は複数行テキスト。オプションでリッチテキストじゃないやつにする。
- Status: 状態を入力。 型は選択肢。Run Done の2種類を用意。
2. データ取得用関数の作成
データソースの作成が終わったらそれにアクセスする関数を作成していきます。
それらの関数はまとめて api フォルダに配置します。
...src/
 └ webparts/
  └ spfxTodo/
     ├ api/ (データ操作用関数を管理)
     ├ assets/
     │ └ stylesheets/
     ├ components/
     │ ├ atoms/
     │ ├ molecules/ (中くらいの部品を管理)
     │ └ organisms/
     │ └ pages/ (画面を管理)
     │ └ templates/
     └ loc/
やっと関数を作成していきます。
import の部分では以下を読み込みます。
- SharePoint へのアクセスを簡単にしてくれるものたち
- 画面でもデータへのアクセスでも使う処理をまとめた util
量が多くなる場合はファイルを分ければよいのですが、今回はざっくりということで同じファイルにしています。
上から以下のように分けています。
- 画面から呼び出し用関数
- リストアイテムの操作用共通関数
- Spへのアクセス用共通関数
画面の呼び出し用関数は、その名の通り画面用コンポーネントから利用されます。
個別のロジック等はできる限りここで吸収します。
共通の仕様として意識したことは、setState を受け取り、処理を終えて取得した結果を setState して終了する感じです。
リストアイテムの操作用共通関数は、画面の呼び出し用関数から呼ばれます。
リストアイテムの操作ごとに汎用的に作ります。
Spへのアクセス用共通関数は、リストアイテムの操作用関数から呼ばれます。
SharePoint Online へ直接アクセスする場所で、Get Post その他ちょっと特殊なもののようなレベルで汎用的に作ります。
SharePoint Online とのやり取りで発生するエラーチェックなどもここで一元的に行います。
引用ばかりで恐縮ですが、以下を参考にされるといいと思います。
import { SPHttpClient, SPHttpClientResponse, ISPHttpClientOptions } from '@microsoft/sp-http';
import { WebPartContext } from '@microsoft/sp-webpart-base';

/********** 画面から呼び出し用関数 **********/
/********** TodoList GET **********/
const getTodoListOptions = "?$select=ID,Title,LimitDate,Note,Modified,Status&$filter=Status eq 'Run'&$orderby=LimitDate asc";

export const GetTodoListItems =
	async (setState: any, targetListName: string, context: WebPartContext) => {
		setState({ loading: true });
		const todoListItems: Array<Object> = await GetListItems(context, targetListName, getTodoListOptions);
		setState({ loading: false, todoListItems });
	};

/********** TodoDetail GET **********/

/********** TodoDetail POST **********/


/********** リストアイテムの操作用共通関数 **********/
const defHeaders: HeadersInit = { "Content-type": "application/json", "Accept": "application/json" };

/********** 検索 **********/
const GetListItems =
	async (context: WebPartContext, listName: string, options: string) => {

		if (!options) {
			options = "";
		}
		const restUri: string = `${context.pageContext.web.absoluteUrl}/_api/web/lists/getbytitle('${listName}')/Items${options}`;
		const res: SPHttpClientResponse = await SpRestGet(context, restUri);
		const resJson: any = await res.json();
		const resJsonArray: Array<Object> = resJson.value;
		return resJsonArray;
	};

/********** 作成 **********/

/********** 更新 **********/

/********** 削除 **********/


/********** Spへのアクセス用共通関数 **********/
/********** GET Request **********/
const SpRestGet =
	async (context: WebPartContext, RestUri: string) : Promise<SPHttpClientResponse>  => {

		const res: SPHttpClientResponse = await context.spHttpClient.get(RestUri, SPHttpClient.configurations.v1);
		//エラーチェックは他のサイトが詳しいので省きます
		return res;
  };

/********** POST Request **********/
/********** 見た目調整用共通関数 **********/
export const DateFormatJa = (datestring: string): string  => {
	const TempDate = new Date(datestring);
	return TempDate.toLocaleDateString("ja");
};
export const DateTimeFormatJa = (datestring: string) : string => {
	const TempDate = new Date(datestring);
	return TempDate.toLocaleString("ja");
};

/********** JSON調整用共通関数 **********/
export const ObjectMerge = <T extends Object>(copyToObj: T, copyFromObj: Object): T => {
	Object.keys(copyToObj).forEach(key => {
		console.log(key);
		if (key in copyFromObj) {
			copyToObj[key] = copyFromObj[key];
		}
	});
	return copyToObj;
};
3. 一覧画面用コンポーネントからの関数の呼び出し
呼び出す処理ができたので、画面から呼び出して結果を確認していきたいと思います。
まず画面の中で共通的に使うものを定義します。
SharePoint Online へのアクセスは取得するデータ量にもよりますが、待ち時間が発生します。
その間の演出として表示するコンポーネントを用意します。
import * as React from 'react';

import { Spinner, SpinnerSize } from 'office-ui-fabric-react';

const Loading = () => (
  <div>
    <Spinner size={SpinnerSize.large} label="loading..." ariaLive="assertive" labelPosition="top" />
  </div>
);
export default Loading;
あと、作成したカスタムリストもリストアイテムの扱う値だけを定義した型を作成します。
export interface ITodoItem {
  Title: string;
  LimitDate: string| null;
  Note: string;
  Status: string;
  ID?: string;
  Created?: string | null;
  Modified?: string | null;
}
次に以下のファイルを更新します。
import の部分では以下を読み込みます。
- 先ほど作成したコンポーネントや、関数の読み込み
- SharePoint っぽいUIを勝手にやってくれる office-ui-fabric-react
- 今回扱うリストアイテムの型
次に、State としてこのコンポーネントが持つ状態を定義します。
- loading データ読み込み中かどうか
- todoListItems 一覧に表示中のアイテムそのもの
画面に出力する箇所では、更新ボタンを表示する部分と、一覧の取得結果を表示する部分を縦に並べています。
import * as React from 'react';

import {
  PrimaryButton, Stack, IStackTokens
} from 'office-ui-fabric-react';

import Loading from '../molecules/Loading';
import * as api from '../../api';

import { IPageProps } from './IPageProps';
import { ITodoItem } from '../molecules/ITodoItem';

interface State {
  loading: boolean;
  todoListItems: Array<Object>;
}

class TodoList extends React.Component<IPageProps, State> {

  constructor(props: IPageProps) {
    super(props);

    this.state = {
      loading: false, todoListItems: []
    };
  }

  private GetTodoListItems = async () =>
    api.GetTodoListItems(this.setState.bind(this), this.props.todoListName, this.props.webPartContext)

  public componentDidMount() {
    this.GetTodoListItems();
  }

  public render() {
    const stackTokens: IStackTokens = { childrenGap: 5 };
    const { loading, todoListItems } = this.state;
    return (
      <div>
        <Stack tokens={stackTokens}>
          <Stack.Item align='end'>
            <PrimaryButton text='Reload' onClick={this.GetTodoListItems} />
          </Stack.Item>
          <Stack.Item align='auto'>
            {loading ? (
              <Loading />
            ) : (
                todoListItems.length > 0 ? (
                todoListItems.map((item : ITodoItem) => <div>{item.Title}</div>)
                ) : (
                    <><p>Good work! No more Todos.</p></>
                  )
              )}
          </Stack.Item>
        </Stack>
      </div>
    );
  }
}
export default TodoList;
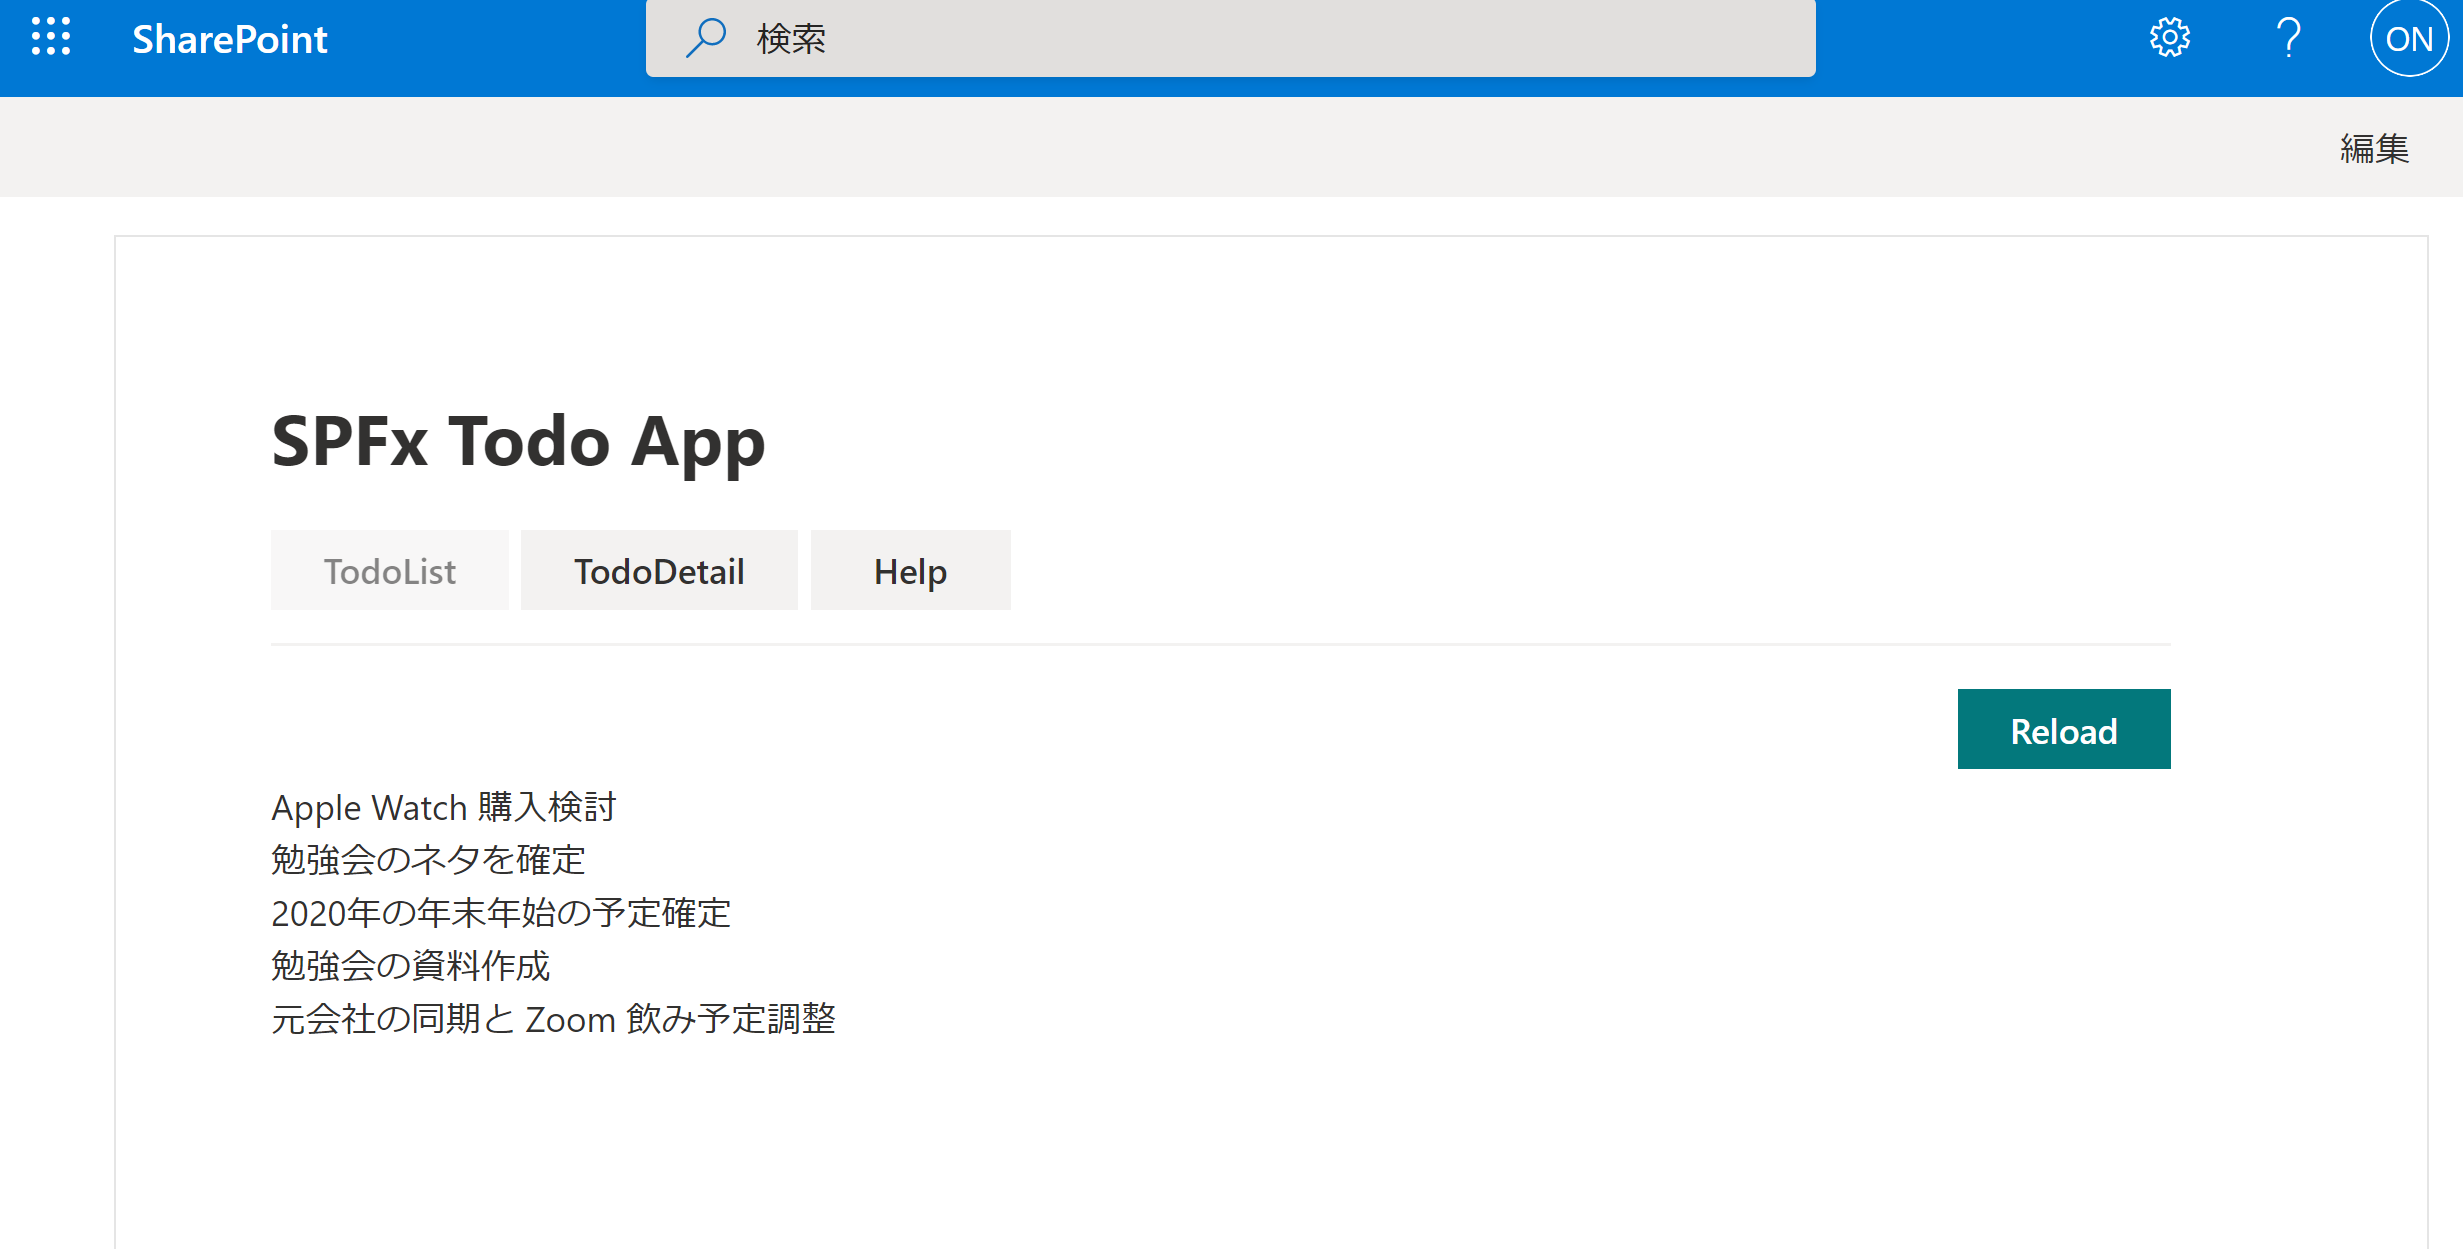
Hosted workbench の実行でリストアイテムのタイトルが以下のように表示できていれば成功です。
Reloadボタンを押すと、Loding... と一瞬表示され、画面が更新されているのがわかります。
4. 一覧画面用コンポーネントの見た目の作成
最後に 先ほど取得したデータの見た目を整えるため、ファイルを更新していきます。
大きな変更は以下の2点です。
- State に todoColumns を追加し、初期値として一覧表示する列を定義
- 一覧の取得結果を表示する部分に DetailList を使用し、一覧表示する。
SharePoint Online っぽい一覧表示をやってくれるコンポーネントとして、 office-ui-fabric-react に DetailsList というものがあるので、それを使います。
https://developer.microsoft.com/ja-JP/fluentui#/controls/web/detailslist
DetailList の プロパティはいろいろありますが、とりあえず、items に、カスタムリストから取得してきたリストアイテムの配列を、columns に、IColumn の配列で、表示したい列だけを定義したもの(fieldName と Object の key で一致させる)を渡しせばいい感じに表示してくれます。
また、表示されたアイテムをクリックした際に、詳細画面に繊維する処理も追記します。
import * as React from 'react';

import {
  PrimaryButton, Stack, IStackTokens, DetailsList, IColumn, CheckboxVisibility
} from 'office-ui-fabric-react';

import Loading from '../molecules/Loading';
import * as api from '../../api';
import * as util from '../util';

import { IPageProps } from './IPageProps';

interface State {
  loading: boolean;
  todoColumns: IColumn[];
  todoListItems: Array<Object>;
}

class TodoList extends React.Component<IPageProps, State> {

  constructor(props: IPageProps) {
    super(props);
    const todoColumns: IColumn[] = [
      {
        key: 'col0',
        name: 'ID',
        fieldName: 'ID',
        minWidth: 20,
        maxWidth: 20,
        data: 'string',
        isPadded: true,
      },
      {
        key: 'col1',
        name: '件名',
        fieldName: 'Title',
        minWidth: 150,
        maxWidth: 150,
        isRowHeader: true,
        isResizable: true,
        data: 'string',
        isPadded: true,
      },
      {
        key: 'col2',
        name: '期限',
        fieldName: 'LimitDate',
        minWidth: 75,
        maxWidth: 75,
        isResizable: true,
        data: 'number',
        isPadded: true,
        isSorted: true,
        isSortedDescending: false,
        onRender: (item) => {
          return <span>{util.DateFormatJa(item.LimitDate)}</span>;
        },
      },
      {
        key: 'col3',
        name: 'メモ',
        fieldName: 'Note',
        minWidth: 200,
        maxWidth: 200,
        isResizable: true,
        data: 'string',
        isPadded: true,
        isMultiline: true
      },
      {
        key: 'col4',
        name: '最終更新',
        fieldName: 'Modified',
        minWidth: 75,
        maxWidth: 75,
        isResizable: true,
        data: 'string',
        isPadded: true,
        onRender: (item) => {
          return <span>{util.DateFormatJa(item.Modified)}</span>;
        },
      }
    ];

    this.state = {
      loading: false, todoColumns, todoListItems: []
    };
  }

  private GetTodoListItems = async () =>
    api.GetTodoListItems(this.setState.bind(this), this.props.todoListName, this.props.webPartContext)

  public componentDidMount() {
    this.GetTodoListItems();
  }

  public render() {
    const stackTokens: IStackTokens = { childrenGap: 5 };
    const { routeProps } = this.props;
    const { history } = routeProps;
    const { loading, todoColumns, todoListItems } = this.state;
    return (
      <div>
        <Stack tokens={stackTokens}>
          <Stack.Item align='end'>
            <PrimaryButton text='Reload' onClick={this.GetTodoListItems} />
          </Stack.Item>
          <Stack.Item align='auto'>
            {loading ? (
              <Loading />
            ) : (
                todoListItems.length > 0 ? (
                  <DetailsList items={todoListItems} columns={todoColumns} checkboxVisibility={CheckboxVisibility.hidden}
                    onActiveItemChanged={(item, i, e) =>
                      history.push({ pathname: "/TodoDetail/" + item.ID })} />
                ) : (
                    <><p>Good work! No more Todos.</p></>
                  )
              )}
          </Stack.Item>
        </Stack>
      </div>
    );
  }
}
export default TodoList;
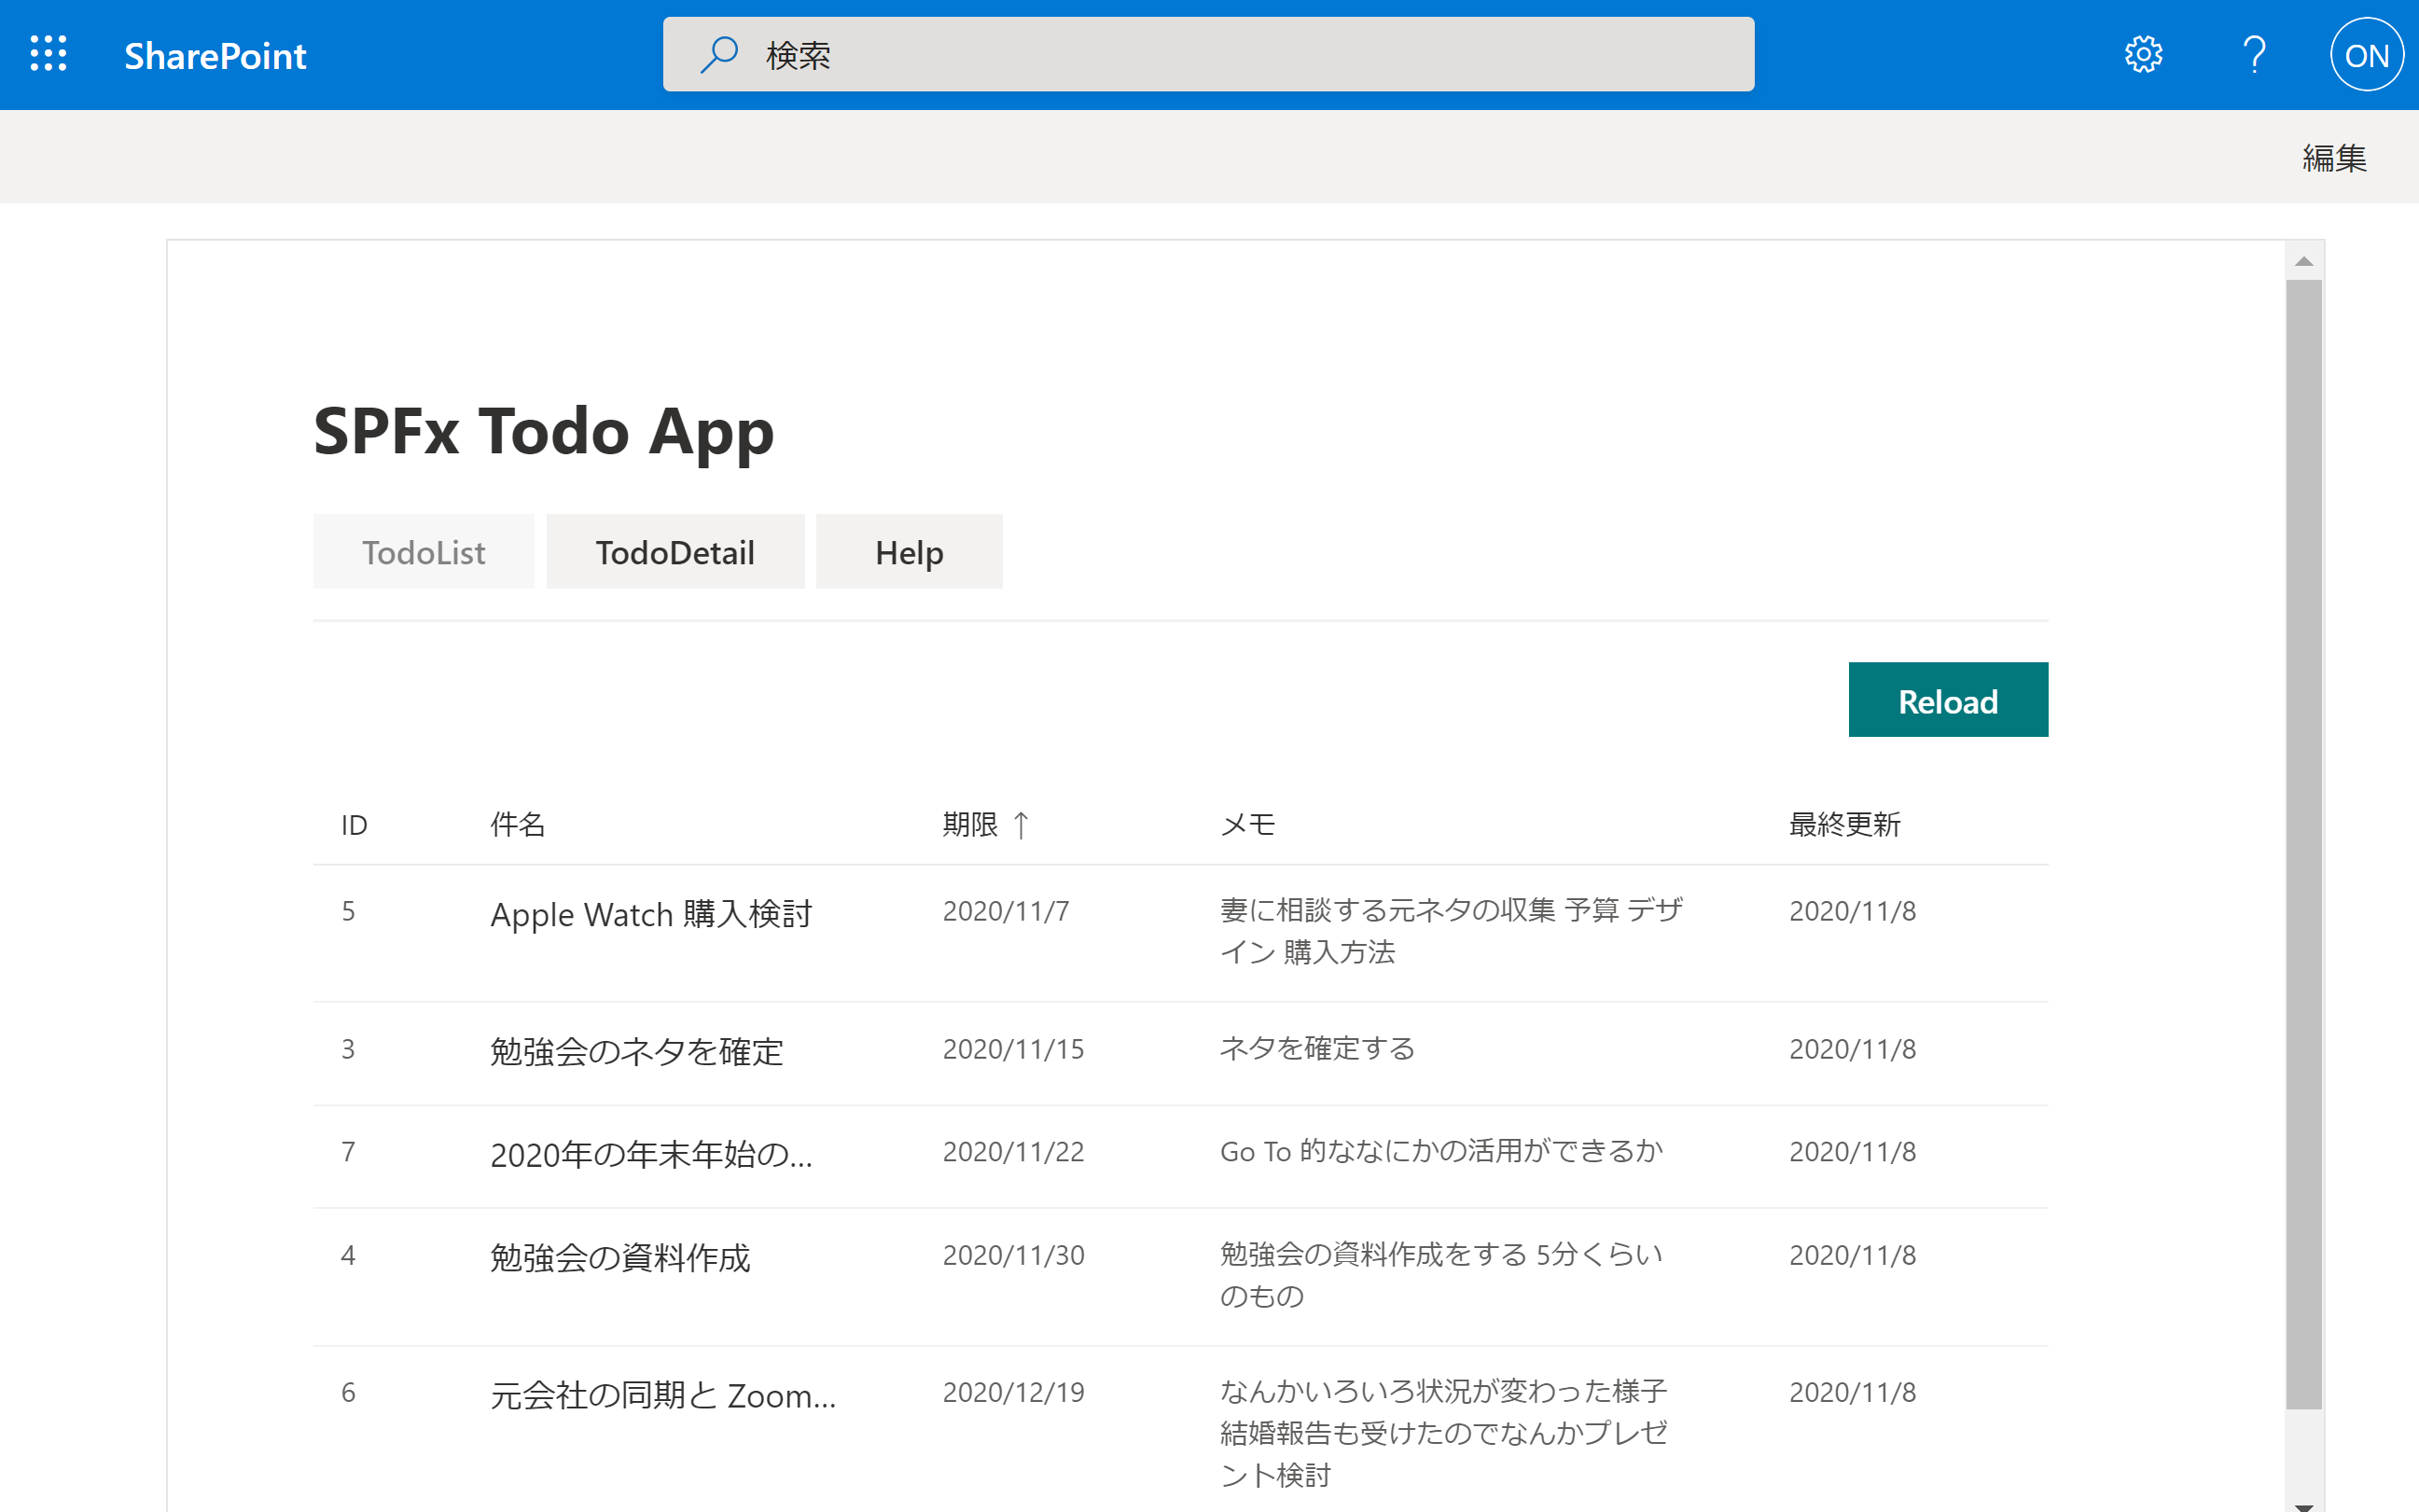
Hosted workbench の実行で以下のように表示できていれば成功です。
アイテムをクリックすれば、別画面に遷移し、IDが表示されるようになっています。
以下に実際に動作させたファイルを置いておきますので、うまくいかない場合は参考にしてください。
次回は作成、更新、削除機能付きの更新画面を作ります。


