追記 2020/12/10
続きを書きました
Svelteで作るTODOアプリ - 状態管理編
Svelte のチュートリアルを一通り試したので練習がてら TODO アプリの作成をしていきたいと思います。
Svelteについては以下が参考になります。
新規のプロジェクトを作成する
$ npx degit sveltejs/template svelte-todo-app
$ cd svelte-todo-app
$ node scripts/setupTypeScript.js
$ yarn install
$ yarn run dev
# http://localhost:5000 にアクセスするとデフォルトの画面が表示されます
 |
|---|
各ファイルについて
-
index.html
アプリのベースとなる html。
<!DOCTYPE html>
<html lang="en">
  <head>
    <meta charset="utf-8" />
    <meta name="viewport" content="width=device-width,initial-scale=1" />

    <title>Svelte app</title>

    <link rel="icon" type="image/png" href="/favicon.png" />
    <link rel="stylesheet" href="/global.css" />
    <link rel="stylesheet" href="/build/bundle.css" />

    <script defer src="/build/bundle.js"></script>
  </head>

  <body></body>
</html>
-
App.svelte
App コンポーネント。
<script lang="ts">
  export let name: string; // exportすることで外部から値を設定できる
</script>

<style>
  main {
    text-align: center;
    padding: 1em;
    max-width: 240px;
    margin: 0 auto;
  }

  h1 {
    color: #ff3e00;
    text-transform: uppercase;
    font-size: 4em;
    font-weight: 100;
  }

  @media (min-width: 640px) {
    main {
      max-width: none;
    }
  }
</style>

<main>
  <!-- `{}`を使って式を埋め込むことができる -->
  <h1>Hello {name}!</h1>
  <p>
    Visit the
    <a href="https://svelte.dev/tutorial">Svelte tutorial</a>
    to learn how to build Svelte apps.
  </p>
</main>
-
main.ts
起点となる App コンポーネントのインスタンス化を行う。
-
target: コンポーネントの差込先 -
props: コンポーネントに渡す値
-
import App from './App.svelte';

const app = new App({
  target: document.body,
  props: {
    name: 'world',
  },
});

export default app;
TODO アプリの実装
事前準備
-
main.tsを修正props は使わないので消してしまいます。
main.tsconst app = new App({ target: document.body, - props: { - name: 'world', - }, }); -
VSCode に拡張機能を入れる
VSCode で開発するので Svelte for VS Code をいれる。
入力欄を作成
 |
|---|
<script lang="ts">
  let title = '';
</script>

<div>
  <label>
    タイトル
    <input bind:value={title} />
  </label>
  {title}
</div>
bind:valueを使用することで、入力した値を変数にバインドできます。
作成ボタンを追加
 |
|---|
<script lang="ts">
  let title = '';

  // 作成ボタンを押したときの処理
  const handleClickCreateButton = () => {
    alert(title);
    title = '';
  };
</script>

<div>
  <form>
    <label>
      タイトル
      <input bind:value={title} />
    </label>
    <button on:click={handleClickCreateButton}>作成</button>
  </form>
</div>
onClick などのイベントは on:eventname に関数を渡すことで拾うことができます。
ちなみに on:click|once のようにすると、一度のみ実行するようにできます。詳細はこちら。
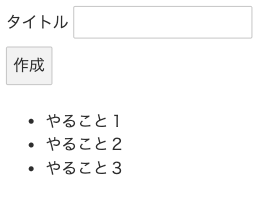
リストを表示
 |
|---|
<script lang="ts">
  let title = '';
  let todoList: string[] = ['やること1', 'やること2', 'やること3'];

  // 省略
</script>

<div>
  <!-- 省略 -->
</div>
<ul>
  {#each todoList as todoItem}
    <li>{todoItem}</li>
  {/each}
</ul>
each ブロックを使うことでリストを扱えます。
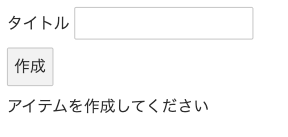
次に、リストが空の場合はメッセージを表示するようにします。
 |
|---|
<script lang="ts">
  let title = '';
  let todoList: string[] = [];

  // 省略
</script>

<div>
  <!-- 省略 -->
</div>
{#if todoList.length === 0}
  <div>アイテムを作成してください</div>
{:else}
  <ul>
    {#each todoList as todoItem}
      <li>{todoItem}</li>
    {/each}
  </ul>
{/if}
条件による出し分けは if ブロックで行います。
ブロックの開始タグには #、中間タグには :、終了タグには /を使います。
アイテムを追加できるようにする
<script lang="ts">
  let title = '';
  let todoList: string[] = [];

  // 作成ボタンを押したときの処理
  const handleClickCreateButton = () => {
    todoList = [...todoList, title]; // ここを修正
    title = '';
  };
</script>
なお、
todoList.push(title);
このような書き方では、画面が更新されません。これは Svelte が代入をトリガーにしていることに起因します。
そのため、
todoList.push(title);
todoList = todoList;
と書くことでも正しい挙動を得ることができます。
タイトルが空の場合にボタンを押せなくする
<button disabled={title === ''} on:click={handleClickCreateButton}>
  作成
</button>
とすれば動きますが、このままだと条件が複雑な場合に読みづらいため、条件式を外に出します。
<script lang="ts">
  // 省略

  $: disabledCreateButton = title === '';
</script>

<div>
  <!-- 省略 -->
  <button disabled={disabledCreateButton} on:click={handleClickCreateButton}>
    作成
  </button>
</div>
トップレベルの文の手前に$:を付けると、依存する値が更新された際に再評価が行われるようになります。
![]()
$:は label 文。
アイテムを削除できるようにする
<script lang="ts">
  let title = '';
  let todoList: string[] = [];

  $: disabledCreateButton = title === '';

  // 作成ボタンを押したときの処理
  const handleClickCreateButton = () => {
    todoList = [...todoList, title];
    title = '';
  };

  // 完了処理
  const completeItem = (index) => {
    todoList = todoList.filter((_, i) => i !== index);
  };
</script>

<div>
  <form>
    <label>
      タイトル
      <input bind:value={title} />
    </label>
    <button disabled={disabledCreateButton} on:click={handleClickCreateButton}>
      作成
    </button>
  </form>
</div>
{#if todoList.length === 0}
  <div>アイテムを作成してください</div>
{:else}
  <ul>
    {#each todoList as todoItem, index}
      <li on:click={() => completeItem(index)}>{todoItem}</li>
    {/each}
  </ul>
{/if}
とりあえず、これで TODO リストとしての最低限の機能は作れました。
見た目を整える
見た目を整えるために CDN で Bootstrap を導入します。global.cssはファイルごと削除。
-  <link rel='stylesheet' href='/global.css'>
+  <link rel="stylesheet" href="https://stackpath.bootstrapcdn.com/bootstrap/4.5.2/css/bootstrap.min.css" integrity="sha384-JcKb8q3iqJ61gNV9KGb8thSsNjpSL0n8PARn9HuZOnIxN0hoP+VmmDGMN5t9UJ0Z" crossorigin="anonymous">
 |
|---|
App.svelte
<script lang="ts">
  let title = '';
  let todoList: string[] = [];

  $: disabledCreateButton = title === '';

  // 作成ボタンを押したときの処理
  const handleClickCreateButton = () => {
    todoList = [...todoList, title];
    title = '';
  };

  // 完了処理
  const completeItem = (index) => {
    todoList = todoList.filter((_, i) => i !== index);
  };
</script>

<div class="container mt-3">
  <div class="row justify-content-center">
    <div class="col-lg-6 col-md-8">
      <h2>TODO アプリ</h2>
      <form>
        <div class="form-group">
          <label for="title">タイトル</label>
          <input id="title" class="form-control" bind:value={title} />
        </div>
        <div class="form-group text-center">
          <button
            class="btn btn-primary px-5"
            disabled={disabledCreateButton}
            on:click={handleClickCreateButton}>
            作成
          </button>
        </div>
      </form>
    </div>
  </div>
  <div class="row justify-content-center">
    <div class="col-lg-6 col-md-8">
      {#if todoList.length === 0}
        <div>アイテムを作成してください</div>
      {:else}
        <ul class="list-group">
          {#each todoList as todoItem, index}
            <li class="list-group-item align-middle">
              {todoItem}
              <button
                class="btn btn-sm btn-success float-right"
                on:click={() => completeItem(index)}>
                ×
              </button>
            </li>
          {/each}
        </ul>
      {/if}
    </div>
  </div>
</div>
良い感じになりました。
機能を追加
アニメーションを追加
<script lang="ts">
  import { slide } from 'svelte/transition';
  // 省略
</script>

<div class="container mt-3">
  <!-- 省略 -->
          {#each todoList as todoItem, index}
            <li transition:slide class="list-group-item align-middle">
              <!-- 省略 -->
            </li>
          {/each}
  <!-- 省略 -->
</div>
transition:slide を付けるだけです。簡単!
slide以外にも、fadeやscaleなどが用意されています。
しかしこれでは、どのアイテムを完了しても一番下のアイテムにアニメーションが効いてしまいます。
そこで each で key を指定するようにします。
<script lang="ts">
  import { slide } from 'svelte/transition';

  type TodoItem = {
    id: number;
    title: string;
  };

  let title = '';
  let todoList: TodoItem[] = [];

  $: disabledCreateButton = title === '';

  // 作成ボタンを押したときの処理
  const handleClickCreateButton = () => {
    const id = new Date().getTime();
    todoList = [...todoList, { id, title }];
    title = '';
  };

  // 完了処理
  const completeItem = (index) => {
    todoList = todoList.filter((_, i) => i !== index);
  };
</script>
- {#each todoList as todoItem, index}
+ {#each todoList as todoItem, index (todoItem.id)}
これでアニメーションが正しく動くようになりました。
優先度を追加
最後に優先度を登録できるようにして完成です。
 |
|---|
App.svelte
<script lang="ts">
  import { slide } from 'svelte/transition';

  const Priorities = {
    High: 1,
    Mid: 2,
    Low: 3,
  } as const;
  type Priority = typeof Priorities[keyof typeof Priorities];

  const priorityNames = {
    [Priorities.High]: '高',
    [Priorities.Mid]: '中',
    [Priorities.Low]: '低',
  } as const;

  type TodoItem = {
    id: number;
    title: string;
    priority: Priority;
  };

  let title = '';
  let priority: number = 2;
  let todoList: TodoItem[] = [];

  $: disabledCreateButton = title === '';
  $: sortedTodoList = todoList.sort(
    (item1, item2) => item1.priority - item2.priority
  );

  // 作成ボタンを押したときの処理
  const handleClickCreateButton = () => {
    const id = new Date().getTime();
    if (priority === 1 || priority === 2 || priority === 3) {
      todoList = [...todoList, { id, title, priority }];
    }
    title = '';
  };

  // 完了処理
  const completeItem = (id: number) => {
    todoList = todoList.filter((todo) => todo.id !== id);
  };
</script>

<div class="container mt-3">
  <div class="row justify-content-center">
    <div class="col-lg-6 col-md-8">
      <h2>TODO アプリ</h2>
      <form>
        <div class="form-group">
          <label for="title">タイトル</label>
          <input id="title" class="form-control" bind:value={title} />
        </div>
        <div class="form-group">
          <label for="priority">優先度</label>
          <select id="priority" class="form-control" bind:value={priority}>
            {#each Object.entries(priorityNames) as [value, label]}
              <option value={Number(value)}>{label}</option>
            {/each}
          </select>
        </div>
        <div class="form-group text-center">
          <button
            class="btn btn-primary px-5"
            disabled={disabledCreateButton}
            on:click={handleClickCreateButton}>
            作成
          </button>
        </div>
      </form>
    </div>
  </div>
  <div class="row justify-content-center">
    <div class="col-lg-6 col-md-8">
      {#if todoList.length === 0}
        <div>アイテムを作成してください</div>
      {:else}
        <ul class="list-group">
          {#each sortedTodoList as todoItem (todoItem.id)}
            <li transition:slide class="list-group-item align-middle">
              <span
                class="badge m-1"
                class:badge-danger={todoItem.priority === Priorities.High}
                class:badge-warning={todoItem.priority === Priorities.Mid}
                class:badge-success={todoItem.priority === Priorities.Low}>
                {priorityNames[todoItem.priority]}
              </span>
              {todoItem.title}
              <button
                class="btn btn-sm btn-success float-right"
                on:click={() => completeItem(todoItem.id)}>
                ×
              </button>
            </li>
          {/each}
        </ul>
      {/if}
    </div>
  </div>
</div>
所感
書き方は Vue に近い感じですね。ほとんど書いたことがないので細かい比較はできませんが。
使ってみた感触はかなり良かったです。class の出し分けのしやすさ、アニメーションの手軽さ、for/if の構文も自分好みで良かったです。VSCodeとの相性も良好でした。
普段は React を書くことが多いですが、Svelte を使うことも視野に入れたいと思いました。もう少し大きいアプリに挑戦したいです。
チュートリアルは日本語には対応していませんがわかりやすく、今回使用した以外にも多くの機能があるので、ぜひ覗いてみてください。