Svelte で作る TODO アプリ ← こちらの記事の続きになります。
前回 Svelte で TODO アプリを作ってみてかなり感触が良かったので、状態管理についても書いていきたいと思います。
小さいアプリなので有用性などは確かめられないと思いますが、とりあえず試していきます。
Svelte ってなんぞって方は前回の記事や、公式のドキュメントも読みやすいのでおすすめです。
Svelte における状態管理
複数のコンポーネントから同じ状態を共有したい場合、Props のバケツリレーなどでは限界があります。
そこでコンポーネントごとの状態(State)とは別にアプリ全体で共有できる状態を持つことを考えます。
このような全体で共有する状態を Store と呼び、この状態の持ち方を Store パターンと呼びます。
今回は React の Redux や Vue の Vuex みたいに状態管理用のライブラリを使うわけではなく、標準搭載されてる svelte/store を使用します。
TODO アプリを改善
TODO リストを store に
src/stores.ts を作成します。
import { writable } from 'svelte/store';

export const Priorities = {
  High: 1,
  Mid: 2,
  Low: 3,
} as const;
export type Priority = typeof Priorities[keyof typeof Priorities];

export type TodoItem = {
  id: number;
  title: string;
  priority: Priority;
};

export const todoList = writable<TodoItem[]>([
  { id: 1, title: 'やること1', priority: Priorities.Mid },
  { id: 2, title: 'やること2', priority: Priorities.Mid },
  { id: 3, title: 'やること3', priority: Priorities.Mid },
]);
型情報などはApp.svelteから引っ張ってきただけです。
writableを使うことで、store を作成できます。引数には初期値を渡します。
値を取り出す
次に作成した store にコンポーネントからアクセスします。
<script lang="ts">
  import { slide } from 'svelte/transition';
  import { Priorities, todoList as todoListStore } from './stores';
  import type { TodoItem } from './stores';

  const priorityNames = {
    [Priorities.High]: '高',
    [Priorities.Mid]: '中',
    [Priorities.Low]: '低',
  } as const;

  let title = '';
  let priority: number = 2;
  let todoList: TodoItem[] = [];
  todoListStore.subscribe((value) => { // <- 追加
    todoList = value;
  });

  $: disabledCreateButton = title === '';
  $: sortedTodoList = todoList.sort(
    (item1, item2) => item1.priority - item2.priority
  );

  // 省略
</script>
writable で作成した store の subscribeメソッドを使うことで、値を取り出すことができます。
subscribeメソッドに渡した関数は、store が更新される度に実行されます。
subscribe メソッドは subscribe(購読) を解除するための関数を返します。
コンポーネントが何度も生成・破棄を繰り返すとメモリリークが発生します。これを防ぐためには、onDestroy で購読を解除します。
<script lang="ts">
  import { onDestroy } from 'svelte';
  import { slide } from 'svelte/transition';
  import { Priorities, todoList as todoListStore } from './stores';
  import type { TodoItem } from './stores';

  const priorityNames = {
    [Priorities.High]: '高',
    [Priorities.Mid]: '中',
    [Priorities.Low]: '低',
  } as const;

  let title = '';
  let priority: number = 2;
  let todoList: TodoItem[] = [];
  const unsubscribe = todoListStore.subscribe((value) => {
    todoList = value;
  });
  onDestroy(unsubscribe); // <- 追加

  // 省略
値を更新する
この状態でも一見動いているように見えますが、リストにアイテムを追加したり削除したりしても store の値は更新されていません。
試しに次のようにコードを追加します。
+ let todoItemCount: number = 0;
+ const unsubscribe2 = todoListStore.subscribe((value) => {
+   todoItemCount = value.length;
+ });
+ onDestroy(unsubscribe2);

</script>

<div class="container mt-3">
...
      {:else}
+       <div>件数:{todoItemCount}</div>
        <ul class="list-group">
通常 todoList から値を取れば済む話ですが、別コンポーネントでは store から取り出すことになるので、別コンポーネントがあるんだと思って見てください。
 |
|---|
この状態で、アイテムを 1 つ完了します。すると、下の画像のように件数が更新されません。
 |
|---|
これは state の更新はされているものの、store が更新されていないためです。
store の値を更新するためには、set もしくは update メソッドを使用します。
変更前の値を利用して更新する場合は、update を利用します。
  // 作成ボタンを押したときの処理
  const handleClickCreateButton = () => {
-   const id = new Date().getTime();
-   if (priority === 1 || priority === 2 || priority === 3) {
-    todoList = [...todoList, { id, title, priority }];
-  }
+   todoListStore.update((todoList) => {
+     const id = new Date().getTime();
+     if (priority === 1 || priority === 2 || priority === 3) {
+       return [...todoList, { id, title, priority }];
+     }
+     return todoList;
+   });
    title = '';
  };

  // 完了処理
  const completeItem = (id: number) => {
-   todoList = todoList.filter((todo) => todo.id !== id);
+   todoListStore.update((todoList) =>
+     todoList.filter((todo) => todo.id !== id)
+   );
  };
今回は実装しませんが、リセット処理のような変更前の値が不要な場合には set が有効です。
const reset = () => {
  todoListStore.set([]);
};
簡略記法
自動購読(Auto-subscriptions)
購読用の変数を用意したり、購読解除の処理をいちいち書いたりするのは面倒なため、別の記法が用意されています。
store を格納している変数の頭に$をつけることで、store の値を参照できます。
- let todoItemCount: number = 0;
- todoListStore.subscribe((value) => {
-   todoItemCount = value.length;
- });

      {#if $todoListStore.length === 0}
        <div>アイテムを作成してください</div>
      {:else}
-       <div>件数:{todoItemCount}</div>
+       <div>件数:{$todoListStore.length}</div>
この方法で値を参照すると、購読と購読解除が自動的に設定されます。
💡 Svelte では$で始まる名前は store への参照を表すため、$から始まる変数が宣言できなくなっています。
let $hoge = 1;
// > ValidationError: The $ prefix is reserved, and cannot be used for variable and import names
また、subscribeメソッドでやったように別の変数に代入したい場合は次のように書けます。ただ単に代入するだけではダメなので注意。
$: todoItemCount = $todoListStore.length;
let todoItemCount = $todoListStore.length;
更新(set)
$ 付きの変数へ代入することで、自動的に set メソッドが呼び出されます。完了処理であれば次のように書き換えられます。
  const completeItem = (id: number) => {
-   todoListStore.update((todoList) =>
-     todoList.filter((todo) => todo.id !== id)
-   );
+   $todoListStore = $todoListStore.filter((todo) => todo.id !== id);
  };
これらの機能を使って、App.svelte を書き直します。
<script lang="ts">
  import { slide } from 'svelte/transition';
  import { Priorities, todoList as todoListStore } from './stores';

  const priorityNames = {
    [Priorities.High]: '高',
    [Priorities.Mid]: '中',
    [Priorities.Low]: '低',
  } as const;

  let title = '';
  let priority: number = 2;

  $: disabledCreateButton = title === '';
  $: sortedTodoList = $todoListStore.sort(
    (item1, item2) => item1.priority - item2.priority
  );

  // 作成ボタンを押したときの処理
  const handleClickCreateButton = () => {
    const id = new Date().getTime();
    if (priority === 1 || priority === 2 || priority === 3) {
      $todoListStore = [...$todoListStore, { id, title, priority }];
    }
    title = '';
  };

  // 完了処理
  const completeItem = (id: number) => {
    $todoListStore = $todoListStore.filter((todo) => todo.id !== id);
  };
</script>

<div class="container mt-3">
  <div class="row justify-content-center">
    <div class="col-lg-6 col-md-8">
      <h2>TODO アプリ</h2>
      <form>
        <div class="form-group">
          <label for="title">タイトル</label>
          <input id="title" class="form-control" bind:value={title} />
        </div>
        <div class="form-group">
          <label for="priority">優先度</label>
          <select id="priority" class="form-control" bind:value={priority}>
            {#each Object.entries(priorityNames) as [value, label]}
              <option value={Number(value)}>{label}</option>
            {/each}
          </select>
        </div>
        <div class="form-group text-center">
          <button
            class="btn btn-primary px-5"
            disabled={disabledCreateButton}
            on:click={handleClickCreateButton}>
            作成
          </button>
        </div>
      </form>
    </div>
  </div>
  <div class="row justify-content-center">
    <div class="col-lg-6 col-md-8">
      {#if $todoListStore.length === 0}
        <div>アイテムを作成してください</div>
      {:else}
        <div>件数:{$todoListStore.length}</div>
        <ul class="list-group">
          {#each sortedTodoList as todoItem (todoItem.id)}
            <li transition:slide class="list-group-item align-middle">
              <span
                class="badge m-1"
                class:badge-danger={todoItem.priority === Priorities.High}
                class:badge-warning={todoItem.priority === Priorities.Mid}
                class:badge-success={todoItem.priority === Priorities.Low}>
                {priorityNames[todoItem.priority]}
              </span>
              {todoItem.title}
              <button
                class="btn btn-sm btn-success float-right"
                on:click={() => completeItem(todoItem.id)}>
                ×
              </button>
            </li>
          {/each}
        </ul>
      {/if}
    </div>
  </div>
</div>
カスタマイズする
更新をできなくする
これで状態を store に移すことができましたが、このままではあらゆるコンポーネントから store の値を自由に更新できてしまいます。
要は set や update を使えないようにすれば良いわけなので、stores.ts を次のように変更します。
const createTodoList = () => {
  const { subscribe } = writable<TodoItem[]>([]);
  return { subscribe };
};

export const todoList = createTodoList();
このように subscribe だけを取り出して export することで外部からの更新が不可能になります。
// 完了処理
const completeItem = (id: number) => {
  $todoListStore = $todoListStore.filter((todo) => todo.id !== id);
  // > Property 'set' does not exist on type '{ subscribe: ... }'.
};
特定の方法での更新をできるようにする
アイテムの追加・完了ができるように、専用のメソッドを用意します。
const createTodoList = () => {
  const { subscribe, update } = writable<TodoItem[]>([]);

  // 作成
  const add = (title: string, priority: Priority) => {
    const id = new Date().getTime();
    update((todoList) => [...todoList, { id, title, priority }]);
  };

  // 完了
  const complete = (id: number) => {
    update((todoList) => todoList.filter((todo) => todo.id !== id));
  };

  return { subscribe, add, complete };
};

export const todoList = createTodoList();
  // 作成ボタンを押したときの処理
  const handleClickCreateButton = () => {
-   const id = new Date().getTime();
    if (priority === 1 || priority === 2 || priority === 3) {
-     $todoListStore = [...$todoListStore, { id, title, priority }];
+     todoListStore.addItem(title, priority);
    }
    title = '';
  };
-
- // 完了処理
- const completeItem = (id: number) => {
-   $todoListStore = $todoListStore.filter((todo) => todo.id !== id);
- };

...

              <button
                class="btn btn-sm btn-success float-right"
-               on:click={() => completeItem(todoItem.id)}>
+               on:click={() => todoListStore.completeItem(todoItem.id)}>
                ×
              </button>
store に追加・完了などの処理を書くことで、更新の方法を限定できるとともに、コンポーネントから表示に関係ないロジックを取り除くことができました。
そのほかの機能
readable
公式 Doc より抜粋: https://svelte.dev/docs#readable
import { readable } from 'svelte/store';

const time = readable(null, (set) => {
  set(new Date());

  const interval = setInterval(() => {
    set(new Date());
  }, 1000);

  return () => clearInterval(interval);
});
readable で作成した store は外部からの書き込みが不可能です。値の更新は、第二引数の関数で行います。
この関数は購読時に実行され、戻り値の関数は購読解除時に実行されます。
公式の例では、購読時から 1 秒ごとに現在時刻で値を更新しています。
このように、タイマーで更新するような値や、マウスポインタの位置などのイベントで更新するような値は外部からの書き込みが不要なため、readable を使うと良いです。
<script lang="ts">
import { readable } from 'svelte/store';
const mousePos = readable({ x: 0, y: 0 }, (set) => {
function handleMouseMove(e: MouseEvent) {
const { pageX: x, pageY: y } = e;
set({ x, y });
}
window.addEventListener('mousemove', handleMouseMove);
return () => window.removeEventListener('mousemove', handleMouseMove);
});
</script>
<style>
div {
padding: 50px;
}
</style>
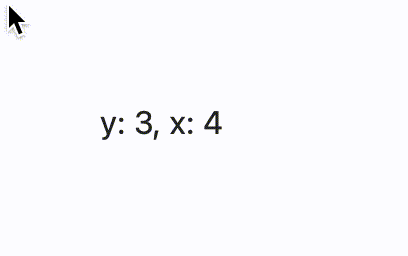
<div>y: {$mousePos.y}, x: {$mousePos.x}</div>
 |
|---|
なお、writable も第二引数に readable と同様の引数をとります。
参考:https://svelte.dev/docs#writable
derived
公式 Doc: https://svelte.dev/docs#derived
「derived」の意味は「派生した」など。
1 つ以上の store から派生した store を作成できます。
下の例では todoList からソートされたリストを持った store を作成しています。
- import { writable } from 'svelte/store';
+ import { derived, writable } from 'svelte/store';

  export const todoList = createTodoList();

+ export const sortedTodoList = derived(todoList, (todoList) =>
+   todoList.sort((item1, item2) => item1.priority - item2.priority)
+ );
- import { Priorities, todoList as todoListStore } from './stores';
+ import { Priorities, sortedTodoList, todoList as todoListStore } from './stores';


  $: disabledCreateButton = title === '';
- $: sortedTodoList = $todoListStore.sort(
-   (item1, item2) => item1.priority - item2.priority
- );


        <ul class="list-group">
-         {#each sortedTodoList as todoItem (todoItem.id)}
+         {#each $sortedTodoList as todoItem (todoItem.id)}
            <li transition:slide class="list-group-item align-middle">
2 つ以上の store から派生する場合は、リストで指定します。
const summed = derived([a, b], ([$a, $b]) => $a + $b);
このほかにもいくつか書き方があるので、気になる方は公式ドキュメントを参考にしてください。
readable/writableの第二引数に渡したような、購読時解除のコールバック関数を指定したり、初期値を持たせることができます。
所感
今回は Svelte の状態管理 (store の扱い)について学んでいきました。機能自体もシンプルな上に、書き方も簡単な書き方が用意されているのが良かったです。
中〜大規模のアプリを作らないとわからない問題点もあると思うので、機会があれば Svelte を使って何か作りたいです。