はじめに
PlayCanvasというWeb上で動くゲームエンジンを使って、
WebVRで使える視線選択について解説していきます。
PlayCanvas:https://playcanvas.com/
今回作成するプロジェクトファイルは公開しています!ぜひ参考にしてください!
https://playcanvas.com/project/639567/overview/vrentry
WebVRの準備
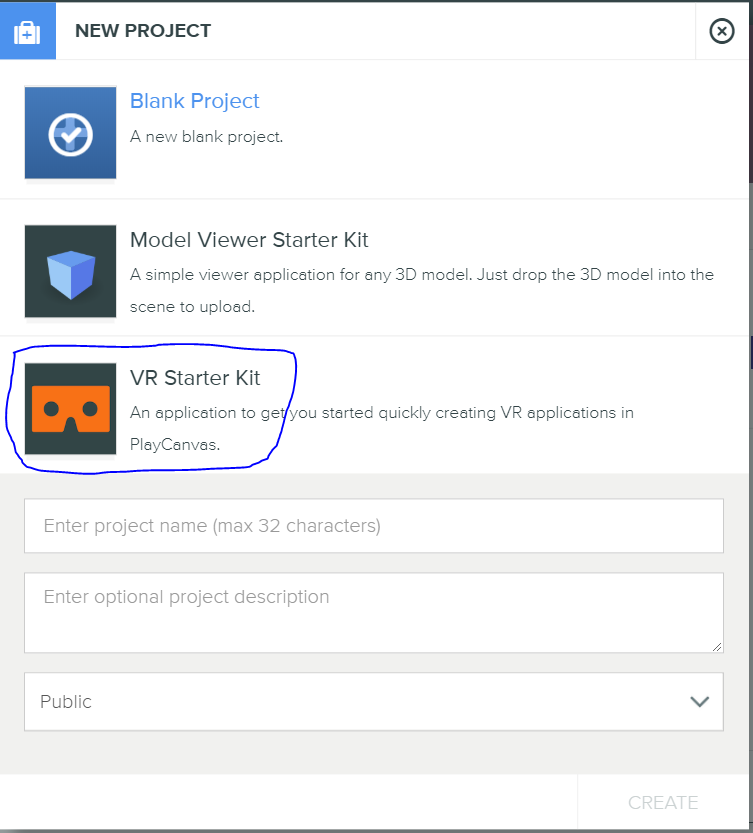
新規のプロジェクトを作成時にVR Starter Kitを選びます。
※iOS13の方は正常に動作しない可能性があります。こちらの方の記事を参考に直してみてください!
【iOS13】新しくなったWebVRの使い方 [PlayCanvas]:https://qiita.com/yushimatenjin/items/344d86b3d193e0a88567
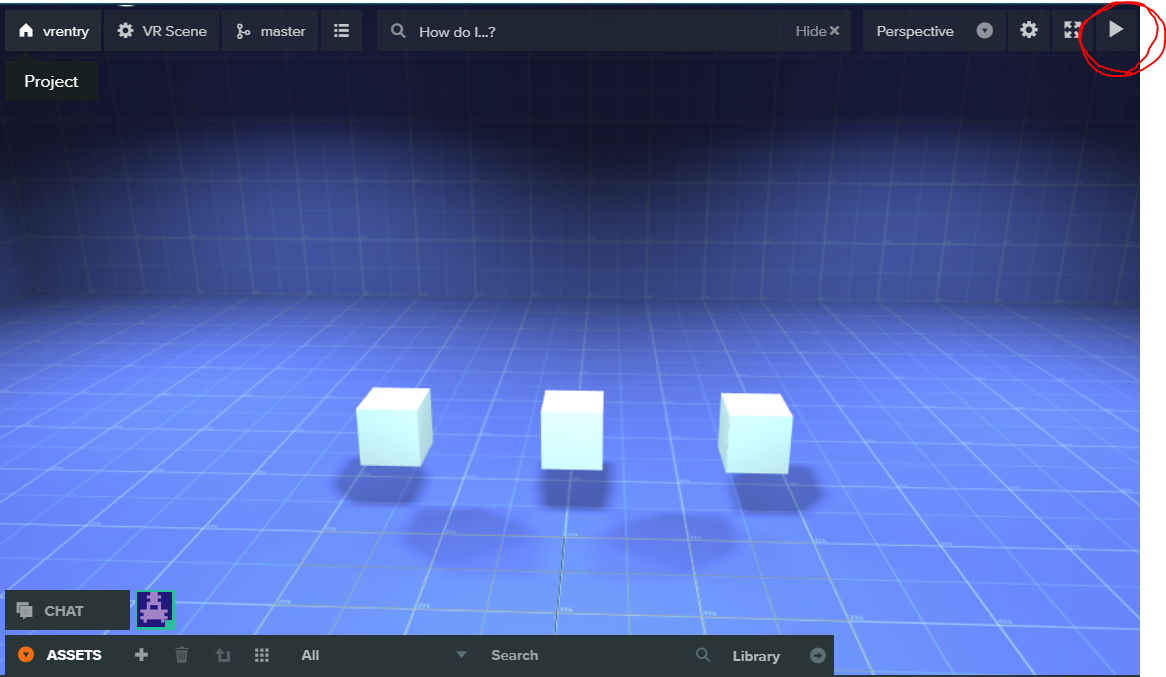
これで右上にあるLaunchボタンを押してみると、PC上ではマウスで簡単にデバックができます!
スマートフォンでのデバックはPUBLISHでURLを発行してスマートフォンにてURLを確認するとやりやすいです!
URL発行についての参考:https://support.playcanvas.jp/hc/ja/articles/224182767
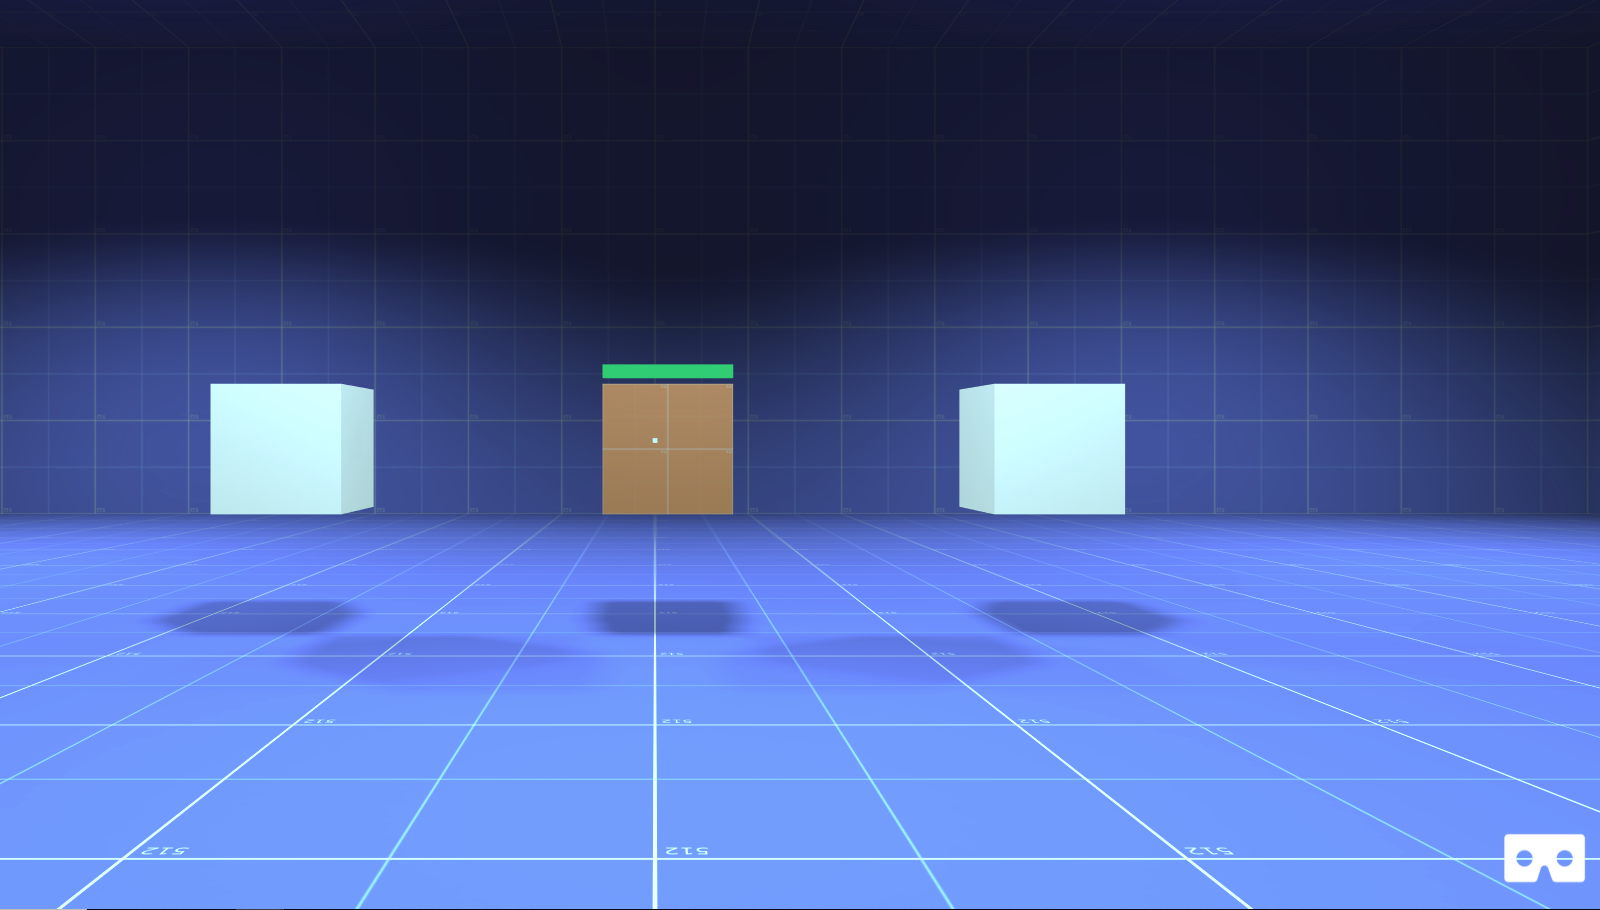
このStarterKitでVRも視線選択も実装済みです。
ここで実装されている視線選択を参考により簡易的な実装していきます。
視線選択Scriptの作成
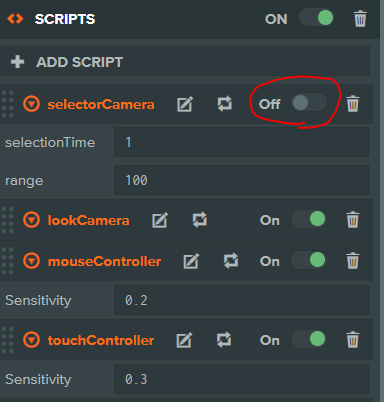
わかりにくくなるため、デフォルトでついている視線選択のスクリプトを無効にします。
ScriptはヒエラルキーにあるCameraOffsetの中のCameraについています。
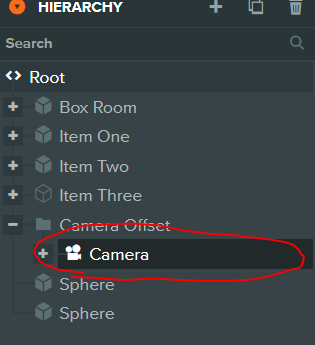
その中にあるselectorCameraのActiveをOffにします。
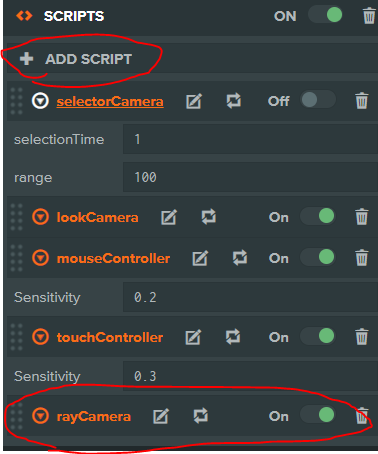
OffにできたらADD SCRIPTで新しく「ray-camera」というScriptを作成します。
Editを押して編集していきます。
初期設定
まず初めに視線選択の幅を設定します。
RayCamera.attributes.add("range", {
    type:'number',
    default:100
});
これでインスペクターで編集ができます。
次にinitialize関数で、変数の初期値、スクリプト間でイベントを呼び出せるようにしていきます。
// initialize code called once per entity
RayCamera.prototype.initialize = function() {
    this.app.on("ray-camera:add", this.addItem,this);
    this.app.on("ray-camera:remove", this.removeItem,this);
    this._ray = new pc.Ray(this.entity.getPosition(),this.entity.forward.scale(this.range));
    this._items = [];
    this._spheres = [];
};
スクリプト間の通信
    this.app.on("ray-camera:add", this.addItem,this);
    this.app.on("ray-camera:remove", this.removeItem,this);
この2行でaddItem関数とremoveItem関数を他のスクリプトから呼び出せるようにしています。
※通信について:https://developer.playcanvas.com/ja/user-manual/scripting/communication/
しかしこれではaddItem関数とremoveItem関数を実装していないためエラーが出てしまいます。
なのでaddItem関数とremoveItem関数を実装していきます!
addItem関数
RayCamera.prototype.addItem = function(item, sphere){
    if(item.model){
        this._items.push(item);
        this._spheres.push(sphere);
    }
};
引数はitemとsphereで、itemにmodelがあれば
itemでは視線選択できるオブジェクトのentityをitemsに登録し、
sphereでは視線選択できるオブジェクトのBoundingSphereをspheres設定します。
※Entityについて:https://developer.playcanvas.com/en/api/pc.Entity.html
※BoundingSphereについて:https://developer.playcanvas.com/en/api/pc.BoundingSphere.html
removeItem関数
RayCamera.prototype.removeItem = function(item){
    var i = this._items.indexOf(item);
    if(i>=0){
        this._items.splice(i,1);
        this._spheres.splice(i,1);
    }
};
この関数では、引数のitemをitemsの中のinddexを探し、
該当するindexに対応するitemsとsphereの中身をsplice関数で削除します。
Rayの作成
this._ray = new pc.Ray(this.entity.getPosition(),this.entity.forward.scale(this.range));
これで視線となるRayを作成します。
引数は現在の位置とrayの方向を送ります。
※pc.Rayについて:https://developer.playcanvas.com/en/api/pc.Ray.html
初期値の設定
    this._items = [];
    this._spheres = [];
addItemとremoveItemで登録する親元の配列を初期化します。
視線の当たり判定
先ほど作成したRayで当たり判定を実装していきます。
当たり判定はupdate関数内で毎フレーム呼び出して判定します!
// update code called every frame
RayCamera.prototype.update = function(dt) {
    for(var i =0; i<this._items.length; i++){
        var item = this._items[i];
        var result = this._spheres[i].intersectsRay(this._ray);
        if(result){
            item.fire("sphere:select");
        }
        else{
            item.fire("sphere:unHover");
        }
    }
};
まずfor文でitemsの数だけ処理を回し、該当するitemを変数に格納します。
var result = this._spheres[i].intersectsRay(this._ray);
intersectsRayでRayに当たっているかを確認できます。
当たっていればtrueを返し、そうでなければfalseを返します。
これはBoundingSphereのメソッドです。
        if(result){
            item.fire("sphere:select");
        }
        else{
            item.fire("sphere:unHover");
        }
そして当たっていればitem.fireで***"sphere:select"に該当する関数の呼び出し、
あたっていなければ"sphere:unHover"***に該当する関数を呼び出します。
これでrayCamera.jsの実装は終了です。
var RayCamera = pc.createScript('rayCamera');

RayCamera.attributes.add('range', {
    type:'number',
    default:100
});

// initialize code called once per entity
RayCamera.prototype.initialize = function() {
    this.app.on("ray-camera:add", this.addItem,this);
    this.app.on("ray-camera:remove", this.removeItem,this);
    this._ray = new pc.Ray(this.entity.getPosition(),this.entity.forward.scale(this.range));
    this._current = null;
    this._items = [];
    this._spheres = [];

};

// update code called every frame
RayCamera.prototype.update = function(dt) {
    for(var i =0; i<this._items.length; i++){
        var item = this._items[i];
        var result = this._spheres[i].intersectsRay(this._ray);
        if(result){
            item.fire("sphere:select");
        }
        else{
            item.fire("sphere:unHover");
        }
    }
};

RayCamera.prototype.addItem = function(item, sphere){
    if(item.model){
        this._items.push(item);
        this._spheres.push(sphere);
    }

};

RayCamera.prototype.removeItem = function(item){
    var i = this._items.indexOf(item);
    if(i>=0){
        this._items.splice(i,1);
        this._spheres.splice(i,1);
    }

};
選択できるオブジェクト・スクリプトの作成
オブジェクトの作成
ヒエラルキータブでSphereを2つ比較するために作成していきます。
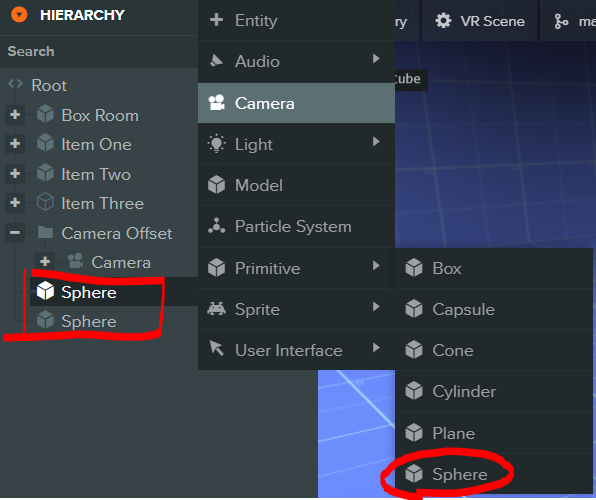
作成したSphereにADD SCRIPTでsphere.jsを作成していきます。
初期設定
まず当たった時とデフォルト状態でのマテリアルをそれぞれ設定します。
Sphere.attributes.add("sphereIdMaterial", {type:"asset", assetType:"material", title:"Sphere Id Material"});
Sphere.attributes.add("sphereHighlightedMaterial", {type:"asset", assetType:"material", title:"Sphere Highlighted Material"});
これで一旦Edito上に戻りsphere.jsのParseボタンを押してスクリプトを更新します。
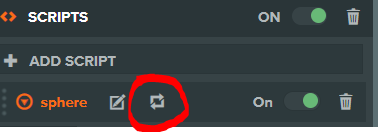
これで先ほど設定した変数が編集できるようになっているはずです。
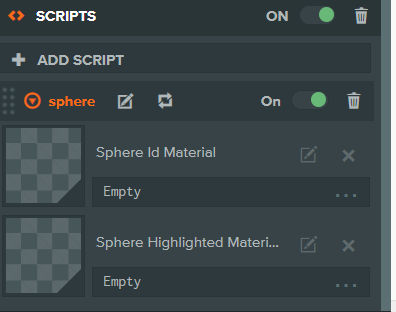
そしてSphere Id MaterialにはWhiteのマテリアルを、
Sphere Highlighted MaterialにはRedのマテリアルをドラック&ドロップで設定していきます。
次にスクリプトに戻りinitialize関数を編集します。
// initialize code called once per entity
Sphere.prototype.initialize = function() {
    this._sphere = new pc.BoundingSphere(this.entity.getPosition(), 0.5);
    this.sphereModel = this.entity.model;
    this.app.fire("ray-camera:add", this.entity, this._sphere);
    this.entity.on("sphere:select",this.onSelect, this);
    this.entity.on("sphere:unHover",this.unHover,this);
};
1行目でpc.BoundingSphereを設定します。引数はSphereの位置と、半径を設定しています。
this._sphere = new pc.BoundingSphere(this.entity.getPosition(), 0.5);
※pc.BoundingSphreについて:https://developer.playcanvas.com/en/api/pc.BoundingSphere.html
2行目でsphereのmodelを設定しています。これは後でマテリアルを変更する用です。
this.sphereModel = this.entity.model;
3行目は先ほどray-camera.jsで実装したaddItem関数を呼び出し、sphereの情報を送ります。
this.app.fire("ray-camera:add", this.entity, this._sphere);
4・5行目で先ほどと同じようにスクリプト間を行うための設定をします。
"sphere:select"でonSelect関数の呼び出し、sphere:unHoverでunHover関数を呼び出せるようにしています。
    this.entity.on("sphere:select",this.onSelect, this);
    this.entity.on("sphere:unHover",this.unHover,this);
これではエラーなのでonSelect関数とunHover関数を実装します。
onSelect関数
Sphere.prototype.onSelect = function(){
  this.sphereModel.materialAsset = this.sphereHighlightedMaterial;
};
選択されたらSphereのマテリアルを先ほど設定した
sphereHighlightedMaterialに設定します。
onHover関数
Sphere.prototype.unHover = function(){
  this.sphereModel.materialAsset = this.sphereIdMaterial;
};
これはonSelectと逆にsphereMaterialでデフォルトのマテリアルに戻します。
これでsphere.jsの実装は終わりです!
var Sphere = pc.createScript('sphere');
Sphere.attributes.add("sphereIdMaterial", {type:"asset", assetType:"material", title:"Sphere Id Material"});
Sphere.attributes.add("sphereHighlightedMaterial", {type:"asset", assetType:"material", title:"Sphere Highlighted Material"});

// initialize code called once per entity
Sphere.prototype.initialize = function() {
    this._sphere = new pc.BoundingSphere(this.entity.getPosition(), 0.5);
    this.sphereModel = this.entity.model;
    this.app.fire("ray-camera:add", this.entity, this._sphere);
    this.entity.on("sphere:select",this.onSelect, this);
    this.entity.on("sphere:unHover",this.unHover,this);
};

// update code called every frame
Sphere.prototype.update = function(dt) {

};

Sphere.prototype.onSelect = function(){
  this.sphereModel.materialAsset = this.sphereHighlightedMaterial;
};

Sphere.prototype.unHover = function(){
  this.sphereModel.materialAsset = this.sphereIdMaterial;
};
デバックで確認
すべてできたらLaunchして確認してみましょう!
もしできてなかったら、アタッチなどの問題があるかもしれません!

さいごに
PlayCanvasで簡易的な視線選択を作りました。
StarterKitにデフォルトで実装されているselector-camera.jsでは時間経過による選択も実装されています。
より複雑な処理をしたい場合はそちらを参考にするのがいいと思います!
プロジェクトファイルは公開しています!活用してみてください!
https://playcanvas.com/project/639567/overview/vrentry
参考サイト
・https://qiita.com/yushimatenjin/items/344d86b3d193e0a88567
・https://support.playcanvas.jp/hc/ja/articles/224182767
・https://developer.playcanvas.com/ja/user-manual/scripting/communication/
・https://developer.playcanvas.com/en/api/pc.Entity.html
・https://developer.playcanvas.com/en/api/pc.BoundingSphere.html
・https://developer.playcanvas.com/en/api/pc.Ray.html