はじめに
今回はGoogle App Scriptを使用して以下を実行するスクリプトを作ってみたいと思います。
- グループの作成
- 特定のリソースセットへの追加
プログラム専門というわけじゃないのでつたない部分はぬるい目で見ていただければと思います。
グローバル変数
const API_KEY        = "自分のAPIキーを指定";
const BASE_URL       = "https://{自分のサブドメインを指定}.okta.com/api/v1";
const RESOURCESET_ID = "{対象のリソースセットのIDを指定}";
const POST_ERROR     = "POST_ERROR";
const PATCH_ERROR    = "PATCH_ERROR";
POST_ERROR/PATCH_ERROR はエラー処理できたらいいなくらいで適当に値を入れてます。
RESOURCESET_ID を簡単に確認するには、対象のリソースセットを管理コンソールから Edit Resouirce Set し、ブラウザのURLを見てください。
末尾の黒塗りの部分がリソースセットのIDになっています。
main
const main =() =>{
  const groupId = createGroup("testrgoup");
  addResourceSet(groupId,RESOURCESET_ID);
};
今回は testgroup という名前でグループを作成します。
createGroup と addResourceSet はこの後記載するメソッドです。
createGroup
const createGroup = (groupName) => {

  const url = `${BASE_URL}/groups/`;

  const data = {
    "profile": {
      "name": groupName,
      "description": ""
    }
  };

  const groupId = JSON.parse(postToOkta(url,data).getContentText())["id"];
  console.log(groupId);
  return groupId;
};
引数で渡された名前のグループを作成し、作成したグループのIDを返すメソッドになっています。
addRecourceSet
const addResourceSet = (groupId,resourceSetId) => {

  const url = `${BASE_URL}/iam/resource-sets/${resourceSetId}/resources`

  const data = {
    "additions": [
      `${BASE_URL}/groups/${groupId}`
    ]
  };

  patchToOkta(url,data);
};
引数で与えられたリソースセットにグループを追加するメソッドになっています。
postToOkta/patchToOkta
個人的には、共通化できそうなメソッドは切り出しておきたい派なので別にしています。
const postToOkta = (url, data = {}) => {
  const params = {
    method: "post",
    headers: {
      "Authorization": `SSWS ${API_KEY}`,
      "Content-Type": "application/json",
      "Accept": "application/json",
    },
    payload: JSON.stringify(data),
    muteHttpExceptions: true
  };

  try {
    const response = UrlFetchApp.fetch(url, params);
    console.log("POST SUCCESS");
    console.log(response.getContentText());
    return response;
  } catch (e) {
    console.error("!!!!POST ERROR!!!!", e);
    return POST_ERROR;
  }
};
const patchToOkta = (url, data = {}) => {
  const params = {
    method: "patch",
    headers: {
      "Authorization": `SSWS ${API_KEY}`,
      "Content-Type": "application/json",
      "Accept": "application/json",
    },
    payload: JSON.stringify(data),
    muteHttpExceptions: true
  };

  try {
    const response = UrlFetchApp.fetch(url, params);
    console.log("PATCH SUCCESS");
    console.log(response.getContentText());
    return response;
  } catch (e) {
    console.error("!!!!PATCH ERROR!!!!", e);
    return PATCH_ERROR;
  }
};
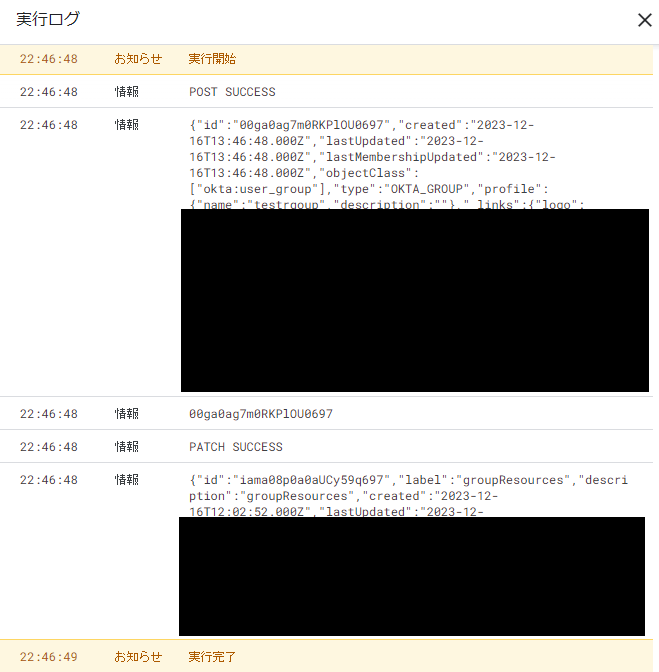
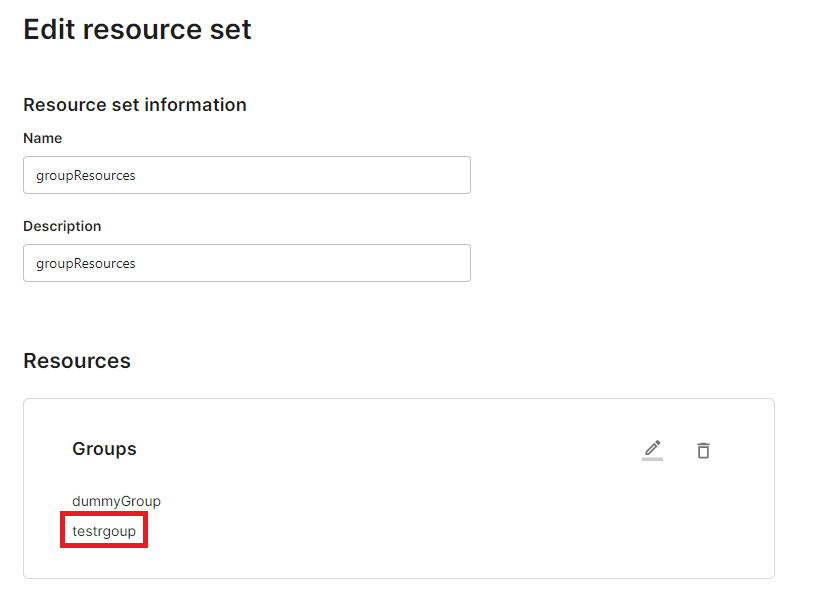
実行してみる
追加されました。
さいごに
プログラミングに全く触れていなかったのでちょっとやってみました。
リソースセットを使用した権限付与の方が、リソースを直接指定しての権限付与よりAPIでの管理がしやすいと思います。
とはいえ、前回も最後に少し書きましたが、リソース数が増えるほどGUIでポチポチはきつくなるのでAPIも触れるようになりたいですね。
今回はここまで。ありがとうございました。


