はじめに
今回は以前のプログラムを改変していますが、その際変数名なども細かく変えています。
- OpenCVで日本語フォントを描写する を関数化する
- OpenCVで日本語フォントを描写する を関数化する を汎用的にする
- OpenCVで透過画像を扱う ~スプライトを舞わせる~
- OpenCVでスプライトを回転させる
- OpenCVでスプライトを回転させる #2 ~cv2.warpAffine()を使いこなす~
- OpenCVでスプライトを回転させる #3 ~人任せにせず自分で計算せよ~ ←今ここ
目指す姿
往年のホビーパソコンのスプライト的な重ね合わせ関数について、
putSprite(back, front4, pos, angle=0, home=(0,0))
とする。表現はこれまでの記事とほとんど変わらないが、引数の意味するところを変更する。
- back 背景画像。RGB3チャンネル。
- front4 重ねたい前景画像。RGBAの4チャンネル。半透明は未対応。半透明って、あんま関心がわかないのよね。
- pos 前景画像の左上ではなく、homeで指定した原点の座標とする。
-
angle 回転角度。単位は度でデフォ値は
0。 -
home スプライトの表示および回転の原点。デフォ値は左上すなわち
(0,0)。
こっちのほうが使いやすいんじゃないかな、と。
基本プログラム
毎度毎度アニメーションさせるのも面倒なので、こんなのを作った。
import cv2
import numpy as np

def makeSampleImg(img4):
    h, w = img4.shape[:2]
    cv2.rectangle(img4, (0,0), (w-1,h-1), (0,0,255,255), 1)
    return img4

def putSprite(img_back, img_front, pos, angle=0, home=(0,0)):
    # さまざまな手法で実装し、最適なものを選ぶ。
    pass

def main():
    img_front = cv2.imread("uchuhikoushi.png", -1)
    img_front = makeSampleImg(img_front)
    img_back = cv2.imread("space.jpg", -1)
    pos = (100,80)
    home = (140,60)
    angle = 30

    # ここがメイン。必要に応じて関数名を変える
    img = putSprite(img_back.copy(), img_front, pos, angle, home)

    cv2.circle(img, pos, 5, (0,0,255), -1)  # 同じ座標(pos)に丸を描く
    cv2.imshow("rotation", img)
    cv2.waitKey(0)
    cv2.destroyAllWindows()

if __name__ == "__main__":
    main()
結果はこうなる。はず。
| 結果 |
|---|
 |
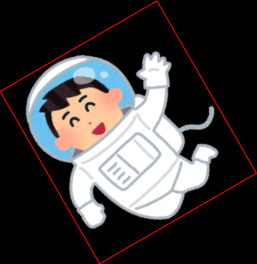
最小外接四角形を求める
「OpenCVでスプライトを回転させる」では回転した画像の左上座標を求めることができなかったが、その後なんとか算出することができた。わかっていたことだが、高校レベルの数学だった。
def putSprite_calc(back, front4, pos, angle=0, home=(0,0)):
    fh, fw = front4.shape[:2]
    bh, bw = back.shape[:2]
    x, y = pos
    xc, yc = home[0] - fw/2, home[1] - fh/2             # homeを左上基準から画像中央基準にする
    a = np.radians(angle)
    cos , sin = np.cos(a), np.sin(a)                    # この三角関数は何度も出るので変数にする
    w_rot = int(fw * abs(cos) + fh * abs(sin))
    h_rot = int(fw * abs(sin) + fh * abs(cos))
    M = cv2.getRotationMatrix2D((fw/2,fh/2), angle, 1)  # 画像中央で回転
    M[0][2] += w_rot/2 - fw/2
    M[1][2] += h_rot/2 - fh/2
    imgRot = cv2.warpAffine(front4, M, (w_rot,h_rot))   # 回転画像を含む外接四角形

    # 外接四角形の全体が背景画像外なら何もしない
    xc_rot = xc * cos + yc * sin                        # 画像中央で回転した際の移動量
    yc_rot = -xc * sin + yc * cos
    x0 = int(x - xc_rot - w_rot / 2)                    # 外接四角形の左上座標
    y0 = int(y - yc_rot - h_rot / 2)
    if not ((-w_rot < x0 < bw) and (-h_rot < y0 < bh)) :
        return back

    # 外接四角形のうち、背景画像内のみを取得する
    x1, y1 = max(x0,  0), max(y0,  0)
    x2, y2 = min(x0 + w_rot, bw), min(y0 + h_rot, bh)
    imgRot = imgRot[y1-y0:y2-y0, x1-x0:x2-x0]

    # マスク手法で外接四角形と背景を合成する
    result = back.copy()
    front = imgRot[:, :, :3]
    mask1 = imgRot[:, :, 3]
    mask = 255 - cv2.merge((mask1, mask1, mask1))
    roi = result[y1:y2, x1:x2]
    tmp = cv2.bitwise_and(roi, mask)
    tmp = cv2.bitwise_or(tmp, front)
    result[y1:y2, x1:x2] = tmp
    return result
| imgRot |
|---|
 |
正方形ROIの改変
「OpenCVでスプライトを回転させる」では結局既知の寸法関係を使った無駄に大きな正方形を使った。
このときの関数を、今回の仕様に改変する。
def putSprite_mask2(back, front4, pos, angle=0, home=(0,0)):
    fh, fw = front4.shape[:2]
    bh, bw = back.shape[:2]
    x, y = pos
    xc, yc = home

    # 回転中心と四隅の距離の最大値を求める
    pts = np.array([(0,0), (fw,0), (fw,fh), (0,fh)])
    ctr = np.array([(xc,yc)])
    r = int(np.sqrt(max(np.sum((pts-ctr)**2, axis=1))))

    # 回転画像を含む正方形
    M = cv2.getRotationMatrix2D((xc,yc), angle, 1)      # homeで回転
    M[0][2] += r - xc
    M[1][2] += r - yc
    imgRot = cv2.warpAffine(front4, M, (2*r,2*r))       # 回転画像を含む正方形

    # 四角形の全体が背景画像外なら何もしない
    x0, y0 = x-r, y-r
    if not ((-2*r < x0 < bw) and (-2*r < y0 < bh)) :
        return back

    # 四角形のうち、背景画像内のみを取得する
    x1, y1 = max(x0,  0), max(y0,  0)
    x2, y2 = min(x0+2*r, bw), min(y0+2*r, bh)
    imgRot = imgRot[y1-y0:y2-y0, x1-x0:x2-x0]

    # マスク手法で外接四角形と背景を合成する
    result = back.copy()
    front = imgRot[:, :, :3]
    mask1 = imgRot[:, :, 3]
    mask = 255 - cv2.merge((mask1, mask1, mask1))
    roi = result[y1:y2, x1:x2]
    tmp = cv2.bitwise_and(roi, mask)
    tmp = cv2.bitwise_or(tmp, front)
    result[y1:y2, x1:x2] = tmp
    return result
| imgRot |
|---|
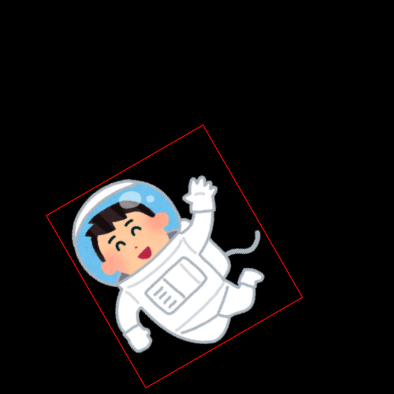 |
正方形ROIの最小化
この無駄に大きな正方形から最小の外接四角形を得るのに数学的にではなくプログラム的に対策できないかといろいろググっていたら、まさしく求めている記事を見つけた。
numpyの2次元配列の非ゼロ領域を囲む四角形の情報を取得する方法について理解する(Kei Minagawa's Blog)
図形の問題が最後まで解けなかったらこちらのお世話になるつもりだった。
| imgRot | 最小化 |
|---|---|
|
|
cv2.warpAffine()によるスプライト関数の改変
「OpenCVでスプライトを回転させる #2 ~cv2.warpAffine()を使いこなす~」のプログラムも修正しておこう。
回転途中の画像サイズは背景画像のそれに等しいので大きな背景画像の上に小さいスプライトを多数置こうとするととたんに実行スピードが落ちるであろう。
| imgRot |
|---|
 |
def putSprite_Affine2(back, front4, pos, angle=0, home=(0,0)):
    x, y = pos
    xc, yc = home
    front3 = front4[:, :, :3]
    mask1 =  front4[:, :, 3]
    mask3 = 255- cv2.merge((mask1, mask1, mask1))
    bh, bw = back.shape[:2]

    M = cv2.getRotationMatrix2D(home, angle, 1)
    M[0][2] += x - xc  # 変化点はposの定義を変えたここだけ。
    M[1][2] += y - yc  # 余計な計算がいらないことがcv2.warpAffine()の強み。
    front_rot = cv2.warpAffine(front3, M, (bw,bh))
    mask_rot = cv2.warpAffine(mask3, M, (bw,bh), borderValue=(255,255,255))
    tmp = cv2.bitwise_and(back, mask_rot)
    result = cv2.bitwise_or(tmp, front_rot)
    return result
実行速度比較
OpenCVで透過画像を扱う ~スプライトを舞わせる~で作った比較プログラムに回転要素を追加して実行してみる。
import cv2
import numpy as np
import time

# def makeSampleImg(img4)は不要

def putSprite_calc(back, front4, pos, angle=0, home=(0,0)):
    # 上で挙げたやつ

def putSprite_mask2(back, front4, pos, angle=0, home=(0,0)):
    # 上で挙げたやつ

def putSprite_Affine2(back, front4, pos, angle=0, home=(0,0)):
    # 上で挙げたやつ

def main(func):
    filename_back = "space.jpg"
    filename_front = "uchuhikoushi.png"
    img_back = cv2.imread(filename_back)
    img_front = cv2.imread(filename_front, -1)
    bh, bw = img_back.shape[:2]
    xc, yc = bw//2, bh//2
    rx, ry = bw*0.3, bh*0.4
    home = (140,60)
    cv2.putText(img_back, func, (20,bh-20), cv2.FONT_HERSHEY_SIMPLEX, 1, (255,255,255))

    ### 時間を計るのはここから
    start_time = time.time()

    for angle in range(-180, 180, 10):
        back = img_back.copy()
        x = int(xc + rx * np.cos(np.radians(angle)))
        y = int(yc + ry * np.sin(np.radians(angle)))
        img = eval(func)(img_back, img_front, (x,y), angle=angle, home=home)

        #ここは必要に応じて有効にしたり無効にしたりする
        #cv2.imshow(func, img)
        #cv2.waitKey(1)

    elasped_time = time.time() - start_time
    ### ここまで

    print (f"{func} : {elasped_time} sec")
    cv2.destroyAllWindows()


if __name__ == "__main__":
    funcs = ["putSprite_calc",
             "putSprite_mask2",
             "putSprite_Affine2" ]
    for func in funcs:
        for i in range(10):
            main(func)
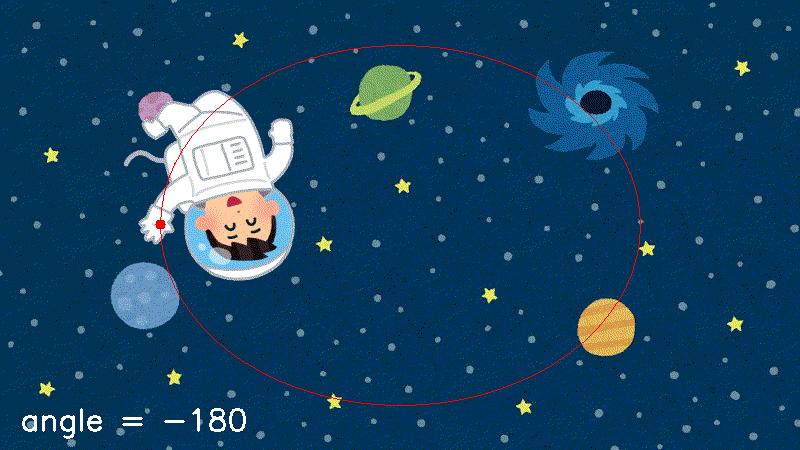
作られるアニメーションは、わかりやすくするためいろいろ要素追加しているがおおよそ下のようになる。
| 結果 |
|---|
 |
その処理にかかる時間は私の環境ではこう。
putSprite_calc    : 0.12500691413879395 sec
putSprite_mask2   : 0.27501583099365234 sec
putSprite_Affine2 : 0.5620322227478027 sec
わかっていたことだが、ROIの面積が小さいほど実行速度が速い。
ROIの大きさは縦×横×RGB3チャンネルの計算量に直結しているので、OpenCVがうまいことやってくれるからといって無駄に大きなROIを使うとたちまち遅くなってしまうわけだ。
終わりに
せっかくここまで作ったのだからゲームを作りたくなったぞ。いいかげんディープラーニングの勉強もしなくてはいけないのだが。
無理矢理ディープラーニングに関連付けるのなら、ディープラーニングをぶん回す際もサイズをいい具合に小さくすることで計算量を少なくすることができるであろう。