introduction
久しぶりにモノづくりをする事に決めた。作るものは遠隔で起動できるデバイス。
遠隔と言えばESP32とかのWiFiが使われがちだが、今回はLTEを試してみる。
WiFiは今まで散々試してきたので今まで使ったことのない物を使ってみたかった。
ただ、試してみると言っても自分はボードも知識も無いので、NEXTSTEP様に相談した所、LTE接続用のボードを貸してくださった。(NEXTSTEP様ありがとうございます!)
すでにQiita記事も記載があるので超助かる。神。
LTE-Mモジュール SIM7080G を Raspberry Pi pico でコントロール
システムの要件
システムに求めるのは下記要件
- サイトからデバイスに指示を出す(随時)
- デバイスは指示を取得してアクションを行う(5分程度の定期間隔)
上記以外は極力求めない。と言うか積極的に妥協する。
Facebookの偉い人がよく言うアレだ。
RaspberryPi Pico + LTEボードを使う
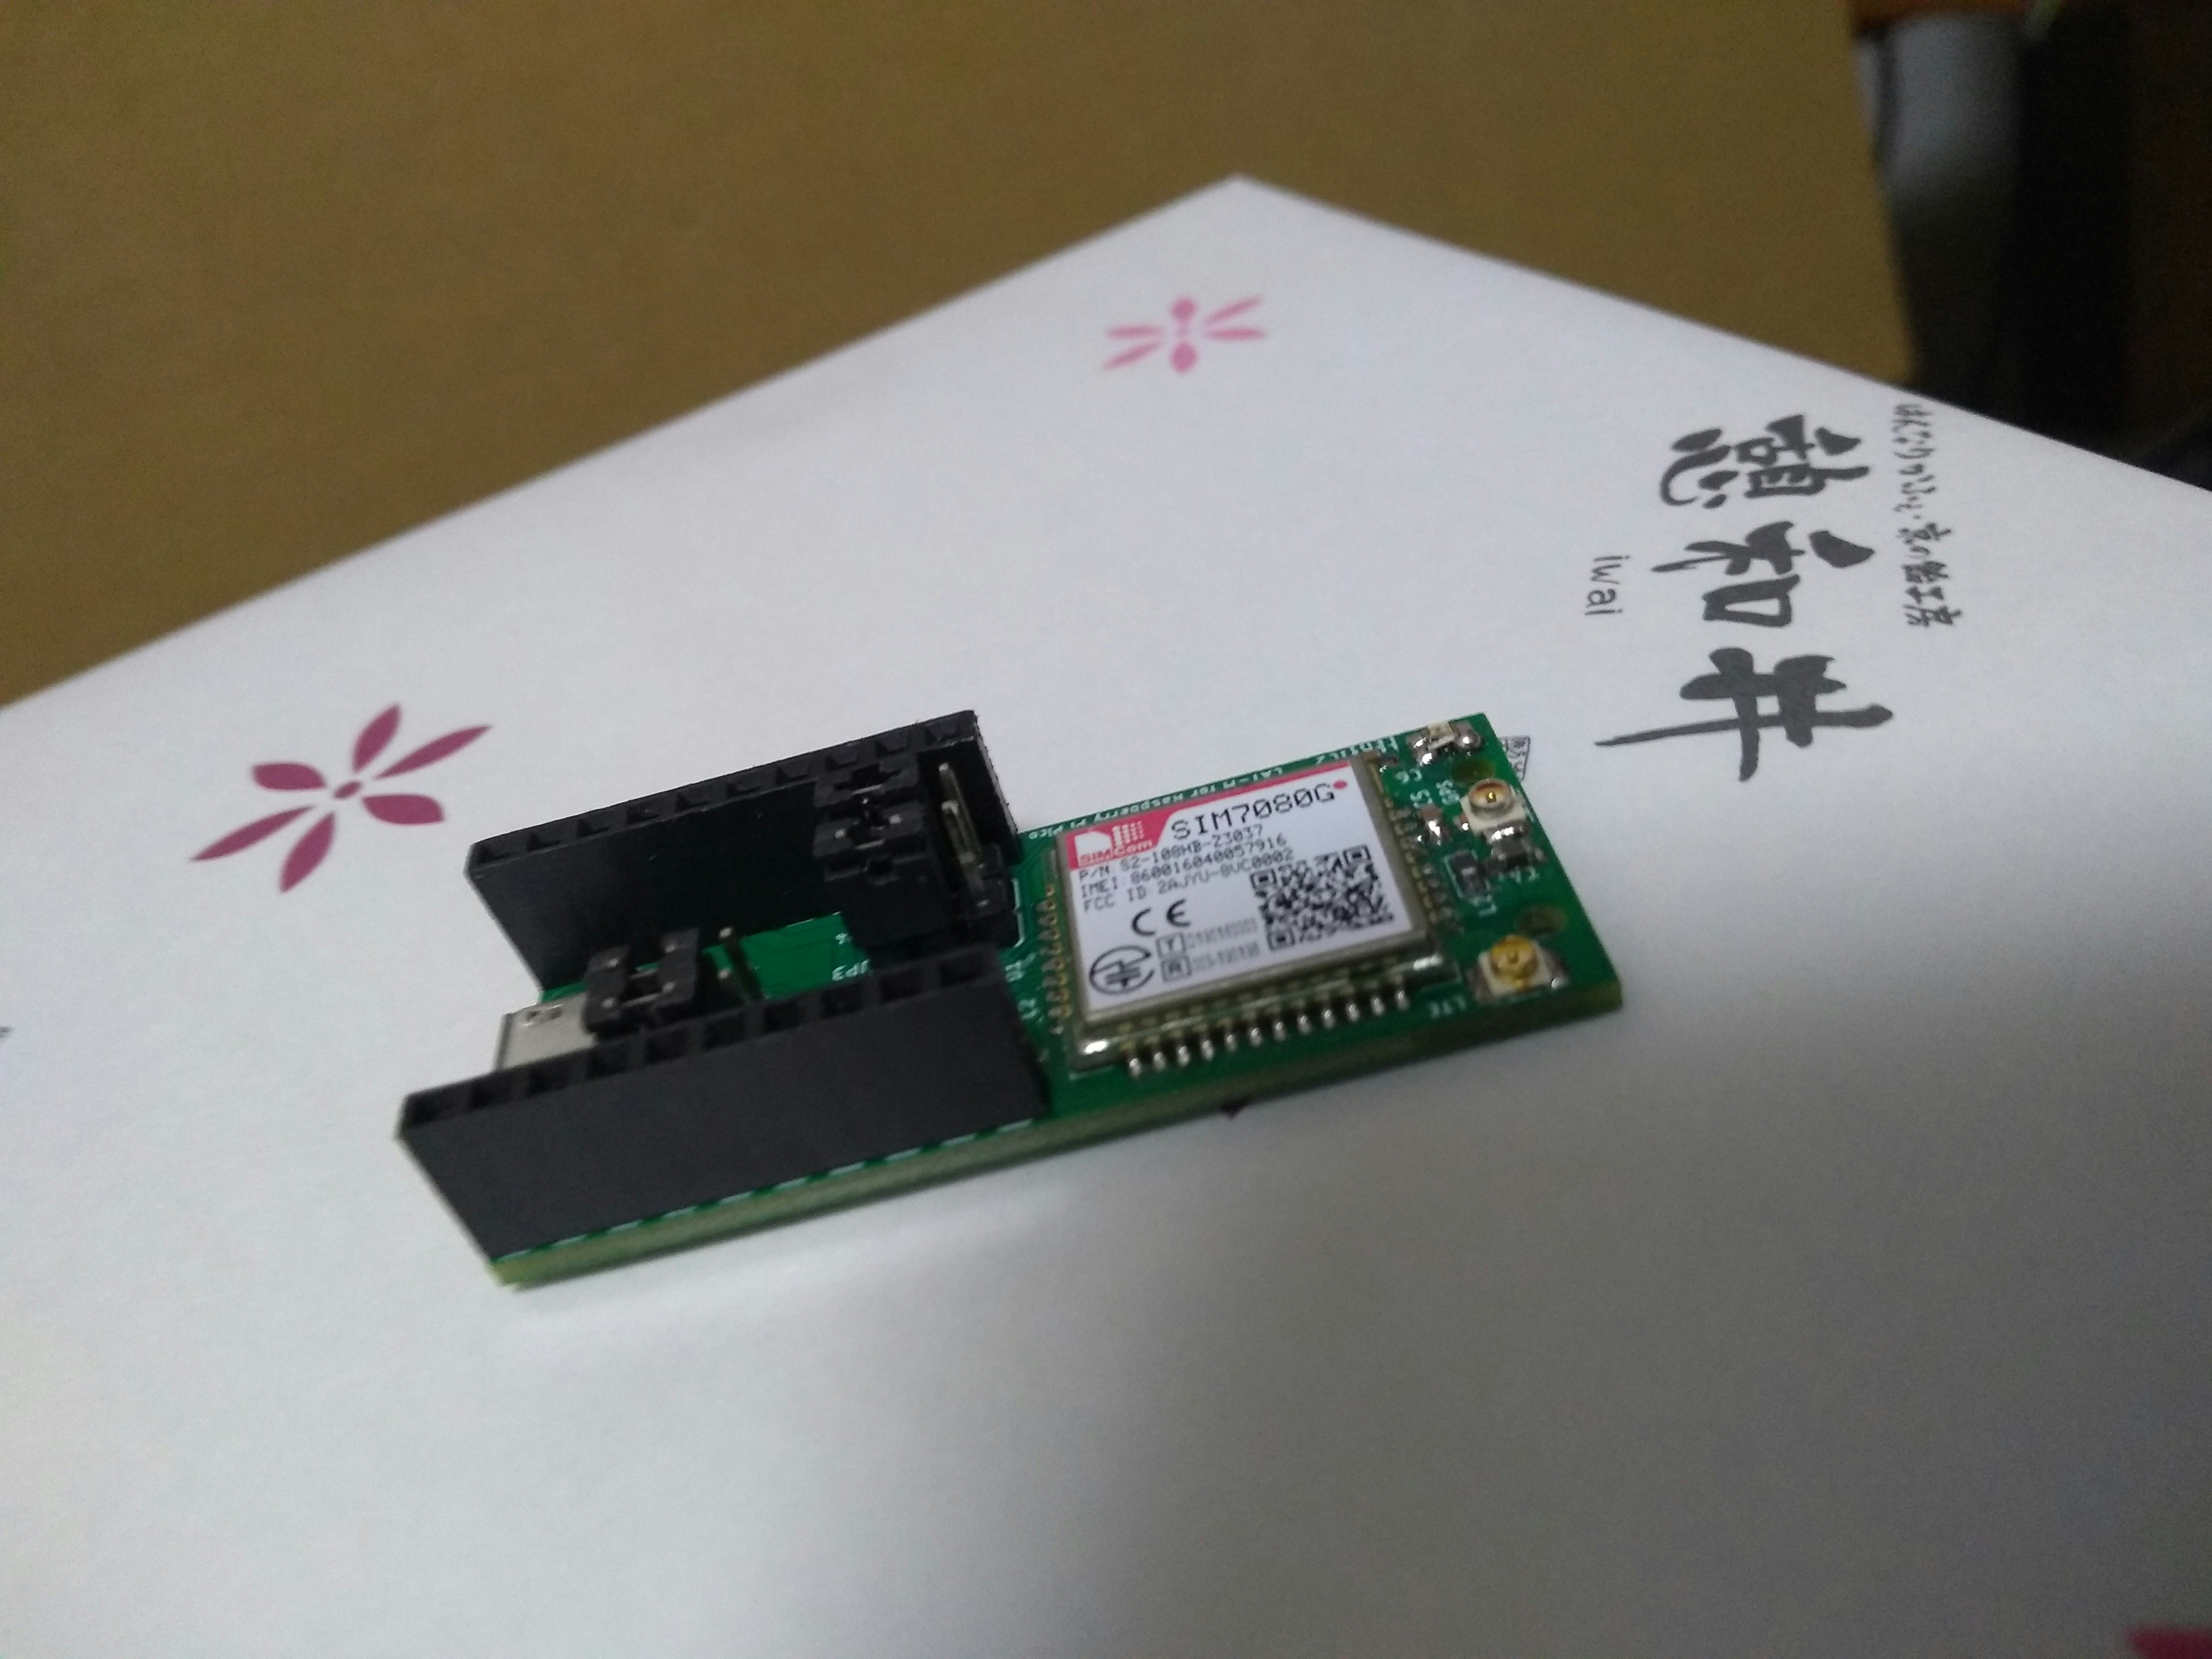
今回お借りしたのはこのボード
キレイに写真撮ろうとしたら、お菓子の箱しか手元になかった。
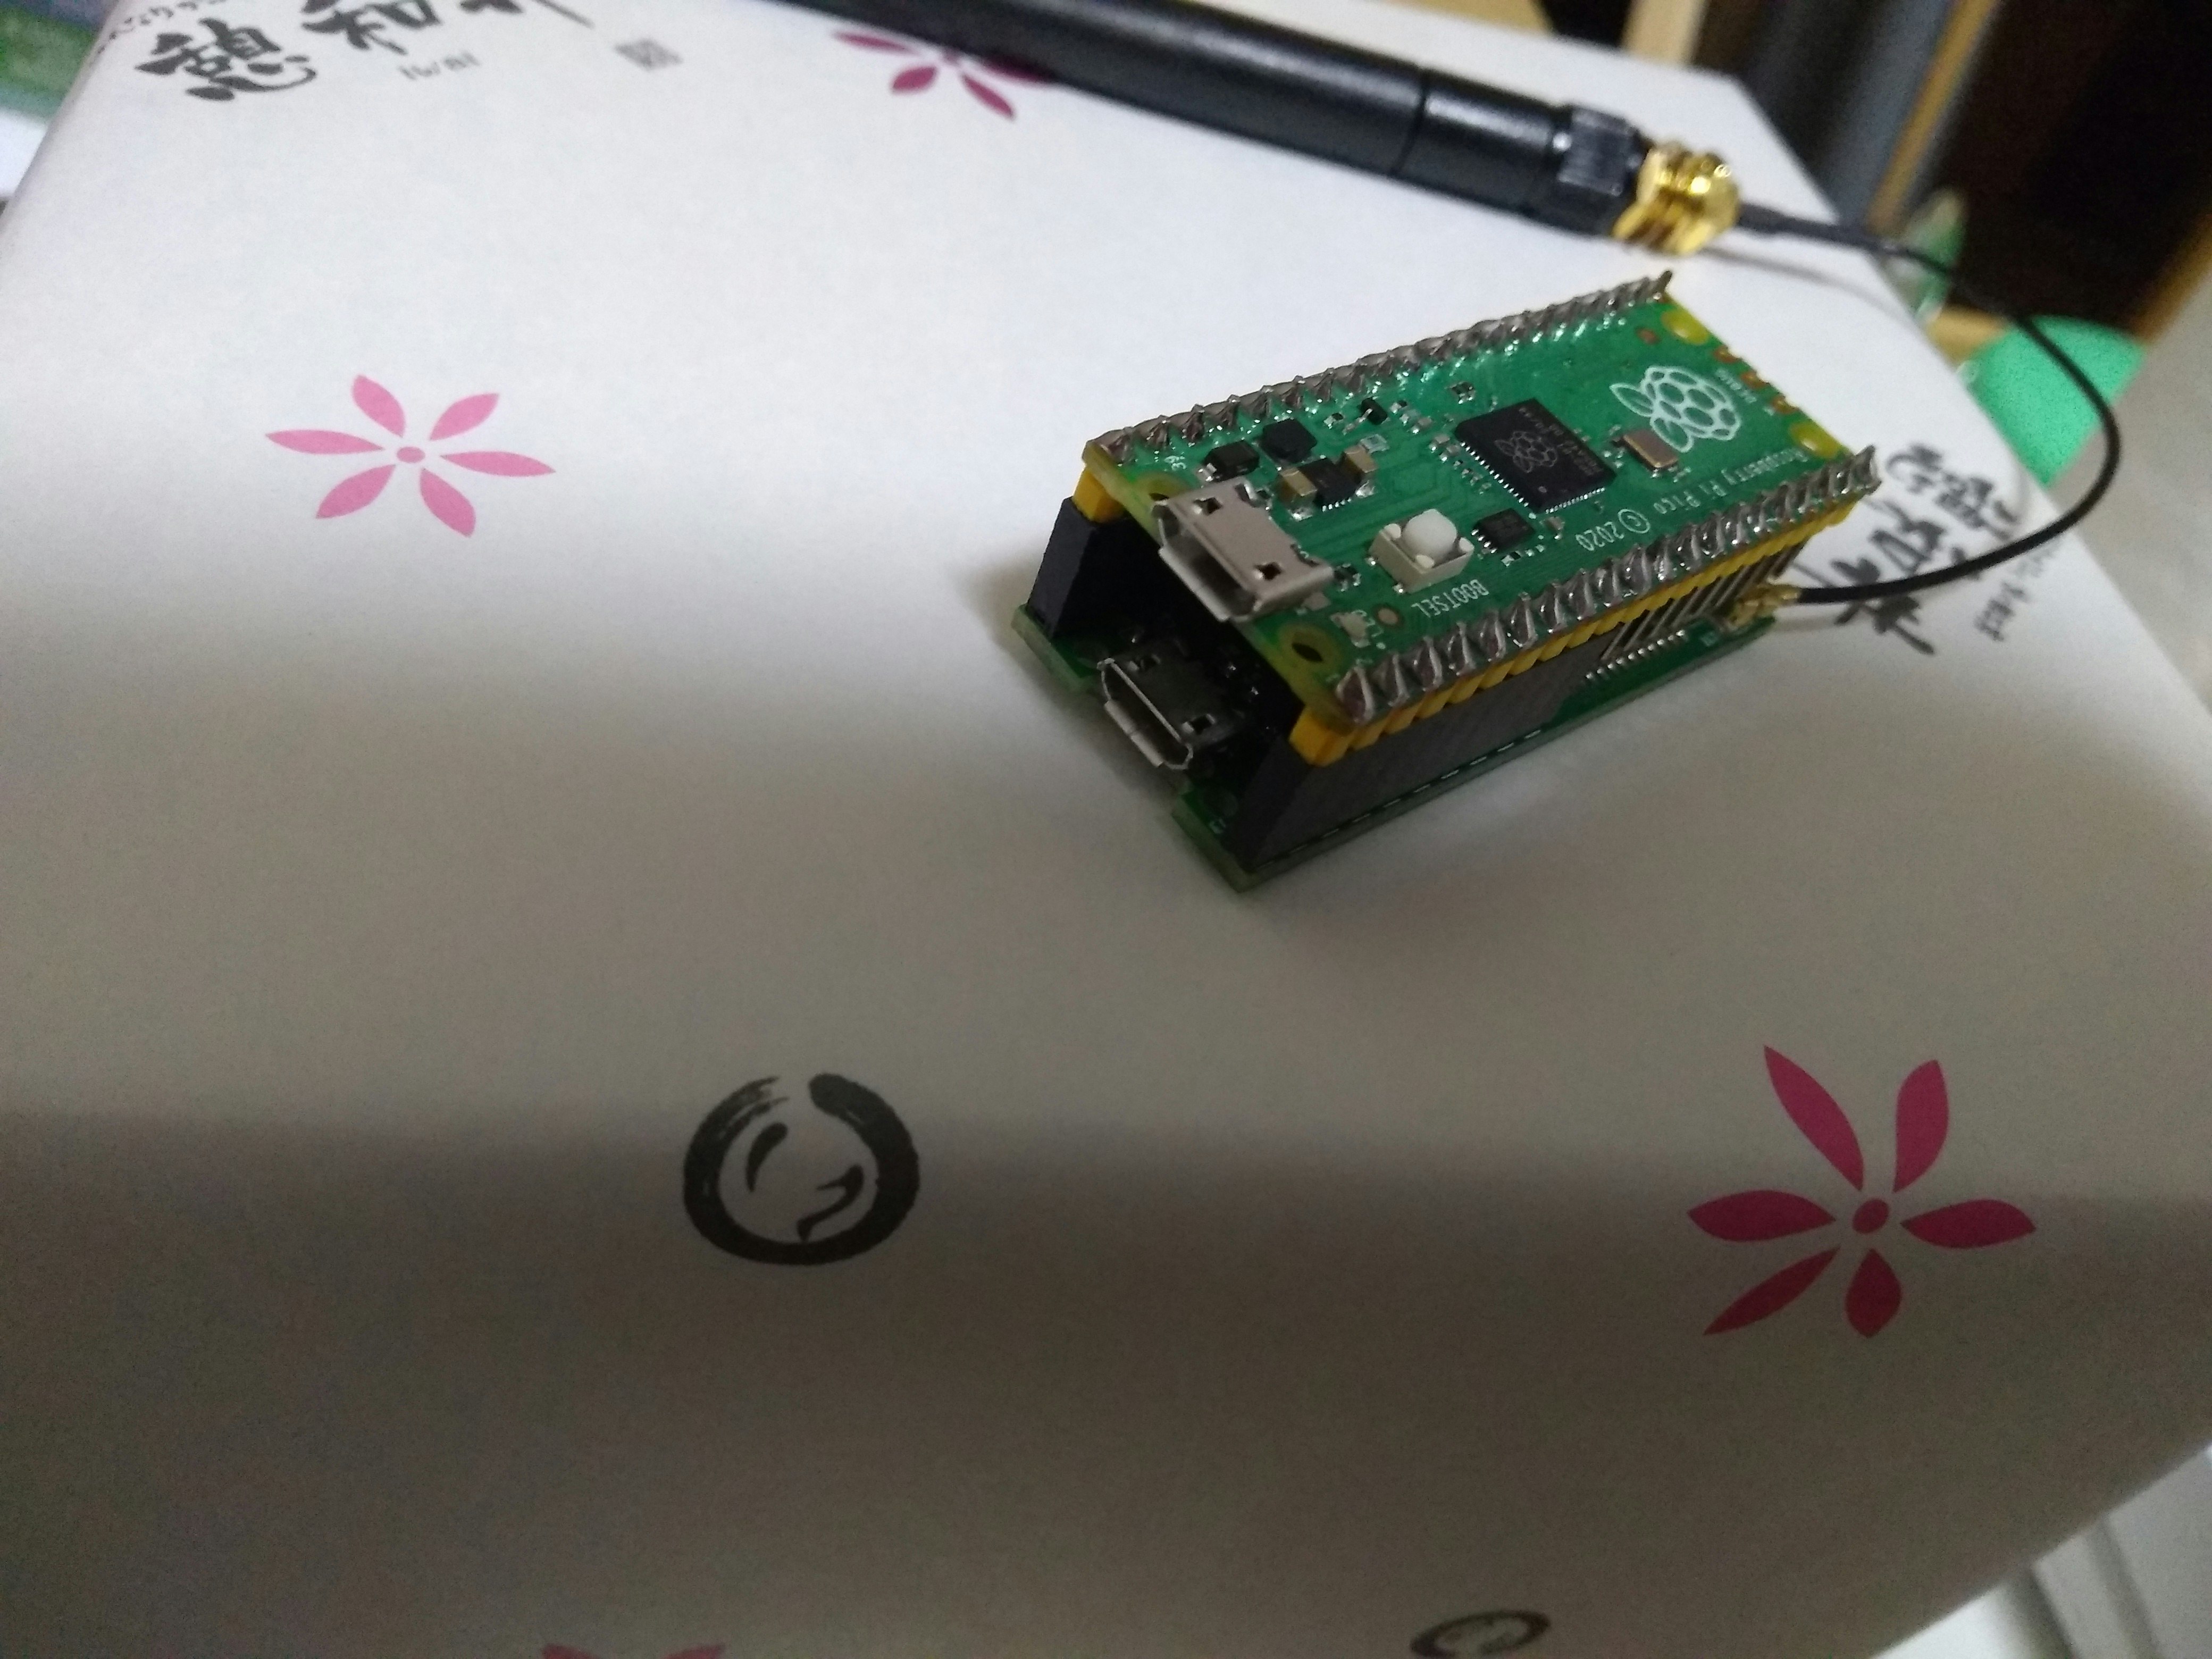
こんな感じでドッキングさせて利用する。
お菓子の箱。
LTEボード自体の使い方はLTEボードの動作確認を参照。ATコマンドで動作確認が取れる。
ATコマンドの詳細はTinyGSMを参照。
この超すごいボードが何をしてくれるかと言うと、RaspberryPi Picoと接続した場合にこんな感じでLTE接続を行ってくれる。
LTE-Mモジュール SIM7080G を Raspberry Pi pico でコントロールを参考に動作確認する。コードもそのまま使う。
Picoの環境設定は550円の「Raspberry Pi Pico」でIoT その2:Arduino IDEを動かすを参考にして欲しい。
ボードの設定が終わったら、SORACOM レシピ:IoTで外部データを表示する情報端末を参考にGSM,ArduinoHttpClient,ArduinoJsonライブラリをインストールする。
ライブラリが存在しない場合は下記の様に"TinyGsmClient.h: No such file or directory"の様なヘッダーが無い旨のエラーが出る。
Raspberry Pi PicoをUSBケーブルでつなぎ、BOOTSELボタンを回押す。Arduino StudioからVerify -> Upload。
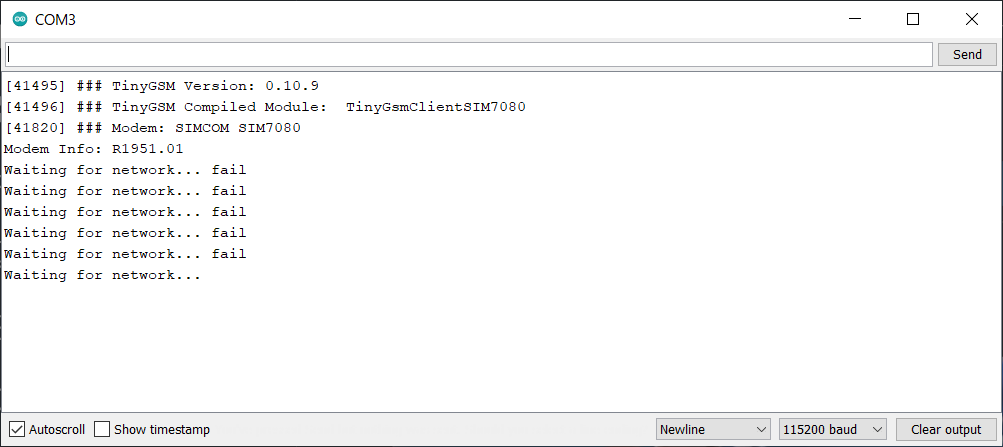
書き込みが成功したら、再度USBを接続し直してTools -> Serial Monitorで動作を確認する。
後々わかるのだが、APNを謝っていた為に接続できていない。
WebApp側を組み込む
Firebaseでプロジェクトを作成する。下記の様な感じで連携させる。
WebApp側でやりたい事は下記2つ
- デバイスのリスト表示
- ステータスの更新アクション(紛失、回収)
Realtime Databaseに保存する構成は下記の通り
- ルート要素:
morotomo- デバイス毎のID
| column | description |
|---|---|
| name | ユーザーが見る為のデバイス名 |
| status | 正常・異常を表すステータス |
| voltage | デバイスの電源電圧 |
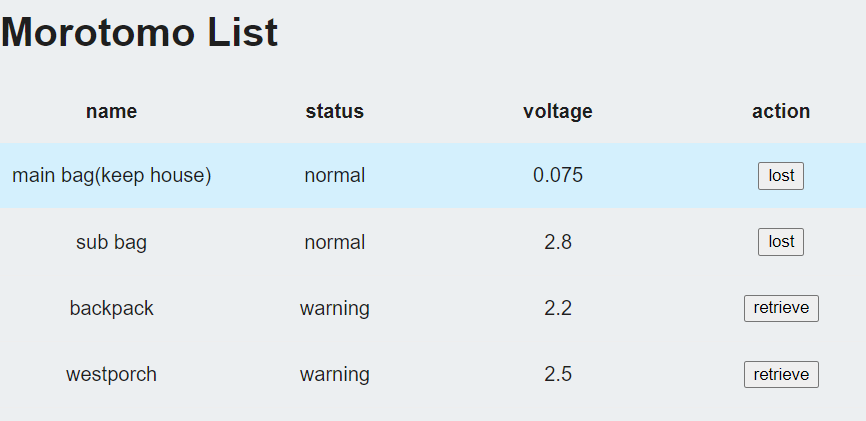
UIはとりあえず一覧で出す
functionsではリスト表示用のデータ取得とステータス更新用の2つを定義。
functions
export const getAllMorotomo = functions.https.onCall((data, context) =>{
  const ref = database.ref("morotomo");
  return ref.once("value").then((snapshot) => {
    const data = snapshot.val();
    const morotomolist = Object.entries(data).map(([key, value]) => ({
      id: key,
      data: value,
    }));
    console.log(JSON.stringify(morotomolist));
    return morotomolist;
  });
});

export const setStatus = functions.https.onCall((data, context) =>{
  const id = data.id;
  const status = data.status;
  database.ref("morotomo/" + id + "/status").set(status);
  const response = {
    data: {
      succeed: true,
    },
  };
  return response;
});
Device側I/Fを組み込む
先ほどと同じくFirebase functionsで実装する。以下のような感じで連携させる。
元来Pub/Subでやろうとしたのだが、どうにもならなかったのであきらめた。
デバイス側がやりたい事は下記2つ。
- ステータスの取得(正常、紛失中)
- 電源電圧の更新
functions
export const setVoltage = functions.https.onRequest((request, response) => {
  cors(request, response, () => {
    const id = request.body.id;
    const voltage = request.body.voltage;
    database.ref("morotomo/" + id + "/voltage").set(voltage);
    const result = {
      data: {
        succeed: true,
      },
    };
    response.send(result);
  });
});

export const getStatus = functions.https.onRequest((request, response) => {
  cors(request, response, () => {
    console.log("getStatus: request.body: ", request.body);
    const id = request.body.id;
    const ref = database.ref("morotomo/" + id + "/status");
    return ref.once("value").then((snapshot) => {
      const status = snapshot.val();
      const result = {
        id: id,
        status: status,
      };
      console.log(JSON.stringify(result));
      response.send(result);
    });
  });
});
Device用のスケッチ
Arduino Studio -> File -> Example -> TinyGSM -> HttpClientを参考にスケッチする。
HttpsClientを参考にしたが、なぜかノータイムでタイムアウトが返ってきたので諦めてHttp接続にした。
morotomo_device.ino
# define TINY_GSM_MODEM_SIM7080

// Set serial for debug console (to the Serial Monitor, default speed 115200)
# define SerialMon Serial

// Set serial for AT commands (to the module)
// Use Hardware Serial on Mega, Leonardo, Micro
# ifndef __AVR_ATmega328P__
# define SerialAT Serial1

// or Software Serial on Uno, Nano
# else
# include <SoftwareSerial.h>
SoftwareSerial SerialAT(2, 3);  // RX, TX
# endif

// Increase RX buffer to capture the entire response
// Chips without internal buffering (A6/A7, ESP8266, M590)
// need enough space in the buffer for the entire response
// else data will be lost (and the http library will fail).
# if !defined(TINY_GSM_RX_BUFFER)
# define TINY_GSM_RX_BUFFER 650
# endif

// See all AT commands, if wanted
// #define DUMP_AT_COMMANDS

// Define the serial console for debug prints, if needed
# define TINY_GSM_DEBUG SerialMon
// #define LOGGING  // <- Logging is for the HTTP library

// Range to attempt to autobaud
// NOTE:  DO NOT AUTOBAUD in production code.  Once you've established
// communication, set a fixed baud rate using modem.setBaud(#).
# define GSM_AUTOBAUD_MIN 9600
# define GSM_AUTOBAUD_MAX 115200

// Add a reception delay, if needed.
// This may be needed for a fast processor at a slow baud rate.
// #define TINY_GSM_YIELD() { delay(2); }

// Define how you're planning to connect to the internet
// These defines are only for this example; they are not needed in other code.
# define TINY_GSM_USE_GPRS true
# define TINY_GSM_MODEM_HAS_GPRS true

// set GSM PIN, if any
# define GSM_PIN ""


// Your GPRS credentials, if any
const char apn[]      = "";
const char gprsUser[] = "";
const char gprsPass[] = "";

// Firebase FunctionsのIF
const char server[]   = "us-central1-xxxxxx.cloudfunctions.net";
const char statusResource[] = "/getStatus";
const char voltageResource[] = "/setVoltage";
const char deviceId[] = "00001";
// not 443
const int  port       = 80;


# include <TinyGsmClient.h>
# include <ArduinoHttpClient.h>
# include <ArduinoJson.h>

# ifdef DUMP_AT_COMMANDS
# include <StreamDebugger.h>
StreamDebugger debugger(SerialAT, SerialMon);
TinyGsm        modem(debugger);
# else
TinyGsm        modem(SerialAT);
# endif

# define PIN_SERIAL1_TX (0u)
# define PIN_SERIAL1_RX (1u)
# define PWKEY 2

void setup() {
  // Set console baud rate
  SerialMon.begin(115200);
  delay(10);

  // !!!!!!!!!!!
  // Set your reset, enable, power pins here
  pinMode(PWKEY, OUTPUT);
  digitalWrite(PWKEY, HIGH);   // turn the LED on (HIGH is the voltage level)
  delay(2000);                       // wait for a second
  digitalWrite(PWKEY, LOW);    // turn the LED off by making the voltage LOW
  // !!!!!!!!!!!

  SerialMon.println("Wait...");

  // Set GSM module baud rate
  TinyGsmAutoBaud(SerialAT, GSM_AUTOBAUD_MIN, GSM_AUTOBAUD_MAX);
  // SerialAT.begin(9600);
  delay(6000);

  SerialMon.println("Miyata Version: 1.0.3");
  SerialMon.println("finish setup.");
}

void loop() {

  // Restart takes quite some time
  // To skip it, call init() instead of restart()
  SerialMon.println("Initializing modem...");
  modem.restart();
  // modem.init();

  String modemInfo = modem.getModemInfo();
  SerialMon.print("Modem Info: ");
  SerialMon.println(modemInfo);

  // Unlock your SIM card with a PIN if needed
  if (GSM_PIN && modem.getSimStatus() != 3) { modem.simUnlock(GSM_PIN); }

  SerialMon.print("Waiting for network...");
  if (!modem.waitForNetwork()) {
    SerialMon.println(" fail");
    delay(10000);
    return;
  }
  SerialMon.println(" success");

  if (modem.isNetworkConnected()) { SerialMon.println("Network connected"); }

  // GPRS connection parameters are usually set after network registration
  SerialMon.print(F("Connecting to "));
  SerialMon.print(apn);
  if (!modem.gprsConnect(apn, gprsUser, gprsPass)) {
    SerialMon.println(" fail");
    delay(10000);
    return;
  }
  SerialMon.println(" success");

  if (modem.isGprsConnected()) { SerialMon.println("GPRS connected"); }

  TinyGsmClient client(modem);
  HttpClient httpDeviceStatus(client, server, port);
  if (getDeviceStatus(httpDeviceStatus) != 0) {
    // action
  }
  httpDeviceStatus.stop();

  // send device voltage
  HttpClient httpVoltage(client, server, port);
  sendVoltage(httpVoltage);
  httpVoltage.stop();


# if TINY_GSM_USE_WIFI
  modem.networkDisconnect();
  SerialMon.println(F("WiFi disconnected"));
# endif
# if TINY_GSM_USE_GPRS
  modem.gprsDisconnect();
  SerialMon.println(F("GPRS disconnected"));
# endif

  // Do nothing forevermore
  delay(1000);
}

int getDeviceStatus(HttpClient http) {
  SerialMon.println(F("getDeviceStatus() - start"));
  char requestJsonBuff[256];
  strcpy(requestJsonBuff, "{ \"id\": \"");
  strcat(requestJsonBuff, deviceId);
  strcat(requestJsonBuff, "\"}");

  SerialMon.println(F("getDeviceStatus() - start post method"));
  http.post(statusResource, "application/json", requestJsonBuff);
  SerialMon.print(F("getDeviceStatus() - Response status code: "));
  int status = http.responseStatusCode();
  SerialMon.println(status);
  if (status < 200 || status > 299) {
    return 0;
  }
  String body = http.responseBody();
  DynamicJsonDocument doc(256);
  deserializeJson(doc, body);
  const char* deviceStatus = doc["status"];

  SerialMon.print(F("getDeviceStatus() - device status: "));
  SerialMon.println(deviceStatus);
  if(strcmp(deviceStatus, "warning") == 0) {
    return 1;
  }
  return 0;
}

void sendVoltage(HttpClient http) {
  SerialMon.println(F("sendVoltage() - start"));
  // GPIO29(A3)
  // TODO 計算ミスってるけど気にしない
  float voltage = 3 * analogRead(29) * 3.3 / 65536;
  String voltageString = String(voltage, 3);
  char voltageCharArray[256];
  voltageString.toCharArray(voltageCharArray, 256);

  char requestJsonBuff[256];
  strcpy(requestJsonBuff, "{ \"id\": \"");
  strcat(requestJsonBuff, deviceId);
  strcat(requestJsonBuff, "\", \"voltage\": ");
  strcat(requestJsonBuff, voltageCharArray);
  strcat(requestJsonBuff, "}");

  SerialMon.println(F("sendVoltage() - start post method"));
  http.post(voltageResource, "application/json", requestJsonBuff);

  SerialMon.print(F("getDeviceStatus() - Response status code: "));
  int status = http.responseStatusCode();
  SerialMon.println(status);
}
Raspberry Pi Picoに書き込んでFirebase Functionsが呼び出せている事と確認する。
尚、GSMへ接続自体が上手くいかない場合は、LTEボードの動作確認を参考にして、LTEボード自体にATコマンドを叩いてpingが通るかを確認する。
注意: LTEボードはラズパイとは別でシリアルを持っているので、直接USBを刺して確認する。
失敗したアプローチ
GCPのPub/Subと連動
Google Cloud IoT Arduinoを利用してPub/Subしようとしたが、WiFiClientSecure.hが見つからないといういかにも初歩的なエラーで時間とられたので諦めた。
連動させられるんだったらこれが王道だと思う。
用意したfunctions
export const subscribeVoltage =
functions.pubsub.topic(mqttVoltageTopic).onPublish((message) => {
  const id = message.json.id;
  const voltage = message.json.voltage;
  database.ref("morotomo/" + id + "/voltage").set(voltage);
  return 0;
});

export const subscribeStatus =
functions.pubsub.topic(mqttStatusTopic).onPublish((message) => {
  const command = message.json.command;
  if (command !== "query") {
    return;
  }
  const id = message.json.id;
  database.ref("morotomo/" + id + "/").once("value")
      .then((snapshot) => {
        const morotomodata = snapshot.val();
        const status = Object.entries(morotomodata)
            .filter(([key, value]) => {
              return key === "status";
            })[1];
        const publishMessage = JSON.stringify({
          id: id,
          command: "query-result",
          status: status,
        });
        const client = mqtt.connect(mqttBroker);
        client.on("connect", () => {
          client.publish(mqttStatusTopic, publishMessage, {}, (err) => {
            if (err) {
              console.log("mqtt publish error: " + err.message);
            }
            client.end();
          });
        });
      });
  return 0;
});
ふりかえり
久々にモノづくり魂に火が付いたものの環境回りで時間を取られる事が多かった。
たまにでも良いので手を動かさないとダメだなーと思った。
LTE初体験だったので、つながらないのが正常なのかどうかがはっきりしなかった。
これからは自身を持ってWiFiから脱却できそう。
コロナのせいで勉強会がオンラインになり、モノづくり系の相談が非常に難しくなった気がしてたけど、
運よく緊急事態宣言が終わったので無事に相談できるようになった。
やっぱ頼れる先があるのはありがたい。


