概要
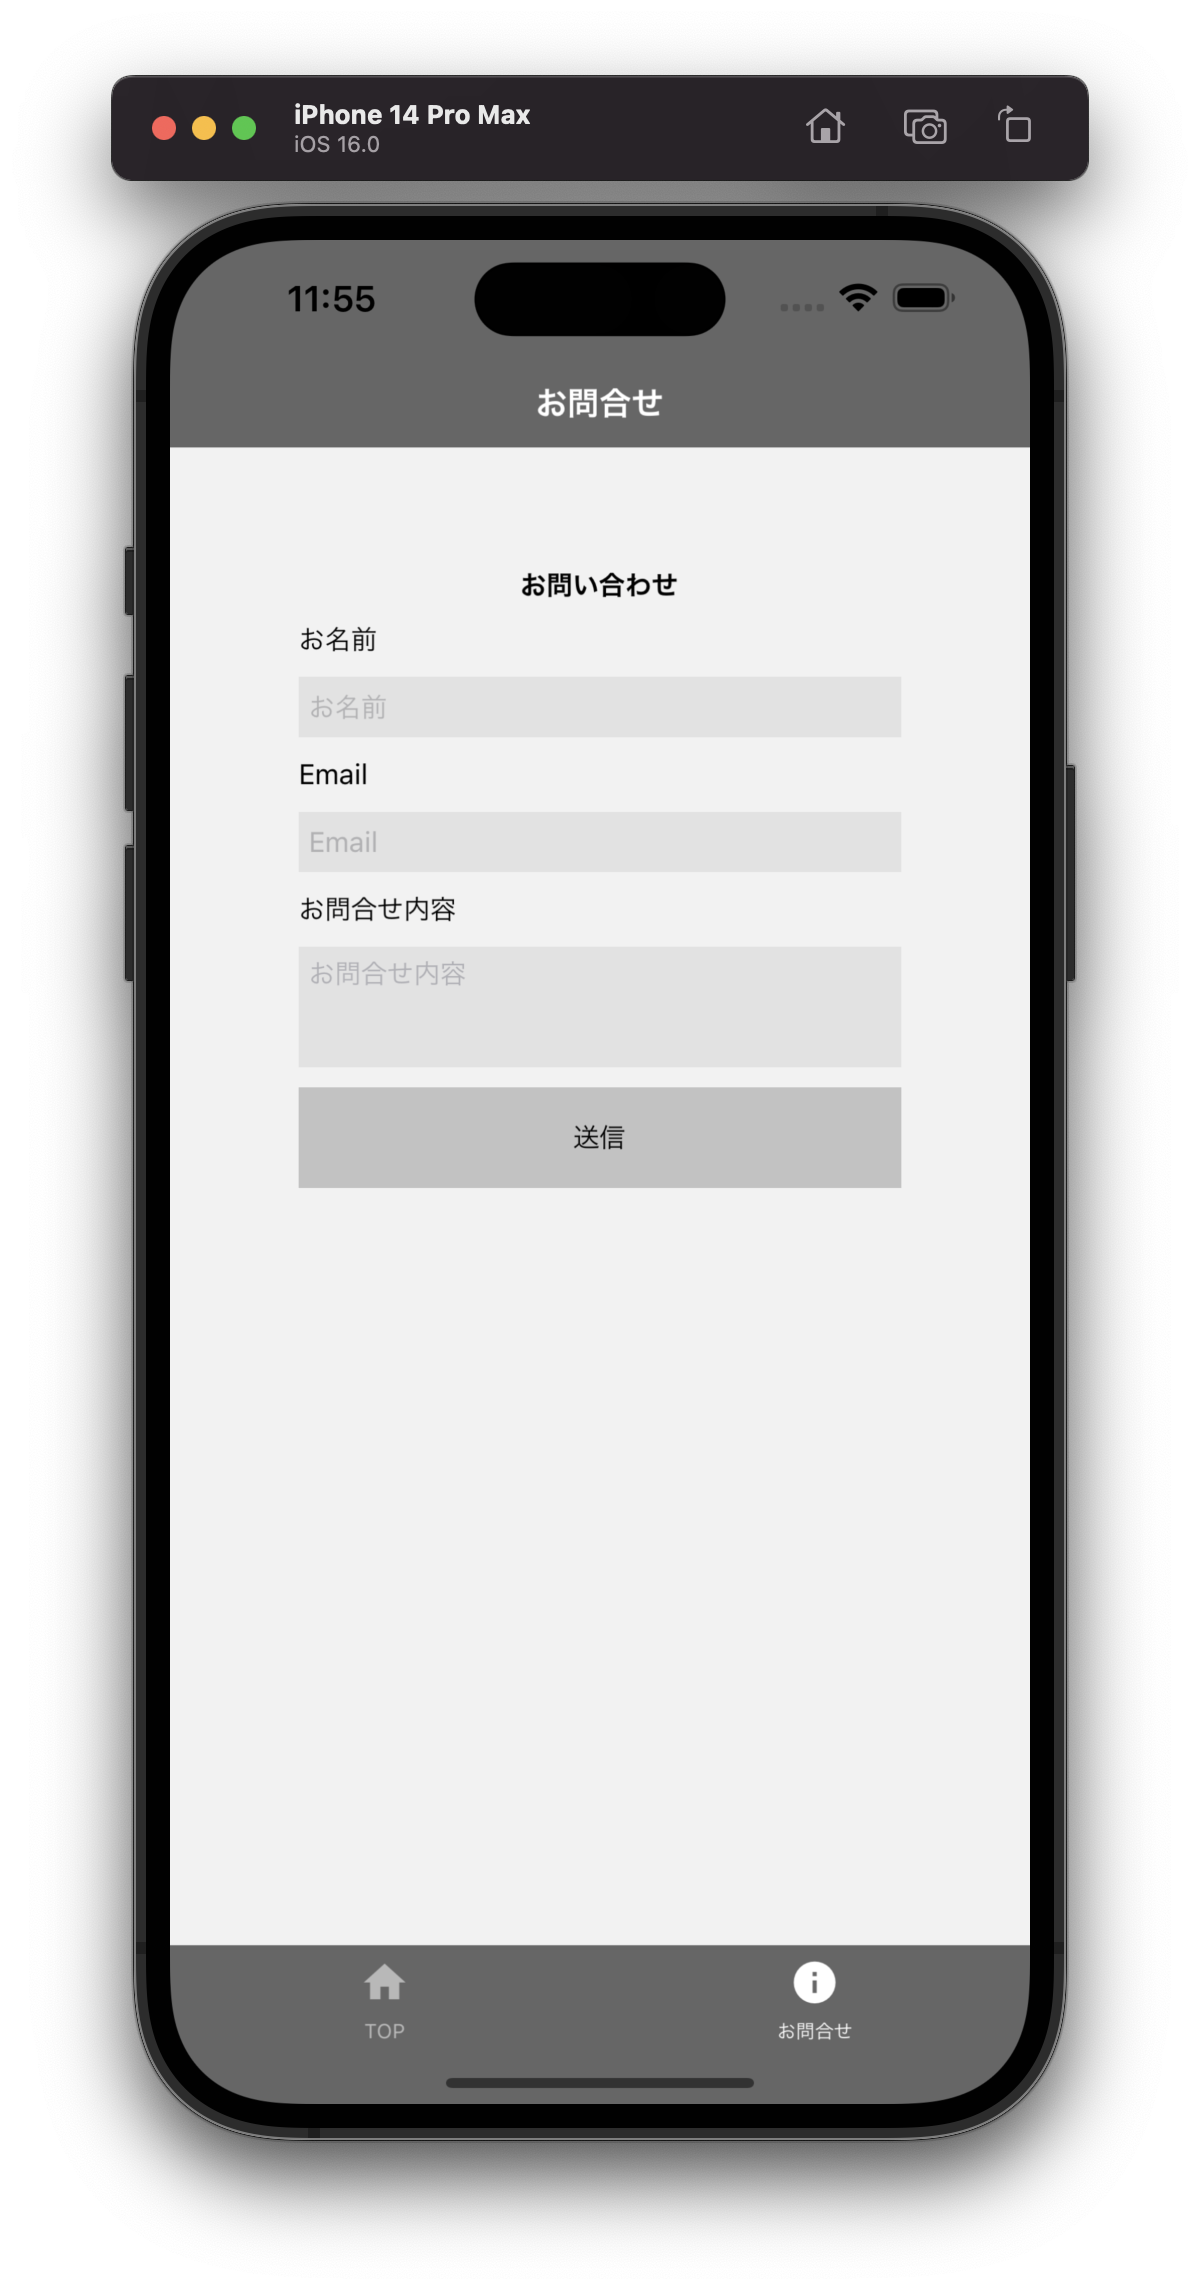
Top・Contactができたので、tabを設置してtabでTopとContactを行き来できるようにします。
完成イメージ
インストール
react-navigationというライブラリーを使って実装するのでインストールします。
react-navigationとそれに依存するライブラリも一緒にインストールします。
expo install react-native-screens react-native-safe-area-context @react-navigation/bottom-tabs @react-navigation/native
タブバー実装
App.jsにタブバーを実装していきます。
一旦、オプションやスタイルを気にせず、最小限のタブを実装するパーツだけを記述してみます。
| キーワード | 内容 |
|---|---|
| NavigationContainer | 遷移の構成や状態など管理するコンポーネント。 画面のコンポーネントは全て NavigationContainerの中に記述する |
| createBottomTabNavigator | タブバーをレンダリングするナビゲーター |
App.js
  import React from "react";
+ import { NavigationContainer } from "@react-navigation/native";
+ import { createBottomTabNavigator } from "@react-navigation/bottom-tabs";

  import Top from "./src/screens/Top";
  import Contact from "./src/screens/Contact";

+ const Tab = createBottomTabNavigator();

  export default function App() {
    return (
-     <Contact />
+     <NavigationContainer>
+       <Tab.Navigator>
+         <Tab.Screen
+           name="Top"
+           component={Top}
+         />
+         <Tab.Screen
+           name="Contact"
+           component={Contact}
+         />
+       </Tab.Navigator>
+     </NavigationContainer>
    );
  }
コピペ用
<NavigationContainer>
  <Tab.Navigator>
    <Tab.Screen
      name="Top"
      component={Top}
    />
    <Tab.Screen
      name="Contact"
      component={Contact}
    />
  </Tab.Navigator>
</NavigationContainer>
オプションを追加していく
アイコン
それぞれのアイコンをつけていきます。
App.js
  import React from "react";
  import { NavigationContainer } from "@react-navigation/native";
  import { createBottomTabNavigator } from "@react-navigation/bottom-tabs";
+ import { MaterialCommunityIcons } from "@expo/vector-icons";

  import Home from "./src/screens/Home";
  import Contact from "./src/screens/Contact";

  const Tab = createBottomTabNavigator();

  export default function App() {
    return (
      <NavigationContainer>
        <Tab.Navigator>
          <Tab.Screen
            name="Home"
            component={Home}
+           options={{
+             title: "TOP",
+             tabBarIcon: ({ color, size }) => (
+               <MaterialCommunityIcons name="home" color={color} size={size} />
+             ),
+           }}
          />

          <Tab.Screen
            name="Contact"
            component={Contact}
+           options={{
+             title: "お問合せ",
+             tabBarIcon: ({ color, size }) => (
+               <MaterialCommunityIcons name="information" color={color} size={size} />
+             ),
+           }}
          />
        </Tab.Navigator>
      </NavigationContainer>
    );
  }
コピペ用
<Tab.Screen
  name="Top"
  component={Top}
  options={{
    title: "TOP",
    tabBarIcon: ({ color, size }) => (
      <MaterialCommunityIcons name="home" color={color} size={size} />
    ),
  }}
/>

<Tab.Screen
  name="Contact"
  component={Contact}
  options={{
    title: "お問合せ",
    tabBarIcon: ({ color, size }) => (
      <MaterialCommunityIcons name="information" color={color} size={size} />
    ),
  }}
/>
タブバーとヘッダーのスタイル
| キーワード | 内容 |
|---|---|
| headerStyle | ヘッダーのスタイルを記述する部分 |
| headerTintColor | ヘッダーのタイトルの色 |
| headerTitleStyle | ヘッダータイトルのスタイルを記述する部分 |
| tabBarStyle | 下方のタブのスタイルを記述する部分 |
| tabBarInactiveTintColor | タブバーアイコンの色 |
| tabBarActiveTintColor | タブバーのアクティブ(表示されている方)の色 |
App.js
  <NavigationContainer>
    <Tab.Navigator
+     screenOptions={{
+       headerStyle: {
+         backgroundColor: "#666",
+       },
+       headerTintColor: "#fff",
+       headerTitleStyle: {
+         fontWeight: "bold",
+       },
+       tabBarStyle: {
+         backgroundColor: "#666",
+       },
+       tabBarInactiveTintColor: "#ffffff88",
+       tabBarActiveTintColor: "#fff",
+     }}
      >
      <Tab.Screen
        name="Home"
        component={Home}
        options={{
          title: "Welcome",
          tabBarIcon: ({ color, size }) => (
            <MaterialCommunityIcons name="home" color={color} size={size} />
          ),
        }}
      />
      <Tab.Screen
        name="Contact"
        component={Contact}
        options={{
          title: "About",
          tabBarIcon: ({ color, size }) => (
            <MaterialCommunityIcons name="information" color={color} size={size} />
          ),
        }}
      />
    </Tab.Navigator>
  </NavigationContainer>
コピペ用
<Tab.Navigator
    screenOptions={{
      headerStyle: {
        backgroundColor: "#666",
      },
      headerTintColor: "#fff",
      headerTitleStyle: {
        fontWeight: "bold",
      },
      tabBarStyle: {
        backgroundColor: "#666",
      },
      tabBarInactiveTintColor: "#ffffff88",
      tabBarActiveTintColor: "#fff",
    }}
>
これで確認してみます。
iOS


Android


これでナビゲーションのタブバーが完成しました。
最終的なコード
App.js
App.js
import React from "react";
import { NavigationContainer } from "@react-navigation/native";
import { createBottomTabNavigator } from "@react-navigation/bottom-tabs";
import { MaterialCommunityIcons } from "@expo/vector-icons";

import Top from "./src/screens/Top";
import Contact from "./src/screens/Contact";

const Tab = createBottomTabNavigator();

export default function App() {
  return (
    <NavigationContainer>
      <Tab.Navigator
        screenOptions={{
          headerStyle: {
            backgroundColor: "#666",
          },
          headerTintColor: "#fff",
          headerTitleStyle: {
            fontWeight: "bold",
          },
          tabBarStyle: {
            backgroundColor: "#666",
          },
          tabBarInactiveTintColor: "#ffffff88",
          tabBarActiveTintColor: "#fff",
        }}
      >
        <Tab.Screen
          name="Top"
          component={Top}
          options={{
            title: "TOP",
            tabBarIcon: ({ color, size }) => (
              <MaterialCommunityIcons name="home" color={color} size={size} />
            ),
          }}
        />

        <Tab.Screen
          name="Contact"
          component={Contact}
          options={{
            title: "お問合せ",
            tabBarIcon: ({ color, size }) => (
              <MaterialCommunityIcons name="information" color={color} size={size} />
            ),
          }}
        />
      </Tab.Navigator>
    </NavigationContainer>
  );
}
完成したら、iOS/Androidそれぞれでビルドを実行していくことができますが、環境ごとに証明書の設定やビルドの種類の選択など複雑になります。
実行してみたい場合はExpo公式サイトのドキュメントに詳しい方法が書いてありますので確認してください。


