こんにちは、Advent Calendar9日目です。
みなさん、プロビジョニングツールは何を使用されていますか?ぼくは、Chefが多いです。
プロビジョニングツールって色々あり、Chef、Puppet、Itamaeなどあります。
今回は、その中でもAnsibleの統合管理版Ansible Semaphoreについて書いていきたいと思います。
Ansible Semaphoreについて
Ansible Semaphoreは、Ansible Tower の OSS Alternativeです。
なので、Ansible Towerと違って無償で試すことが可能です。
#Ansible Towerほどの機能はない
#Ansible Towerは、10ノードまで無償(ただし、機能制限あり)
環境
InstanceType:t2.micro
OS:Amazon Linux AMI release 2016.09
DB:5.5.53-MariaDB
インストール手順
それでは、Ansible Semaphoreのインストールを行っていきます。
Install Git
$ yum -y install git
Install Ansible
Ansibleをインストールします。
$ yum --enablerepo=epel install ansible
.
.
.
Complete!
バージョンを確認します。
インストールされていることがわかりますね。
$ ansible --version
ansible 2.2.0.0
  config file = /etc/ansible/ansible.cfg
  configured module search path = Default w/o overrides
Install MariaDB
MariaDBのPGP keyをインストールします。
$ rpm --import https://yum.mariadb.org/RPM-GPG-KEY-MariaDB
リポジトリの設定を行います。
$ vim /etc/yum.repos.d/mariadb.repo
[mariadb]
name = MariaDB
baseurl = http://yum.mariadb.org/5.5/centos6-amd64
gpgkey=https://yum.mariadb.org/RPM-GPG-KEY-MariaDB
gpgcheck=1
MariaDBのインストールをします。
$ yum install -y MariaDB-server MariaDB-client
$ /etc/init.d/mysql start
Starting MySQL.161206 21:22:30 mysqld_safe Logging to '/var/lib/mysql/ip-172-31-62-59.err'.
. SUCCESS!
MariaDBにログインできましたね。
$ mysql -u root
Welcome to the MariaDB monitor.  Commands end with ; or \g.
Your MariaDB connection id is 2
Server version: 5.5.53-MariaDB MariaDB Server

Copyright (c) 2000, 2016, Oracle, MariaDB Corporation Ab and others.

Type 'help;' or '\h' for help. Type '\c' to clear the current input statement.

MariaDB [(none)]>
Setup Database
Semaphore用のスキーマとユーザーを作成します。
MariaDB [(none)]> CREATE DATABASE semaphore;
Query OK, 1 row affected (0.00 sec)
MariaDB [(none)]> CREATE USER 'semaphore'@'localhost' IDENTIFIED BY 'password';
Query OK, 0 rows affected (0.00 sec)
MariaDB [(none)]> GRANT ALL PRIVILEGES ON semaphore.* TO 'semaphore'@'localhost' WITH GRANT OPTION;
Query OK, 0 rows affected (0.00 sec)
Install Ansible Semaphore
Playbook格納先を作成します。
$ mkdir /opt/semaphore
Semaphoreをインストールします。
$ wget https://github.com/ansible-semaphore/semaphore/releases/download/v2.0.4/semaphore_linux_amd64
$ sudo mv semaphore_linux_amd64 /usr/bin/semaphore
$ sudo chmod a+x /usr/bin/semaphore
Setup Ansible Semaphore
対話型で設定を行っていきます。
$ sudo semaphore -setup
 Hello! You will now be guided through a setup to:

 1. Set up configuration for a MySQL/MariaDB database
 2. Set up a path for your playbooks (auto-created)
 3. Run database Migrations
 4. Set up initial seamphore user & password

 > DB Hostname (default 127.0.0.1:3306):
 > DB User (default root): semaphore
 > DB Password: password
 > DB Name (default semaphore): semaphore
 > Playbook path: /opt/semaphore

 Generated configuration:
 {
 	"mysql": {
 		"host": "127.0.0.1:3306",
 		"user": "semaphore",
 		"pass": "password",
 		"name": "semaphore"
 	},
 	"port": "",
 	"bugsnag_key": "",
 	"tmp_path": "/opt/semaphore",
 	"cookie_hash": "tNSwJYsXQdXrbXLzymmhKBqba2jz8lbCEolGOb2emZw=",
 	"cookie_encryption": "LChepvmWvO6TDLrex4UVUOTfkrZbTfkMlI6PuXc5y1o="
 }

 > Is this correct? (yes/no): yes
 Running: mkdir -p /opt/semaphore..
 Configuration written to /opt/semaphore/semaphore_config.json..
 Pinging database..

 Running DB Migrations..
Creating migrations table
Executing migration v0.0.0 (at 2016-12-06 21:53:18.568392328 +0900 JST)...
 [11/11]
Executing migration v1.0.0 (at 2016-12-06 21:53:18.63120758 +0900 JST)...
 [7/7]
Executing migration v1.1.0 (at 2016-12-06 21:53:18.682923725 +0900 JST)...
 [1/1]
Executing migration v1.2.0 (at 2016-12-06 21:53:18.688844058 +0900 JST)...
 [1/1]
Executing migration v1.3.0 (at 2016-12-06 21:53:18.692643909 +0900 JST)...
 [3/3]
Executing migration v1.4.0 (at 2016-12-06 21:53:18.722589625 +0900 JST)...
 [2/2]
Executing migration v1.5.0 (at 2016-12-06 21:53:18.732435869 +0900 JST)...
 [1/1]
Executing migration v0.1.0 (at 2016-12-06 21:53:18.736244906 +0900 JST)...
 [6/6]
Executing migration v1.6.0 (at 2016-12-06 21:53:18.76486765 +0900 JST)...
 [4/4]
Executing migration v1.7.0 (at 2016-12-06 21:53:18.787032755 +0900 JST)...
 [1/1]


 > Username: semaphore
 > Email:
 > Your name: semaphore
 > Password: password

 You are all setup semaphore!
 Re-launch this program pointing to the configuration file

./semaphore -config /opt/semaphore/semaphore_config.json

 To run as daemon:

nohup ./semaphore -config /opt/semaphore/semaphore_config.json &

 You can login with  or semaphore.
セットアップ完了したので、Ansible Semaphoreを起動します。
$ cd /usr/bin
$ nohup ./semaphore -config /opt/semaphore/semaphore_config.json &
[1] 23428
起動していることがわかりますね。
$ ps aux | grep semaphore
root     23428  0.1  1.3  19804 14188 pts/0    Sl   21:55   0:00 ./semaphore -config /opt/semaphore/semaphore_config.json
root     23431  0.0  0.9  15576  9412 pts/0    Sl   21:55   0:00 /usr/bin/semaphore -config /opt/semaphore/semaphore_config.json
root     23440  0.0  0.2 110456  2192 pts/0    S+   21:55   0:00 grep --color=auto semaphore
Ansible Semaphoreログイン
それでは、Ansible Semaphoreにログインしたいと思います。
ブラウザのアドレスバーに以下を入力します。
セットアップ時に登録したユーザー情報を入力します。
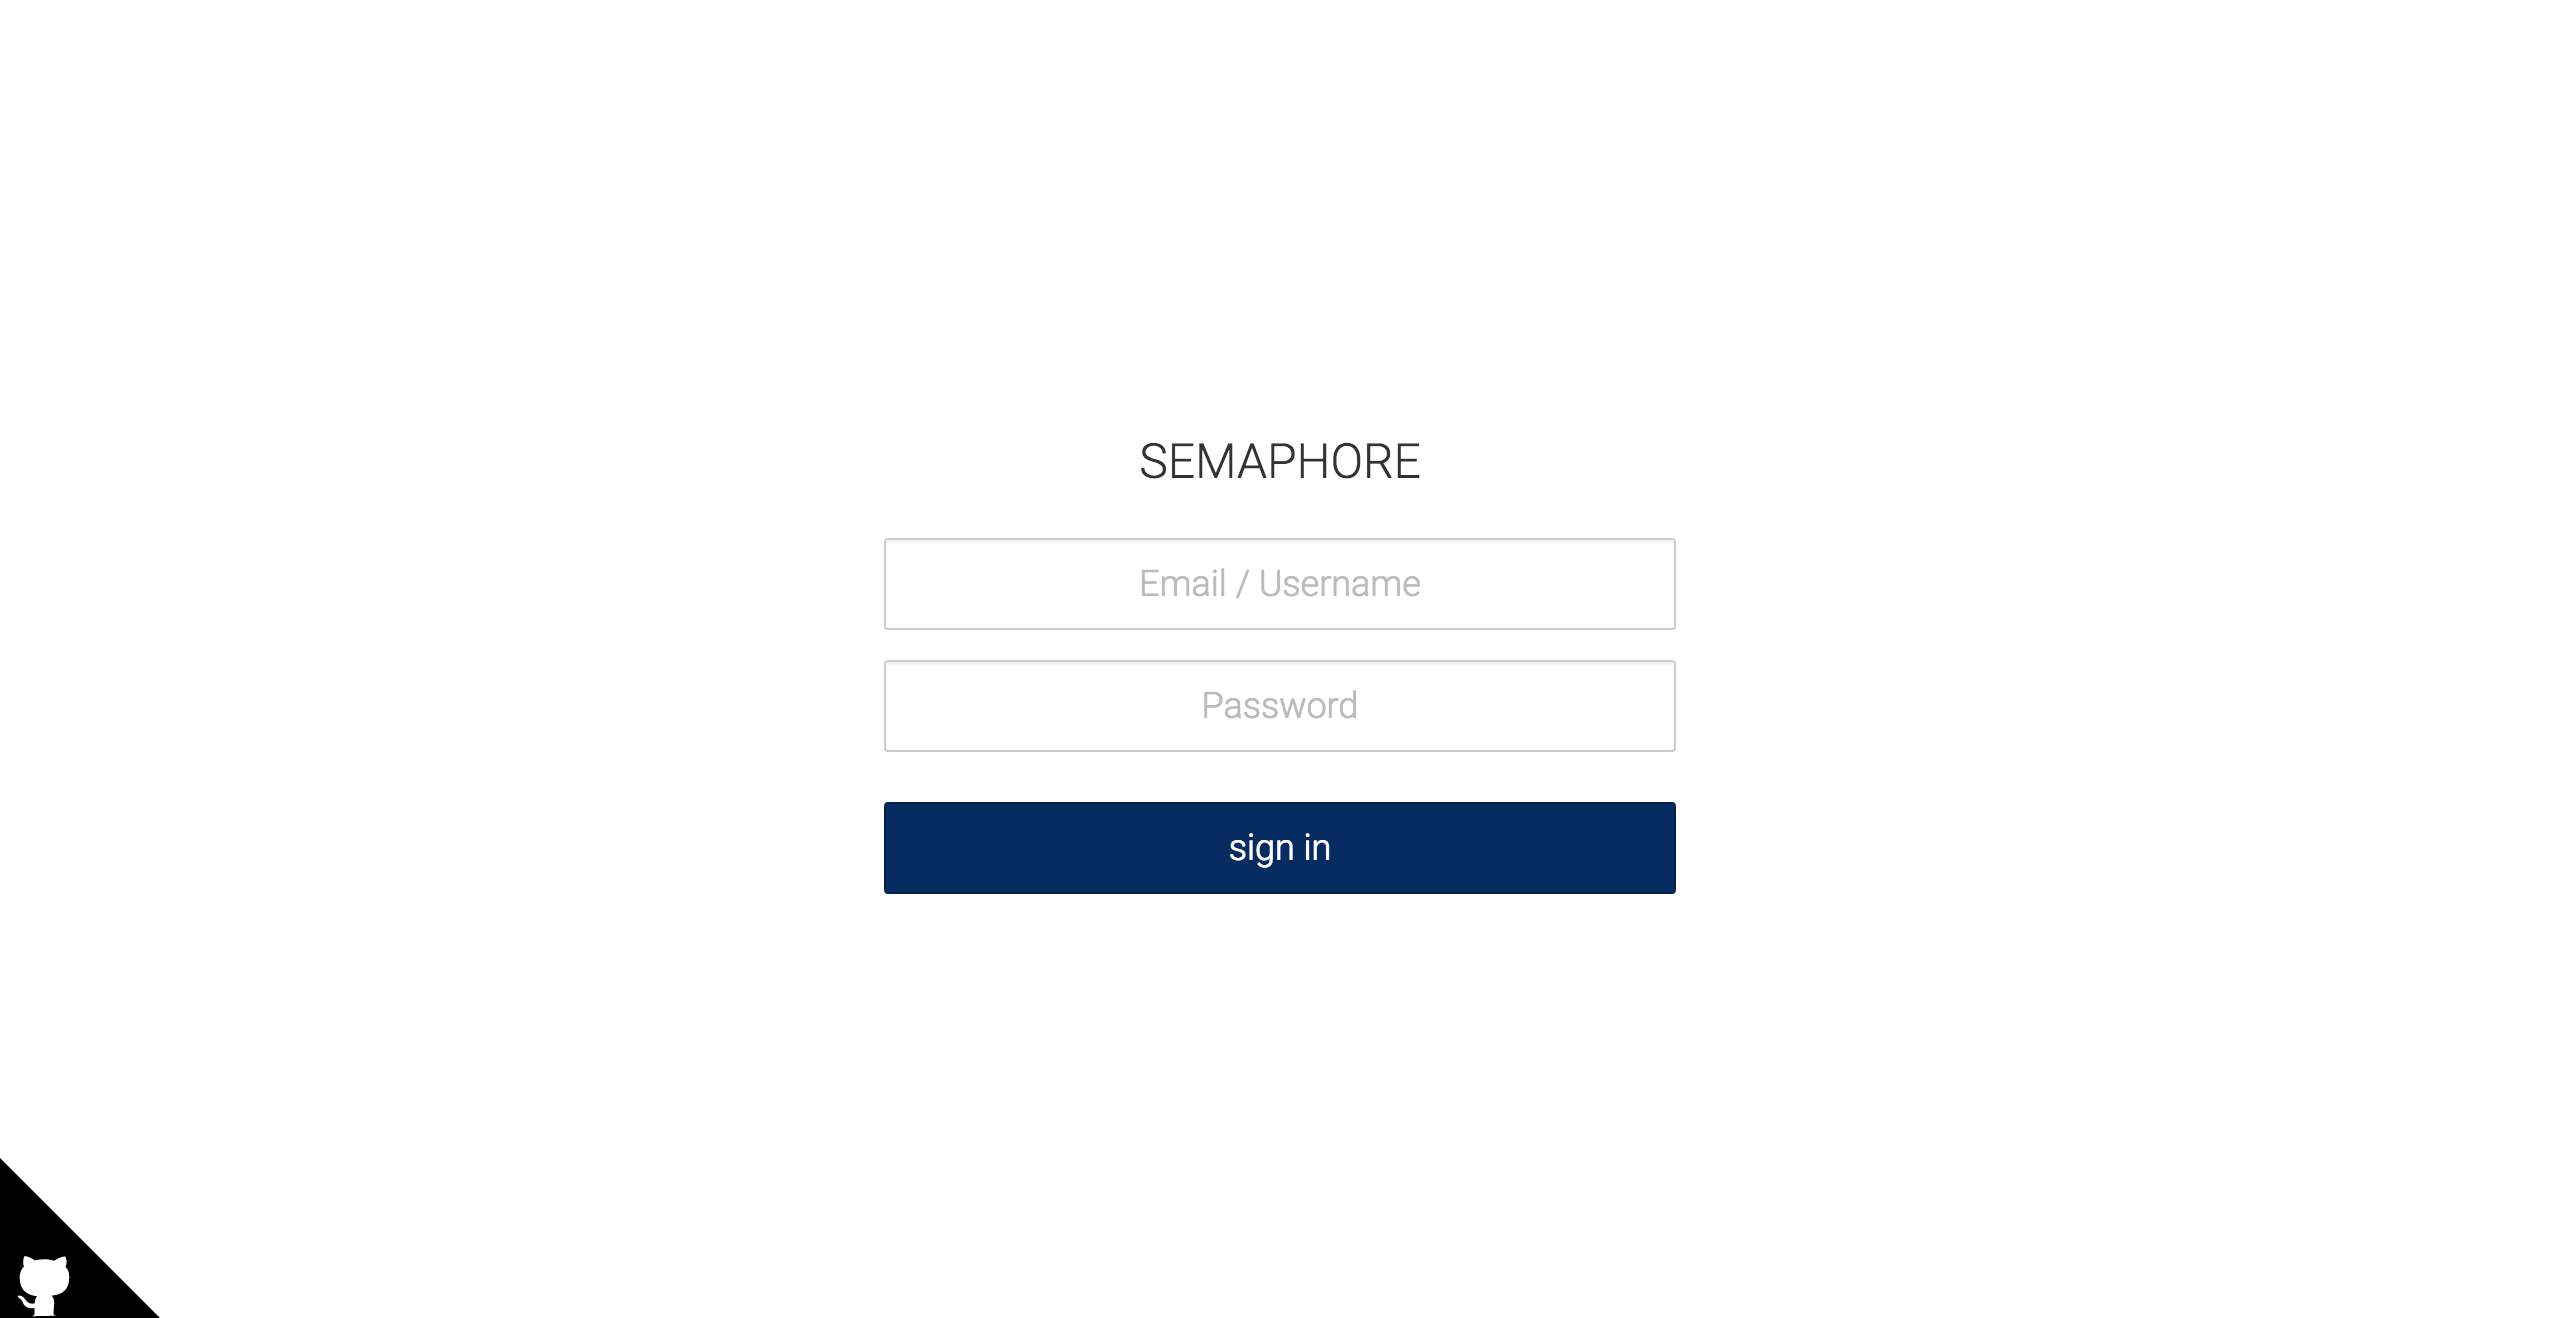
ログインできましたね。
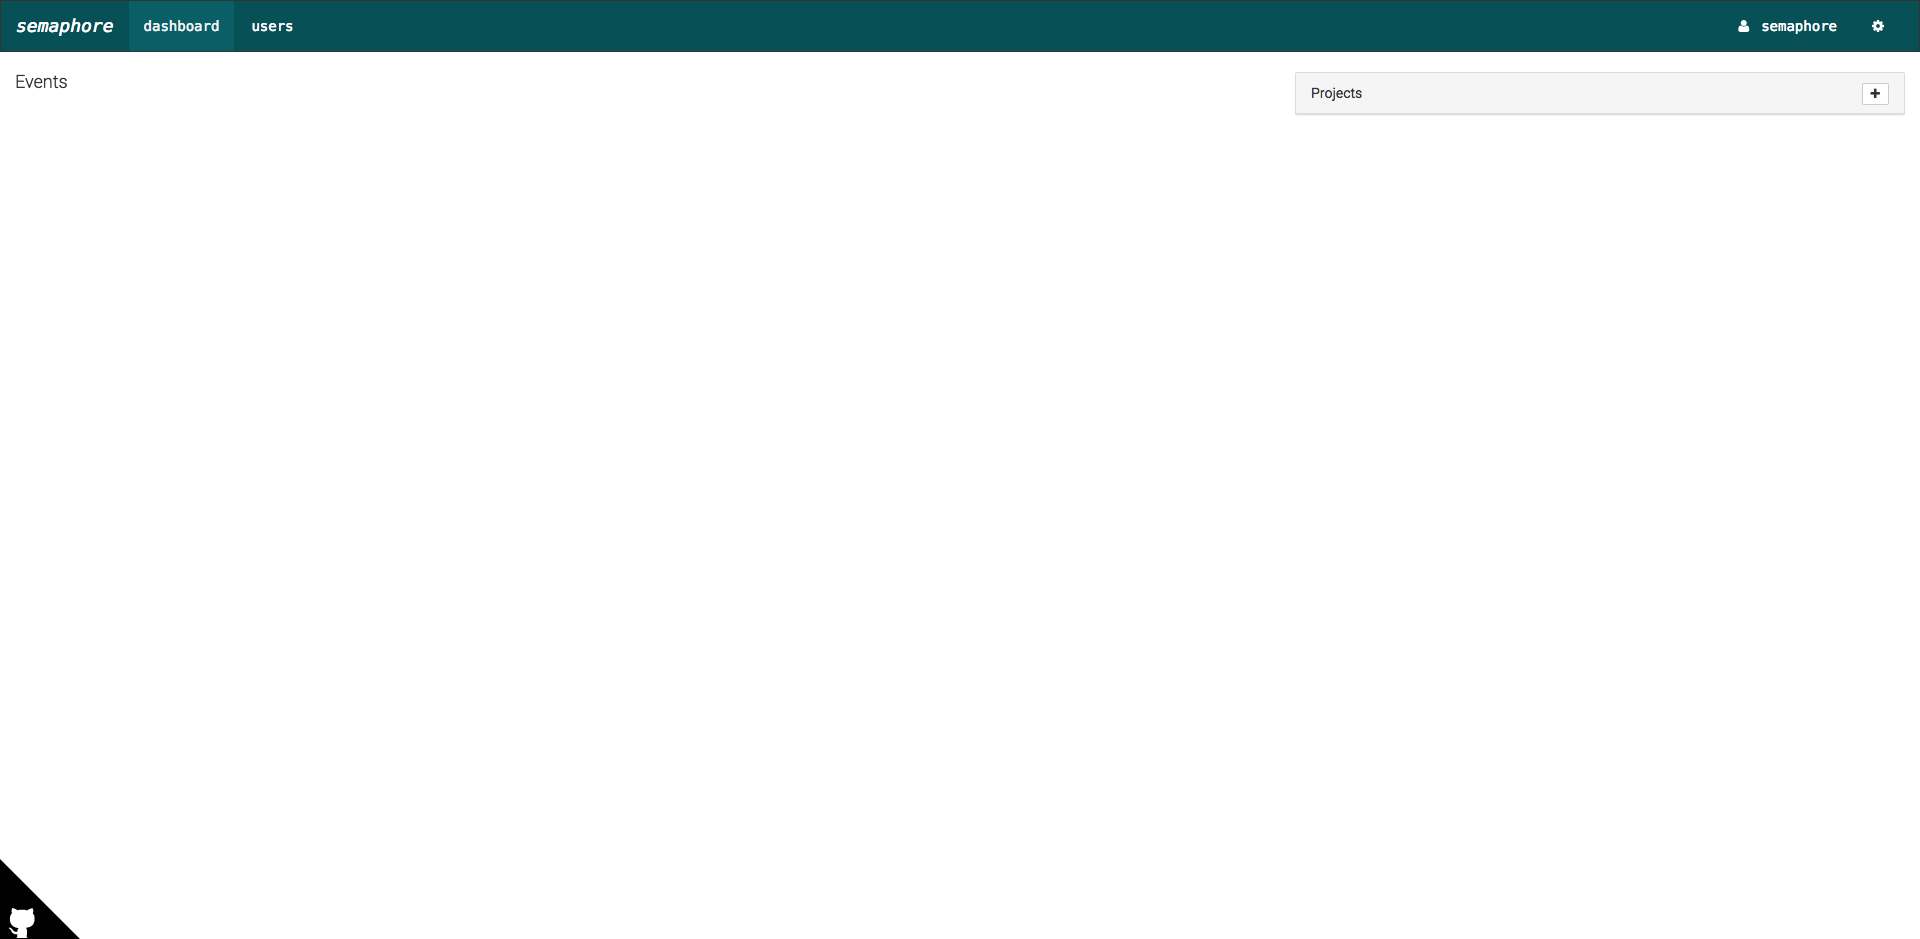
Playbookを動かすための準備
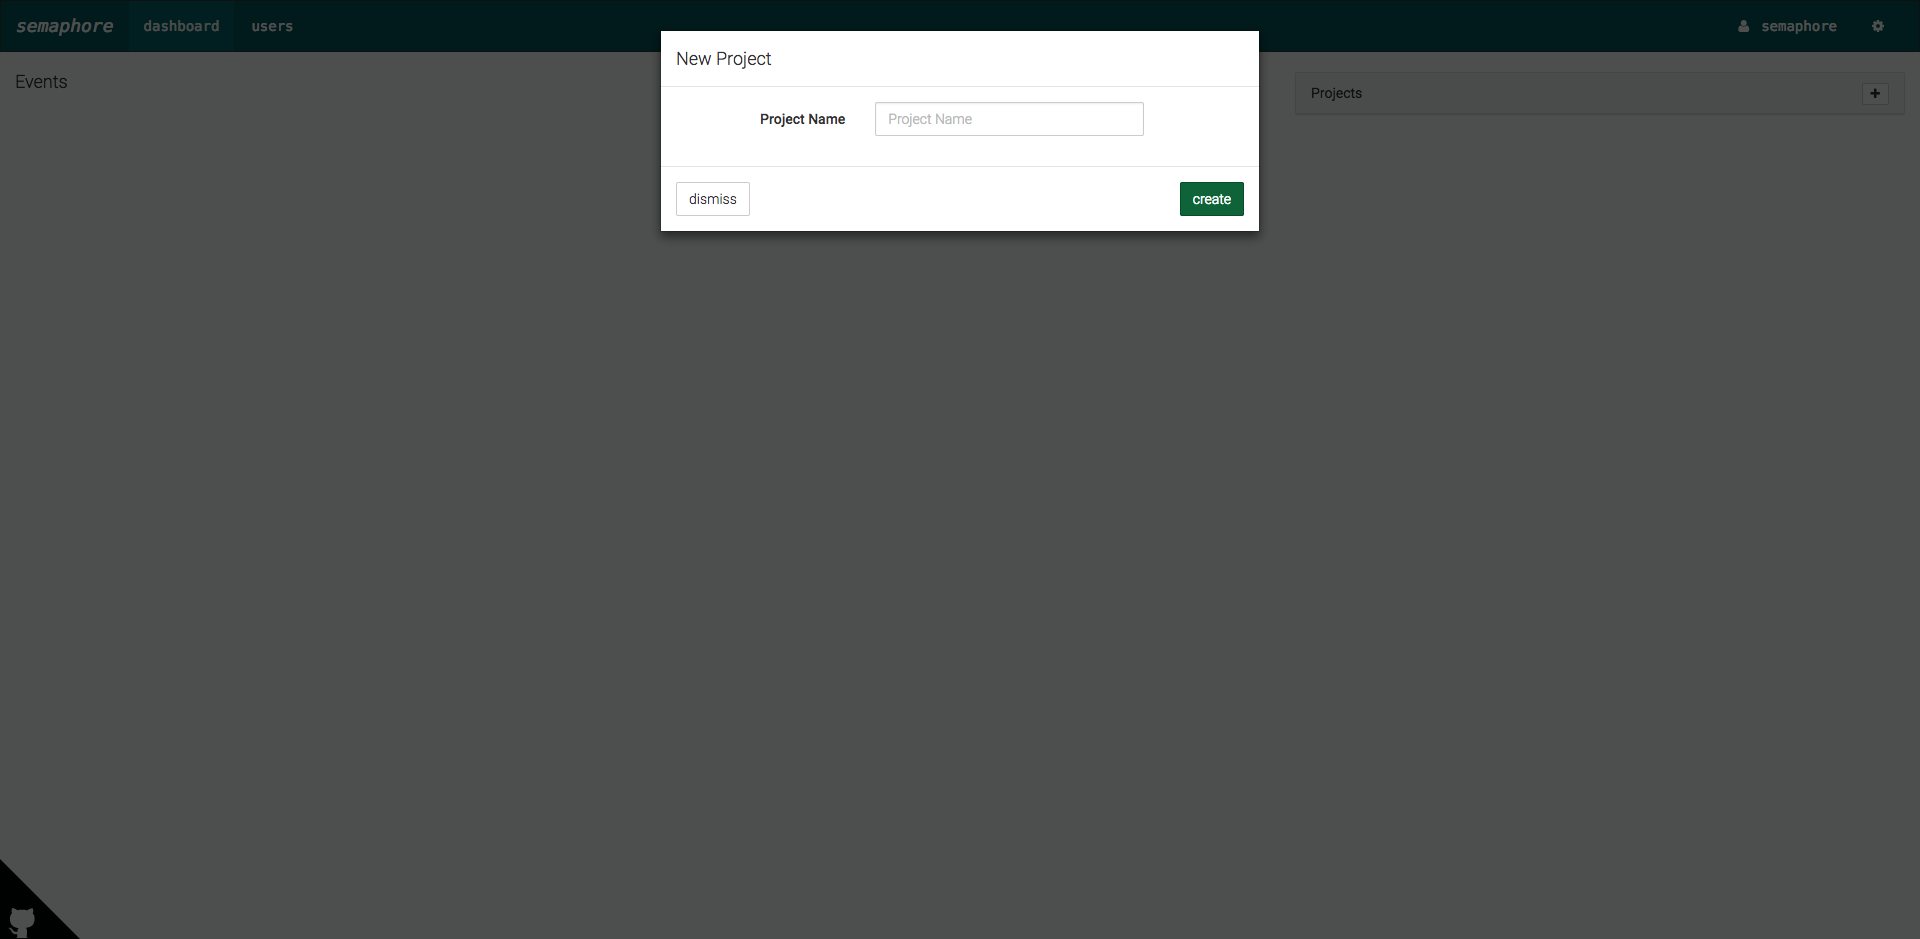
それでは、プロジェクトを作成します。
Projectsの"+"をクリックします。
「Key Store」でGitHub、サーバのKey登録を行います。

「Inventory」の設定をします。
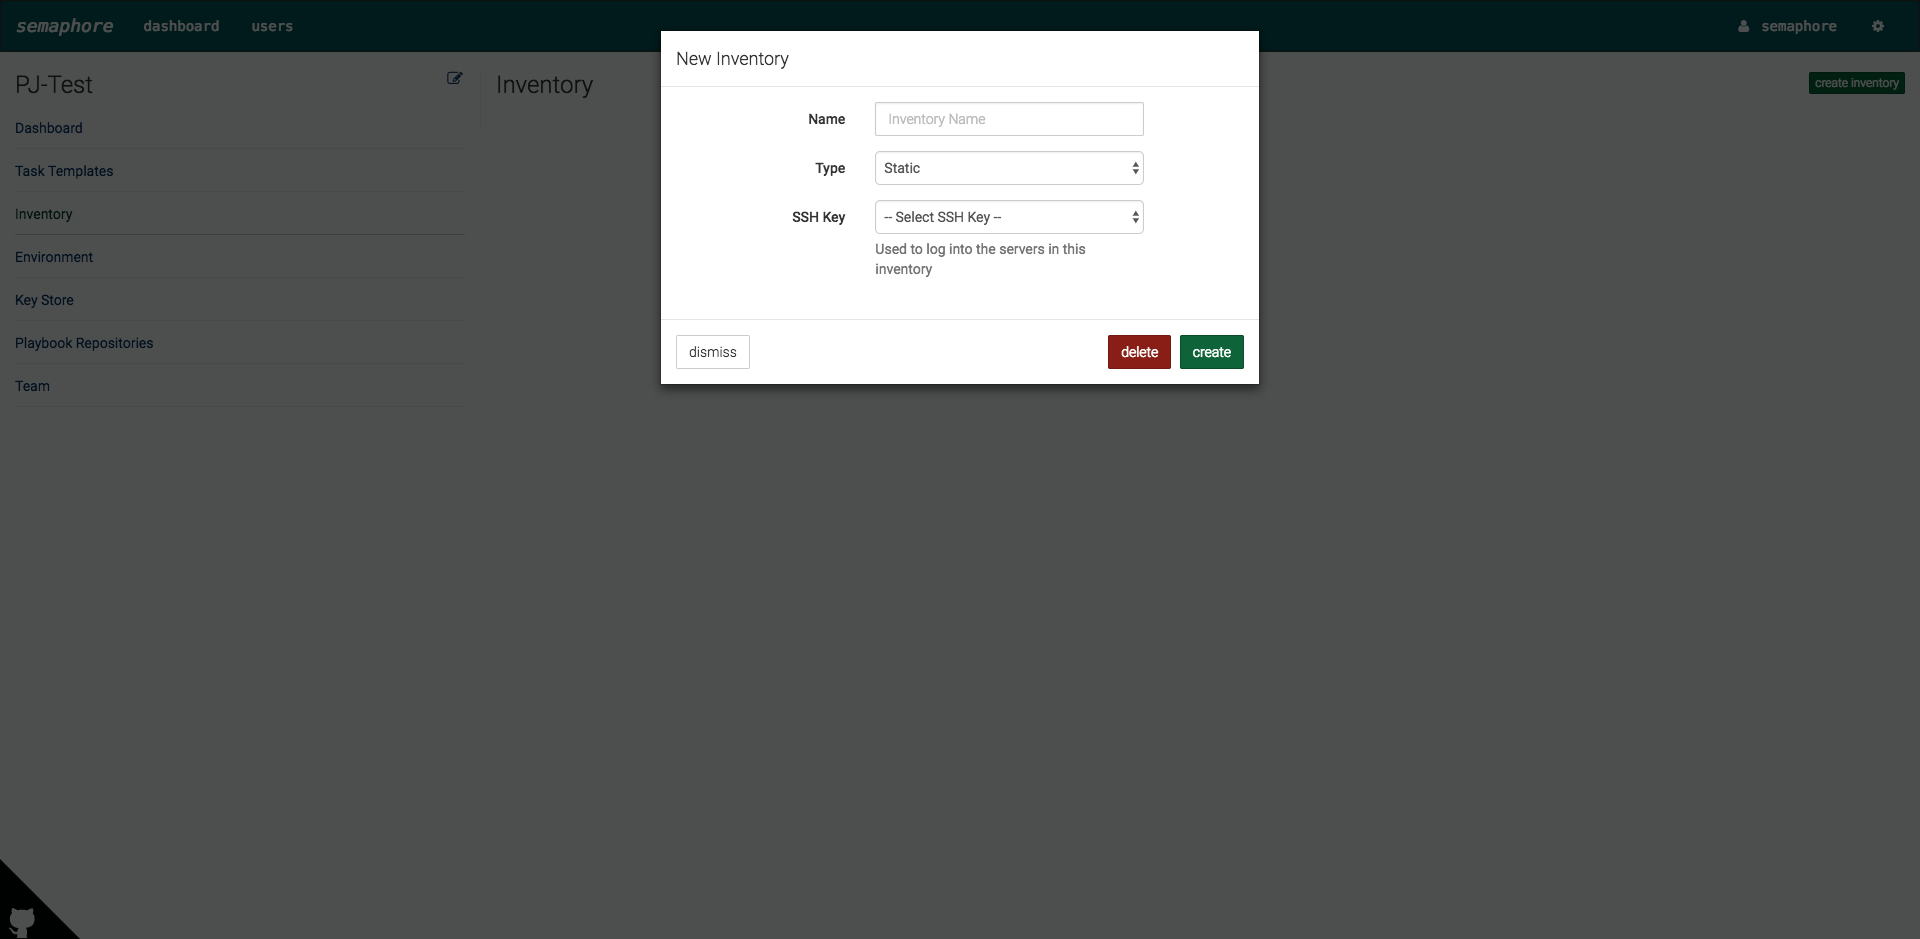
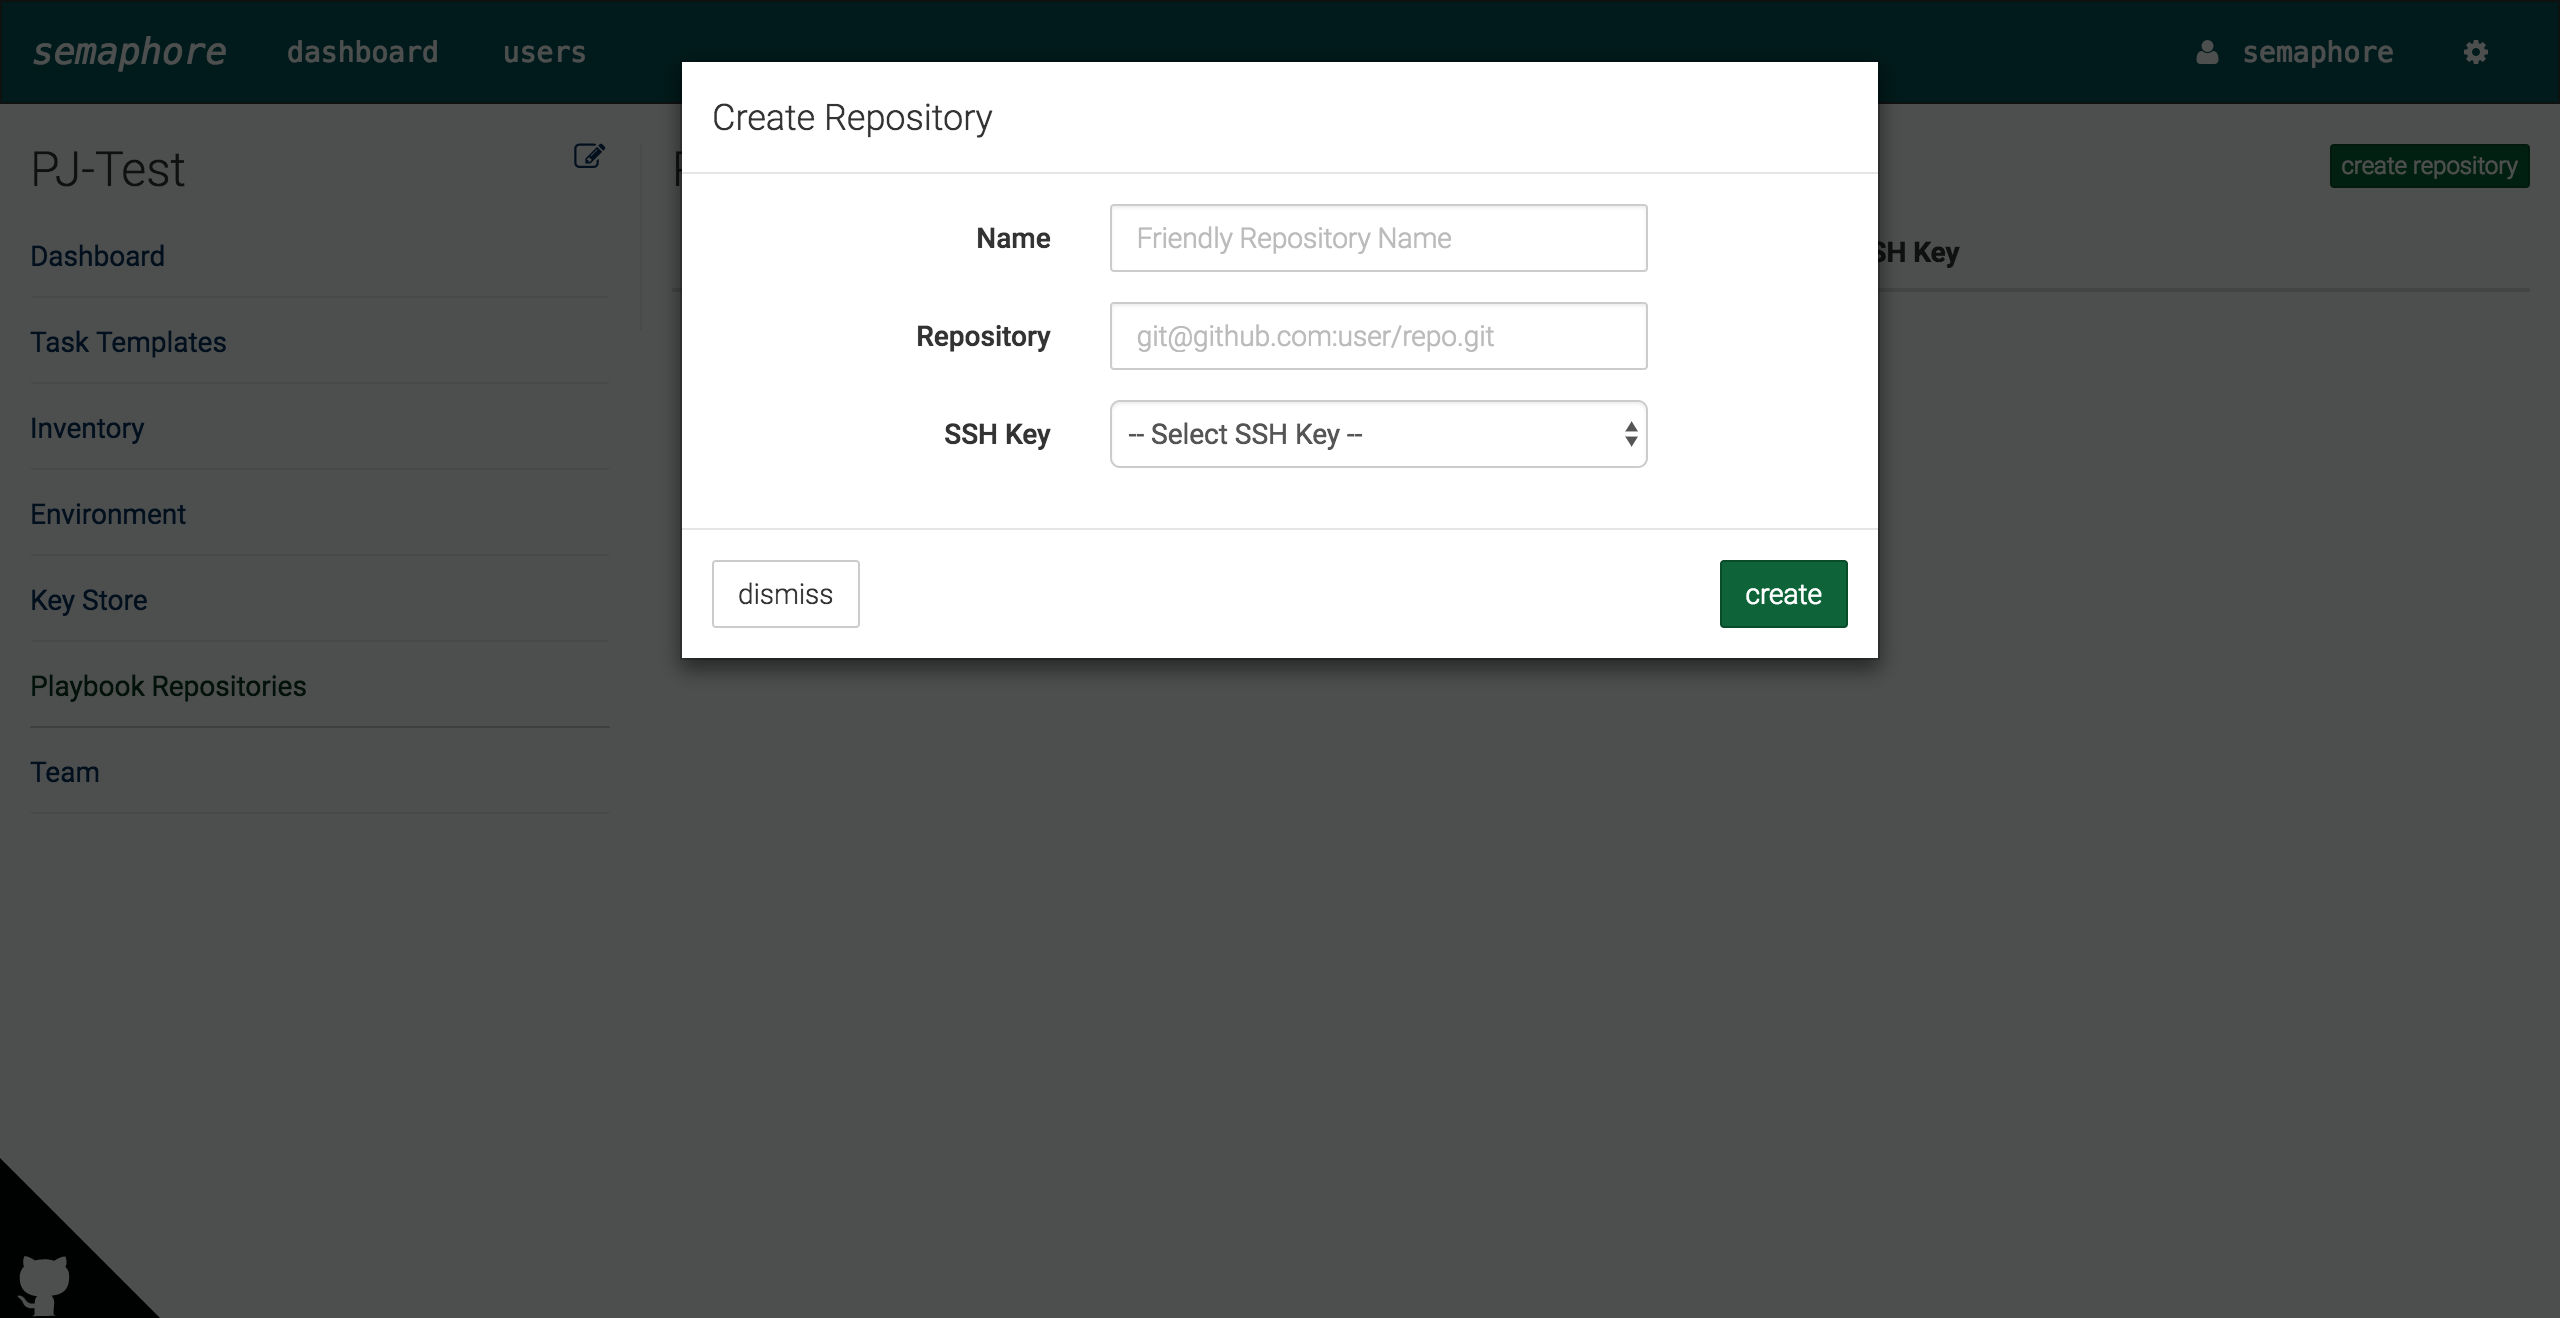
GitHubにPlaybookを管理している場合は、リポジトリをGitHubに指定し、先ほど作成したKeyをセットします。
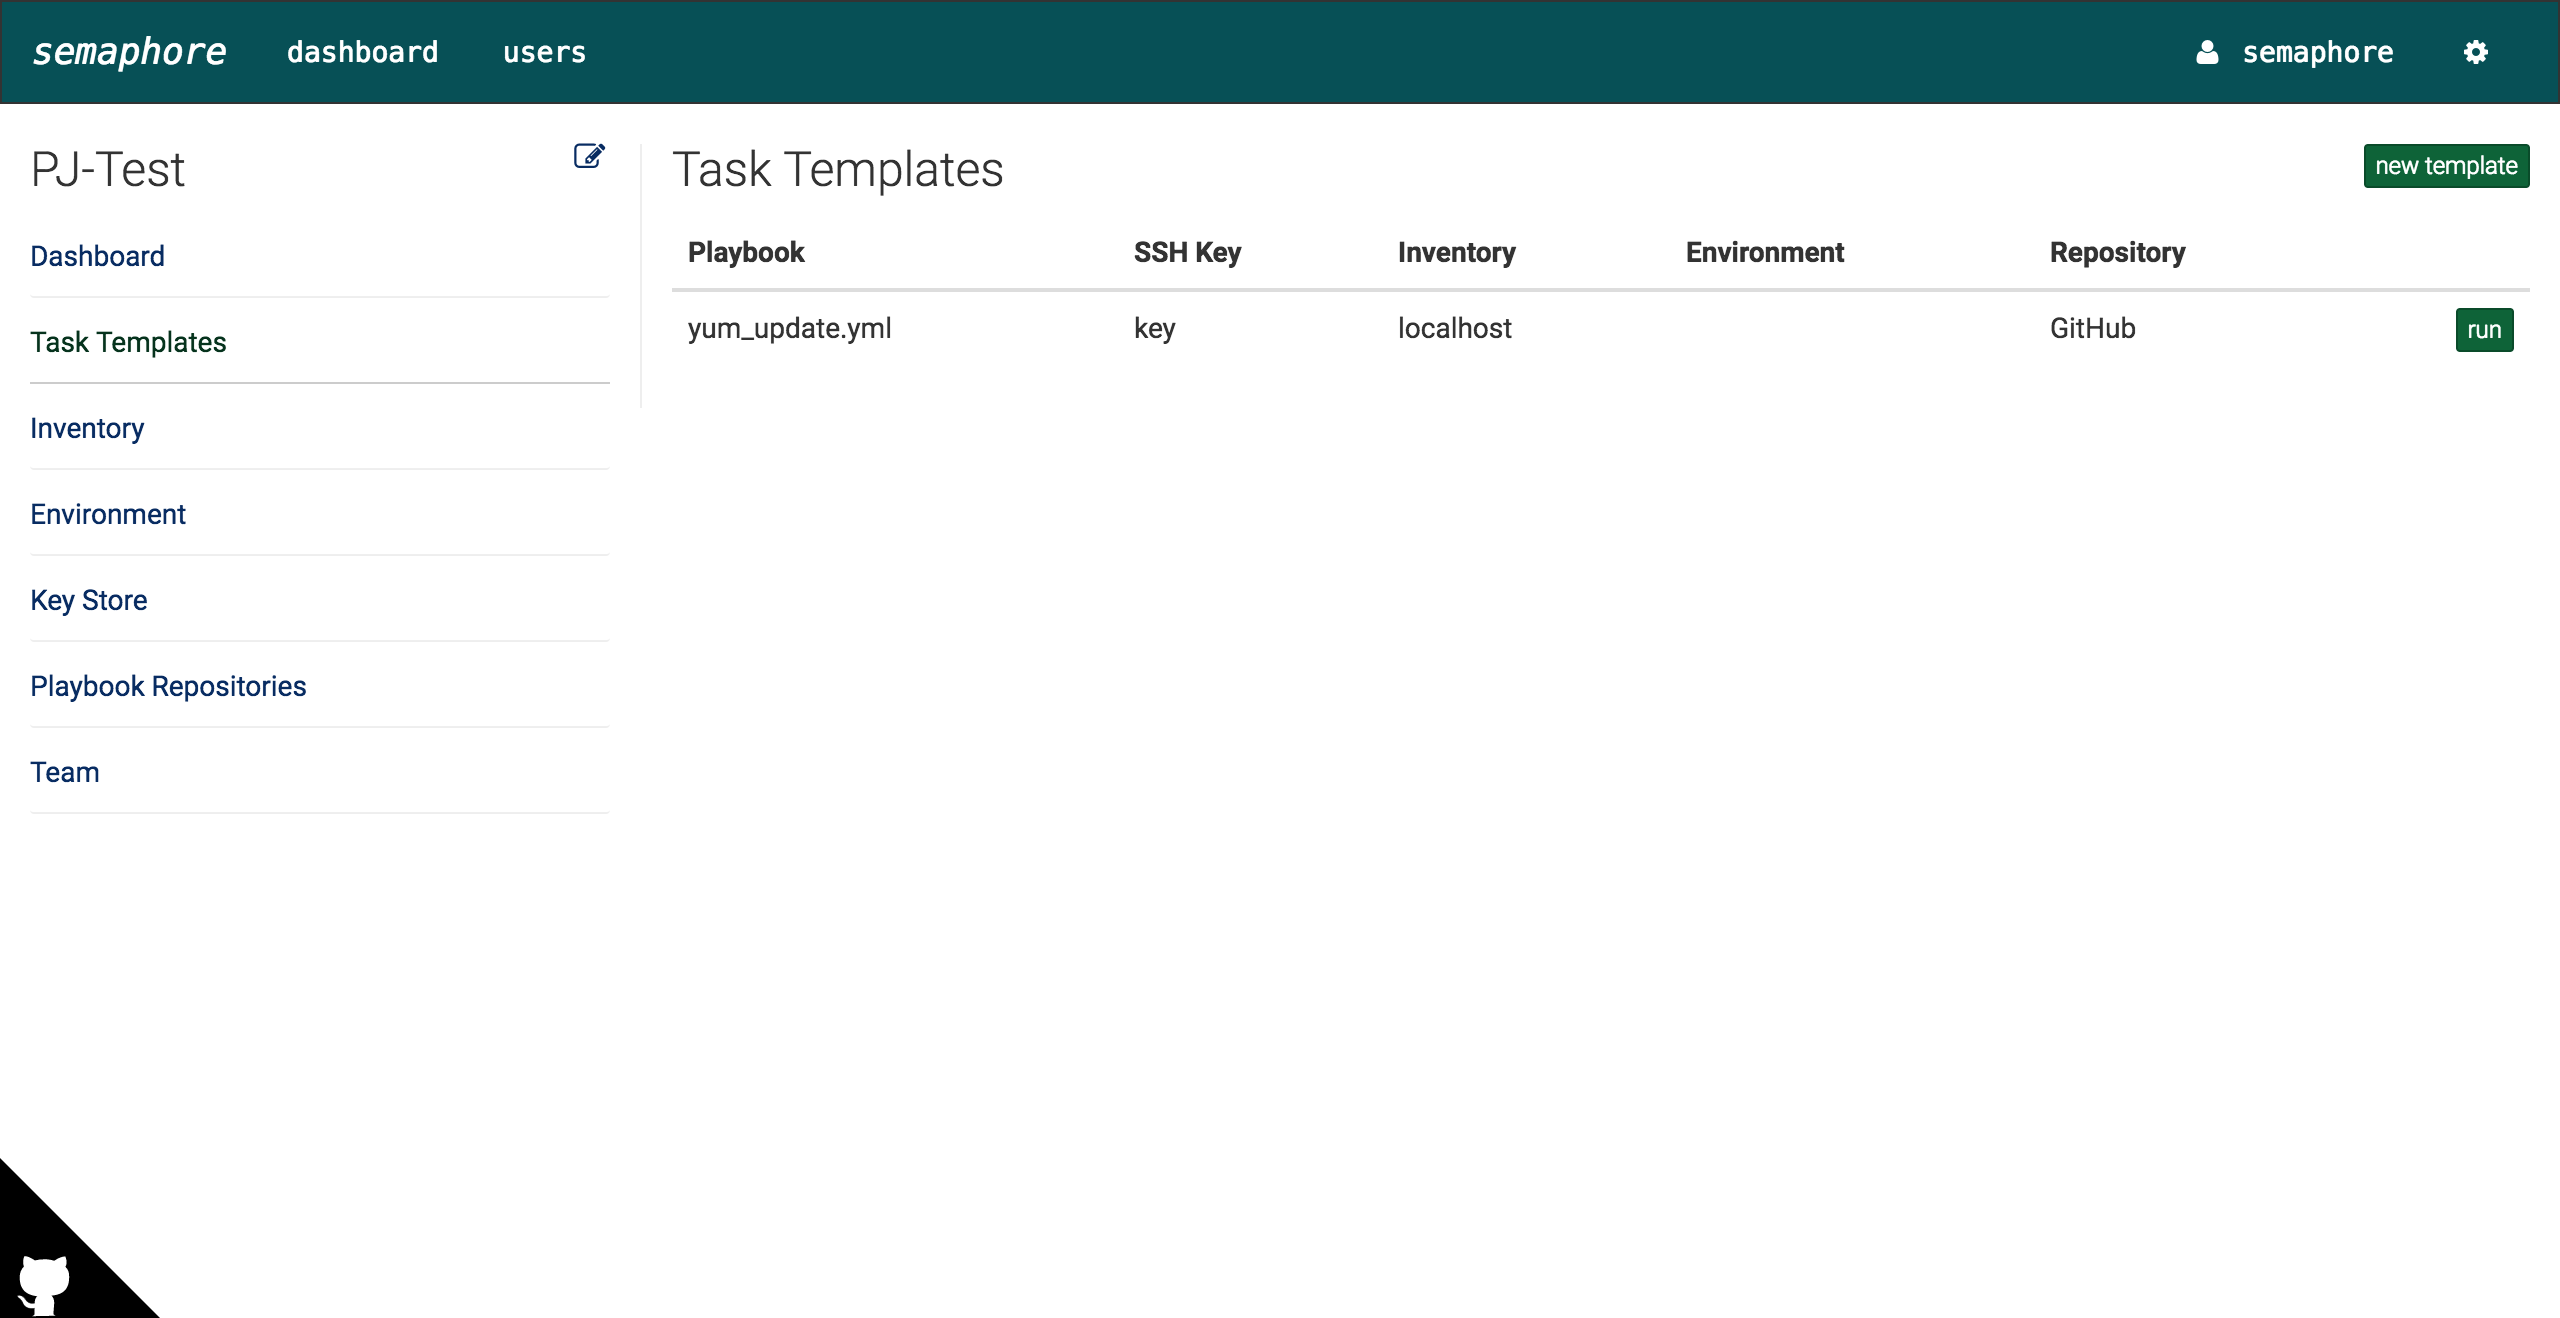
Playbookを実行するための「Task Template」でTemplateを作成します。
作成すると下記のようになります。
Template Taskの実行
それでは「run」をクリックし、実行します。
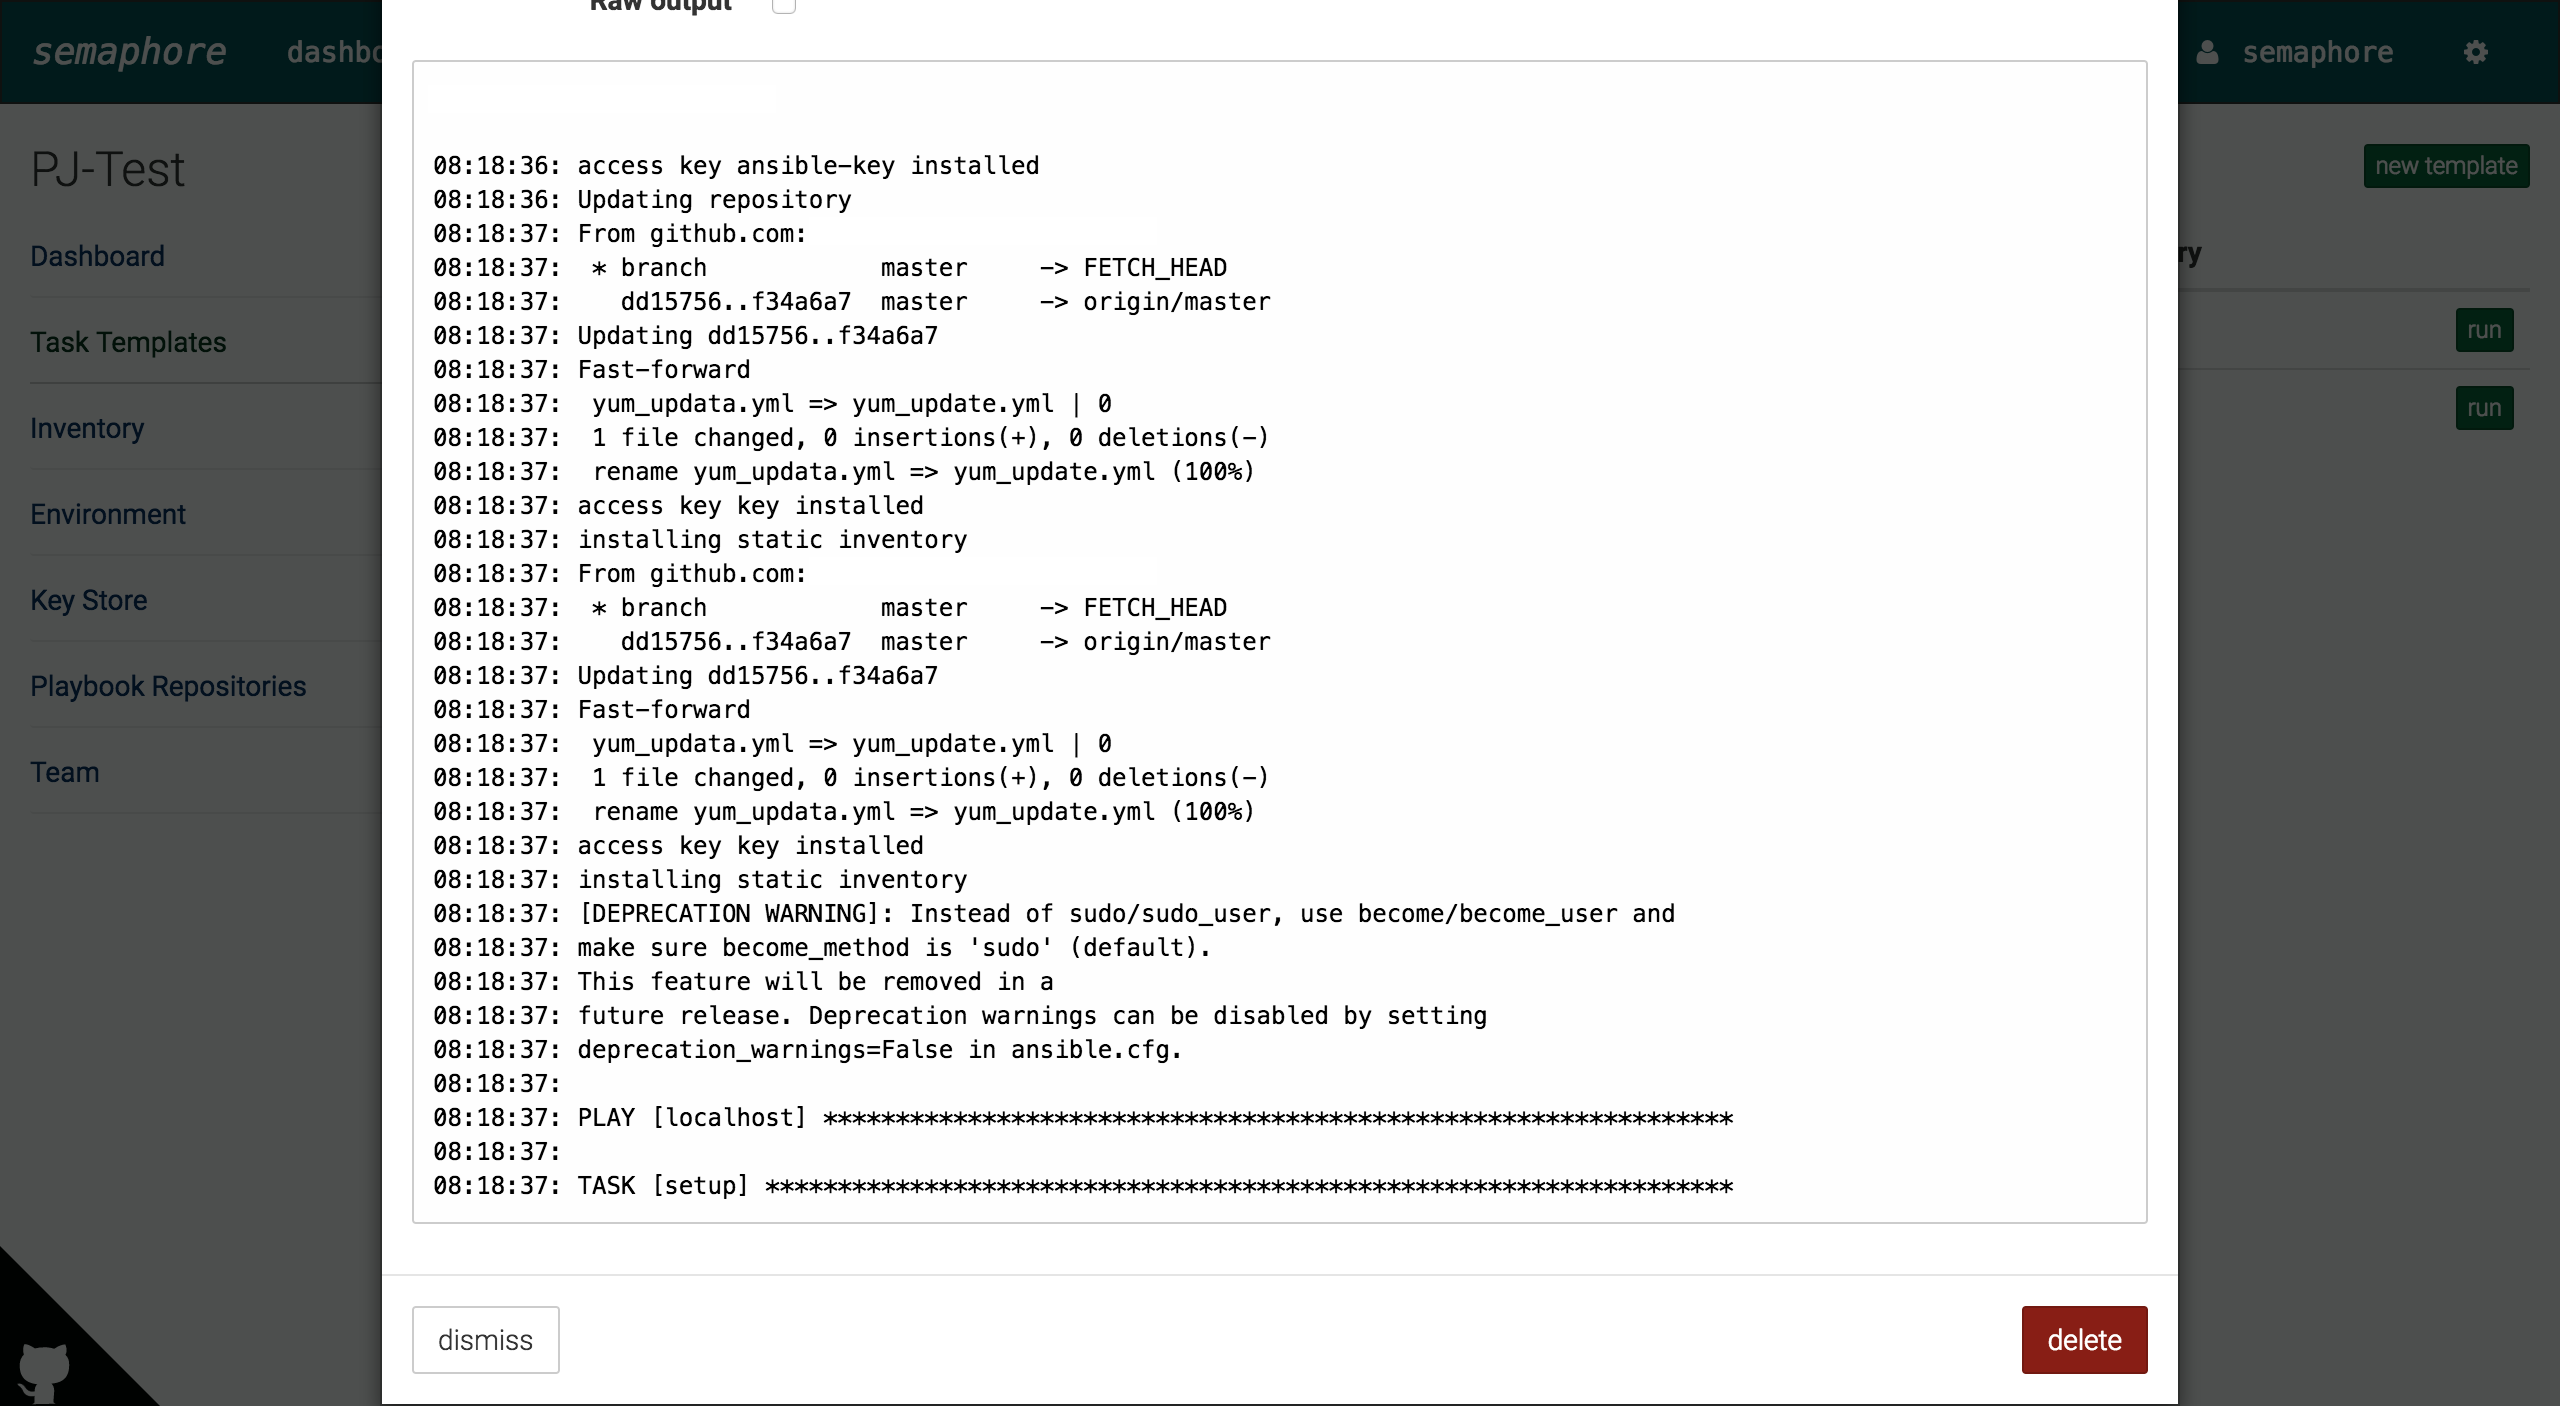
実行されましたね。
最後に
Ansibleを画面でポチポチするだけで実行できる環境を構築しました。
非エンジニアの方も使いやすいのではないでしょうか。
また、実行結果や、ユーザー管理などもできるので、監査や管理面でも有効ですね。
ということで、長くなりましたがAdvent Calendar9日目おしまいです。
ありがとうございましたー