はじめに
タイトルの通り【Django】REST frameworkでプロジェクトにデータPOSTしてくるクライアントのIPアドレスをDBに格納するの続きです.
前回の記事では,「DjangoのREST frameworkを使ってクライアントのIPアドレスも取れるようになりました.」的なことを書きました.でも,みなさんの手元で本当にできるのかを確認する方法を言ってなかったなと思って続きを書いております.
結論
**「Advanced REST client」**というGoogle Chromeの拡張機能を使って実際にPOSTして確認します.DjangoのDB内にlocalhostのIPアドレスが格納されていることを想定して説明していきます.
確認手順
環境
macOS Catalina 10.15.7
Python 3.8.5
Django 3.2.8
djangorestframework 3.12.4
前提
※前回の記事にある手順を完了した状態で,下記の確認手順を実行してください!
1.プロジェクト内でユーザを作成する
あとでDjangoのadminに入るので,admin権限を持つユーザを作ってください.
Djangoプロジェクトが作りたてでユーザがいないって方は,とりあえずスーパーユーザを作ればいいと思います.
$ python manage.py createsuperuser
2.「Google Chrome」をダウンロードする
「Advanced REST client」はChromeの拡張機能なので,Google Chrome をダウンロードしてインストールするに沿ってダウンロードします.
3.Advanced REST clientをダウンロードする
Advanced REST client - Chrome ウェブストアからダウンロードします.
4.Djangoプロジェクトを起動する
$ python manage.py runserver

Watching for file changes with StatReloader
Performing system checks...

System check identified no issues (0 silenced).
October 27, 2021 - 11:49:22
Django version 3.2.8, using settings '_config.settings'
Starting development server at http://127.0.0.1:8000/
Quit the server with CONTROL-C.
※localhostにアクセスして,Page not found (404)って怒られればOKです.(Djangoプロジェクトが元気に走ってる証拠です)
5.Advanced REST clientでデータをPOSTする
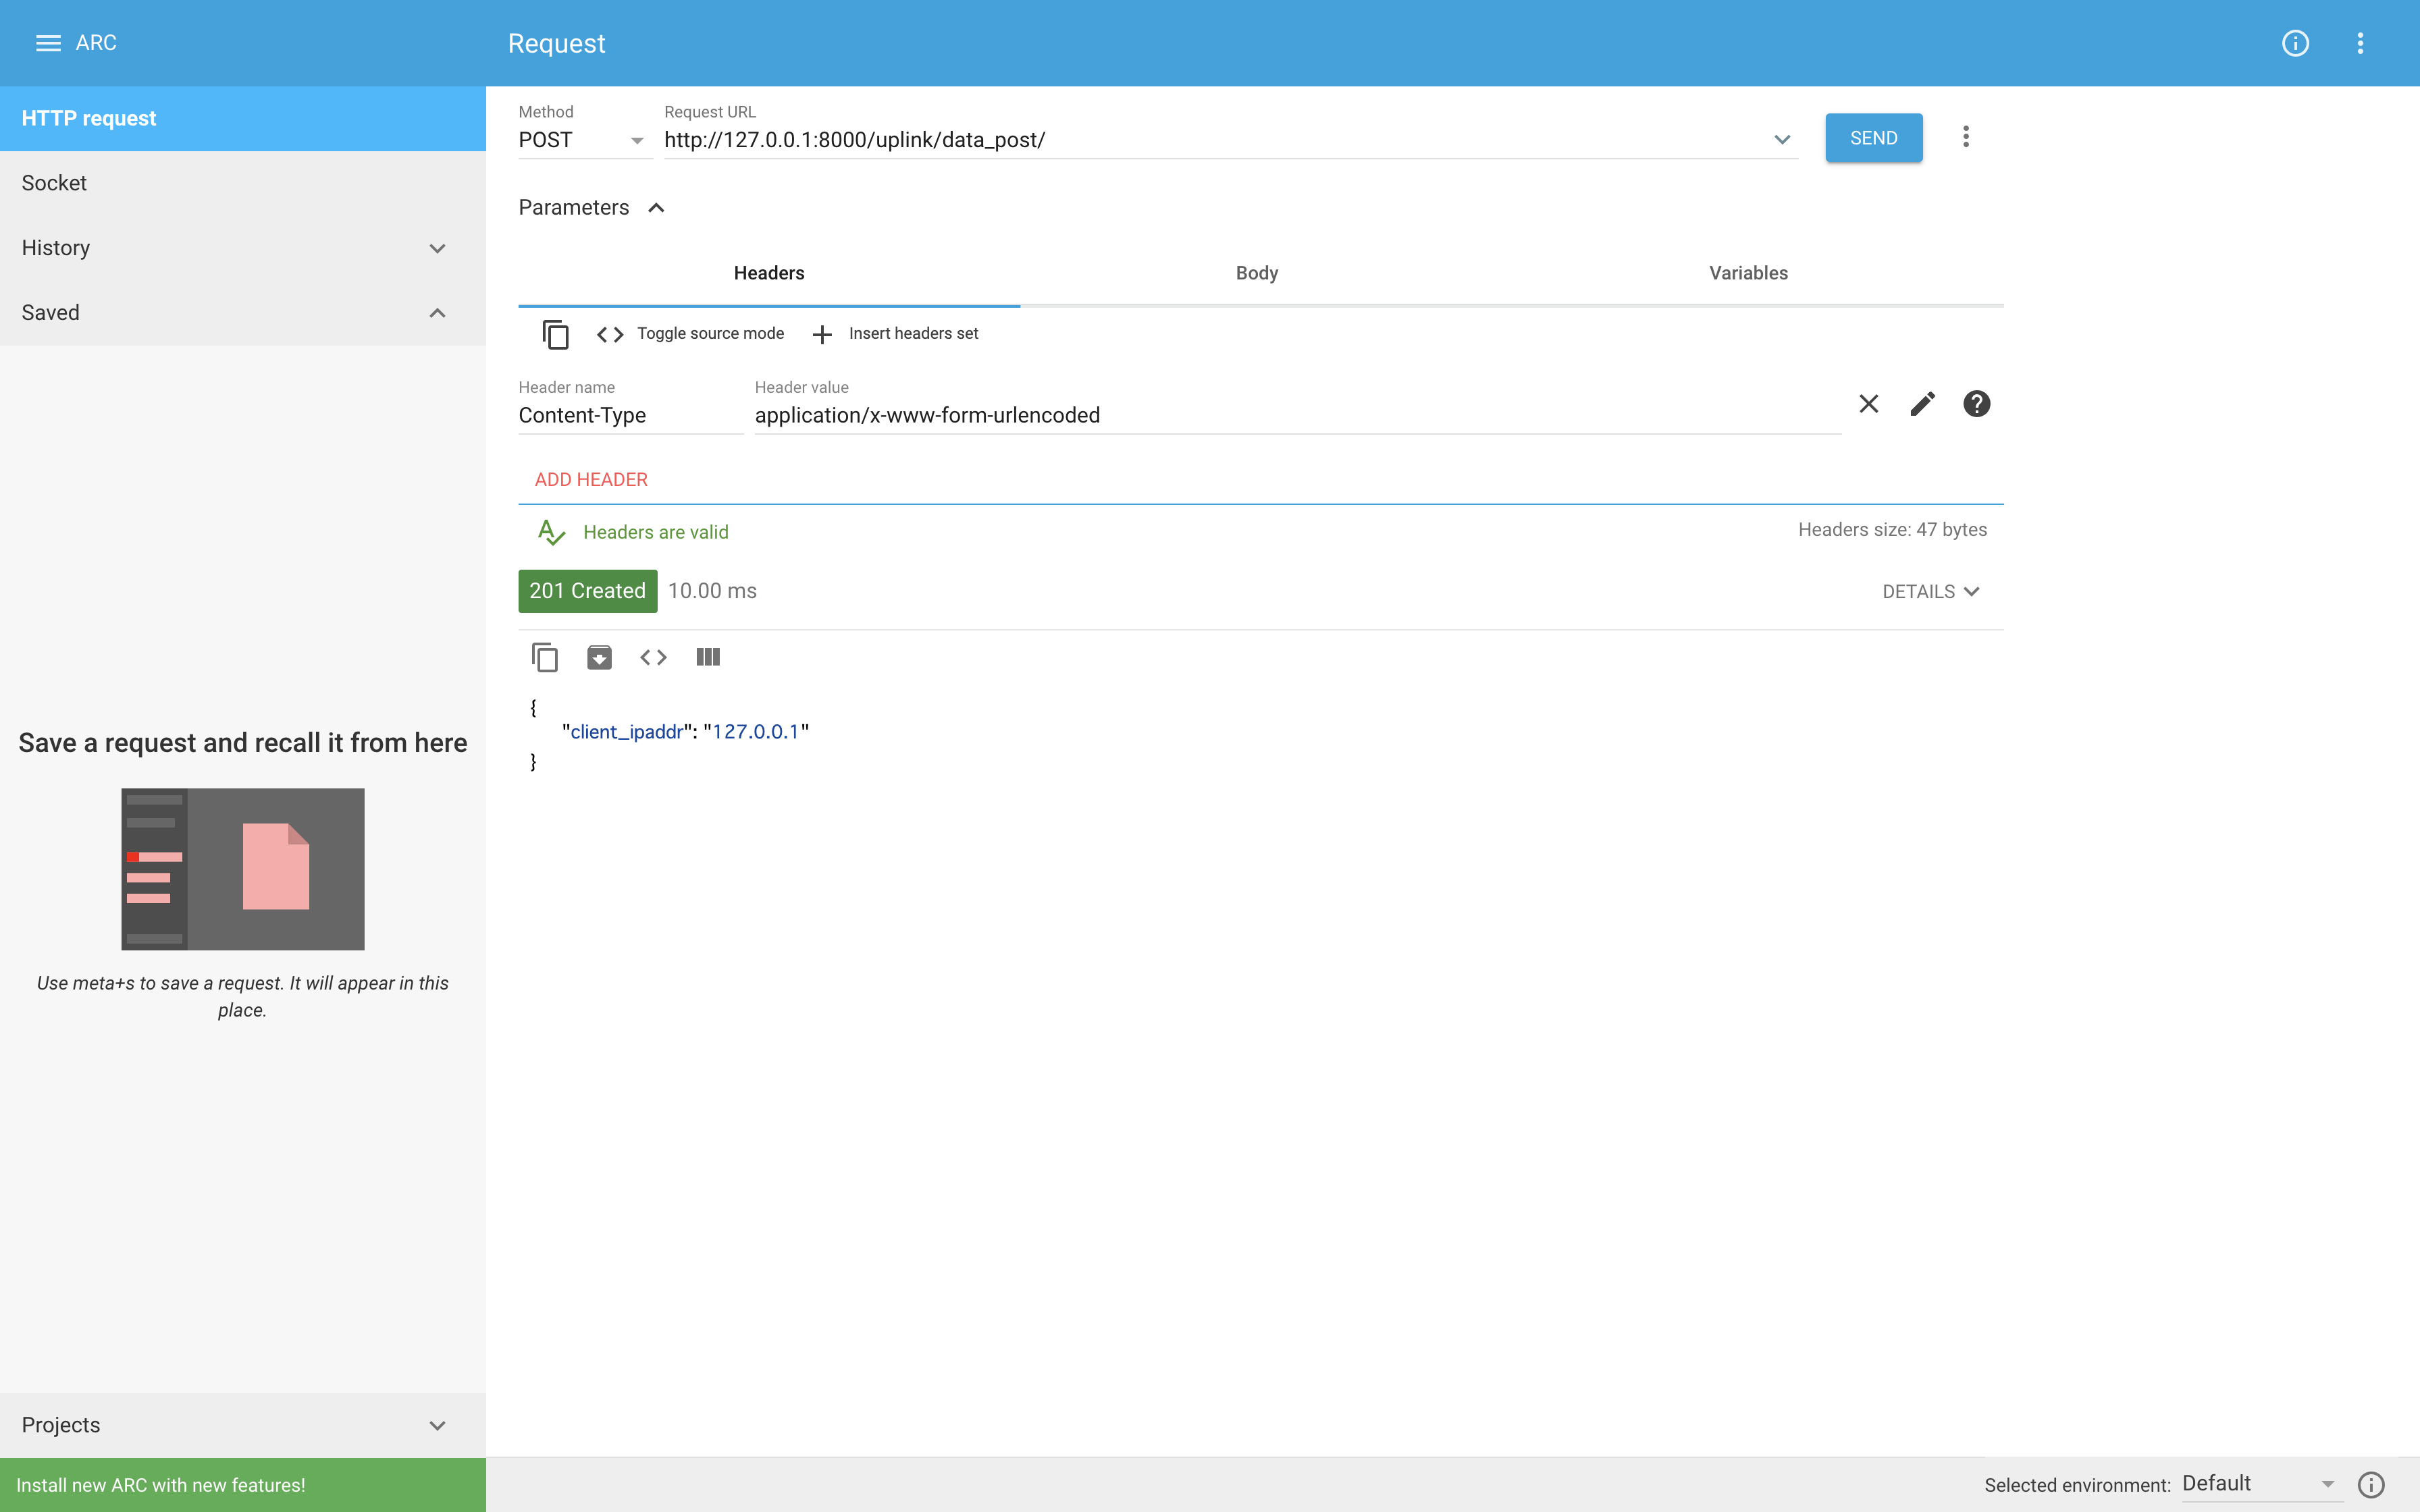
アプリを起動し,「HTTP request」を選択します.
さらに「Method」を「POST」にして,「Request URL」をhttp://127.0.0.1:8000/uplink/data_post/にします.(URLは私の記事の通りにやって頂いている方はこれで合ってますが,そうじゃない方は別のURLになると思います.)
最後に,「Header name」と「Content-Type」にして,「Header value」を「application/x-www-form-urlencoded」にしたら,「SEND」を押下しましょう!201 Createdと出れば成功です.

※URLの最後の/を忘れるとRuntimeError: You called this URL via POST, but the URL doesn't end in a slash and you have APPEND_SLASH set. Django can't redirect to the slash URL while maintaining POST data. Change your form to point to 127.0.0.1:8000/uplink/data_post/ (note the trailing slash), or set APPEND_SLASH=False in your Django settings.って怒られると思います.
6.Djangoのadmin画面でIPアドレスのPOSTを確認
admin画面にアクセスして1.の手順で作成したユーザでログインします.
「PostData」をクリックするとlocalhostのIPアドレスである127.0.0.1とPOSTをした時刻が記録されていますね.

まとめ
これで「IPアドレスほんとに入ったわ!」ということをみなさんにも確認して頂けるようになったと思います.POSTクライアントのIPアドレスをデータとして持っておけば,downlinkなどの応用ができるので是非ご活用ください.
※ご意見や疑問点お待ちしております!
参考
Google Chrome をダウンロードしてインストールする
Advanced REST client - Chrome ウェブストア
Advanced rest clientでログインしてAPIを叩く方法