はじめに
始まりました、Advent Calendar 1日目の記事です。
前提
ビデオツール部分の実装などは行っていません。
ビデオツールの背景機能ってどうやってるんだ?
ZoomやGoogle Meetなどで実装されている背景機能は自分で実現できないだろうかと思って。
React.jsとTensorflow.jsを使って実装してみることにした。
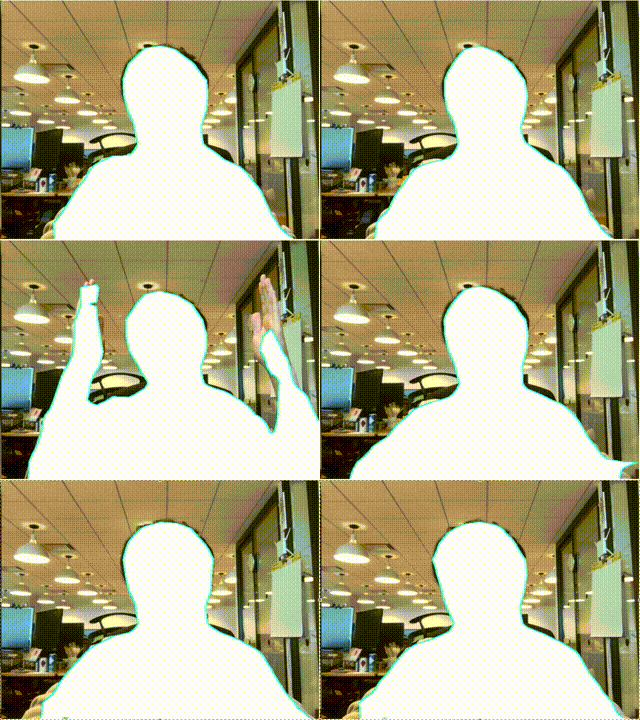
完成物
逆に自分を白く塗りつぶした。
クライアント完結で機械学習を使える!
機械学習のアプリを作ろうと思うと、Pythonでテンプレートを使って書くか、PythonでREST APIを書いて、React.jsなどでフロント側を作るという方法しか知らなかった。
個人的にはReact.jsを使い慣れているので、UIがある時にはReact.jsを使いたい。
そんな時、Tensorflow.jsを知った!
Tensorflow.jsを使うことで、Pythonを書くことなく、機械学習を使ったアプリが作れる!
すぐに使えるモデルがたくさん
Tensorflow.jsでは事前トレーニング済みのモデルが用意されている。
詳しくはこちら。
今回は人体セグメンテーション(BodyPix)のモデルを使用して背景機能を作っていく。
準備
最初に
$ npx create-react-app bodypix-web
$ cd bodypix-web
必要ライブラリのインストール
$ yarn add @tensorflow-models/body-pix @tensorflow/tfjs # 機械学習用
$ yarn add react-webcam # カメラ用
$ yarn add @material-ui/core # UI用
BodyPixを使って人体セグメンテーション
- モデルのロード
- セグメンテーションの生成
- セグメンテーションの描画
モデルのロード
@tensorflow-models/body-pixのload()メソッドがあり、呼び出すことでロードができる。
import React, { useState, useEffect } from "react";
import "@tensorflow/tfjs";
import * as bodyPix from "@tensorflow-models/body-pix";

const App = () => {
    const [model, setModel] = useState();

    useEffect(() => {
        bodyPix.load().then((net) => {
            setModel(net);
        })
    }, []);
    return ();
}
また、load()の引数として以下のようなオプションを与えることができる。
- architecture: セグメンテーションのモデルを指定できる。MobileNetV1やResNet50が指定できる(デフォルトはMobileNetV1)。
- outputStride: セグメンテーションのモデルの出力ストライドを指定できる。値が小さいほど出力される解像度が高くなり、モデルの精度が向上するが速度は遅くなる。
- multiplier: MobileNetV1のみで使用できる畳み込みの深さを指定できるパラメータ。値が大きいほど精度が向上するが速度は遅くなる。
- quantByes: 重みの量子化に使用するバイト数を指定できる。何ができるかあまりわかっていない。
セグメンテーションの生成
ロードしたモデルのsegmentPerson()メソッドを使うことでセグメンテーションを生成することができる。
import React, { useState, useEffect } from "react";
import { Button, Box } from "@material-ui/core";

import "@tensorflow/tfjs";
import * as bodyPix from "@tensorflow-models/body-pix";

import WebCam from "react-webcam";

const App = () => {
    const [model, setModel] = useState();

    useEffect(() => {
        bodyPix.load().then((net) => {
            setModel(net);
        })
    }, []);


    // ここに注目
    const estimate = useCallback(() => {
        const webcam = document.getElementById("webcam");
        model.segmentPerson(webcam).then((segmentation) => {
            console.log(segmentation);
        }, [model])
    });

    return (
        <>
            <Box>
                <Button onClick={estimate}>推定</Button>
            </Box>
            <Box>
                <WebCam id="webcam" width={640} height={480} />
            </Box>
        </>
    );
}
segmentPerson()の引数としてはImageData、HTMLImageElement、HTMLCanvasElement、HTMLVideoElementが指定できる。今回はHTMLVideoElementを指定している。
セグメンテーションの描画
@tensorflow-models/body-pixのtoMask()メソッドでセグメンテーションに対応したピクセル値を生成し、drawMask()メソッドでそのマスクを画像やキャンバスに描画する。
import React, { useState, useEffect } from "react";
import { Button, Box } from "@material-ui/core";

import "@tensorflow/tfjs";
import * as bodyPix from "@tensorflow-models/body-pix";

import WebCam from "react-webcam";

const App = () => {
    const [model, setModel] = useState();

    useEffect(() => {
        bodyPix.load().then((net) => {
            setModel(net);
        })
    }, []);


    const estimate = useCallback(() => {
        const webcam = document.getElementById("webcam");
        model.segmentPerson(webcam).then((segmentation) => {
            showResult(segmentation);
        }, [model, showResult])
    });

    // ここに注目
    const showResult = useCallback((seg) => {
        const foregroundColor = { r: 0, g: 0, b: 0, a: 0 };
        const backgroundColor = { r: 127, g: 127, b: 127, a: 255 };

        const mask = bodyPix.toMask(seg, foregroundColor, backgroundColor);

        const webcam = document.getElementById("webcam");
        const canvas = document.getElementById("canvas");
        const opacity = 0.7;

        bodyPix.drawMask(canvas, webcam, mask, opacity, 0, false);
    }, );

    return (
        <>
            <Box>
                <Button onClick={estimate}>推定</Button>
            </Box>
            <Box>
                <WebCam id="webcam" width={640} height={480} />
                <canvas id="canvas" width={640} height={480} />
            </Box>
        </>
    );
}
描画するためにまずtoMask()メソッドを使用しマスクを作成する。toMask()メソッドでマスクを作るためには前景と背景の色を決める必要がある。ここではrgba指定で作成し、toMask()メソッドにセグメンテーション結果とともに渡している。
次に、drawMask()メソッドを使用してキャンバスに描画する。drawMask()メソッドは以下の引数が必要となる。
- canvas: キャンバスの要素。
- image: 適用する元画像。VideoElementも指定できるため、webcamを指定している。
- maskImage:
toMask()などで生成されたマスクデータ。 - maskOpacity: 画面上にマスクを描画する際に不透明度。デフォルトは0.7となっている。
- maskBlurAmount: マスクをぼかすピクセルすう。0~20が指定できる。デフォルトは0となっている。
- flipHorizontal: 結果を反転させるかどうかを指定できる。デフォルトはfalseとなっている。
他にやったこと
- リアルタイム描画
- 背景塗りつぶし、人物塗りつぶし、塗りつぶしなしの切り替え
コードはこちら
https://github.com/makky0620/bodypix-web
最後に
サンプルコードとかではReact.jsを使った例がなかったので、ちゃんとかけているか分からないですが、結構簡単に実装できて嬉しかった。
他のモデルも触ってみよう!
