はじめに
SwiftUIでMapkitとFirebaseを使用し、位置情報をデータベースに保存することを目的とする。
今回はSwiftUIで取得した現在地から逆ジオコーディングし、都道府県名と市区町村名を取得するところまでを記載。
Mapkitを使って現在置を取得する方法は前回記事を参考にしてください。
参考記事
【SwiftUI】Mapkitを使った位置情報の取得とピンの表示
開発環境
OSX 10.15.7 (Catalina)
Xcode 12.0.1
CocoaPods 1.10.0
取得した現在地から逆ジオコーディングを実行する
追加するのはmakeCoordinatorの下部にtitleとsubtitleを定義します。
ContentView.swift
func makeCoordinator() -> mapView.Coordinator {

        return mapView.Coordinator(parent1: self)
    }

    // ここから追加
    // 都道府県名
    @Binding var title : String
    // 市区町村名
    @Binding var subtitle : String

    func  makeUIView(context: UIViewRepresentableContext<mapView>) -> MKMapView {
        // Tokyo 35.6804° N, 139.7690° E
次にCoordinatorクラス内のlocationManagerファンクション内にtitleとsubtitleを追加します。
今回は都道府県名と市区町村名を取得できればよいため、administrativeAreaとlocalityを設定しました。
他の地名や郵便番号など取得したい場合はこの箇所を変更、または追加していきます。
その場合は以下の記事が参考になりました。
[Swift] MapKitを使って”ジオコーディング・逆ジオコーディング”をやってみる
ContentView.swift
class Coordinator: NSObject, CLLocationManagerDelegate {

        var parent : mapView

        init(parent1 : mapView) {

            parent = parent1
        }

        func locationManager(_ manager: CLLocationManager, didChangeAuthorization status: CLAuthorizationStatus) {

            if status == .denied{

                parent.alert.toggle()
                print("denied")
            }
        }

        func locationManager(_ manager: CLLocationManager, didUpdateLocations locations: [CLLocation]) {

            let location = locations.last

            let point = MKPointAnnotation()

            let georeader = CLGeocoder()
            georeader.reverseGeocodeLocation(location!) { (places, err) in

                if err != nil {

                    print((err?.localizedDescription)!)
                    return
                }

                // ここから追加
                // 都道府県名
                self.parent.title = (places?.first?.administrativeArea)!
                // 市町村名
                self.parent.subtitle = (places?.first?.locality)!

                // 前回記事から一部変更。ピンの選択時に都道府県名と市区町村名を表示できるように設定。

                let place = places?.first?.administrativeArea
                let subPlace = places?.first?.locality
                print(place as Any)
                point.title = place
                point.subtitle = subPlace

                point.coordinate = location!.coordinate
                self.parent.map.removeAnnotations(self.parent.map.annotations)
                self.parent.map.addAnnotation(point)

                let region = MKCoordinateRegion(center: location!.coordinate, latitudinalMeters: 10000, longitudinalMeters: 100000)
                print(region)
                self.parent.map.region = region

            }
        }
    }
今後、ここで取得した緯度経度と都道府県名、市区町村名はFirebaseに保存できるようにします。
都道府県名と市区町村名を表示する
ContentView.swift
struct ContentView: View {
// ここから追加
@State var title = ""
@State var subtitle = ""
@State var manager = CLLocationManager()
@State var alert = false
var body: some View {
// 以下の行を追加
// ContentViewに地図を表示
ZStack(alignment: .bottom, content: {
mapView(manager: $manager, alert: $alert, title: $title, subtitle: $subtitle).alert(isPresented: $alert) {
Alert(title: Text("Please Enable Location Access In Setting Panel!!!"))
}
// 以下を追加
// 地名を取得した場合に表示
if self.title != "" {
HStack(spacing: 12) {
Image(systemName: "info.circle.fill").font(.largeTitle).foregroundColor(.black)
VStack(alignment: .leading, spacing: 5){
Text(self.title).font(.body).foregroundColor(.black)
Text(self.subtitle).font(.caption).foregroundColor(.gray)
}
Spacer()
}
.padding()
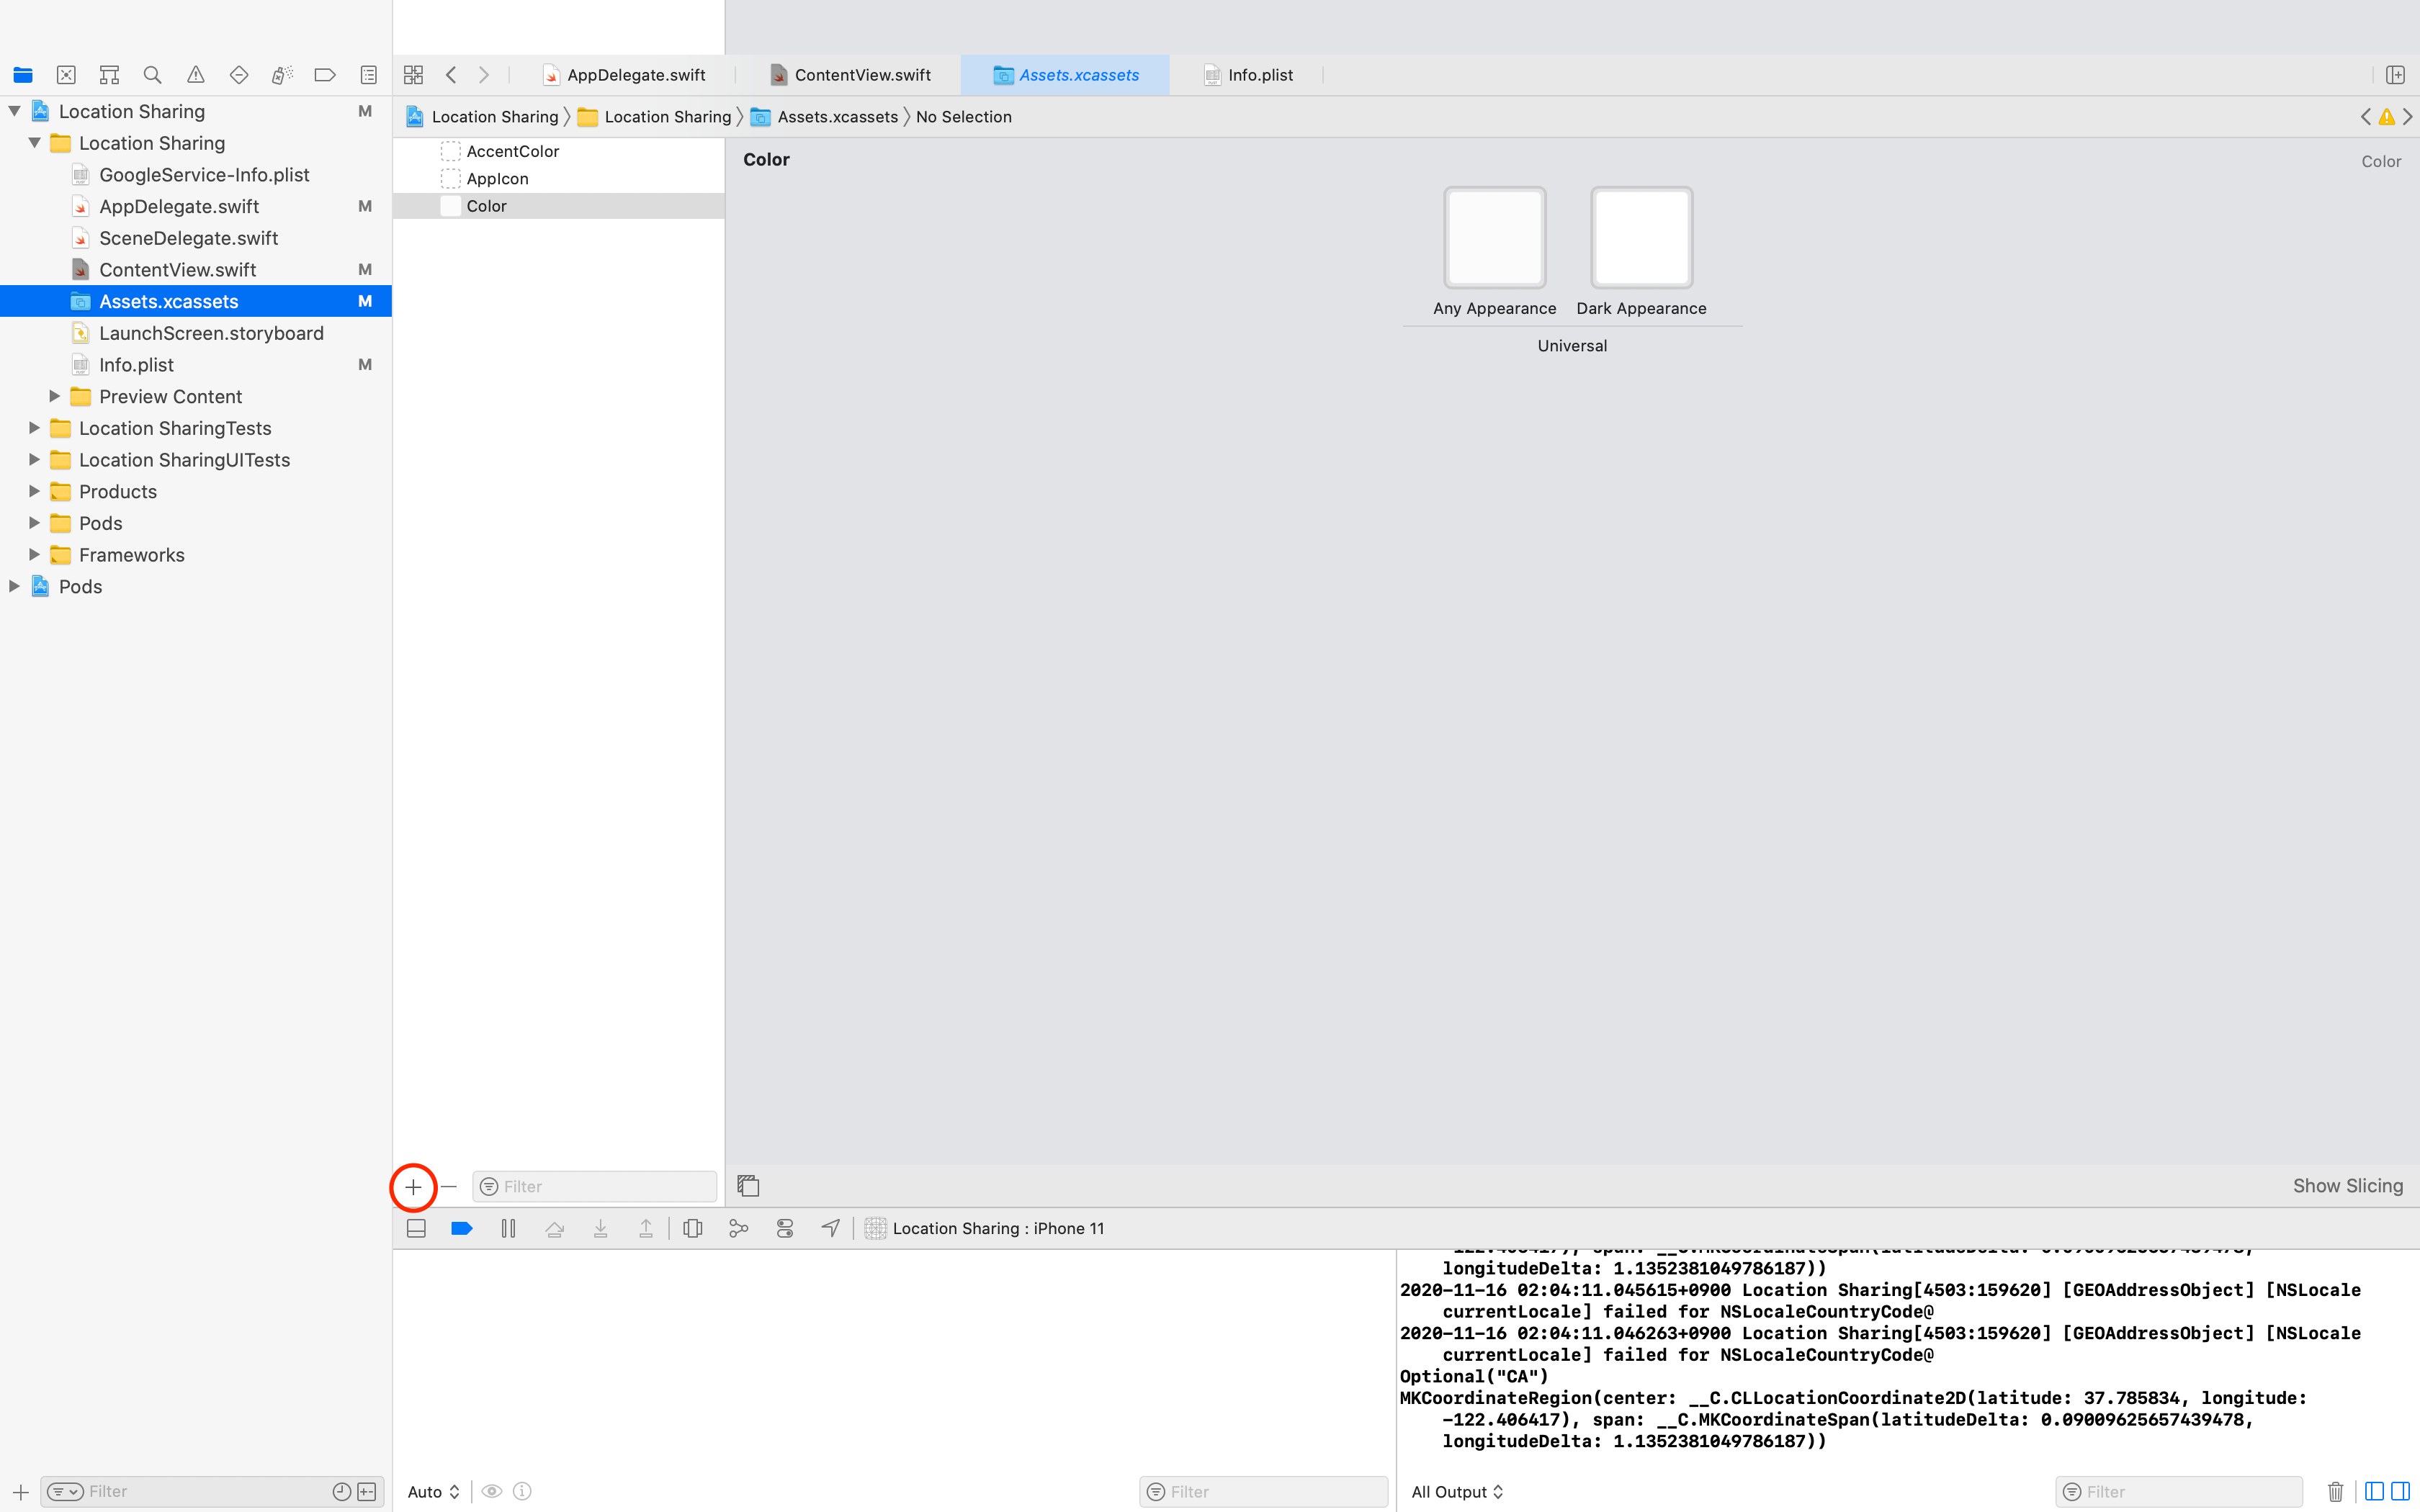
// "Color"はAssets.xcassetsで設定
.background(Color("Color"))
.cornerRadius(15)
.offset(y: -30)
.padding()
}
})
}
}
"Color"はAssets.xcassetsで設定しました。[+]から、[Color set]を選択し、色を作成しました。
Simulatorで地図の表示と確認
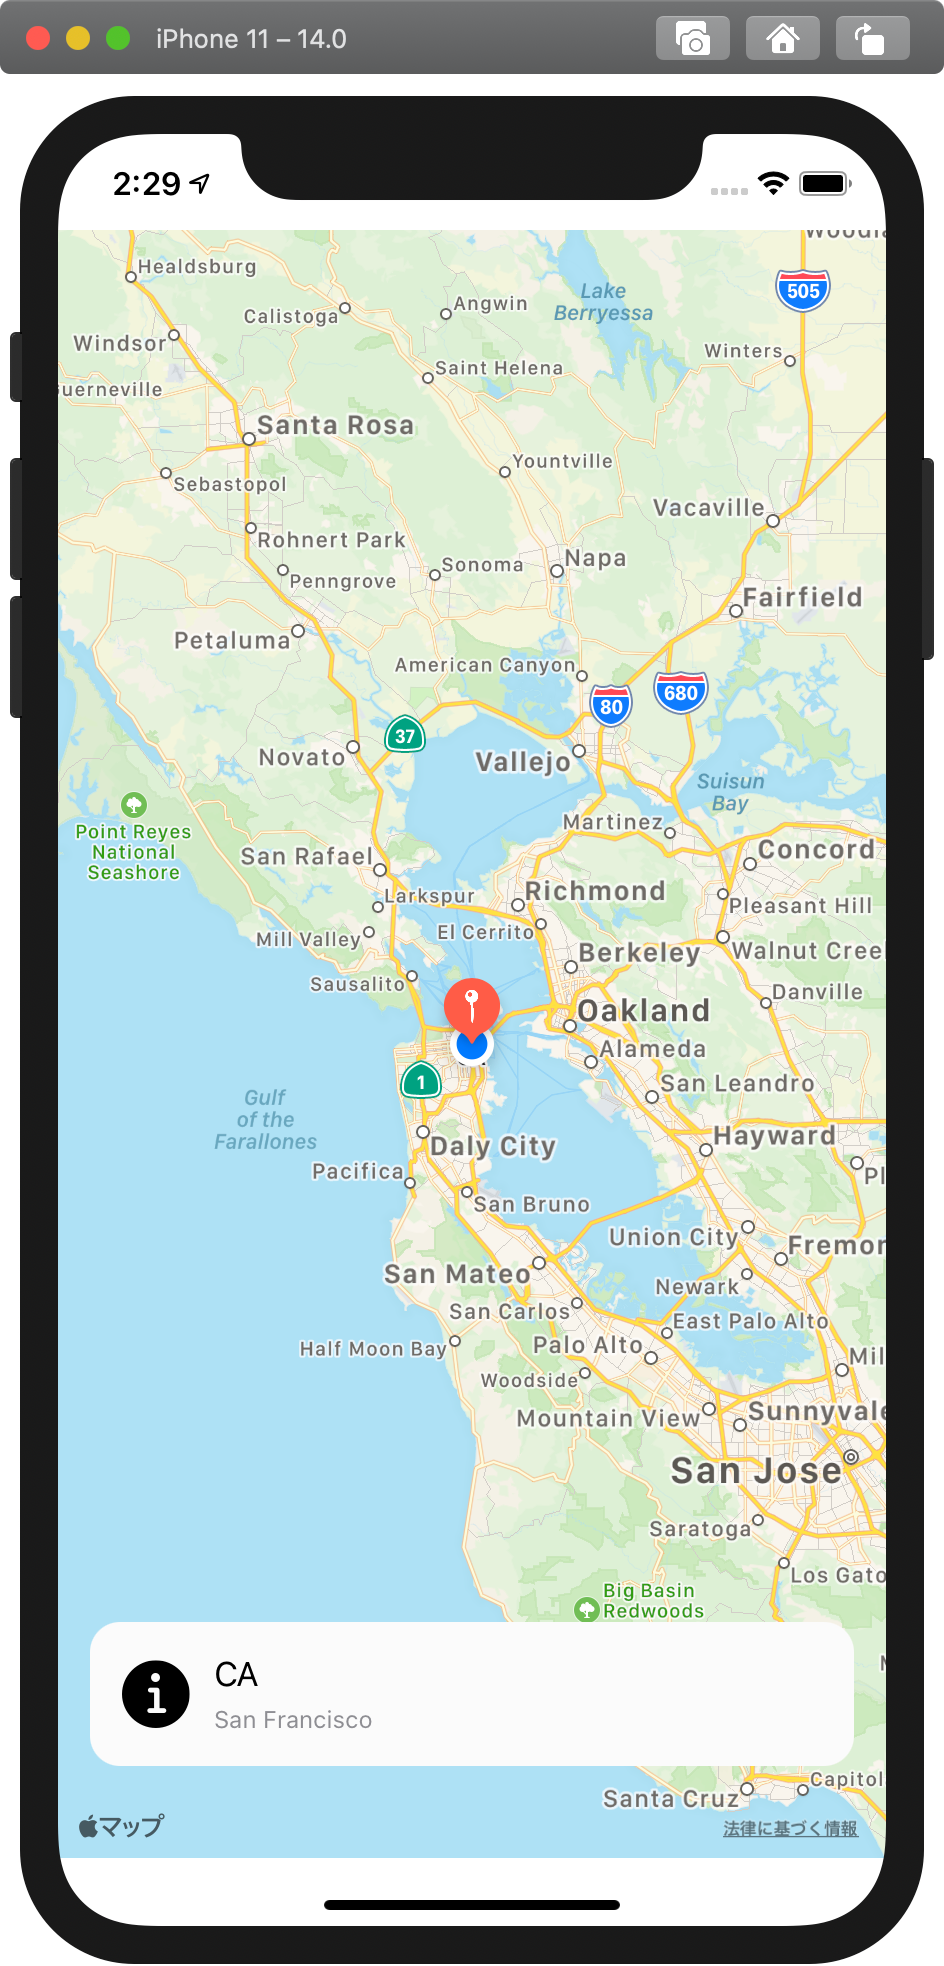
以上です。