はじめに
SwiftUIでMapkitとFirebaseを使用し、位置情報をデータベースに保存することを目的とする。
今回はSwiftUIで現在地を取得し、地図を表示するところまでを記載。
Firebaseの導入方法は前回記事を参考にしてください。
参考記事
【SwiftUI】CocoaPods導入手順とFirebaseの設定
開発環境
OSX 10.15.7 (Catalina)
Xcode 12.0.1
CocoaPods 1.10.0
Mapkitのインポートと地図表示まで
MapkitとCoreLocationをインポートする。
Alertは位置情報の取得が設定できなかった場合に通知を行うように設定。
import SwiftUI
import Firebase
// 以下の行を追加
import CoreLocation
import MapKit
struct ContentView: View {
// 以下を追記
@State var manager = CLLocationManager()
@State var alert = false
var body: some View {
// 以下の行を追加
// ContentViewに地図を表示
mapView(manager: $manager, alert: $alert).alert(isPresented: $alert) {
Alert(title: Text("Please Enable Location Access In Setting Panel!!!"))
}
}
}
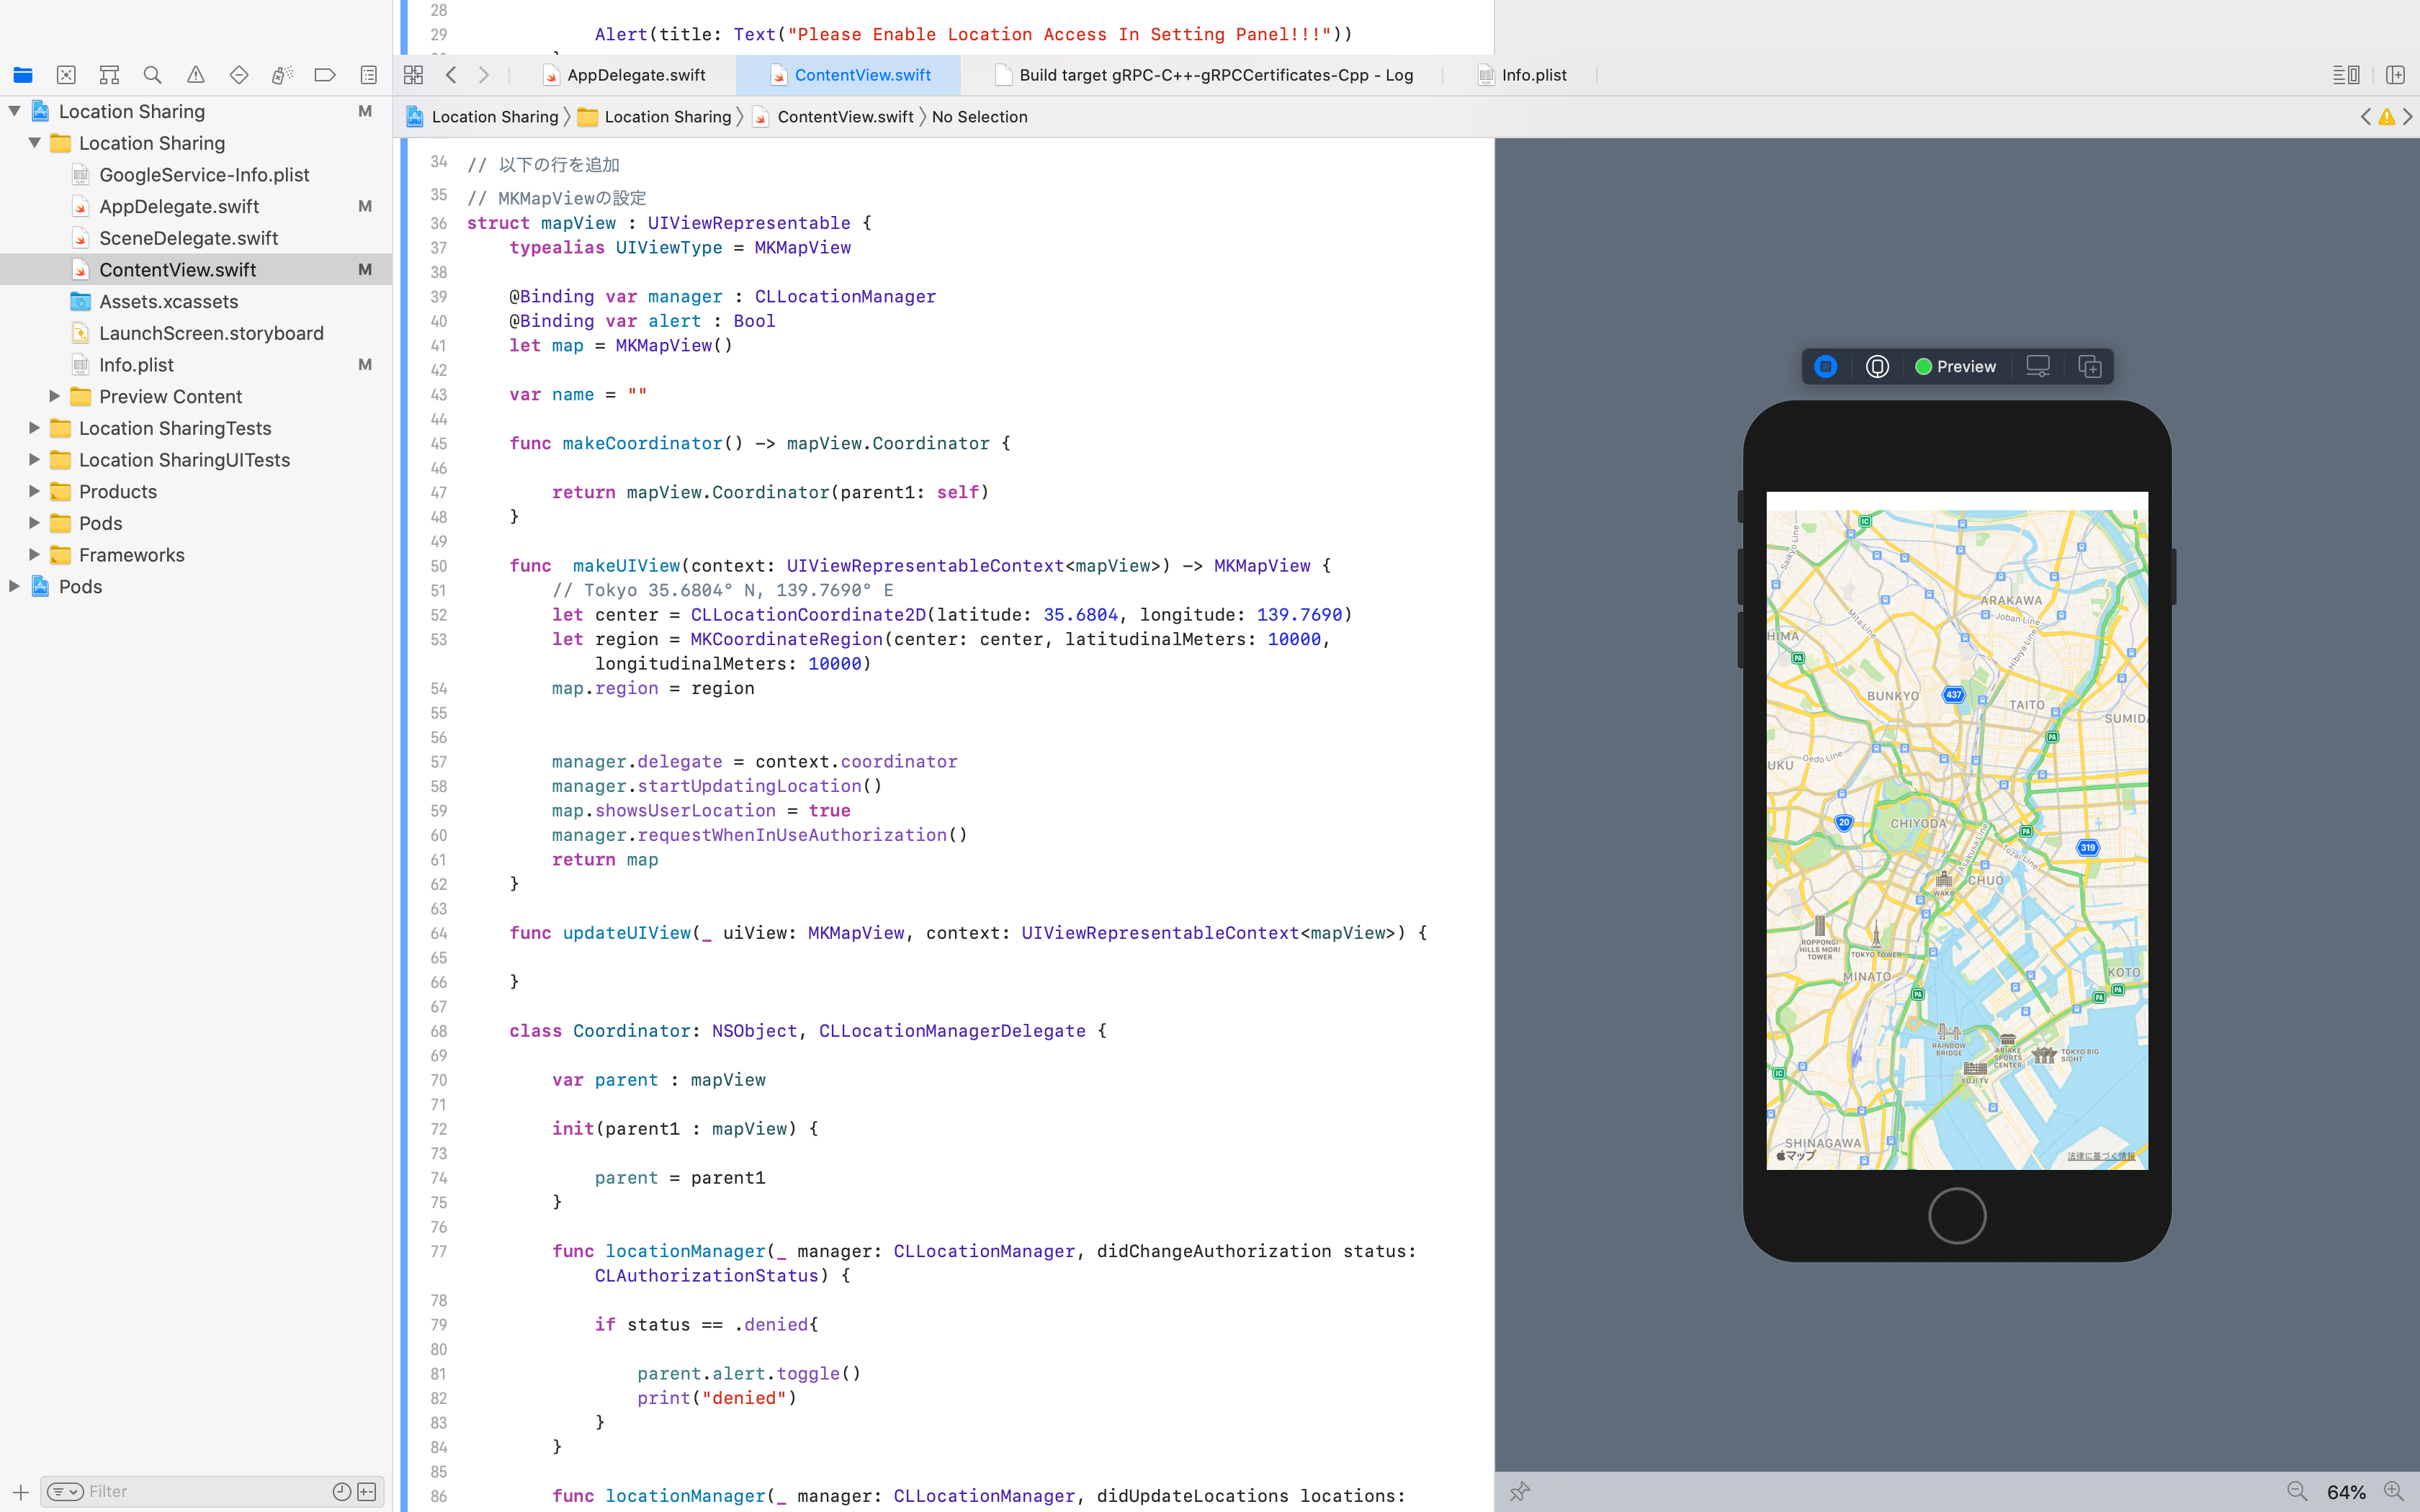
// MKMapViewの設定
mapViewの作成
地図表示にはmakeUIView、updateUIViewの設定が必要です。
【SwiftUI】MapKitを導入して地図を表示する
を参考にすると、makeUIViewのところはcodeの部分はMKMapView(frame: .zero)を記載するだけで地図の表示は可能です。今回は位置情報を取得するため、showsUserLocationをtrueに設定しています。
makeCoordinatorはカスタムインスタンスを作成し、makeUIView(context:)メソッドを呼び出す前にこのメソッドを呼び出します。makeCoordinatorはclassで設定したコーディネーターを提供します。
// MKMapViewの設定
struct mapView : UIViewRepresentable {
    typealias UIViewType = MKMapView

    @Binding var manager : CLLocationManager
    @Binding var alert : Bool

    let map = MKMapView()

    func makeCoordinator() -> mapView.Coordinator {

        return mapView.Coordinator(parent1: self)
    }

    func  makeUIView(context: UIViewRepresentableContext<mapView>) -> MKMapView {
        // Tokyo 35.6804° N, 139.7690° E
        let center = CLLocationCoordinate2D(latitude: 35.6804, longitude: 139.7690)
        let region = MKCoordinateRegion(center: center, latitudinalMeters: 10000, longitudinalMeters: 10000)
        map.region = region

        manager.delegate = context.coordinator
        manager.startUpdatingLocation()
        map.showsUserLocation = true
        manager.requestWhenInUseAuthorization()
        return map
    }

    func updateUIView(_ uiView: MKMapView, context: UIViewRepresentableContext<mapView>) {

    }

    class Coordinator: NSObject, CLLocationManagerDelegate {

        var parent : mapView

        init(parent1 : mapView) {

            parent = parent1
        }

        func locationManager(_ manager: CLLocationManager, didChangeAuthorization status: CLAuthorizationStatus) {

            if status == .denied{

                parent.alert.toggle()
                print("denied")
            }
        }

        func locationManager(_ manager: CLLocationManager, didUpdateLocations locations: [CLLocation]) {

            let location = locations.last

            let point = MKPointAnnotation()

            let georeader = CLGeocoder()
            georeader.reverseGeocodeLocation(location!) { (places, err) in

                if err != nil {

                    print((err?.localizedDescription)!)
                    return
                }

                let place = places?.first?.locality
                point.title = place
                point.subtitle = "Current Place"
                point.coordinate = location!.coordinate
                self.parent.map.removeAnnotations(self.parent.map.annotations)
                self.parent.map.addAnnotation(point)

                let region = MKCoordinateRegion(center: location!.coordinate, latitudinalMeters: 10000, longitudinalMeters: 100000)
                print(region)
                self.parent.map.region = region

            }
        }
    }
}
locationManagerのところで、位置情報を取得し、地図上にピンを落とし、表示する設定にしています。simulatorを利用した場合はピンが落とされますが、SwiftUI画面のpreview画面では表示されません。simulatorではGPS情報は取得できませんでしたが、実機で確認したところ、現在地を表すピンが表示されました。
ここではCLGeocoderを呼び出しているため、逆ジオコーディングを行い、地名を表示することも可能です。他にもピンの表示の仕方もここを変更すれば実装が可能です。
ここは今後実装します。
Xcodeプロジェクトの'info.plist'に追加
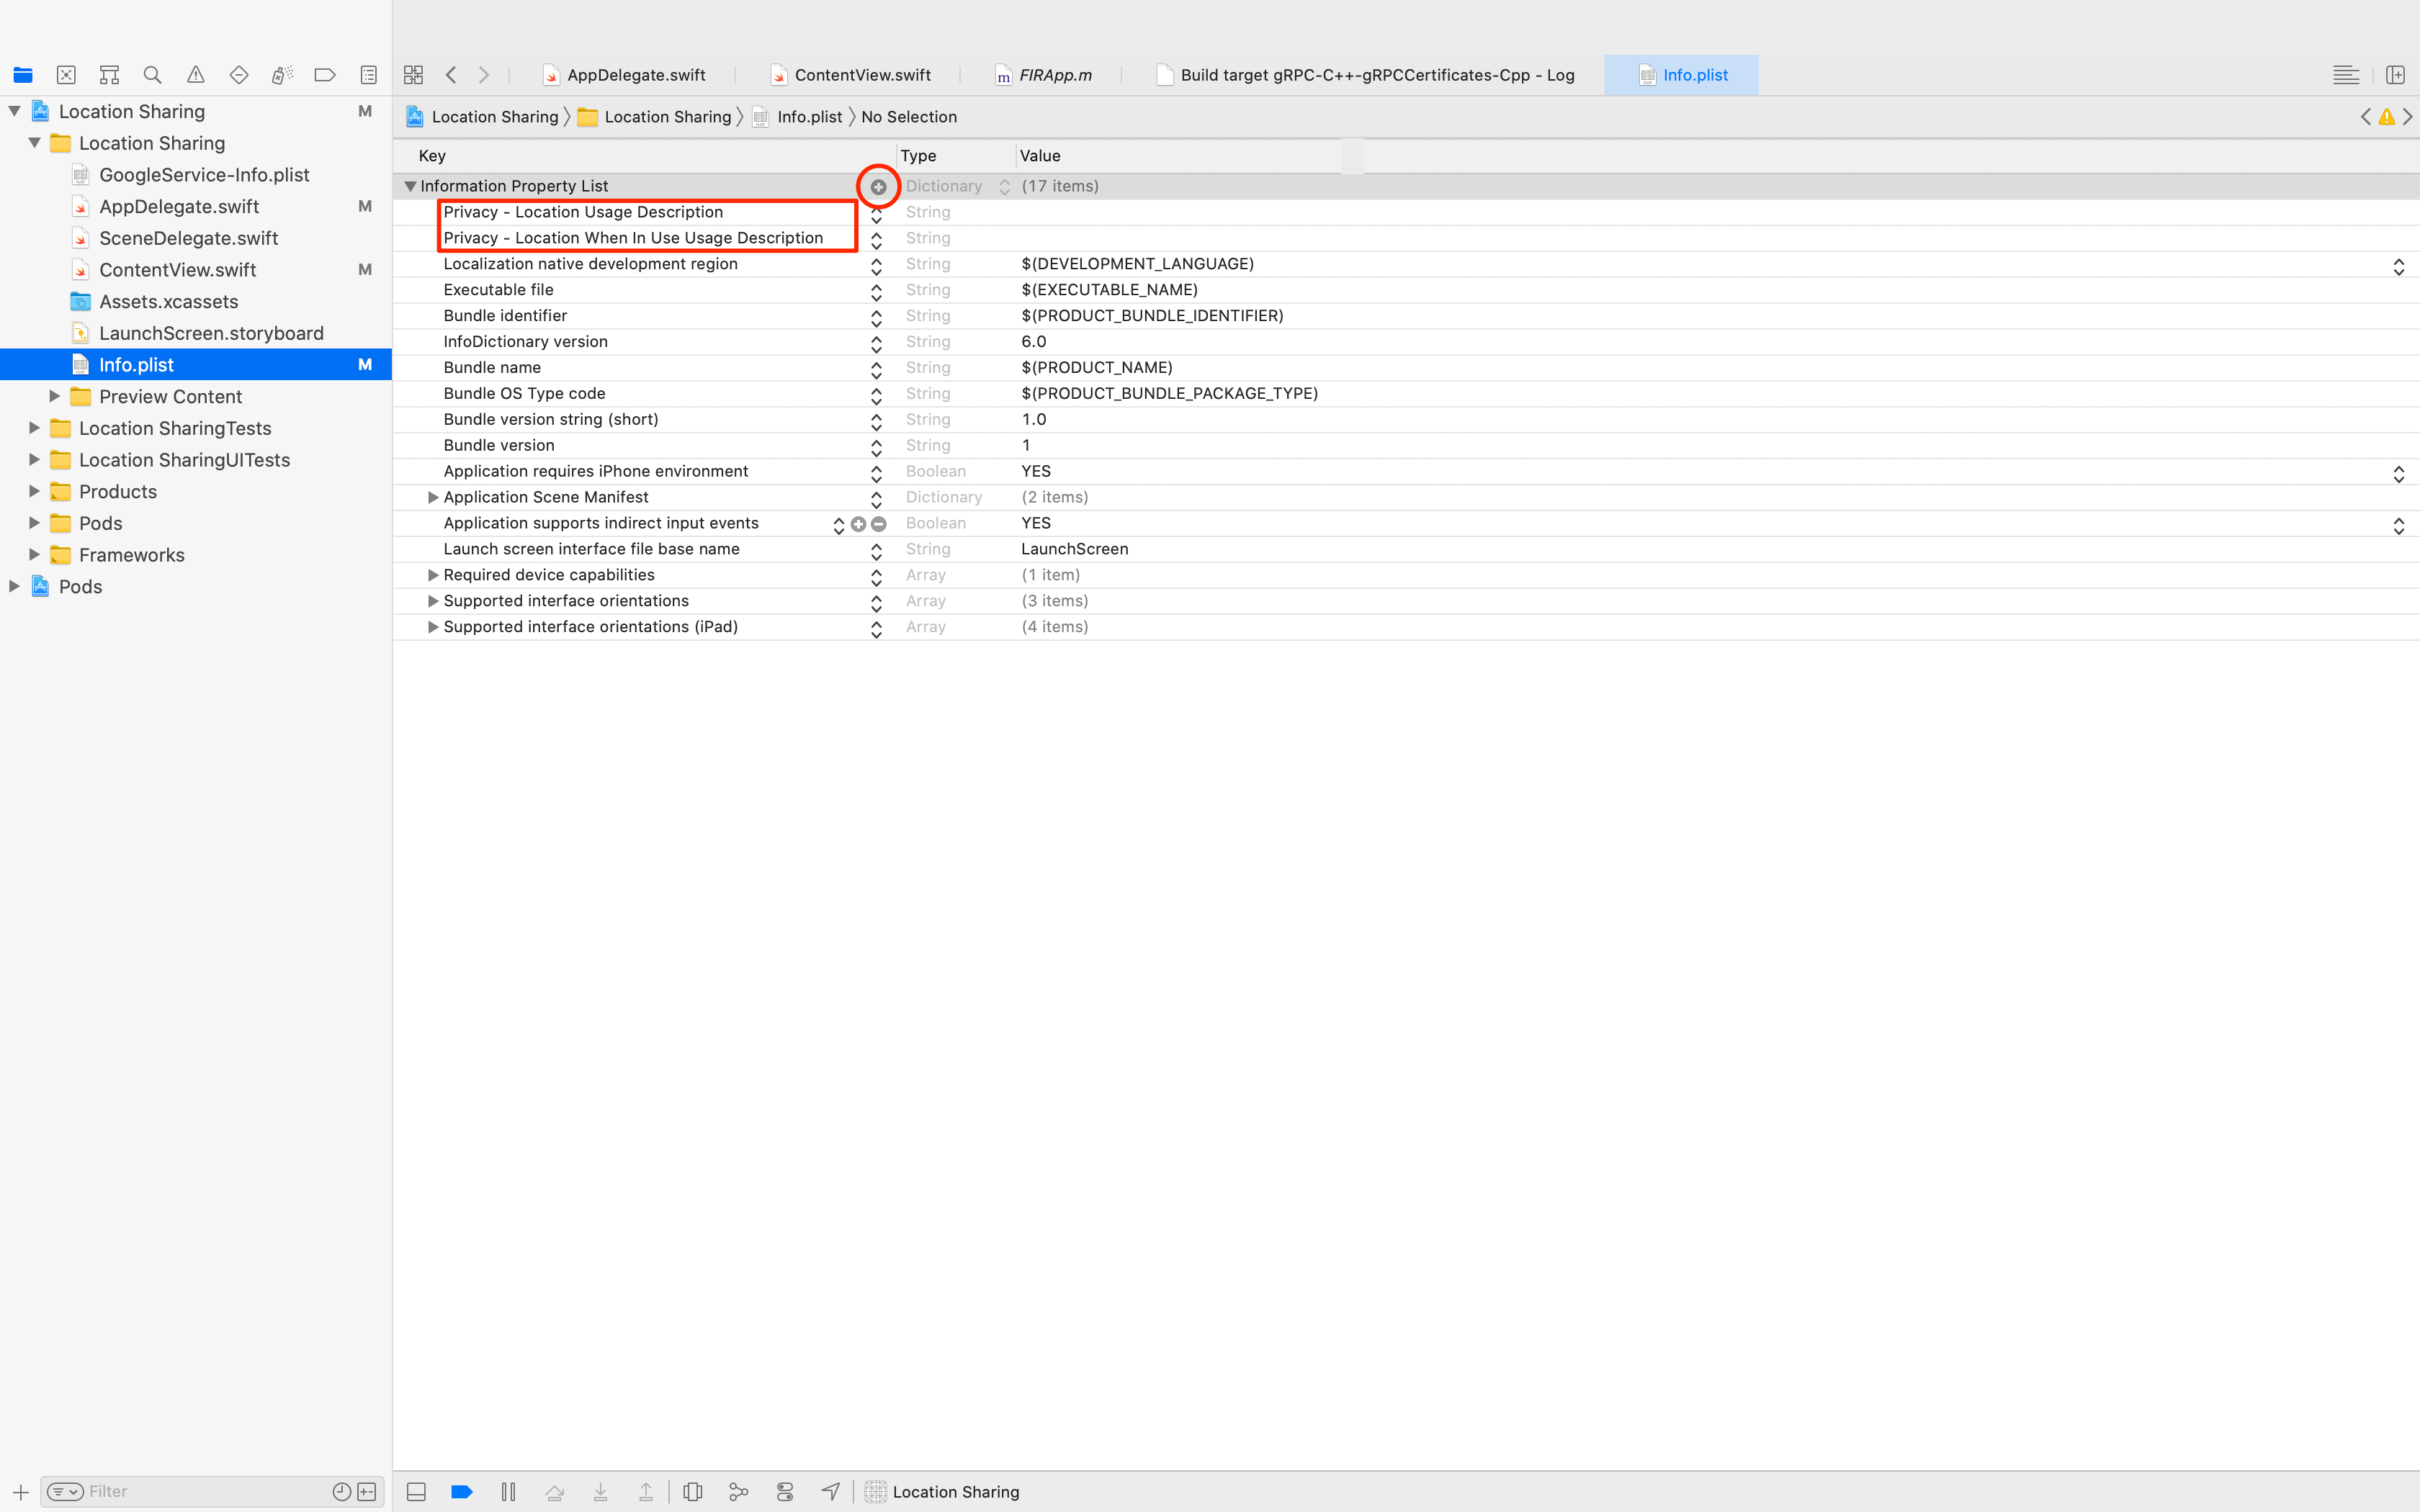
Privacy - Location Usage Description
開発者に許可を与える。なぜ、ユーザーの位置情報を取得するかの理由を記載。
[Deprecated] Privacy - Location Usage Description (NSLocationUsageDescription) - Allows the developer to describe why the app wants to access the user location. NOTE: This key has been deprecated in iOS 8 (and greater). Use NSLocationAlwaysUsageDescription or NSLocationWhenInUseUsageDescription instead.
Privacy - Location When In Use Usage Description
開発者に許可を与える。アプリ使用中にユーザーの位置情報を取得する理由を記載。
Privacy - Location When In Use Usage Description (NSLocationWhenInUseUsageDescription) - Allows the developer to describe why the app wants to access the user's location while it is running.
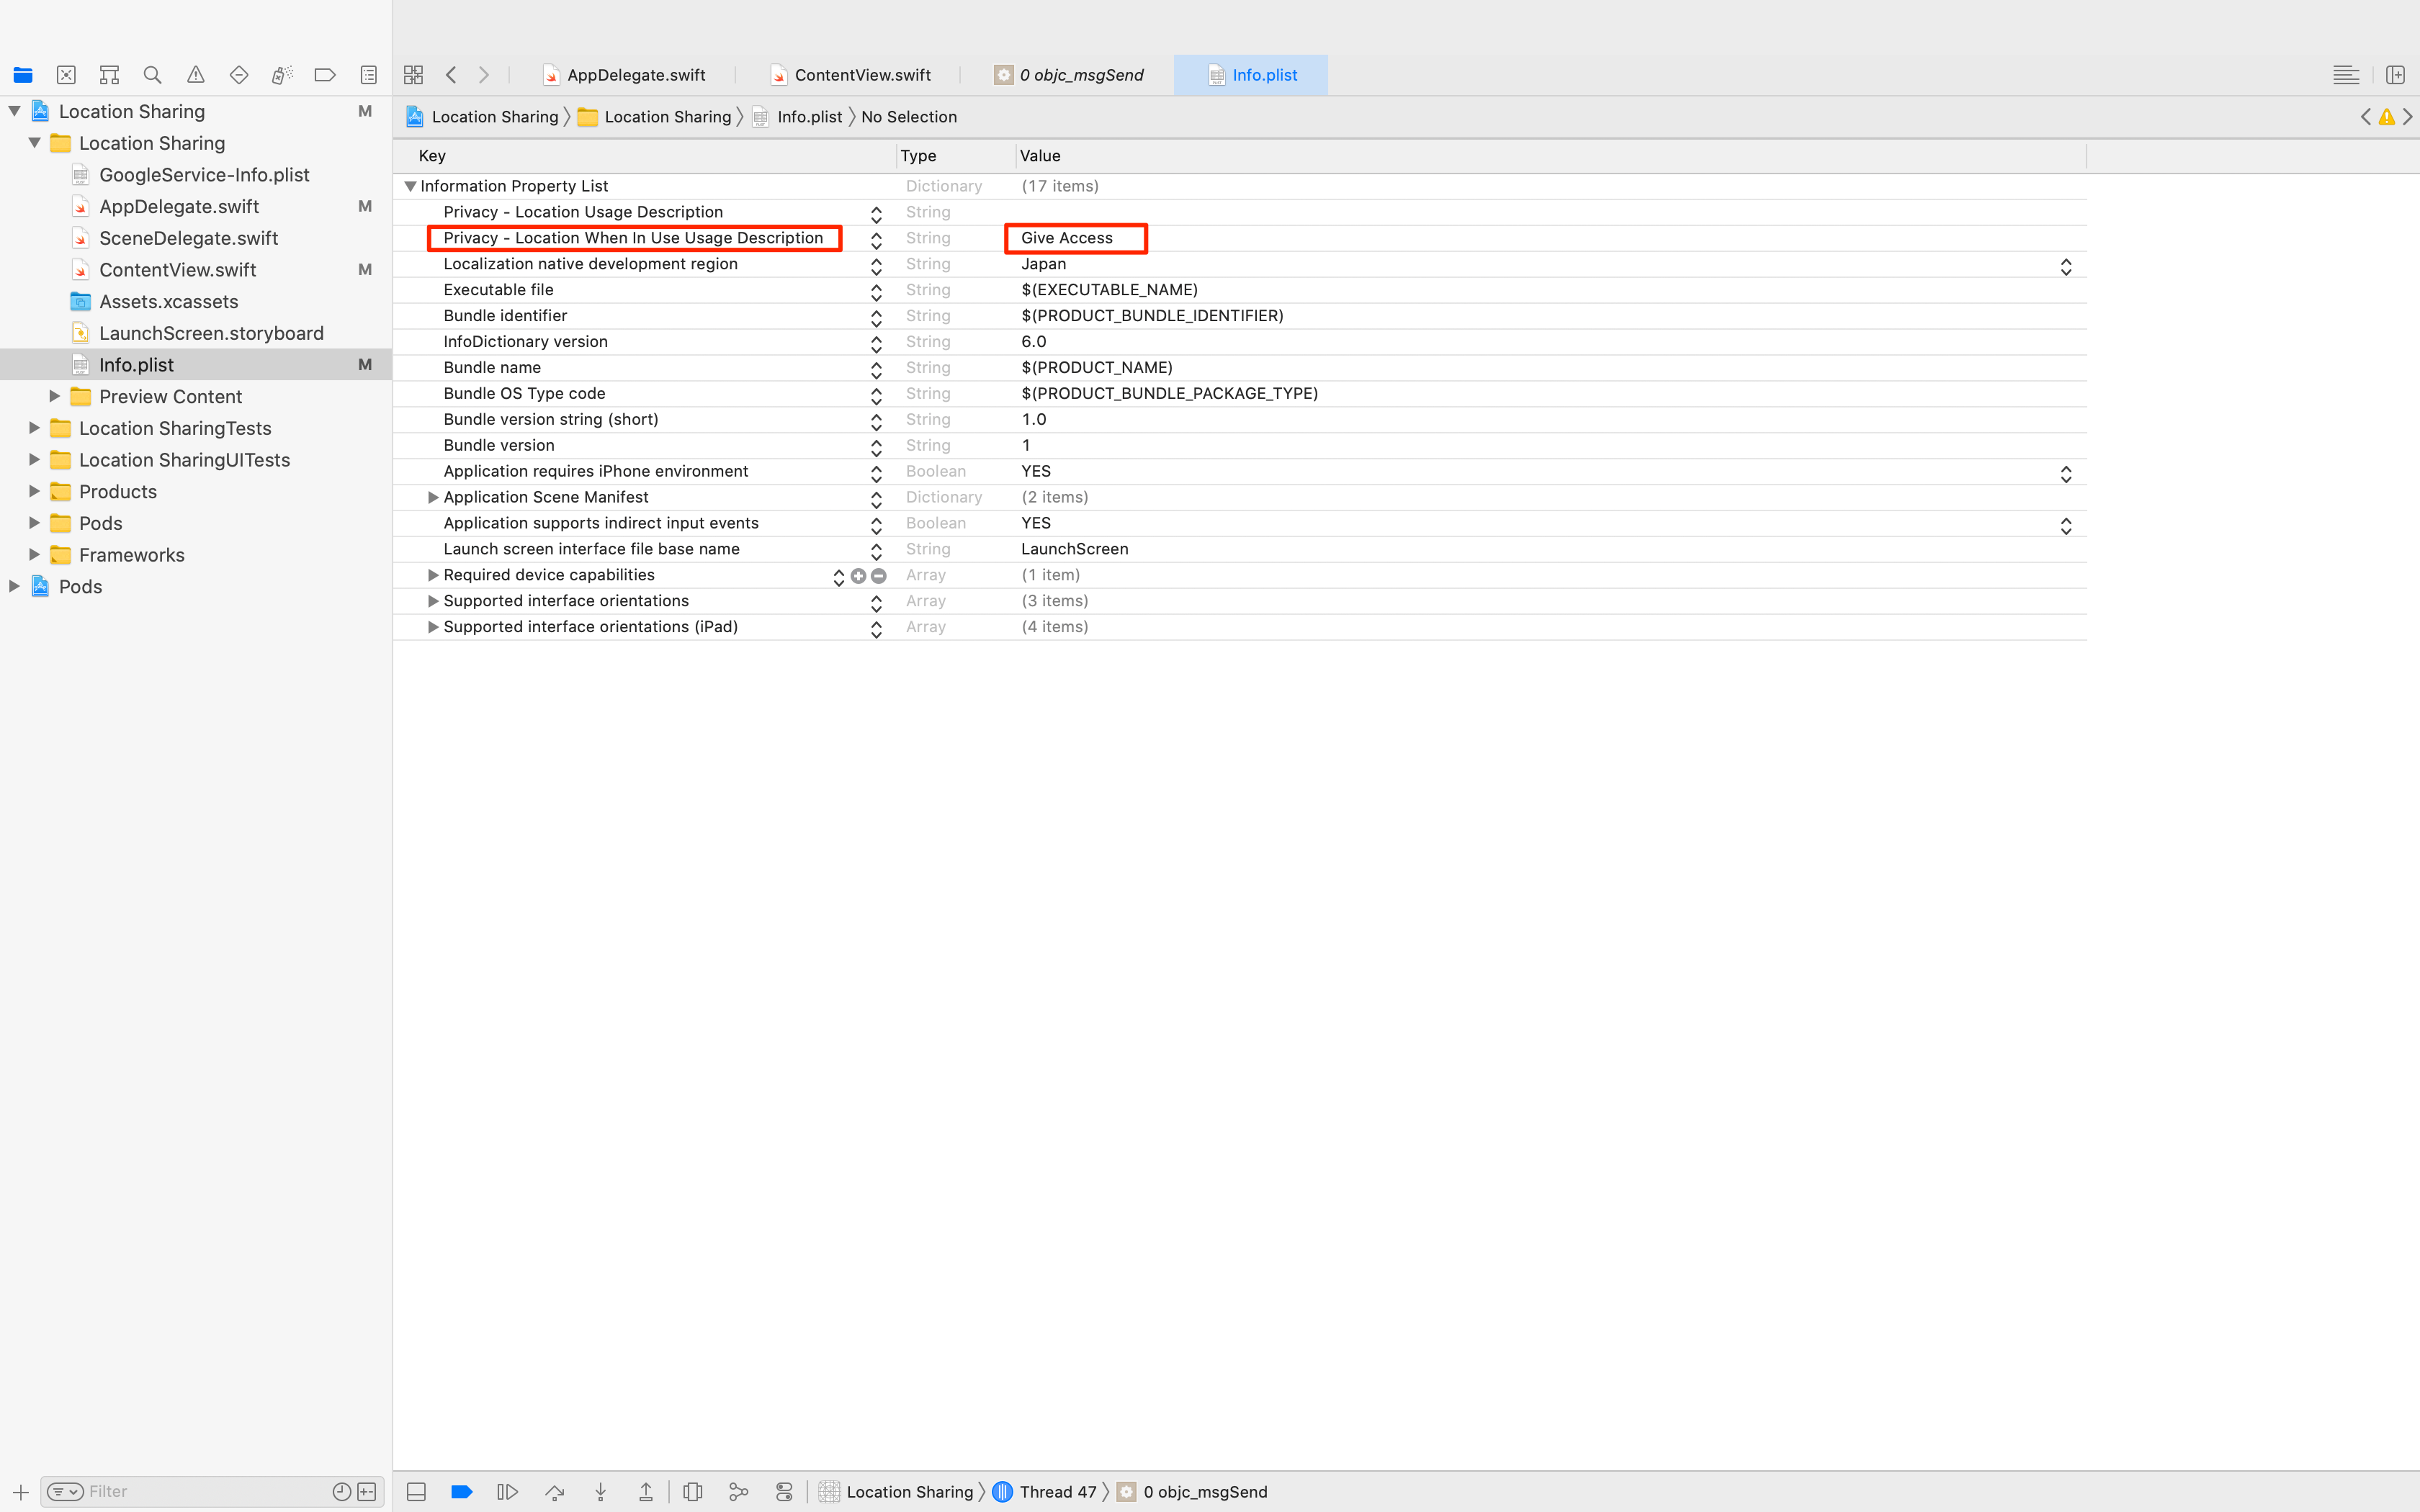
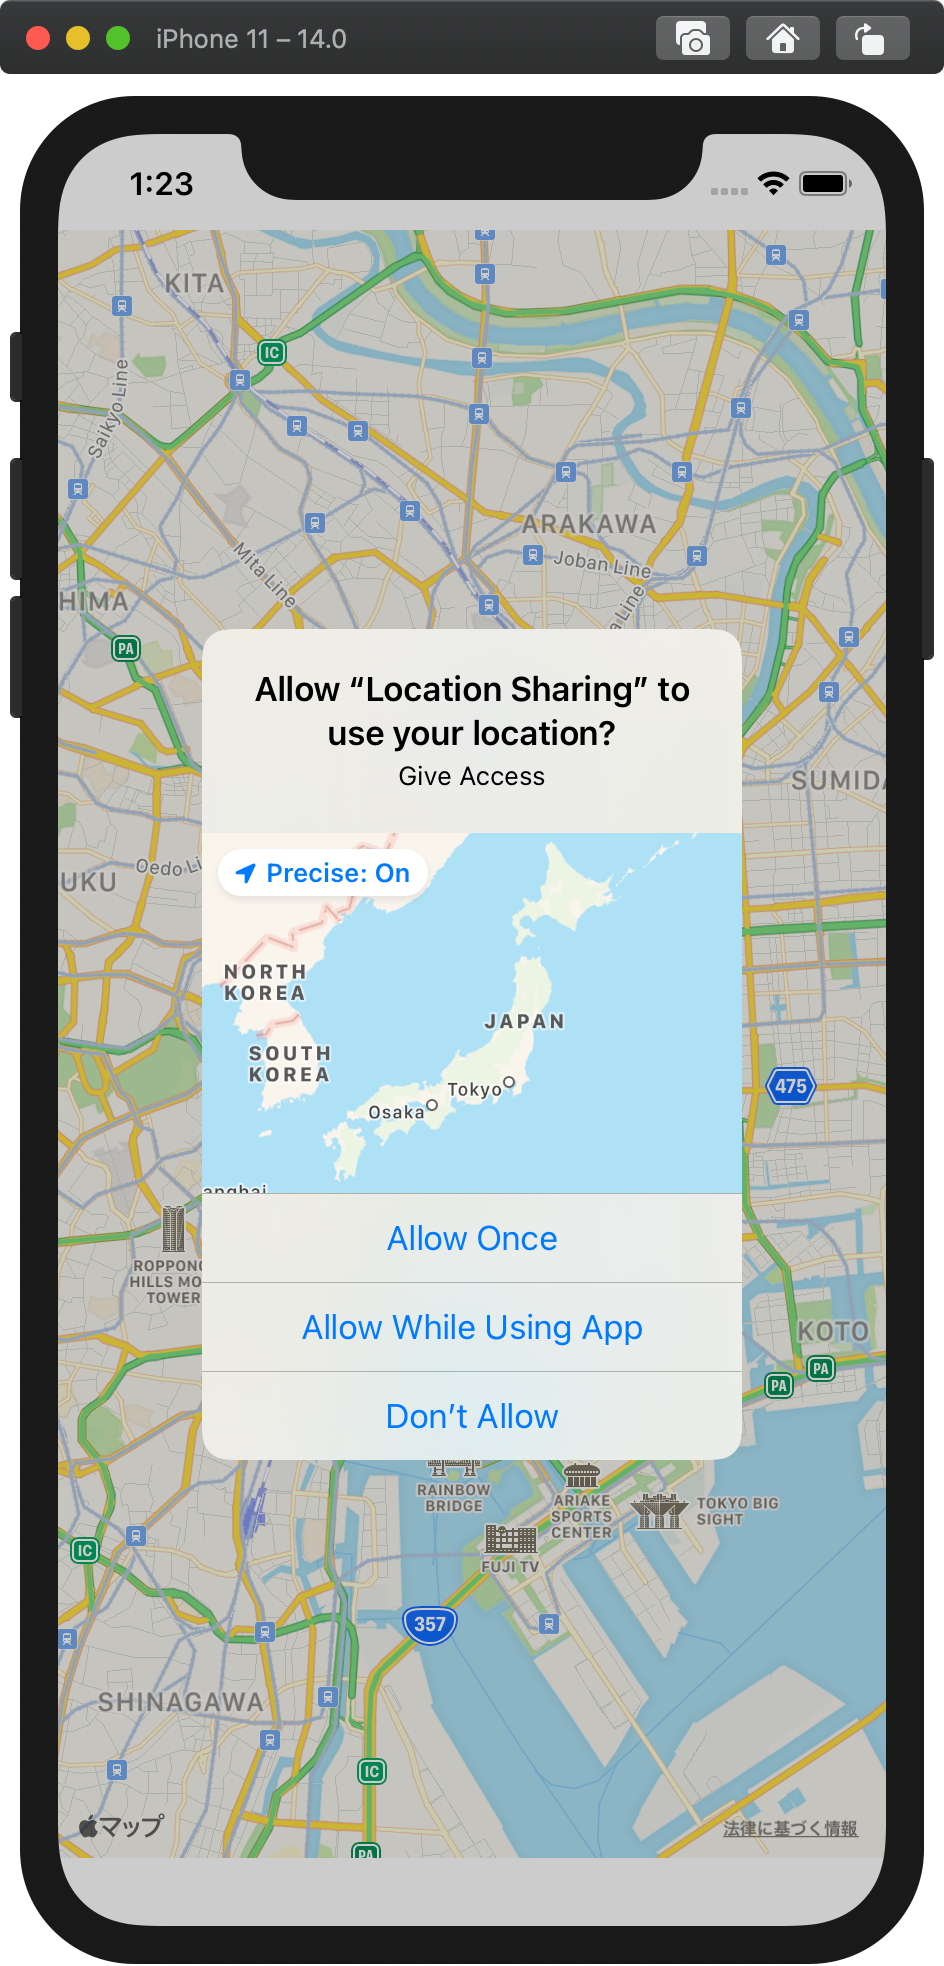
「Location When In Use Usage Description」のValueを編集し、文字列を入力すると、初回起動時の確認画面で、文字を表示することができます。
下記のsimulator画像参考。
プレビューで確認し、地図を表示
現在の位置情報が取得できます。
Simulatorを起動した場合は初回時に「位置情報の取得」許可が求められます。
初回起動画面
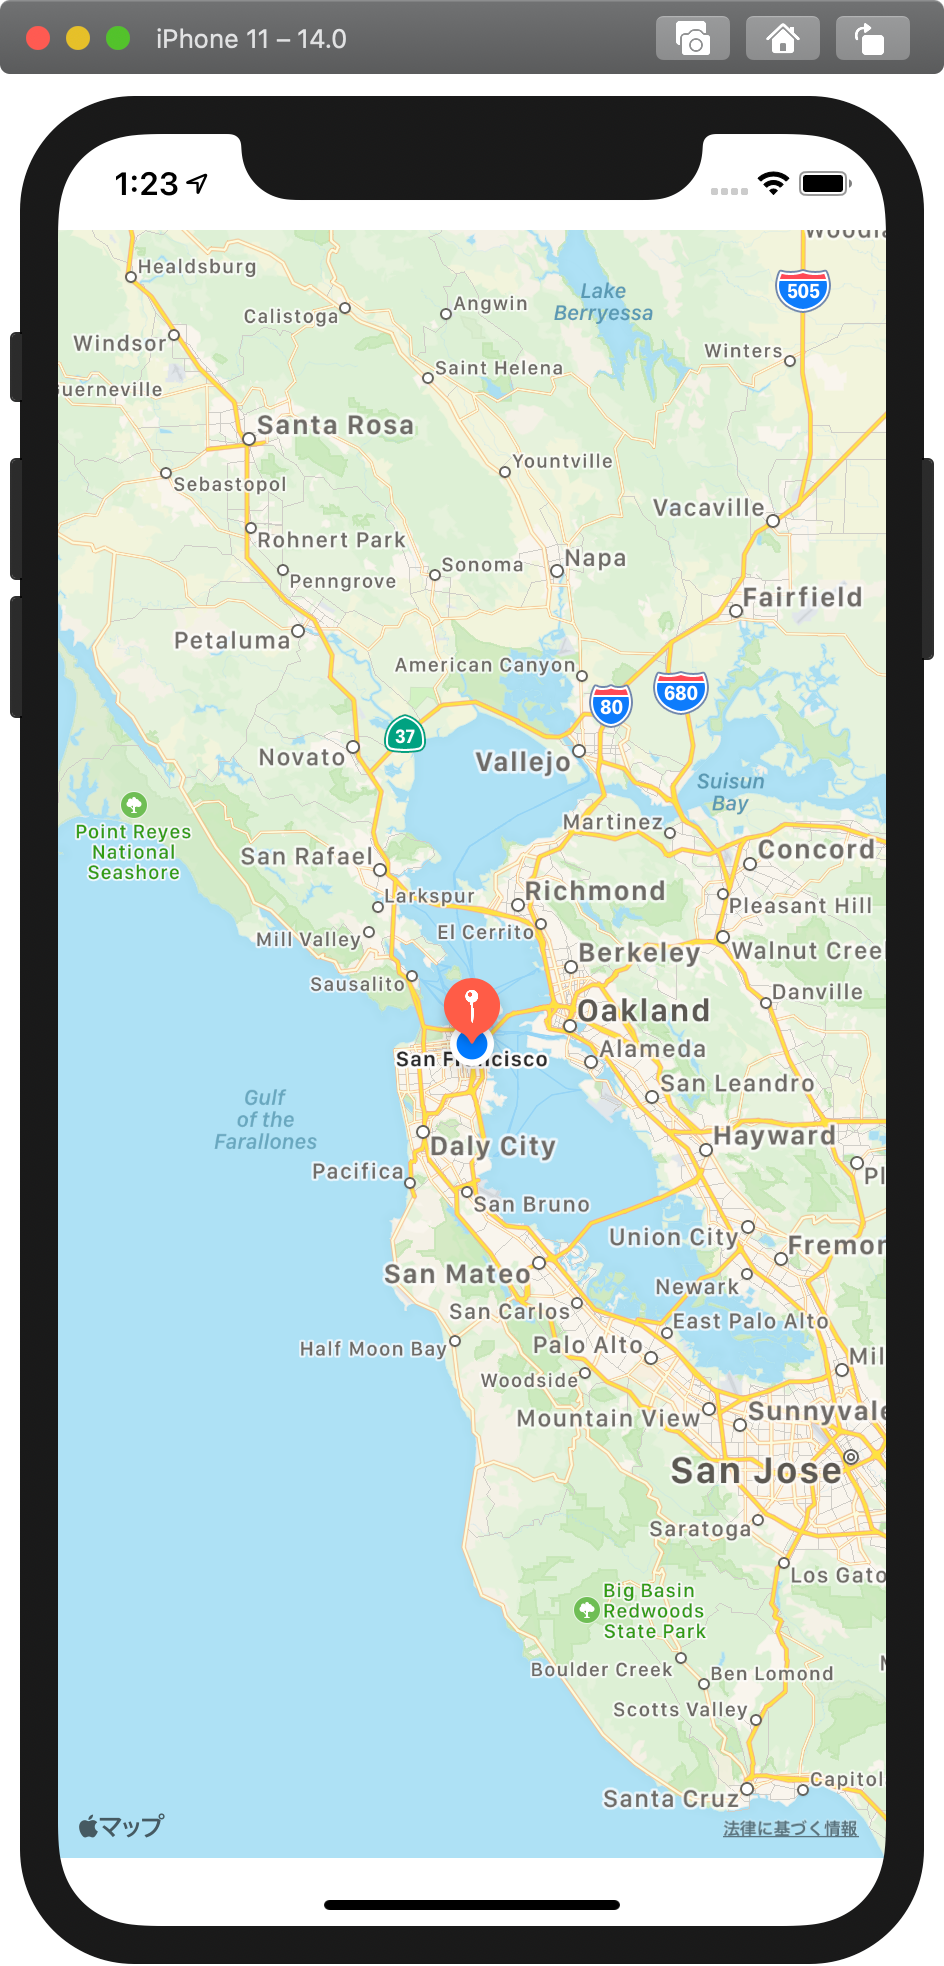
位置情報取得とピンの表示
simulatorでGPS取得ができずになぜか、サンフランシスコが表示されている。
デバックの際に[GEOAddressObject] [NSLocale currentLocale] failed for NSLocaleCountryCode@のエラーが表示されるのはsimulatorの「設定」→「一般」→「言語と地域」のところで「地域」に日本を登録すると、エラーは出なくなります。
以上です。