
agentgateway
AIエージェントが様々なタスクをこなすためには、様々なMCPサーバーやAIエージェントと接続して機能を拡張する必要があります。数が少なければ、MCPサーバーやAIエージェントとの通信の監視やトラフィックを制御できますが、接続数が増えると管理が煩雑になります。特に組織統制が必要な場合は、すべてのクライアントとサーバー間の接続を管理することは非現実的です。
これを解決する一つとして、クライアントからの接続をゲートウェイで仲介する方法があります。サーバーとクライアント間の通信をゲートウェイ経由とし、そのゲートウェイで必要な監視と制御をします。
agentgatewayは、このようなゲートウェイ機能を持つサービスです。agentgatewayは、LLM・MCP・A2Aの通信を仲介するOSSゲートウェイで、Linux Foundation傘下のAAIF(Agentic AI Foundation)のプロジェクトの1つです。
記事で扱う内容
今回は実際にagentgateway経由でMCPサーバーの呼び出しを試した内容を紹介します。複数のMCPサーバーを仲介し、agentgatewayのインバウンド認証も有効にした構成を試したかったのですが、MCPサーバーの3LO(3-legged OAuth)認証に手間取ったこともあり、今回はその部分にのみフォーカスします。
次回以降で、複数MCPサーバーの接続やインバウンド認証に挑戦する予定です。
試した環境
今回の環境は以下となります。
| もの | 内容 |
|---|---|
| OS | Windows 11 |
| agentgateway | v1.7.0 |
| MCPクライアント | Claude Code v2.1.316 |
| MCPサーバー | GitHub MCPサーバー(リモート) |
全体構成
構築するシステム全体の構成は次の図の通りとなります。

MCPクライアントであるClaude CodeとリモートMCPサーバーであるGitHub MCPサーバーの間にagentgatewayを置きます。Claude CodeからGitHubのリポジトリ操作はagentgatewayとGitHub MCPサーバーを経由します。
GitHub MCPサーバーは利用者本人の権限を利用します。OAuth(3LO)でアクセストークンを受け取り、それをagentgatewayへのリクエストに付与します。
GitHub MCPサーバーは、クライアント動的登録(DCR)に対応していません(https://github.com/github/github-mcp-server/blob/main/docs/host-integration.md)。そのためOAuthで利用するために、事前にGitHub AppをOAuthクライアントとして登録します。ここで発行されたクライアントIDとシークレットをClaude CodeにMCP情報と合わせて登録しておきます。
agentgatewayの準備
今回はWindows 11上で、agentgatewayのバイナリを使って動作させます。agentgatewayはバイナリファイルを直接起動する以外に、Dockerを使う方法やHelmを使う方法もあります(https://agentgateway.dev/docs/standalone/latest/documentation/setup/install/#choose-an-installation-method)。
バイナリをダウンロードします。公式サイト(https://agentgateway.dev/docs/standalone/latest/documentation/setup/install/binary/)には、Windows用のコマンドの記載はないので、Linux版を参考に、次のPowerShellを実行します。
cd <インストール先フォルダ>
Invoke-WebRequest https://github.com/agentgateway/agentgateway/releases/download/v1.7.0/agentgateway-windows-amd64.exe -OutFile agentgateway.exe
実行する際に、フルパスを入力しなくて済むように、環境変数Pathにインストール先フォルダを登録しておきます。
GitHubリポジトリの作成
MCPサーバーで操作するGitHubリポジトリを作成します。今回はテスト用であるためプライベートリポジトリとし、空のリポジトリ作成とならないようにREADMEを作成します。デフォルトから変更する点は次の3つです。
| Repository name | agentgateway-mcp-test |
|---|---|
| Choose visibility | Private |
| Add README | On |

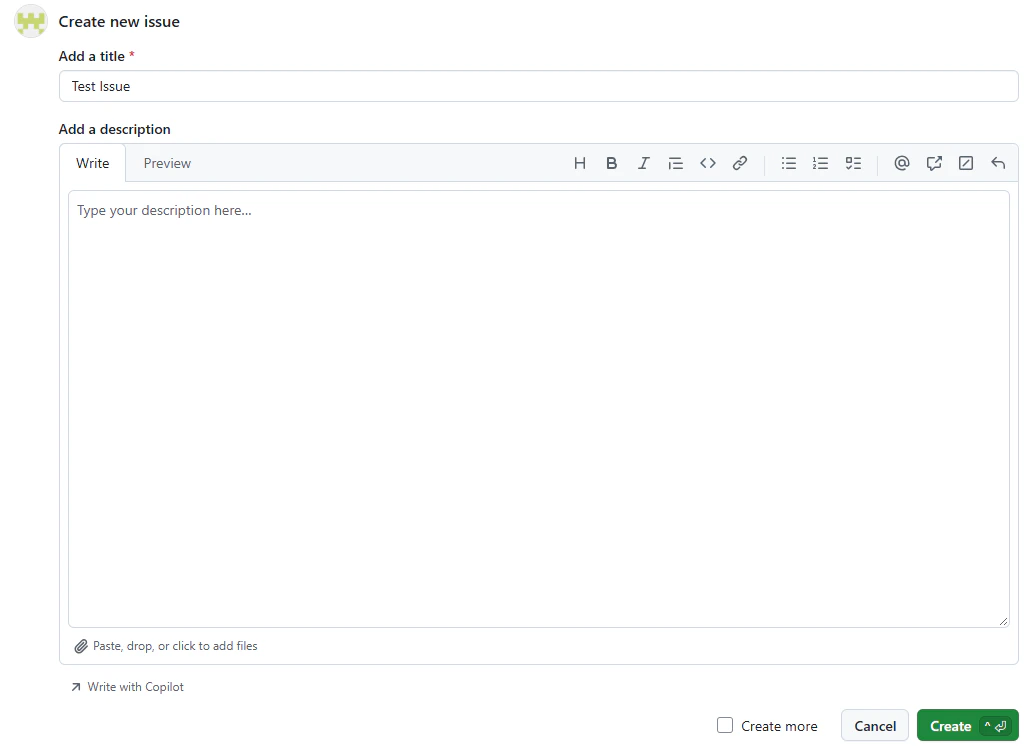
リポジトリ作成後、Issueを1件作成します。これは後でClaude Codeから、リポジトリと正しく接続できたかの動作確認に使用します。そのためIssueの中身は何でもOKです。ここではタイトルを「Test Issue」とだけ設定します。
GitHub Appの作成
GitHub MCPサーバーをOAuthで利用するために、GitHub Appを作ります。GitHub Appに設定する権限により、MCPサーバーから操作できる範囲が決定します。GitHub Appの作成はGitHub右上のユーザーアイコンから「Settings」を選択し、Settings画面の左メニューから「Developer settings」を選びます。画面遷移後、左メニューの「GitHub Apps」を選択し、画面中央の「New GitHub App」ボタンを選択します。
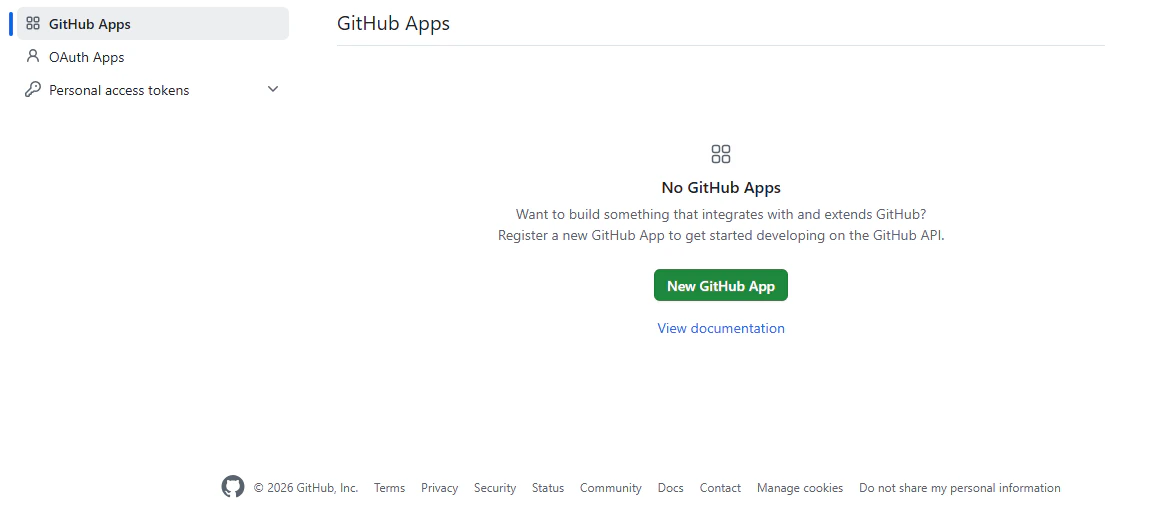
GitHub App作成画面では次の表の内容を入力します。Repository permissionは動作検証で利用する必要最小限としています。実際にClaude Codeから開発する場合は、権限を再設定する必要があります。
| 項目 | 入力内容 |
|---|---|
| GitHub App Name | agentgateway-mcp-githubapp |
| Homepage URL | http://localhost |
| Redirect URI | http://localhost:8765/callback |
| WebHook | Activeのチェックボックスを外す |
| Repository permissions | ・ContentsをRead-only ・IssuesをRead-only ※Metadataは自動でRead-onlyになる |
GitHub App作成後、画面にClient IDが表示されます。後で利用するため控えておく必要があります。続けて左メニューの「Credentials」を選択し、画面中央の「New secret」からクライアントシークレットを作成します。シークレットは作成時しか参照できないので、注意してください。これも後で利用するため控えておいてください。

リポジトリへのGitHub Appのインストール
GitHub Appsは作成した後、リポジトリにインストールする必要があります。作成したGitHub Appsの画面左メニューにある「Install App」を選択し、自分のアカウントの「Install」を選択します。その後、「Only select repositories」を選び、先ほど作成したリポジトリを選択します(ここではagentgateway-mcp-test)。最後に「Install」ボタンを選択します。

agentgatewayの設定
agentgatewayは、待ち受けるポート番号、接続先となるMCPサーバーやLLMを、YAMLかJSON形式の設定ファイルとして保存し、これを起動時に指定することができます(リンク)。
今回は、gatewaysとroutesの2つのセクションを使います。
| セクション名 | 概要 |
|---|---|
gateways |
ルーティングや機能が接続されるポートとリスナーを定義する |
routes |
ゲートウェイへのリクエストを、どのように照合し、どのようなバックエンドに転送されるかを定義する |
MCPサーバーへの接続を定義する方法は2通りあります。トップレベルにmcpを記載する方法と、routesの転送先にMCPサーバーを記載する方法です。mcpセクションの場合、/mcpというパスで、接続したMCPサーバーがまとめて公開されます。routesセクションの場合、MCPサーバーをパスごとに設定できます。agentgatewayのドキュメントには、ユーザーがMCPサーバーごとにブラウザでOAuth認証する場合、MCPサーバーをパスごとに分けるように記載されています。今回は、GitHubのMCPサーバーをユーザーがブラウザ経由で認証して使うこと、また今後接続するMCPサーバーを増やす想定であることから、routesセクションを用います。
それでは、GitHub MCPサーバーに接続するための設定ファイルを作成します。次の内容をconfig.yamlとして保存します。
gateways:
  default:
    port: 4000
routes:
- name: github
  matches:
  - path:
      pathPrefix: /github/mcp
  backends:
  - mcp:
      targets:
      - name: github
        mcp:
          host: https://api.githubcopilot.com/mcp/
- name: github-prm
  matches:
  - path:
      exact: /.well-known/oauth-protected-resource/github/mcp
  policies:
    directResponse:
      status: 200
      headers:
        content-type: '"application/json"'
      body: '{"resource":"http://localhost:4000/github/mcp","authorization_servers":["https://github.com/login/oauth"],"resource_name":"GitHub MCP Server (via agentgateway)"}'
これらは次に紹介する失敗例を解決した結果です。NGだったケースとそれによって追記した箇所を紹介します。
試行錯誤した過程
まず最初に作成したconfig.yamlは以下です。
gateways:
  default:
    port: 4000
routes:
- name: github
  matches:
  - path:
      pathPrefix: /github/mcp
  backends:
  - mcp:
      targets:
      - name: github
        mcp:
          host: https://api.githubcopilot.com/mcp/
この設定を読み込み、agentgatewayを起動するコマンドは以下です。
agentgateway -f config.yaml
ここから別ターミナルでClaude CodeにMCPサーバーを登録・認証・接続するのですが、このconfigでは認証に失敗しました。その内容を紹介します。
ログインすると、ブラウザがroute not foundになる
Claude Codeにagentgateway経由でMCPを登録します。agentgatewayはローカルで4000番ポートで待ち受けとなっているため、それを指定します。
claude mcp add --transport http --scope local --client-id <クライアントID> --client-secret --callback-port 8765 github-via-agw http://localhost:4000/github/mcp
クライアントIDには、GitHub Apps作成時に取得したものを指定します。実行するとクライアントシークレットを要求されるので、これも先ほど生成したものを入力します。
次にGitHubにログインします。ログインには次のコマンドを実行します。
claude mcp login github-via-agw
実行すると、GitHubページの権限承諾ページに飛ぶ想定だったのですが、「route not found」となりました。

この原因について、Claude Codeと相談しながら確認しました。ざっくりいうとGitHub MCPサーバーが必要とする認可サーバーが見つからないためでした。
GitHub MCPサーバーに対して、loginを実行するとClaude Codeは、ログインの前に「GitHub MCPサーバーの認可サーバーはどこにある?」という情報(PRM:Protected Resource Metadata)を、確認しに行きます。通常ではGitHub MCPサーバーに直接確認するのですが、今回はagentgatewayを経由しているため、agentgatewayに確認していました。PRMと認可サーバーの情報を確認した先は、次の 4 つです。
- /.well-known/oauth-protected-resource/github/mcp
- /.well-known/oauth-protected-resource
- /.well-known/oauth-authorization-server
- /.well-known/openid-configuration
先ほど設定したルート情報は/github/mcpだけのためこれらは未定義となります。そのためagentgatewayは「route not found」というエラーを返していました。
これを解決するために、config.yamlに/.well-known/oauth-protected-resource/github/mcpのルートを追記し、ログイン先の認可サーバーがGitHubであることを返すように設定しました。前に掲載したconfig.yamlと同様ですが、再掲します。
gateways:
  default:
    port: 4000
routes:
- name: github
  matches:
  - path:
      pathPrefix: /github/mcp
  backends:
  - mcp:
      targets:
      - name: github
        mcp:
          host: https://api.githubcopilot.com/mcp/
- name: github-prm
  matches:
  - path:
      exact: /.well-known/oauth-protected-resource/github/mcp
  policies:
    directResponse:
      status: 200
      headers:
        content-type: '"application/json"'
      body: '{"resource":"http://localhost:4000/github/mcp","authorization_servers":["https://github.com/login/oauth"],"resource_name":"GitHub MCP Server (via agentgateway)"}'
一度agentgatewayを終了し、再度起動します。
agentgateway -f config.yaml
改めてログインします。設定ファイルを直しても、登録を残したままだと同じ「route not found」が続きました。そのため、Claude CodeのMCPサーバーの登録をいったん外し、登録し直してからログインします。
claude mcp remove github-via-agw --scope local
claude mcp add --transport http --scope local --client-id <Client ID> --client-secret --callback-port 8765 github-via-agw http://localhost:4000/github/mcp
claude mcp login github-via-agw
config.yamlを更新したことで、GitHubのアクセス承諾画面にリダイレクトされました。

「Authorize」を選択することで、MCPサーバーと接続でき、Claude Codeが許可した範囲の操作を行えるようになります。
接続確認は次のコマンドから可能です。
claude mcp list
次のように「Connected」と表示されれば問題ありません。
github-via-agw: http://localhost:4000/github/mcp (HTTP) - ✔ Connected
では実際にClaude Codeを起動して、対象リポジトリのIssue一覧をMCP経由で取得するために、次のプロンプトを入力します。
MCPサーバーを使って、agentgateway-mcp-testのIssueの一覧を取得して
実行結果は次のようになりました。テストで作成したIssueが正しく取得できていることがわかります。

github-via-agwも2度使用されていることがわかります。詳細は次の通りです。

この結果から、MCP経由で「Get my user profile(get_meツール)」と「List issues(list_issuesツール)」が呼び出されたことがわかります。これはagentgatewayのログからもわかります。
<date>     info    request gateway=default/default listener=default route=default/github src.addr=127.0.0.1:<port> http.method=POST http.host=localhost http.path=/github/mcp http.version=HTTP/1.1 http.status=200 protocol=mcp mcp.method.name=server/discover duration=1318ms
<date>     info    request gateway=default/default listener=default route=default/github src.addr=127.0.0.1:<port> http.method=POST http.host=localhost http.path=/github/mcp http.version=HTTP/1.1 http.status=200 protocol=mcp mcp.method.name=prompts/list duration=397ms
<date>     info    request gateway=default/default listener=default route=default/github src.addr=127.0.0.1:<port> http.method=POST http.host=localhost http.path=/github/mcp http.version=HTTP/1.1 http.status=200 protocol=mcp mcp.method.name=resources/list duration=830ms
<date>     info    request gateway=default/default listener=default route=default/github src.addr=127.0.0.1:<port> http.method=POST http.host=localhost http.path=/github/mcp http.version=HTTP/1.1 http.status=200 protocol=mcp mcp.method.name=tools/list duration=1427ms
<date>     info    request gateway=default/default listener=default route=default/github src.addr=127.0.0.1:<port> http.method=POST http.host=localhost http.path=/github/mcp http.version=HTTP/1.1 http.status=200 protocol=mcp mcp.method.name=tools/call mcp.target=github mcp.resource.type=tool gen_ai.tool.name=get_me duration=512ms
<date>     info    request gateway=default/default listener=default route=default/github src.addr=127.0.0.1:<port> http.method=POST http.host=localhost http.path=/github/mcp http.version=HTTP/1.1 http.status=200 protocol=mcp mcp.method.name=tools/call mcp.target=github mcp.resource.type=tool gen_ai.tool.name=list_issues duration=935ms
mcp.method.nameを見ることで、どのようなメソッドが呼ばれたか、tools/call についてはgen_ai.tool.nameを見ることで、どのツールが使用されたかがわかります。また、すべての行にroute=default/githubが出ており、これらの要求がagentgatewayのgithubのルートを通ったことが分かります。
まとめ
今回はagentgatewayをClaude CodeとGitHub MCPサーバーの間に置いて、リポジトリのIssueを取得しました。
OAuth(3LO)で接続する際に、認可サーバーの場所をClaude Codeが見つけられない問題が発生しましたが、agentgatewayの設定ファイルを更新することで、問題なく認証できました。
今回は1つのMCPサーバーを接続しただけなので、agentgatewayのメリットがわかりづらくなっています。次は複数個のMCPサーバーを接続して、そのメリットが確認できればと思います。