RealmSwift
CoreData & ObjectiveRecordで何ら不自由なく使えていたためいままで、試してませんでしたがtry! SwiftのDIAMONDスポンサーになるほどなので、ここは試しに使ってみようと思います。
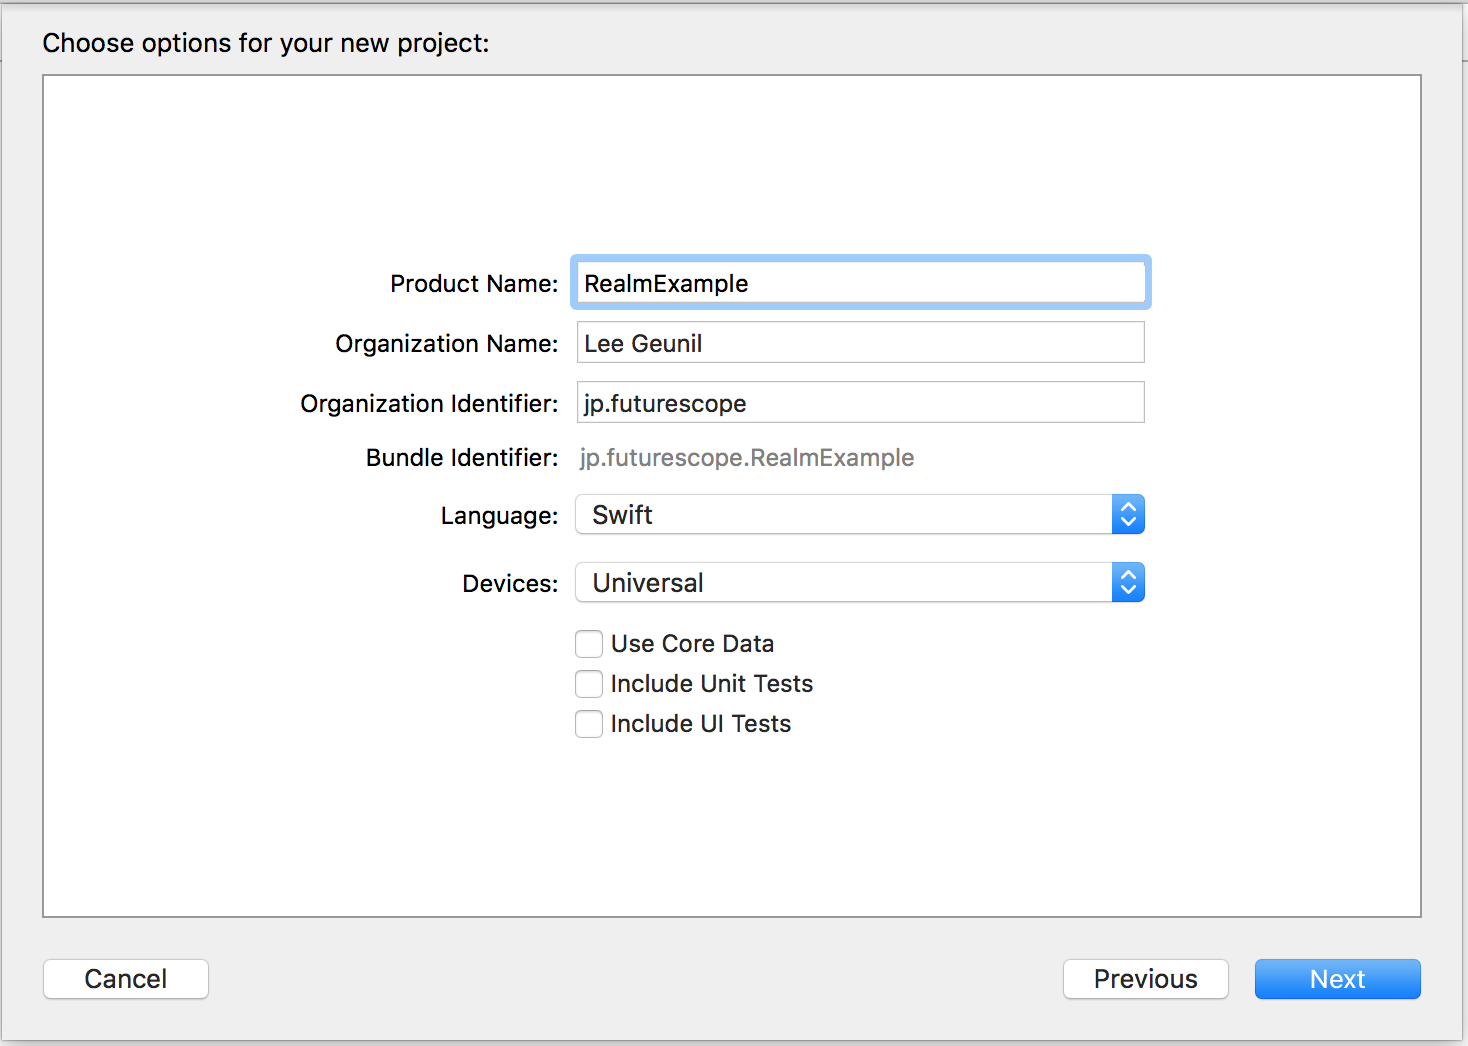
Xcodeで新規プロジェクトを作成する
今回はRealmExampleと言う名前で作成しました。

※CoreDataは使わないのでUse Core Dataのチェックを外します。
CocoaPodsをインストール
RealmSwiftをインストールするにはcocoapodsが便利なので
まずはcocoapodsをインストールします。
sudo gem install -n /usr/local/bin cocoapods
pod --version
-n /usr/local/binはEl Capitanから必須です。詳細は下記
MacOSX El Capitanでcocoapodsインストールが出来ない時の対処法
RealmSwiftをインストール
pod init
Xcodeプロジェクトを作成して
コマンドラインにてプロジェクトフォルダディレクトリpod initを行うとPodfileが作られるのでvim Podfileして下記のようにする
use_frameworks!

target 'RealmExample' do
pod 'RealmSwift'
end
※import RealmSwiftでどうしてもエラーになる方はCleanしてみてください。
(Shift+Command+K) & (Option+Shift+Command+K)
pod install
最後にpod installを行います。
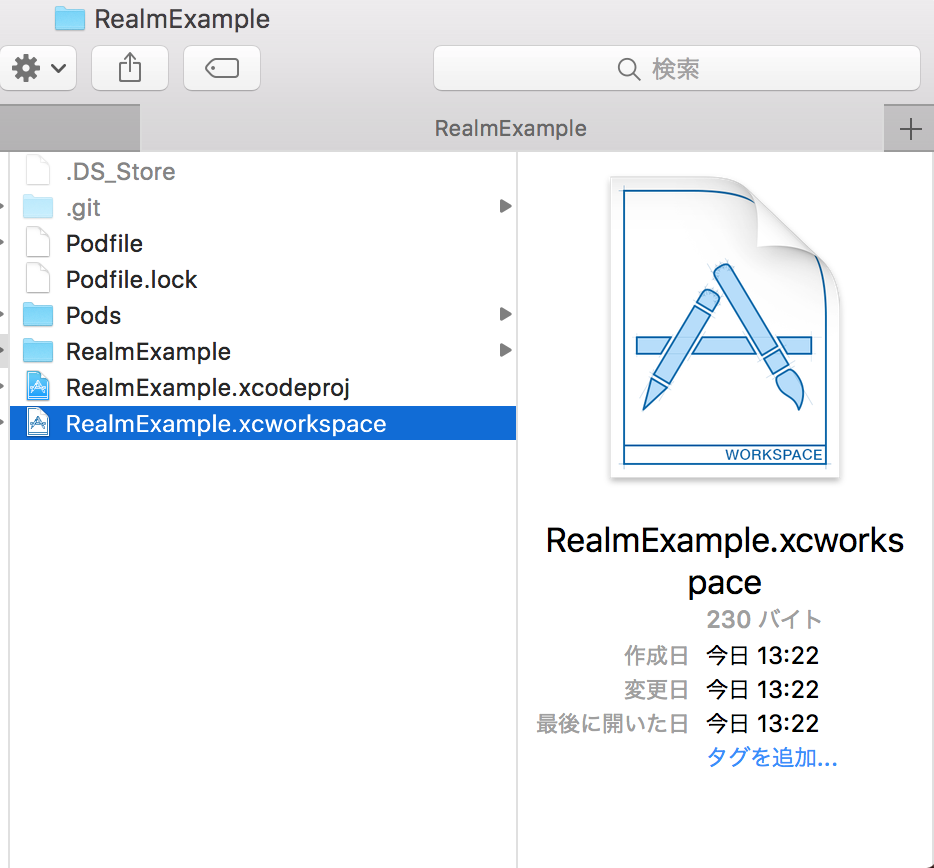
処理が完了したら[プロジェクト名].wordkspaceというファイルが作成されています。
プロジェクトが開いていたら一旦閉じて[プロジェクト名].wordkspaceを開いて下さい。

※CocoaPodsを使用する場合は常にこの[プロジェクト名].wordkspaceで開いて下さい。
RealmSwiftを試す
モデルクラス
import RealmSwift

class User: Object {
    dynamic var id = 0
    dynamic var name = ""
    dynamic var createdAt: Double = 0
}
オブジェクトの作成、更新、参照
import RealmSwift

import UIKit
import RealmSwift

class ViewController: UIViewController {
    override func viewDidLoad() {
        super.viewDidLoad()
        // Do any additional setup after loading the view, typically from a nib.

        //Realmオブジェクト生成
        let realm = try! Realm()

        //作成
        let tanaka = User()
        tanaka.id = 1
        tanaka.name = "田中"
        tanaka.createdAt = NSDate().timeIntervalSince1970
        try! realm.write {
            realm.add(tanaka)
        }

        //作成
        let yamada = User()
        yamada.id = 2
        yamada.name = "山田"
        yamada.createdAt = NSDate().timeIntervalSince1970
        try! realm.write {
            realm.add(yamada)
        }

        //作成
        let suzuki = User()
        suzuki.id = 3
        suzuki.name = "鈴木"
        suzuki.createdAt = NSDate().timeIntervalSince1970
        try! realm.write {
            realm.add(suzuki)
        }

        //参照
        let users = realm.objects(User).filter("id != 0").sorted("id")
        for user in users {
            print(user.name)
        }

        //更新
        let hoge = realm.objects(User).last!
        try! realm.write {
            hoge.name = "ほげ"
        }

        //参照
        for user in realm.objects(User).filter("id != 0").sorted("id") {
            print(user.name)
        }

        //削除
        let lastUser = realm.objects(User).last!
        try! realm.write {
            realm.delete(lastUser)
        }

        //参照
        for user in realm.objects(User).filter("id != 0").sorted("id") {
            print(user.name)
        }
    }
}
Userオブジェクトを作成(田中、山田、鈴木)して参照
最後のオブジェクト(鈴木)を「ほげ」に更新して参照
最後のオブジェクト(ほげ)を削除して参照
printデバッグの結果はこちらになります。
田中
山田
鈴木
田中
山田
ほげ
田中
山田
まず**「田中、山田、鈴木」が出力され、
鈴木をほげに更新したため「田中、山田、ほげ」に、
ほげを削除したので「田中、山田」**のみになりました。
まとめ
今回、備忘録としてRealmSwiftインストールから試すまでをやってみました。
新しいMacでCocoaPodsのインストールで少々ハマりました。
最初はReamlでObjective-Cのライブラリしかないのかと思ってましたが途中でRealmSwiftがあることに気付きました。
あとimport RealmSwiftがNo such errorで挫折しそうでしたが、Cleanするだけでした!
下記の記事がとても参考になりました。
Realm for Swift まとめ完全版