14
17

Delete article

Deleted articles cannot be recovered.

Draft of this article would be also deleted.

Are you sure you want to delete this article?

More than 5 years have passed since last update.

Chrome拡張のGhostText導入手順(Visual Studio Code編)

Last updated at Posted at 2017-05-26

Chrome拡張のGhostTextを使用すると、テキストエリアの入力を別エディタから行うことができます。
この記事では、Visual Studio CodeからChromeのテキストエリアに入力するための導入手順と使い方を紹介します。
GhostTextをVisual Studio Codeで使用する日本語情報が見つからなかったため、ここに記録しておきます。

環境

Chrome
Visual Studio Code

導入手順

  1. 以下のリンクからChromeにGhostTextをインストールします
    GhostText
    image.png
     

  2. インストールするとアイコンが表示されます
    image.png
     

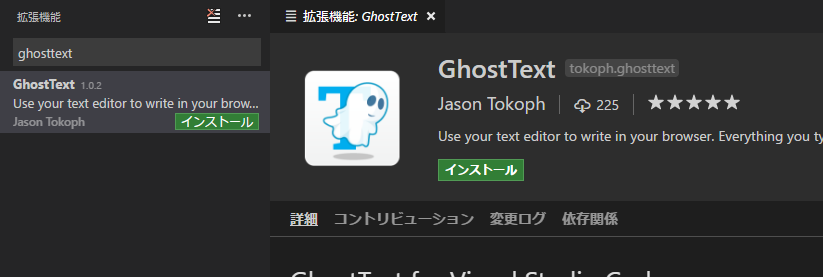
  3. Visual Studio CodeにGhostTextをインストールします
    image.png
     

  4. コマンドパレットに Enable GhostTextと入力してGhostTextを有効化します
    Visual Studio Codeを起動するたびにこのコマンドを打つ必要があるようです。
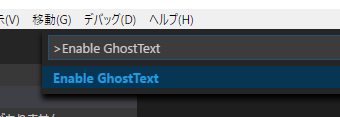
    image.png
    成功すると以下のように表示されます
    image.png

使用方法

  1. Visual Studio Codeを起動し、GhostTextを有効化(コマンドパレットに Enable GhostTextと入力)した状態で、Webページを開きます。
     

  2. テキストエリアにフォーカスをセットしてから、アイコンをクリックするか、Ctrl + Shift + Kを入力します。

連携に成功すると以下のメッセージが表示されます。
image.png

対象のテキストエリアが青枠で囲まれます。
image.png
 
3. Visual Studio Codeに新規ファイルが作成され文字を入力すると、Chromeのテキストエリアに書き込まれます
image.png

Redmineへの長文の書き込みが煩わしくなり、探したところこの方法が見つかりました。
以下の記事を参考にさせていただきました。
http://qiita.com/seihmd/items/94f7628b949626e73f51

14
17
0

Register as a new user and use Qiita more conveniently

  1. You get articles that match your needs
  2. You can efficiently read back useful information
  3. You can use dark theme
What you can do with signing up
14
17

Delete article

Deleted articles cannot be recovered.

Draft of this article would be also deleted.

Are you sure you want to delete this article?