かなり久しぶりに記事を書きます。お手柔らかに。
以前、さくらのVPSのプランを1GB=>2GBに上げようとしたところ、当時のv3は非対応だっため、v4で契約して構築し直した、という記事を書きました。
あれから7年ーーー
nginxやPHP、MariaDBはちょこちょこバージョンアップ作業をしていたのですが、CentOSだけは基本上げられずじまいでした。
- CentOS Linux release 7.9.2009 (Core)
- nginx version: nginx/1.18.0
- PHP 8.2.10 (cli) (built: Aug 29 2023 15:31:38) (NTS gcc x86_64)
- mariadb from 11.4.3-MariaDB, client 15.2 for Linux (x86_64) using readline 5.1
そんな中、作業中にいくつかのコマンドが使えなくなっていることが判明したり、そもそもOSのセキュリティサポートは2024年6月で終了していました。
というわけで、OSアップデートをするべく、7年ぶりのVPS構築をしました。
VPSの乗り換え
いきなり大きな話ですが、近年は様々なVPSサービスが登場していて、スペックもさることながら価格もいろいろです。
結論としては、慣れ親しんださくらのVPSを離れ、XServer VPSへ移る決断をしました。主な理由は・・・そう、コストです。
| VPS | CPU | メモリ | SSD | コスト(毎月払い) |
|---|---|---|---|---|
| さくら | 3コア | 2GB | 100GB | 1,738円 |
| XServer | 3コア | 2GB | 50GB | 900円 |
実際には、リージョンで違ったり、単月払いより年間払いのほうがお得だったり、キャンペーンを実施していたりするので、必ずしも上記の金額ではないですが、概ね半額近い差がありました。
というわけで、ちょうど独自ドメインの管理もXServerに移したばかりだったので、VPSもXServerに移行することを決めました。
OSの選択
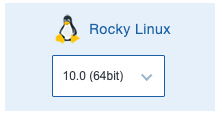
様々なOSから選択することができるのですが、今回はRocky Linux 10.0を選択しました。特に何か拘ったとかではなく、なんとなく、CentOSからの流れです。
初期設定(セキュリティ的なところとか)
以降、コマンドの先頭が%の場合はローカル、$の場合はVPS上の一般ユーザ(sudoが使える)、#の場合はVPS上のrootとします。
SSHログイン
% ssh root@xxx.xxx.xxx.xx
ユーザ作成
本稿では、adminユーザを作るとします。
作成 + wheelグループ追加
# useradd admin

# passwd admin
新しいパスワード:
新しいパスワードを再入力してください:
passwd: パスワードは正しく更新されました
sudoを使えるようにするため、wheelグループに追加します。
# id admin
uid=1001(admin) gid=1001(admin) groups=1001(admin)

# usermod -G wheel admin

# id admin
uid=1001(admin) gid=1001(admin) groups=1001(admin),10(wheel)
adminに切り替えて、sudoの確認をします。
# exit

% ssh admin@xxx.xxx.xxx.xx

$ sudo su root
[sudo] admin のパスワード:
sudoユーザのPATHを引き継ぐ
どこまで必要かはわかりませんが、sudoした後でもadminのPATHを引き継いでおけるようにしたいと思います。デフォルトはこんな感じです。
$ echo $PATH
/home/admin/.local/bin:/home/admin/bin:/usr/local/bin:/usr/bin:/usr/local/sbin:/usr/sbin

$ sudo su root

# echo $PATH
/root/.local/bin:/root/bin:/sbin:/bin:/usr/sbin:/usr/bin
visudoで、以下の通り、追記とコメントアウトをします。
---
$ sudo visudo
Defaults    env_reset
Defaults    env_keep =  "COLORS DISPLAY HOSTNAME HISTSIZE KDEDIR LS_COLORS"
Defaults    env_keep += "MAIL PS1 PS2 QTDIR USERNAME LANG LC_ADDRESS LC_CTYPE"
Defaults    env_keep += "LC_COLLATE LC_IDENTIFICATION LC_MEASUREMENT LC_MESSAGES"
Defaults    env_keep += "LC_MONETARY LC_NAME LC_NUMERIC LC_PAPER LC_TELEPHONE"
Defaults    env_keep += "LC_TIME LC_ALL LANGUAGE LINGUAS _XKB_CHARSET XAUTHORITY"

// 追記
Defaults    env_keep += "PATH"
// コメントアウト
#Defaults    secure_path = /sbin:/bin:/usr/sbin:/usr/bin
---

$ sudo su root

# echo $PATH
/root/.local/bin:/root/bin:/home/admin/.local/bin:/home/admin/bin:/usr/local/bin:/usr/bin:/usr/local/sbin:/usr/sbin
先頭に /root/.local/bin:/root/bin が付く理由
これは下記の通り、.bashrc的なものに記述があるためと思います。が、特に完全一致させなくてもいいかなと思うのでそのままにしておきます。
# cat .bashrc
---
// 略
# User specific environment
if ! [[ "$PATH" =~ "$HOME/.local/bin:$HOME/bin:" ]]
then
    PATH="$HOME/.local/bin:$HOME/bin:$PATH"
fi
export PATH
---
公開鍵認証
ssh-keyは既にローカルで作成済みとして、それを使います。なければ作るだけなのでそこは省略。
ローカルの公開鍵を取得
% cat .ssh/id_rsa.pub
ssh-rsa .......
サーバに公開鍵を登録
$ mkdir ~/.ssh
$ chmod 700 .ssh
$ cd .ssh/
$ vi authorized_keys

// ローカルの公開鍵を貼り付ける(FTPとかで送ったほうが正確だけど)
ssh-rsa .......

$ chmod 600 authorized_keys
確認
% ssh admin@xxx.xxx.xxx.xx
Activate the web console with: systemctl enable --now cockpit.socket

Last login: Tue Sep  2 22:24:33 2025 from xxx.xxx.xxx.xx
firewall設定
前回同様、sshのポートは10022とし、http(80)とhttps(443)のポートも許可します。
# systemctl status firewalld
● firewalld.service - firewalld - dynamic firewall daemon
     Loaded: loaded (/usr/lib/systemd/system/firewalld.service; enabled; preset: enabled)
     Active: active (running) since Tue 2025-09-02 12:43:30 JST; 9h ago
 Invocation: cc7a3cac4caf4f57ba9bec6840d4ee32
       Docs: man:firewalld(1)
   Main PID: 697 (firewalld)
      Tasks: 2 (limit: 10461)
     Memory: 42.1M (peak: 43.9M)
        CPU: 711ms
     CGroup: /system.slice/firewalld.service
             └─697 /usr/bin/python3 -sP /usr/sbin/firewalld --nofork --nopid

 9月 02 12:43:25 saito-test-instance-rocky10-20250701.novalocal systemd[1]: Starting firewalld.service - firewalld - dynamic firewall daemon...
 9月 02 12:43:30 saito-test-instance-rocky10-20250701.novalocal systemd[1]: Started firewalld.service - firewalld - dynamic firewall daemon.

# firewall-cmd --permanent --add-port=10022/tcp
success

# sudo firewall-cmd --permanent --add-service=http
success

# sudo firewall-cmd --permanent --add-service=https
success

# firewall-cmd --reload
success

# firewall-cmd --list-all
public (default, active)
  target: default
  ingress-priority: 0
  egress-priority: 0
  icmp-block-inversion: no
  interfaces: ens3
  sources:
  services: cockpit dhcpv6-client http https ssh
  ports: 10022/tcp
  protocols:
  forward: yes
  masquerade: no
  forward-ports:
  source-ports:
  icmp-blocks:
  rich rules:
ssh関連設定
先述の通り、sshのポートを10022にしたいので、関連する設定をいくつか行います。
SELinuxにおいて、sshのポートに10022を追加
# semanage port -a -t ssh_port_t -p tcp 10022
rootログインやパスワードログインの禁止、ポートの変更
# vi /etc/ssh/sshd_config

# PermitRootLogin yes
PermitRootLogin no

# PasswordAuthentication yes
PasswordAuthentication no

# Port 22
Port 10022

# systemctl restart sshd.service
確認
admin / 10022ポートでログイン可能
% ssh admin@xxx.xxx.xxx.xx -p 10022
Activate the web console with: systemctl enable --now cockpit.socket

Last login: Tue Sep  2 22:27:59 2025 from xxx.xxx.xxx.xx
admin / 22ポートでログイン不可
% ssh admin@xxx.xxx.xxx.xx
ssh: connect to host xxx.xxx.xxx.xx port 22: Connection refused
root / 10022ポートでログイン不可
% ssh root@xxx.xxx.xxx.xx -p 10022
root@xxx.xxx.xxx.xx: Permission denied (publickey,gssapi-keyex,gssapi-with-mic).
ここまでで、ローカルからVPSにssh接続する際の基本的な初期設定は完了です。
VPS to GitHub接続設定
VPS上でGitHubからcloneなどができるようにします。やることはローカルからのsshと変わらなくて、VPSの公開鍵をGitHubに登録するだけです。
鍵の生成
$ ssh-keygen -t rsa
Generating public/private rsa key pair.
Enter file in which to save the key (/home/admin/.ssh/id_rsa):
Enter passphrase for "/home/admin/.ssh/id_rsa" (empty for no passphrase):
Enter same passphrase again:
Your identification has been saved in /home/admin/.ssh/id_rsa
Your public key has been saved in /home/admin/.ssh/id_rsa.pub
// 以下略

$ cat ~/.ssh/id_rsa.pub

$ chmod 600 ~/.ssh/id_rsa
GitHub側に設定
ここはGUIで操作します。
確認
$ ssh -T git@github.com
Hi admin! You've successfully authenticated, but GitHub does not provide shell access.
続きは次回、「WordPress構築編」でお会いしましょう。
シリーズ三部作
最後までご覧いただき、ありがとうございます。ここでひとつ宣伝をさせてください。
規約上、「広告や販売を主目的とする」でなければよさそうなので!
本規約で定めがない場合又は別途当社が承認していない限り、客観的に宣伝広告や販売を主目的とすると判断される記事の投稿をしないこと
楽天モバイル従業員紹介キャンペーン
楽天モバイルでは、楽天従業員による紹介キャンペーンを引き続き実施中です!
今すぐの乗り換えでなくても、下記からログインしておくと一定期間はキャンペーン対象になるので、検討中の方もぜひー。
▼ キャンペーン適用はこちらからログインしてお申し込みください!
https://r10.to/hkJoD3
従業員紹介キャンペーンは、通常の紹介キャンペーンと比べても、下記のように大変魅力的な特典となっております。
-
乗り換え・新規共に、1,000ポイント多くもらえる!
-
再契約や二回線目以降(最大五回線)の契約も特典の付与対象!
-
データタイプやWi-FiルーターのRakuten Turboの契約も特典の付与対象!
※本記事執筆時点のご案内です


