VagrantとVirtualBoxはインストール済み
仮想環境にCentOS7をインストールするところから始めて、Railsプロジェクトの作成、MySQLデータベースの作成までを行いました
主に参考にした記事
以下の記事を参考にしながら進めました
大まかな流れ
- CentOS7インストール → 日本語化
- Vagrant 共有フォルダの設定
- rbenvインストール → Rubyインストール
- Rails と Bundler のインストール
- MySQLのインストール → 設定
- Railsプロジェクト作成
- MySQLデータベース作成
環境
- MacOSX 10.13.3
- Vagrant 2.0.2
- VirtualBox 5.2.6
- CentOS 7.4
- Ruby 2.5.0
- Rails 5.1.5
- MySQL 5.7.21
仮想環境にCentOS7をインストール
以下からCentOS7のBoxを探します
https://app.vagrantup.com/boxes/search
今回は centos/7 を選びました
$ vagrant init centos/7

A `Vagrantfile` has been placed in this directory. You are now
ready to `vagrant up` your first virtual environment! Please read
the comments in the Vagrantfile as well as documentation on
`vagrantup.com` for more information on using Vagrant.
Vagrantfile が生成されたら vagrant up します
そうするとboxのインストールが開始され、インストール完了後にboxが起動します
$ vagrant up

Bringing machine 'default' up with 'virtualbox' provider...
==> default: Box 'centos/7' could not be found. Attempting to find and install...
起動できたか確認します
$ vagrant status

Current machine states:

default                   running (virtualbox)

The VM is running. To stop this VM, you can run `vagrant halt` to
shut it down forcefully, or you can run `vagrant suspend` to simply
suspend the virtual machine. In either case, to restart it again,
simply run `vagrant up`.
このように表示されれば問題無く動作しています
Vagrant 共有フォルダの設定
Vagrantfileに共有フォルダの設定を追加します
config.vm.synced_folder ".", "/vagrant", type: "nfs"
追加したら vagrant を起動しなおします
$ vagrant reload
NFSのマウントがうまくいかない時は以下を参照してみてください
CentOS7 を日本語化する
インストールしたBoxのCentOSは英語環境だったので日本語化します
英語のままでいいという人はここは飛ばしてしまってOKです
この辺を参考にしました
- CentOS7の日本語化(日本語環境で利用する)
- [ロケール(locale)まとめ] (https://qiita.com/aosho235/items/58e2e7acd5c2ee3641ff)
まず vagrant ssh で仮想環境にSSH接続します
$ vagrant ssh
[vagrant@localhost ~]$
接続したら locale -a で このCentOS7環境にインストール済のロケールを確認してみます
[vagrant@localhost ~]$ locale -a
C
POSIX
en_AG
en_AG.utf8
(中略)
en_ZW
en_ZW.iso88591
en_ZW.utf8
英語しか入ってないようです
日本語のロケールをインストールします
[vagrant@localhost ~]$ sudo localedef -i ja_JP -f UTF-8 -A /usr/share/locale/locale.alias ja_JP.UTF-8
もう一度 locale -a してみると…
[vagrant@localhost ~]$ locale -a
C
POSIX
en_AG
en_AG.utf8
(中略)
en_ZW
en_ZW.iso88591
en_ZW.utf8
ja_JP.utf8
「ja_JP.utf8」がありますね
無事にインストールできたようです
続けて日本語化のために必要なパッケージをインストールします
[vagrant@localhost ~]$ sudo yum install ibus-kkc vlgothic-*
インストールできたらロケールを日本語に設定した後、configファイルの設定をサーバーに反映させます
[vagrant@localhost ~]$ sudo localectl set-locale LANG=ja_JP.UTF-8
[vagrant@localhost ~]$ source /etc/locale.conf
最後に確認してみます
[vagrant@localhost ~]$ echo $LANG
ja_JP.UTF-8

[vagrant@localhost ~]$ yum info httpd
読み込んだプラグイン:fastestmirror
Loading mirror speeds from cached hostfile
 * base: ftp.riken.jp
 * extras: ftp.riken.jp
 * updates: ftp.riken.jp
利用可能なパッケージ
名前                : httpd
アーキテクチャー    : x86_64
バージョン          : 2.4.6
リリース            : 67.el7.centos.6
容量                : 2.7 M
リポジトリー        : updates/7/x86_64
要約                : Apache HTTP Server
URL                 : http://httpd.apache.org/
ライセンス          : ASL 2.0
説明                : The Apache HTTP Server is a powerful, efficient, and extensible
                    : web server.
echo $LANG は言語設定の確認です
「ja_JP.UTF-8」と出力されていれば問題ありません
yum info httpd で実際の出力を確認しています
日本語が表示されれば問題ありません
rbenvインストール
rbenvを使うと複数のRubyのバージョンをインストールして管理、切り替えすることができます
rbenvの役割
ここでは git clone してインストールしますので
まずgitをインストールします
インストール済みのパッケージをアップデート
[vagrant@localhost ~]$ sudo yum update
続けてgitをインストール
[vagrant@localhost ~]$ sudo yum install git
rbenvに必要なパッケージをインストール
[vagrant@localhost ~]$ sudo yum install gcc gcc-c++ openssl-devel readline-devel
rbenvをcloneします
[vagrant@localhost ~]$ git clone https://github.com/sstephenson/rbenv.git ~/.rbenv

Cloning into '/home/vagrant/.rbenv'...
remote: Counting objects: 2706, done.
remote: Total 2706 (delta 0), reused 0 (delta 0), pack-reused 2706
Receiving objects: 100% (2706/2706), 503.75 KiB | 289.00 KiB/s, done.
Resolving deltas: 100% (1695/1695), done.
cloneできたらrbenvのPATHを通します
[vagrant@localhost ~]$ echo 'export PATH="$HOME/.rbenv/bin:$PATH"' >> ~/.bash_profile
[vagrant@localhost ~]$ echo 'eval "$(rbenv init -)"' >> ~/.bash_profile
[vagrant@localhost ~]$ source ~/.bash_profile
最後にrbenvが使えるか確認します
[vagrant@localhost ~]$ rbenv --version

rbenv 1.1.1-28-gb943955
rbenvを使用してRubyをインストール
まずruby-buildプラグインをcloneします
[vagrant@localhost ~]$ git clone https://github.com/sstephenson/ruby-build.git ~/.rbenv/plugins/ruby-build

Cloning into '/home/vagrant/.rbenv/plugins/ruby-build'...
remote: Counting objects: 8615, done.
remote: Compressing objects: 100% (16/16), done.
remote: Total 8615 (delta 8), reused 19 (delta 4), pack-reused 8592
Receiving objects: 100% (8615/8615), 1.80 MiB | 417.00 KiB/s, done.
Resolving deltas: 100% (5498/5498), done.
今回は最新の安定版をインストールします
最新の安定版のバージョンを確認します
[vagrant@localhost ~]$ rbenv install -l | grep -v - | tail -1
  2.5.0
ちなみにインストール可能な全てのバージョン rbenv install -l で確認できます
さて Ruby 2.5.0 のインストールを進めていきます
[vagrant@localhost ~]$ rbenv install 2.5.0

Downloading ruby-2.5.0.tar.bz2...
-> https://cache.ruby-lang.org/pub/ruby/2.5/ruby-2.5.0.tar.bz2
Installing ruby-2.5.0...
Installed ruby-2.5.0 to /home/vagrant/.rbenv/versions/2.5.0
インストールできたら、Rubyを 2.5.0 に切り替えます
[vagrant@localhost ~]$ rbenv global 2.5.0
[vagrant@localhost ~]$ rbenv rehash
バージョンを確認してみます
[vagrant@localhost ~]$ ruby -v
ruby 2.5.0p0 (2017-12-25 revision 61468) [x86_64-linux]
Ruby 2.5.0 がインストールできました
Rails と Bundler のインストール
BundlerとはRubyのライブラリ管理ツールです
詳しくは以下記事などを参照してみてください
あらためてBundlerに関して理解する
Railのインストール
[vagrant@localhost ~]$ gem install --no-ri --no-rdoc rails

Fetching: concurrent-ruby-1.0.5.gem (100%)
Successfully installed concurrent-ruby-1.0.5
(中略)
Successfully installed rails-5.1.5
36 gems installed
Bundlerのインストール
[vagrant@localhost ~]$ gem install bundler

Successfully installed bundler-1.16.1
Parsing documentation for bundler-1.16.1
Installing ri documentation for bundler-1.16.1
Done installing documentation for bundler after 3 seconds
1 gem installed
さてRailsがインストールできたか確認してみます
[vagrant@localhost ~]$ rails -v
Rails 5.1.5
大丈夫ですね
MySQLのインストール
RailsのデフォルトのDBはSQLite
CentOS7はmariaDBです
今回はMySQLを使いたいので、mariaDBを削除してMySQLを入れます
mariaDBの削除
[vagrant@localhost ~]$ sudo yum remove mariadb-libs

読み込んだプラグイン:fastestmirror
依存性の解決をしています
--> トランザクションの確認を実行しています。
---> パッケージ mariadb-libs.x86_64 1:5.5.56-2.el7 を 削除

(中略)

削除しました:
  mariadb-libs.x86_64 1:5.5.56-2.el7

依存性の削除をしました:
  postfix.x86_64 2:2.10.1-6.el7

完了しました!
続けてMySQLのインストールですが、まずrpmのURLを確認します
https://dev.mysql.com/downloads/repo/yum/
スクロールするとRPMパッケージの一覧があります
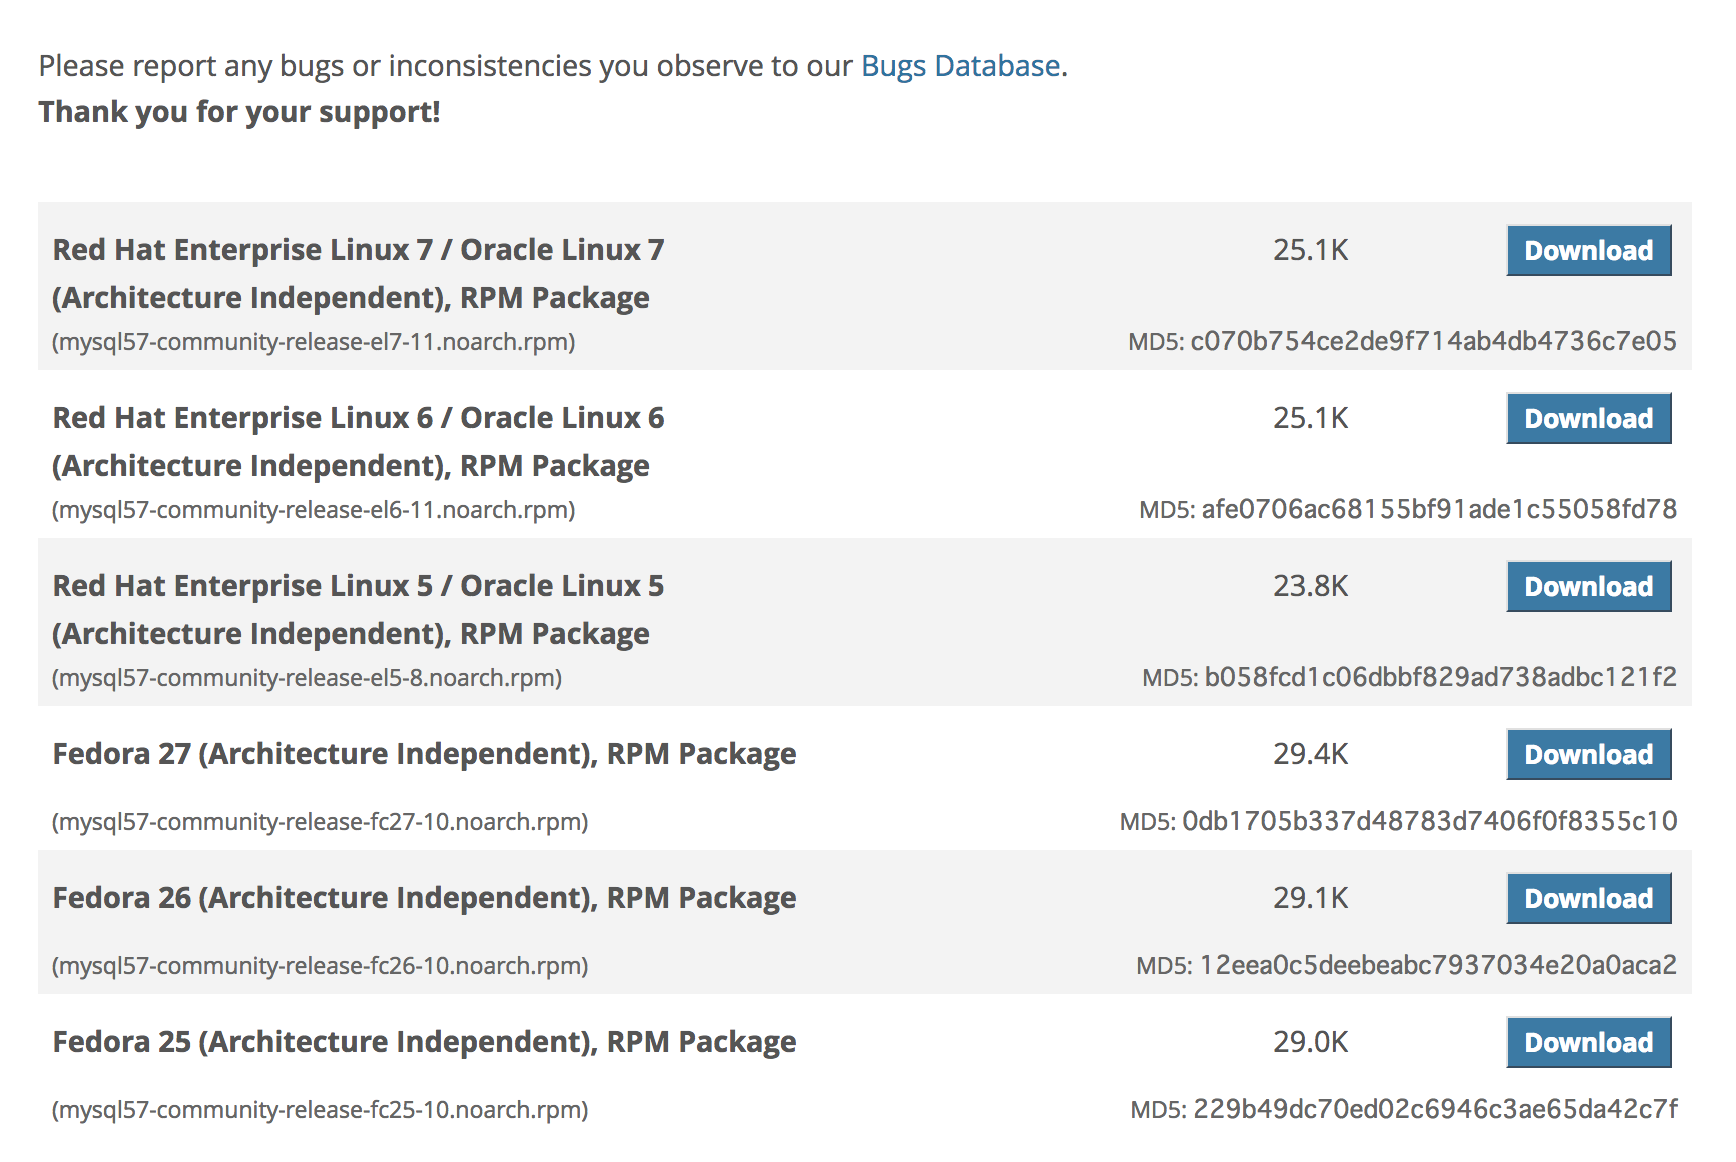
CentOS7 なので Linux7 ですね
「Download」をクリックしてみましょう

一番下の「No thanks, just start my download.」 のリンク先URLがRPMパッケージのURLです
これをコピーします
そして sudo yum localinstall [RPMパッケージのURL] でインストールします
[vagrant@localhost ~]$ sudo yum localinstall https://dev.mysql.com/get/mysql57-community-release-el7-11.noarch.rpm

読み込んだプラグイン:fastestmirror
mysql57-community-release-el7-11.noarch.rpm                                      |  25 kB  00:00:00
/var/tmp/yum-root-u23NlE/mysql57-community-release-el7-11.noarch.rpm を調べています:

(中略)

インストール:
  mysql57-community-release.noarch 0:el7-11

完了しました!
RPMパッケージがインストールできたら、MySQLをインストールします
[vagrant@localhost ~]$ sudo yum install mysql-community-server
読み込んだプラグイン:fastestmirror
mysql-connectors-community

(中略)

インストール:
  mysql-community-server.x86_64 0:5.7.21-1.el7

依存性関連をインストールしました:
  mysql-community-client.x86_64 0:5.7.21-1.el7       mysql-community-common.x86_64 0:5.7.21-1.el7
  mysql-community-libs.x86_64 0:5.7.21-1.el7         net-tools.x86_64 0:2.0-0.22.20131004git.el7

完了しました!
インストールできたか確認してみましょう
[vagrant@localhost ~]$ mysqld --version
mysqld  Ver 5.7.21 for Linux on x86_64 (MySQL Community Server (GPL))
MySQLの諸設定
以下を行います
- MySQLの起動と自動起動設定
- 初期パスワードの確認
- mysql_secure_installation でパスワードの変更等を行う
- 文字コードをUTF-8に変更
- RailsでMySQLを使用するためのパッケージをインストール
MySQLの起動と自動起動設定
[vagrant@localhost ~]$ sudo systemctl start mysqld.service
[vagrant@localhost ~]$ sudo systemctl enable  mysqld.service
初期パスワードの確認
起動すると初期パスワードが生成されます
/var/log/mysqld.log に出力されていますので、これを確認します
[vagrant@localhost ~]$ cat /var/log/mysqld.log | grep password
2018-02-26T08:42:27.401878Z 1 [Note] A temporary password is generated for root@localhost: S>)k5cQwdP?k
この場合 「 S>)k5cQwdP?k 」 がパスワードです
mysql_secure_installation でセキュリティ関連の初期設定ができるのですが、その際にこのパスワードが必要になります
mysql_secure_installation でパスワードの変更等を行う
[vagrant@localhost ~]$ mysql_secure_installation

Securing the MySQL server deployment.

Enter password for user root:
新規パスワードの設定
The existing password for the user account root has expired. Please set a new password.

New password:

Re-enter new password:
rootパスワードの設定
The 'validate_password' plugin is installed on the server.
The subsequent steps will run with the existing configuration
of the plugin.
Using existing password for root.

Estimated strength of the password: 100
Change the password for root ? ((Press y|Y for Yes, any other key for No) : y

New password:

Re-enter new password:

Estimated strength of the password: 100
Do you wish to continue with the password provided?(Press y|Y for Yes, any other key for No) : y
By default, a MySQL installation has an anonymous user,
allowing anyone to log into MySQL without having to have
a user account created for them. This is intended only for
testing, and to make the installation go a bit smoother.
You should remove them before moving into a production
environment.
匿名ユーザー削除
Remove anonymous users? (Press y|Y for Yes, any other key for No) : y
Success.


Normally, root should only be allowed to connect from
'localhost'. This ensures that someone cannot guess at
the root password from the network.
リモートホストからのrootログインを禁止
Disallow root login remotely? (Press y|Y for Yes, any other key for No) : y
Success.

By default, MySQL comes with a database named 'test' that
anyone can access. This is also intended only for testing,
and should be removed before moving into a production
environment.
testデータベース削除
Remove test database and access to it? (Press y|Y for Yes, any other key for No) : y
 - Dropping test database...
Success.

 - Removing privileges on test database...
Success.
ユーザー権限が保存されているテーブルをリロード
Reloading the privilege tables will ensure that all changes
made so far will take effect immediately.

Reload privilege tables now? (Press y|Y for Yes, any other key for No) : y
Success.
これで完了です
All done!
設定できたかMySQLにログインして確認してみます
[vagrant@localhost ~]$ mysql -u root -p

Enter password:
Welcome to the MySQL monitor.  Commands end with ; or \g.
Your MySQL connection id is 6
Server version: 5.7.21 MySQL Community Server (GPL)

Copyright (c) 2000, 2018, Oracle and/or its affiliates. All rights reserved.

Oracle is a registered trademark of Oracle Corporation and/or its
affiliates. Other names may be trademarks of their respective
owners.

Type 'help;' or '\h' for help. Type '\c' to clear the current input statement.

mysql> quit
Bye
文字コードをUTF-8に変更
「/etc/my.cnf」 に文字コード設定を追加します
[vagrant@localhost ~]$ sudo vi /etc/my.cnf
以下2行を追加します
# 文字コードの設定を追加
character_set_server=utf8
skip-character-set-client-handshake
MySQLを再起動して設定を反映させます
[vagrant@localhost ~]$ sudo systemctl restart mysqld.service
RailsでMySQLを使用するためのパッケージをインストール
[vagrant@localhost ~]$ sudo yum install mysql-devel

読み込んだプラグイン:fastestmirror
Loading mirror speeds from cached hostfile

(中略)

インストール:
  mysql-community-devel.x86_64 0:5.7.21-1.el7

完了しました!
Railsプロジェクトを作成してみる
実際にMySQLを使ってプロジェクトを作成してみます
ディレクトリを作成、プロジェクトごとにGemをBundlerで管理していきます
[vagrant@localhost ~]$ cd /vagrant
[vagrant@localhost vagrant]$ mkdir project
[vagrant@localhost vagrant]$ cd project/
[vagrant@localhost project]$ bundle init
Writing new Gemfile to /vagrant/project/Gemfile
Gemfileが生成されます
Gemとバージョンを指定します
source "https://rubygems.org"

gem "rails", "5.1.5"
Railsをインストール
ホストOSとの共有フォルダ内にインストールすると実行速度が遅くなるので、共有フォルダ外にインストールします
[vagrant@localhost project]$ bundle install --path ~/bundler/project/vender/bundle

Fetching gem metadata from https://rubygems.org/..........
(中略)
Bundle complete! 1 Gemfile dependency, 38 gems now installed.
Bundled gems are installed into `/home/vagrant/bundler/project/vender/bundle`
これで準備ができました
bundle exec rails new でアプリケーションを作成するのですが、この時にオプションでmysqlを指定します
[vagrant@localhost project]$ bundle exec rails new . --database=mysql --skip-spring

       exist
      create  README.md
      create  Rakefile
      create  config.ru
      create  .gitignore
    conflict  Gemfile
以下のようにGemfileを上書きするか聞かれますので「y」を入力します
Overwrite /vagrant/project/Gemfile? (enter "h" for help) [Ynaqdh] y

       force  Gemfile
         run  git init from "."
Initialized empty Git repository in /vagrant/project/.git/
      create  app
(中略)
Bundle complete! 14 Gemfile dependencies, 68 gems now installed.
Bundled gems are installed into `/home/vagrant/bundler/project/vender/bundle`
これでプロジェクトが作成できました
データベースの作成
まだMySQLのデータベースがないので新規作成しておきます
まずは /home/vagrant/bundler/project/config/database.yml にパスワードを追記します
default: &default
  adapter: mysql2
  encoding: utf8
  pool: <%= ENV.fetch("RAILS_MAX_THREADS") { 5 } %>
  username: root
  password: (ここにパスワードを入れる)
  socket: /var/lib/mysql/mysql.sock
データベースを作成します
[vagrant@localhost project]$ rake db:create:all
データベースを作成されたか確認します
[vagrant@localhost project]$ rails db

Enter password:

Welcome to the MySQL monitor.  Commands end with ; or \g.
Your MySQL connection id is 8
Server version: 5.7.21 MySQL Community Server (GPL)

Copyright (c) 2000, 2018, Oracle and/or its affiliates. All rights reserved.

Oracle is a registered trademark of Oracle Corporation and/or its
affiliates. Other names may be trademarks of their respective
owners.

Type 'help;' or '\h' for help. Type '\c' to clear the current input statement.

mysql> show databases;
+---------------------+
| Database            |
+---------------------+
| information_schema  |
| mysql               |
| performance_schema  |
| project_development |
| project_test        |
| sys                 |
+---------------------+
6 rows in set (0.00 sec)
作成されていますね