他のデモ https://media.giphy.com/media/TGu1wje7gWM26vByT7/giphy.gif
はじめに
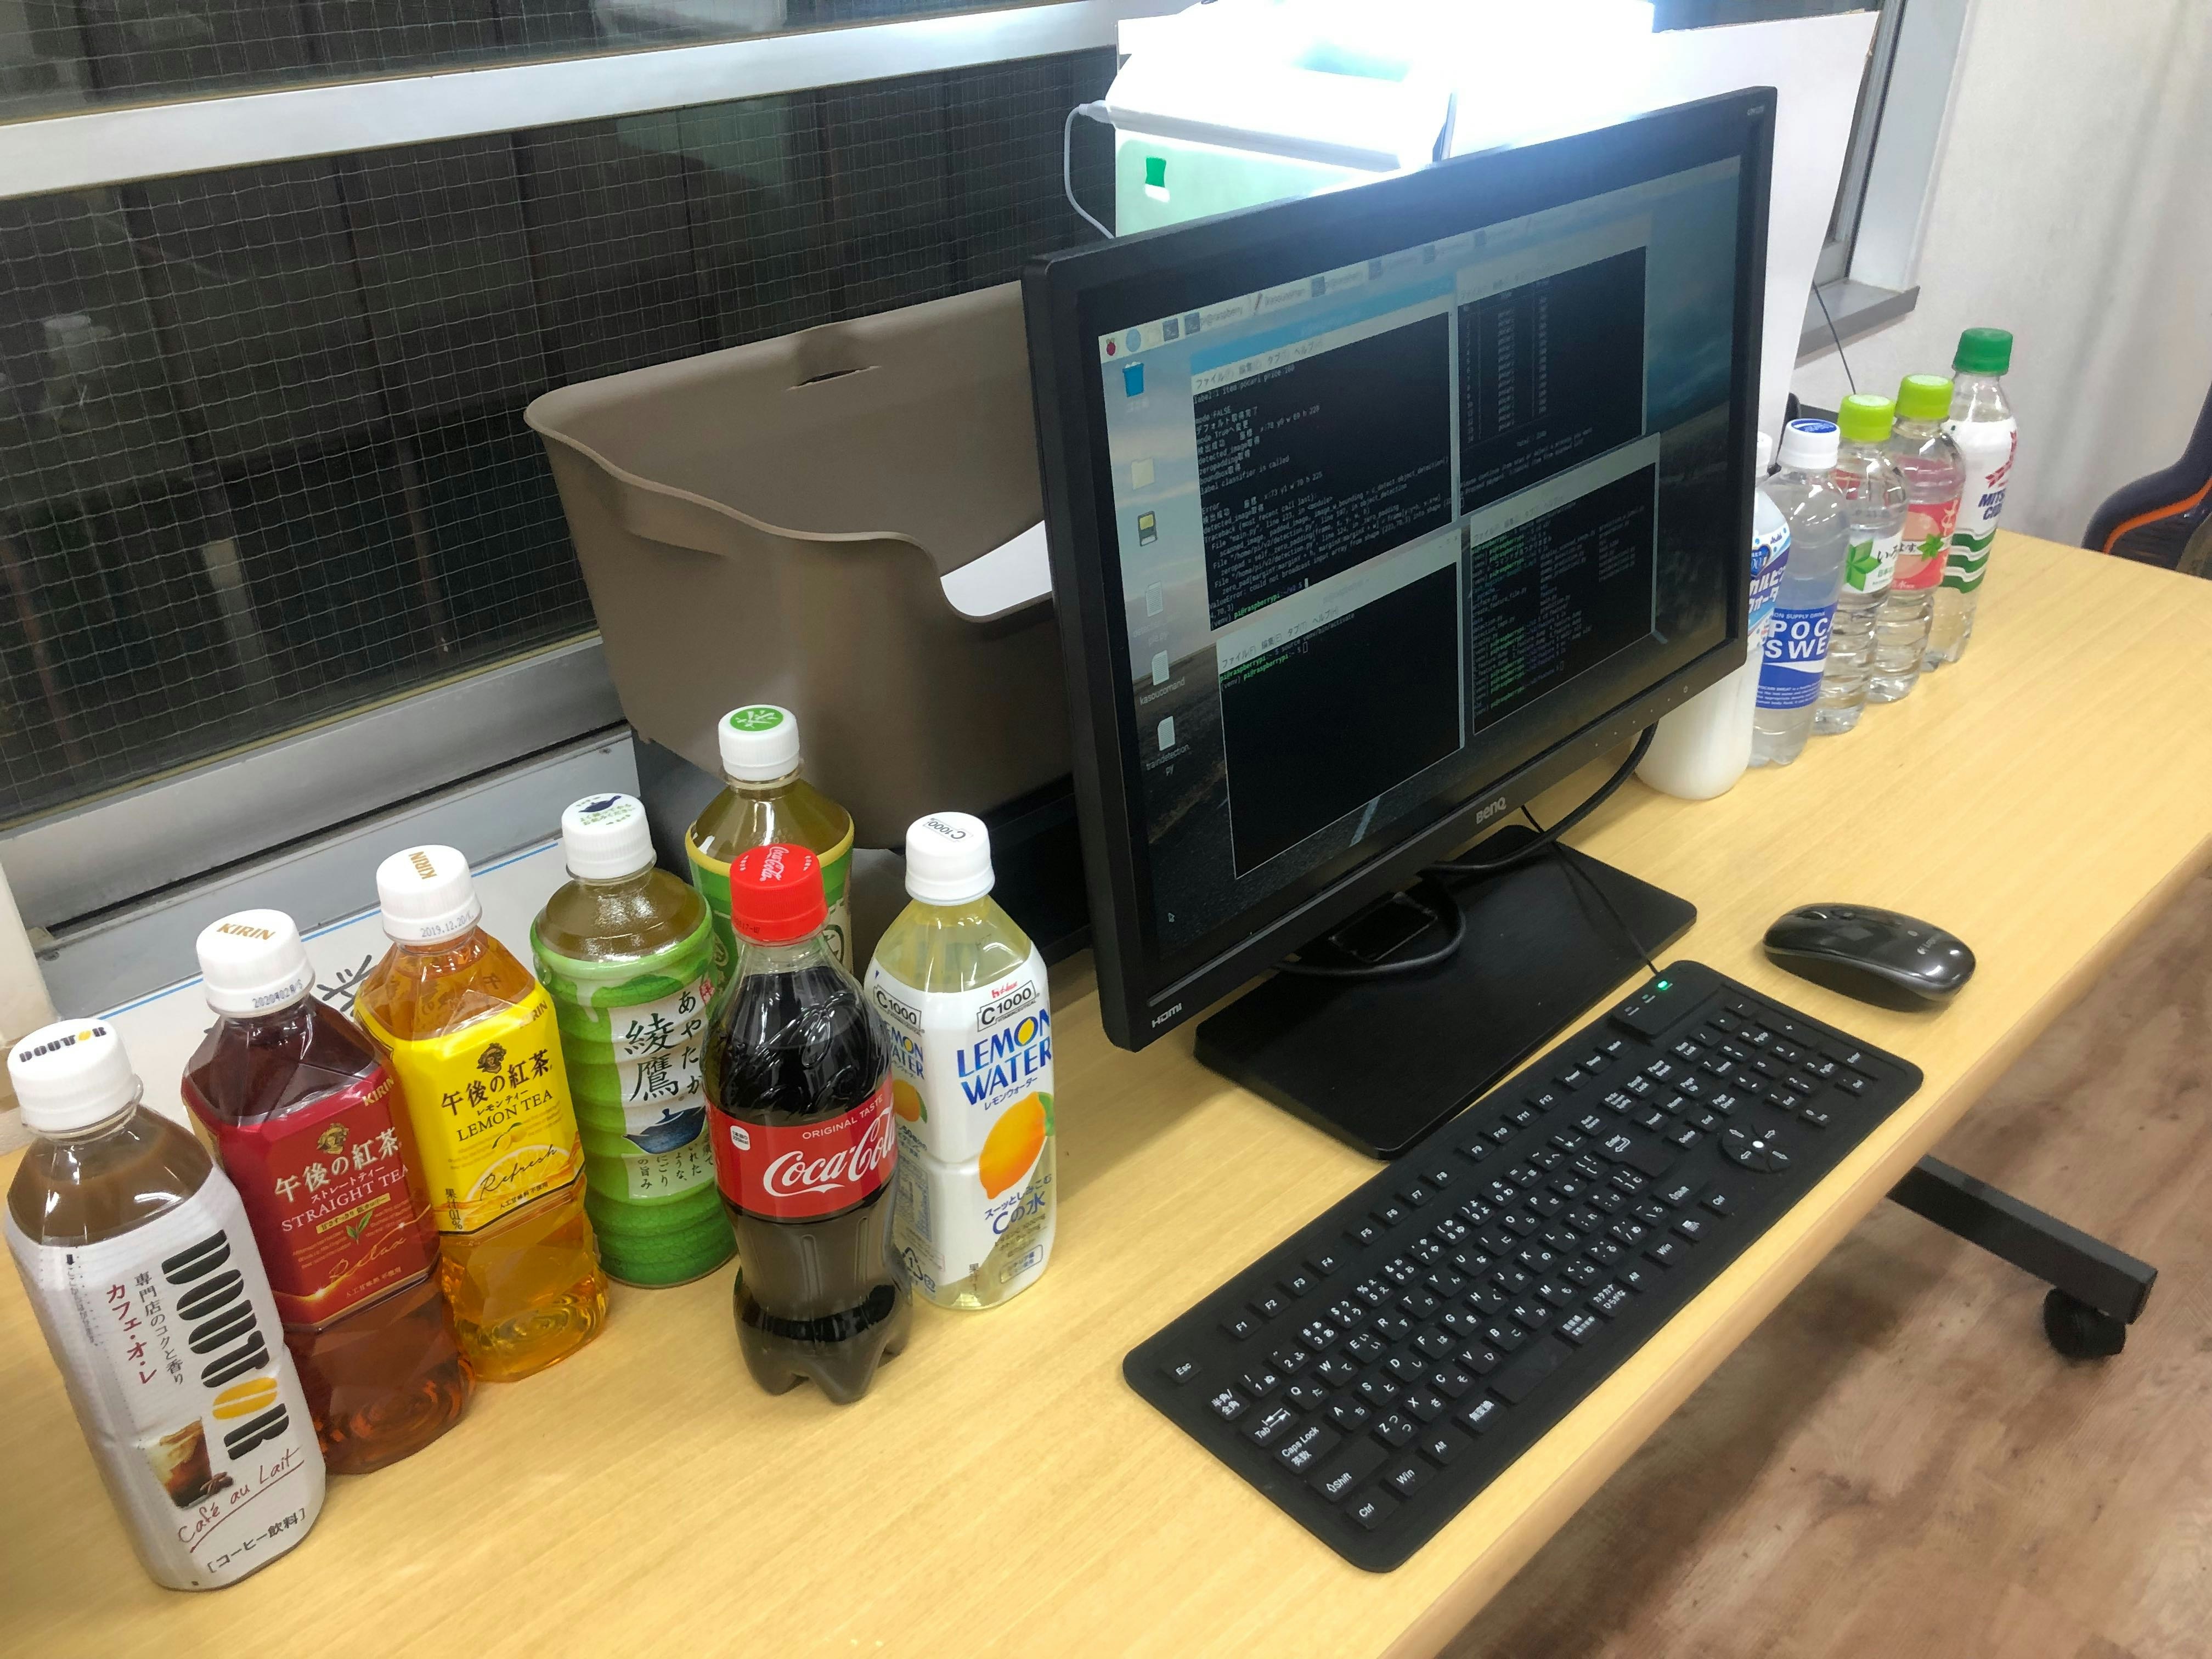
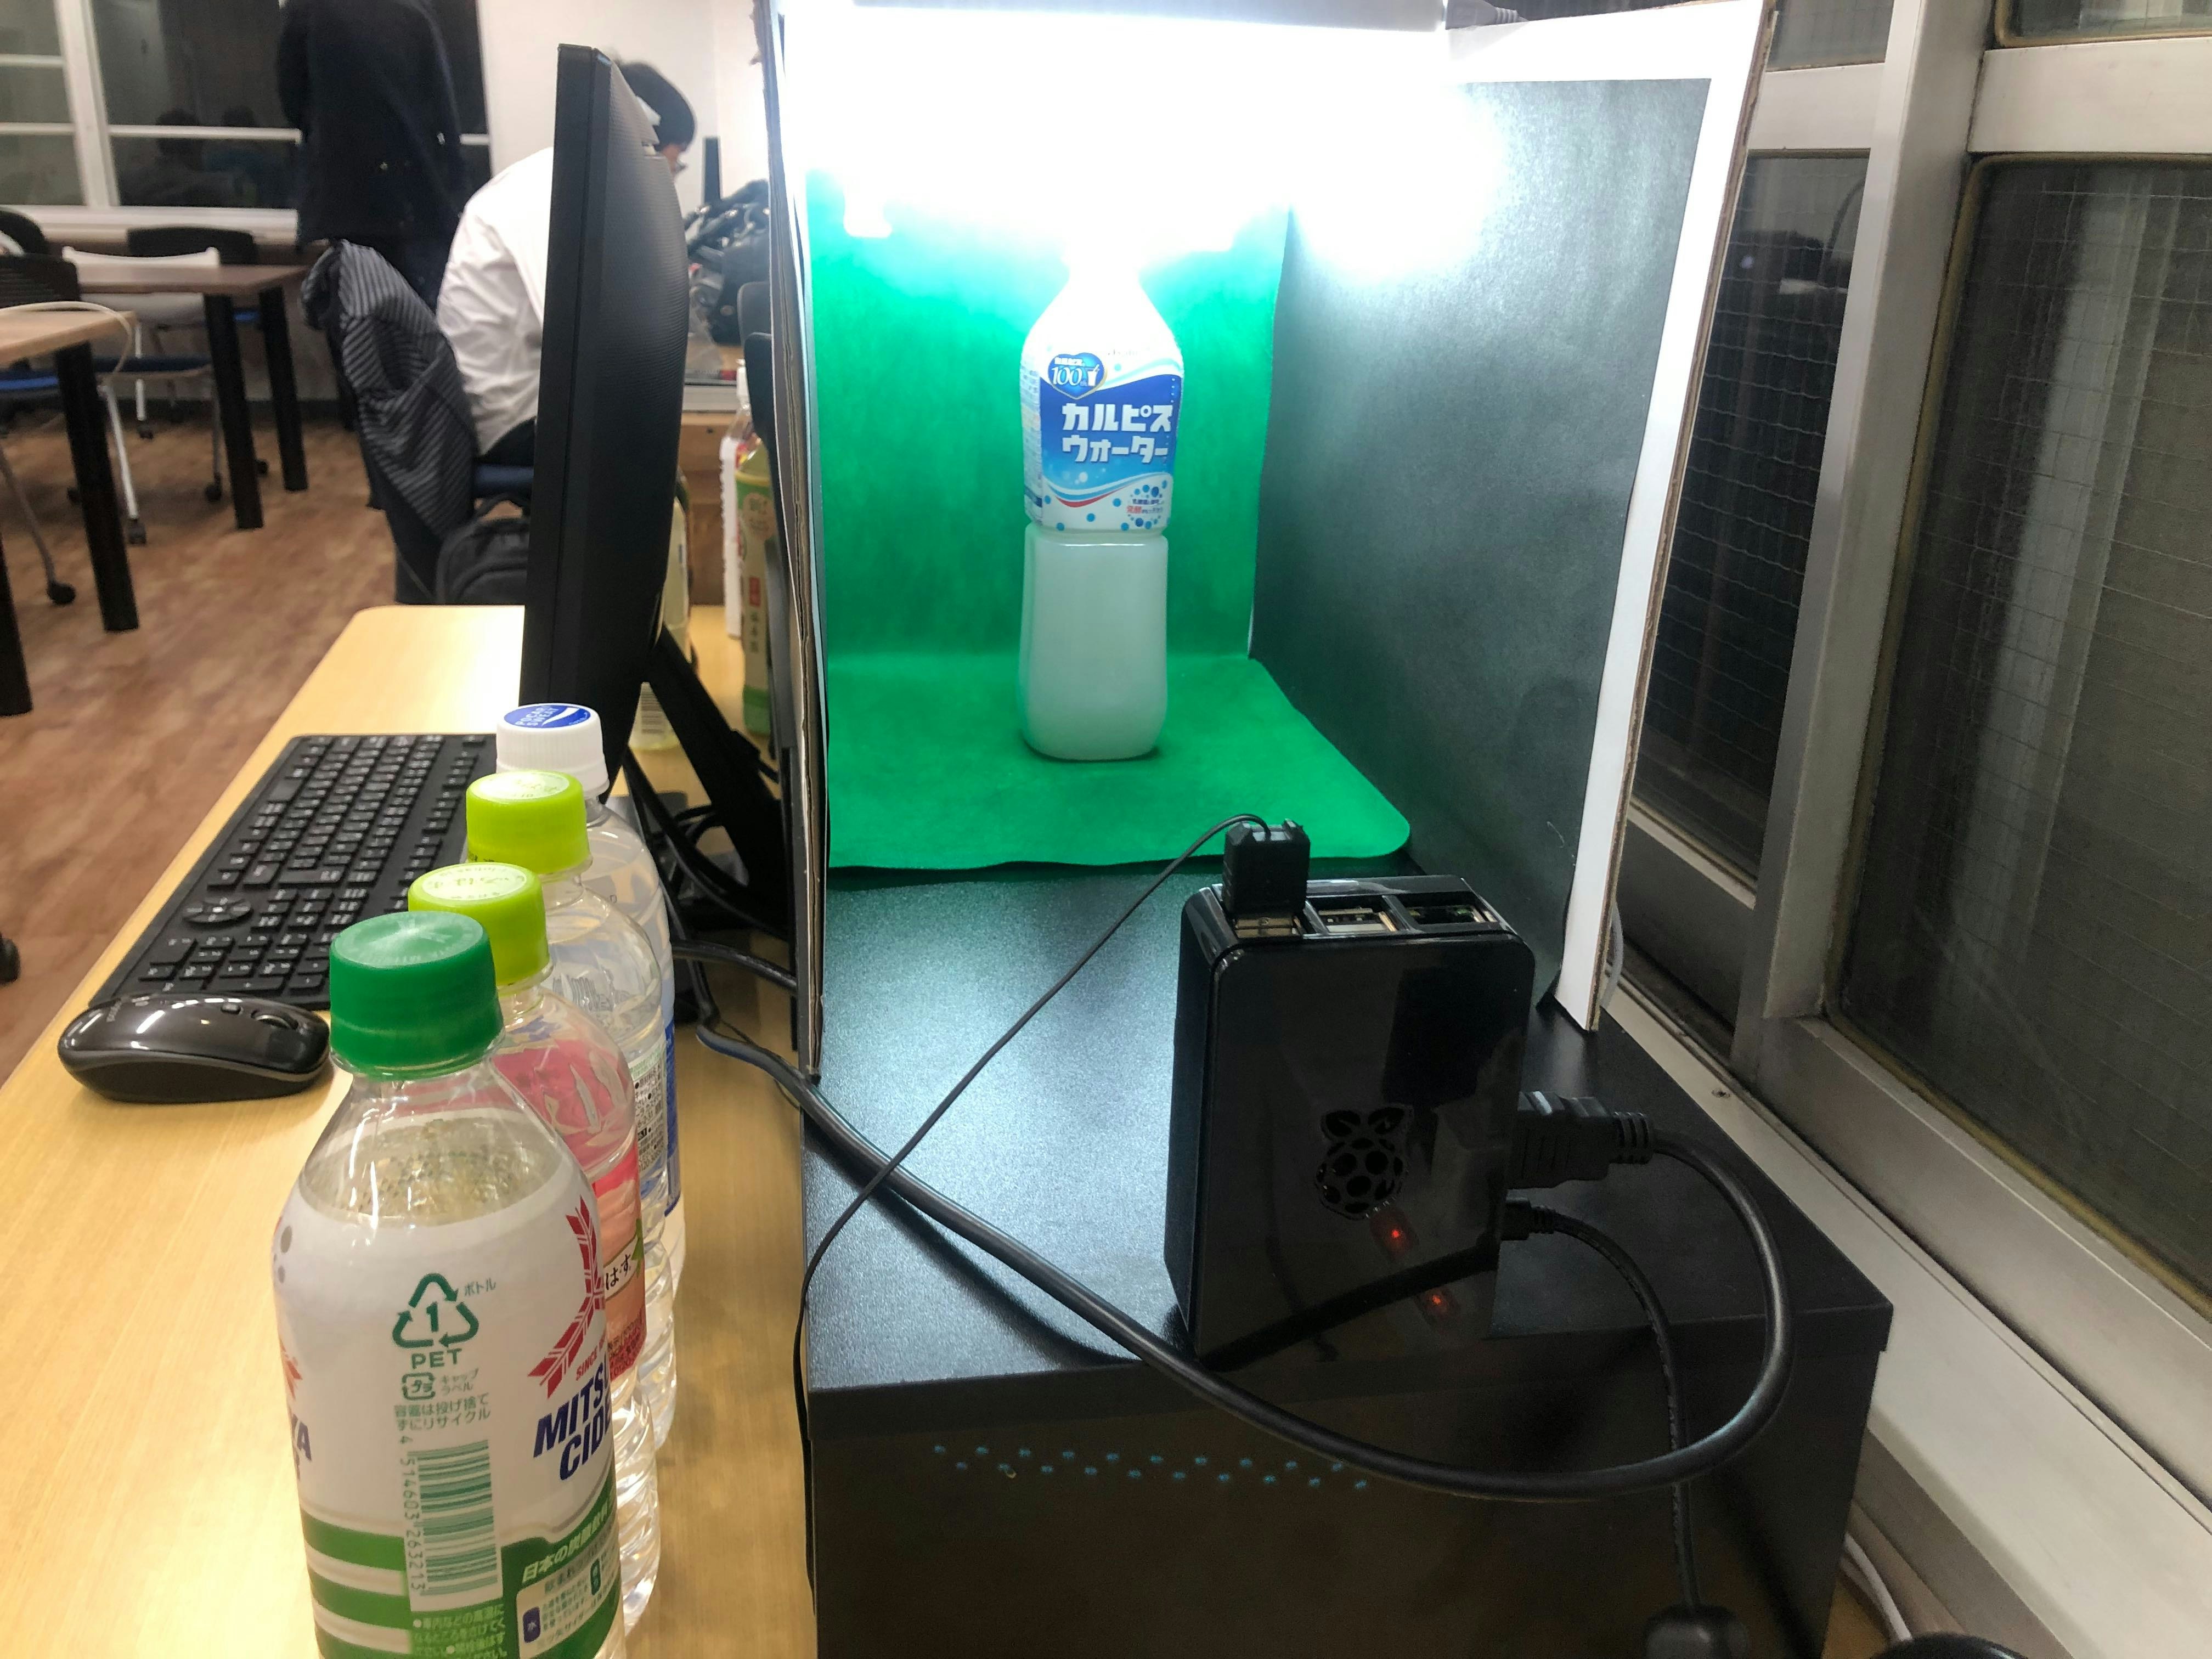
Rasberry Piで自動レジを作成するプロジェクトをやっていたのですが、その際に使用した物体検出方法を紹介します。自動レジのgit
↓自動レジで使ったモデルの詳細 最新の距離学習を使っているので是非みてみてください。
[[Keras]MobileNetV2+ArcFaceを使ってペットボトルの分類してみた]
(https://qiita.com/noritsugu_yamada/items/2e049cd7a8fd77eee0f5)
Raspberry Pi上で処理速度が必要なタスクだったので、YoloやSSDなどのディープラーニングベースでの物体検出は使えませんでした。また検出画像を次工程でCNNに入れ商品を分類するという構造だったので、とにかく物体がカメラに入ってきたらその部分だけを切り出せればよいということで、背景差分での物体検出をやってみました。
Rasberry PiでもMac上でも動きます。今の所一つの物体にしか対応してません。cv2.contourArea()あたりを使えば物体が重なってなければ検出できると思います(やってません)
参考になりそうなサイト https://postd.cc/image-processing-101/
正直ディープラーニングなしでここまで綺麗に抜き出せるとは思いませんでした。
手法
- 何も物体が写っていない画像をデフォルト画像にセットする
- 物体が入ってきたら、一つ前のフレームと比較し差分がなければ物体検出へ(要は止まったらとる)
- デフォルト画像との差分を取得し、差分がある領域を四角形で切り出す
- (おまけ)切り出した画像をセンターに持ってきて、その他の領域はゼロで埋める
こんな感じです。背景差分の取得にはOpenCVのBackgroundSubtractorMOGを使用しました。
おまけに関しては、CNNへ入力する際にゼロ埋めしておくとアスペクト比が維持できるのでやっています。
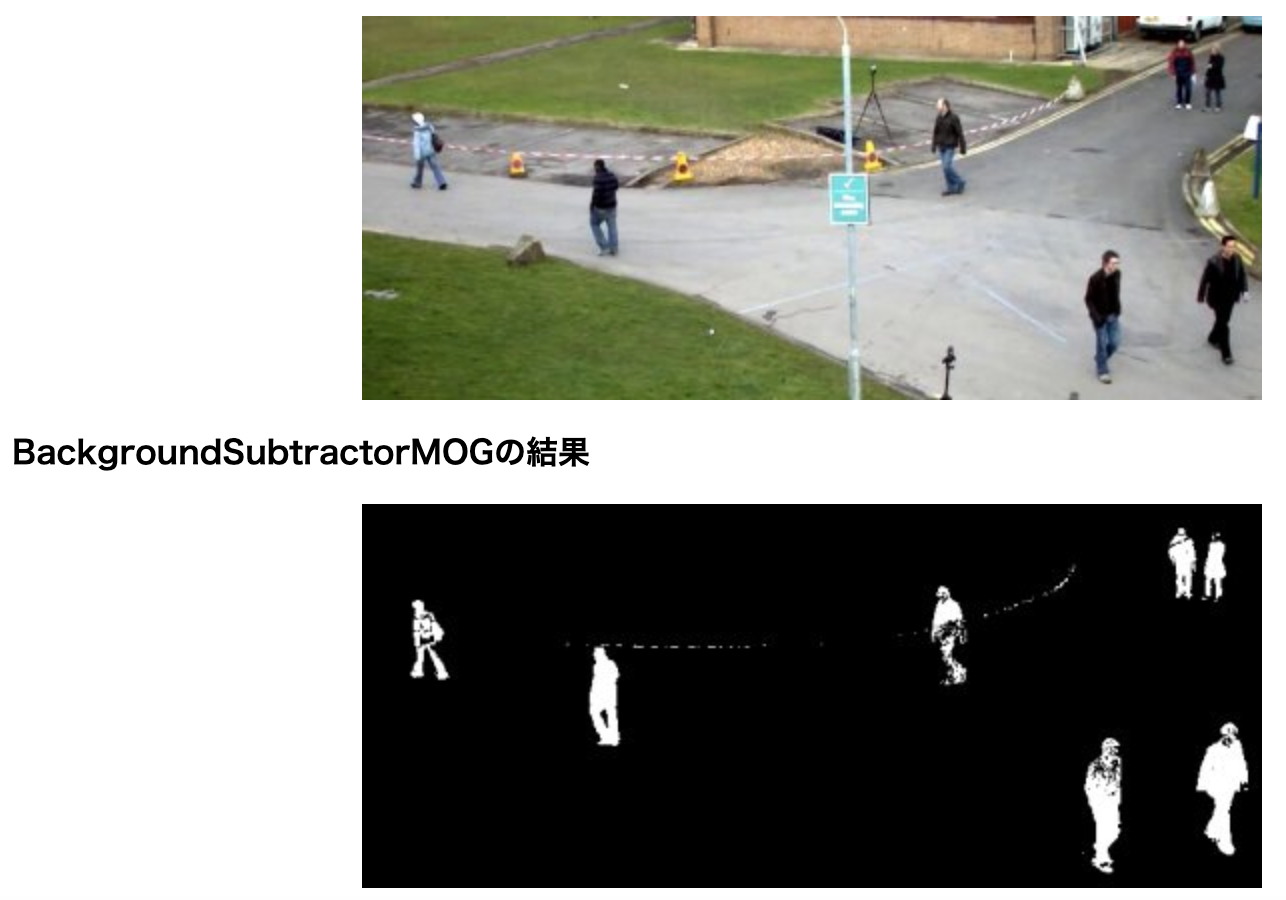
BackgroundSubtractorMOG
混合正規(ガウス)分布(Mixture of Gaussian Distribution, MoG)と呼ばれる移動物体を検出する手法。
本来の使い方とは違いますが、カメラのチラツキの影響がほぼなく差分を検出できるのでこちらを使用しました。
実装は下記コードの_get_background_subtraction関数をみてください。
元の画像 openCV公式ドキュメントより
全体のコード
やや長いです。pyファイルに貼り付けて実行してみてください。
実行するとまずデフォルトの画像を取得するので、背景だけを映してください。1秒程度でデフォルト取得完了です。
テストのため、検出物体を画面上に出力するようにしています。
import cv2
import numpy as np
import time
# 音を出すライブラリ sound=Trueの時はインポートしてください
# import pygame.mixer
from copy import deepcopy


class detection:

    def __init__(self,
                 cvsize=(224, 224),
                 margin=2,
                 default_threshold=500,
                 x1=0,
                 x2=224,
                 square=True,
                 sound=False):
        """
        Parameter & Attribute
        ---------------------------------------
        cvsize: (int, int) opencvで取得する画像のサイズ(横と縦)
        margin: int 検出した物体の範囲のマージン。増やすと横と縦の枠が大きくなる。
        rangethreshold: int 物体検知する最小の閾値
        default_threshold: int modeをTrueに戻す判定の差分ありでも許す閾値
        default: numpy.array 商品が乗ってない状態のレジの画像
        mode: bool object_detectionの処理の切り替えに使用
        preflame: numpy.array 背景差分の比較用の前のフレームの画像
        square: bool Trueなら画像を切り出し正方形にする(cvsizeでのリサイズはその後行う)
                Trueの場合parameterのx1,x2は無効となる
        x1,x2: int 画像を切り出す時のX軸(横軸)の開始位置と終了位置(_get_frameで使用)
        sound: bool 画像取得時とmodeがTrueになった時に音を鳴らすか。デバッグ用
        kurikaeshi: bool メッセージの表示をコントロールする
        ---------------------------------------
        注意点:cap作成時time.sleepを1秒程度入れてます。
                カメラが起動したてだと画像取得がうまくいかないため。
        """

        self.cap = cv2.VideoCapture(0)
        time.sleep(1) #スリープ入れること
        self.cvsize = cvsize
        self.margin = margin
        self.rangethreshold = int(cvsize[0]/10)
        self.default_threshold = default_threshold
        self.default = None
        self.mode = True
        self.preflame = None
        if square:
            _, f = self.cap.read()
            self.x1 = int((f.shape[1] - f.shape[0]) / 2)
            self.x2 = f.shape[1] - self.x1
        else:
            self.x1 = x1
            self.x2 = x2
        self.sound = sound
        self.kurikaeshi = True
        self._get_default()  #デフォルト画像の取得

    def _get_default(self):
        #物体がないデフォルトの画像を取得する関数
        self.default = self._get_frame()
        print("デフォルト取得完了")

    def set_mode(self, mode=False):
        #modeを設定する関数 分類が終わっときに使用
        self.mode = mode

    def cap_release(self):
        #カメラを解放するだけの関数
        self.cap.release()

    def _get_frame(self,frame_return=False):
        """
        カメラから画像を取得し、リサイズ、切り取り、平滑化を行って返す関数
        frame_return: Trueならframeも返す
        """
        _, frame = self.cap.read()
        frame = frame[:, self.x1:self.x2, :].astype("uint8")
        frame = cv2.resize(frame, self.cvsize)
        gbur = cv2.GaussianBlur(frame, (5, 5), 0)

        if frame_return:
            return gbur, frame
        else:
            return gbur

    def _get_background_subtraction(self, image1, image2):
        """
        2つの画像を入力すると差分のマスクを返す関数
        image1,image2: 3次元のnumpy.array(dtype:unit8)
        fgmask: 2次元のnumpy.array(dtype:unit8 )
                差分なしは0、差分ありは255に2値化されている
        """
        fgbg = cv2.bgsegm.createBackgroundSubtractorMOG()
        fgmask = fgbg.apply(image1)
        fgmask = fgbg.apply(image2)
        return fgmask

    def _zero_padding(self, frame, x, y, w, h, out_size=(224,224)):
        """
        フレームを座標で切り取りゼロ埋めして返す 中央に画像を配置します
        """
        zero_pad = np.zeros(frame.shape)
        FY, FX, _ = frame.shape
        marginY = int((FY - h) / 2)
        marginX = int((FX - w) / 2)
        if marginY < 0:
            marginY = 0
        if marginX < 0:
            marginX = 0
        #稀にエラーが出るのでエラー回避
        try:
            zero_pad[marginY:marginY + h, marginX:marginX + w] = frame[y:y+h, x:x+w]
        except ValueError:
            zero_pad = frame
            print("zero_paddingでエラーが発生しました")
        zero_pad = zero_pad.astype("uint8")
        zero_pad = cv2.resize(zero_pad, out_size)
        return zero_pad

    def _bounding_box(self, frame, x, y, w, h):
        """
        フレームにバウンディングボックスをつけて返します。
        """
        cv2.rectangle(frame, (x, y), (x + w, y + h), (0, 255, 0), 3)
        return frame

    def object_detection(self):
        """
        背景差分で物体検出を行う関数 検出したら画像を返し、それ以外はNoneを返します。
        ループで回す前提の関数です。modeがTrueの状態では物体検出を行います。
        Falseの状態ではデフォルト状態(物体なし)に戻ったことを検知するとmodeをTrueに切り替えます。

        detected_image: 検出した物体の画像 3次元のnumpy.array(dtype:unit8)
        zeropad: 検出した物体の画像をゼロ埋めしたもの 3次元のnumpy(dtype:unit8)
        boundbox: 画像に検出物体のバウンディングボックスをつけたもの 3次元のnumpy(dtype:unit8)

        注意点:商品分類が完了したらset_mode(False)を使ってself.modeをFalseにしてください
        """

        detected_image = None
        zeropad = None
        boundbox = None
        # 音声ファイル初期化
        if self.sound:
            pygame.mixer.init()
            pygame.mixer.music.load("Cash_Register-Beep01-1.mp3")

        if self.mode:

            #print("mode:True")
            #処理の初めで比較する前のフレーム画像がないなら取得する
            if self.preflame is None:
                self.preflame = self._get_frame()
            #背景差分の取得
            gbur, frame = self._get_frame(frame_return=True)
            fgmask = self._get_background_subtraction(self.preflame, gbur)
            self.preflame = gbur
            #前のフレームとの差分がないならTrue
            if np.max(fgmask) < 1:
                fgmask = self._get_background_subtraction(self.default, gbur)
                #デフォルト画像とのフレームとの差分があるならTrue
                if np.max(fgmask) > 200:
                    #差分箇所の座標と範囲を取得
                    Y, X = np.where(fgmask > 200)
                    x = int(np.min(X)-self.margin)
                    if x < 0: #マイナスならマージンなし
                        x = x + self.margin
                    w = int(np.max(X)-x+1+self.margin)
                    if x + w > frame.shape[1]: #マージンで幅の最大値超えたらマイナスする
                        w = w-x+w-frame.shape[1]
                    y = int(np.min(Y)-self.margin)
                    if y < 0: #マイナスならマージンなし
                        y = y + self.margin
                    h = int(np.max(Y)-y+1+self.margin)
                    if y + h > frame.shape[0]:  #マージンで縦の最大値超えたらマイナスする
                        h = h - y + h - frame.shape[0]
                    #検出範囲が一定以下は画像を検出しない
                    if w > self.rangethreshold and h > self.rangethreshold:
                        print("検出成功  座標 x:{} y{} w {} h {}".format(x, y, w, h))
                        detected_image = frame[y:y + h, x:x + w]
                        print("detected_image取得")
                        zeropad = self._zero_padding(frame, x, y, w, h)
                        print("zeropadding取得")
                        boundbox = deepcopy(frame)
                        boundbox = self._bounding_box(boundbox, x, y, w, h)
                        print("boundbox取得")
                        self.preflame = None
                        if self.sound:
                            # 音声再生
                            pygame.mixer.music.play(2)
                            time.sleep(1)
                            pygame.mixer.music.stop()
                    else:
                        pass
                        #print("検出物体が小さい")
                else:
                    pass
                    #print("デフォルトとの差分なし")
            return detected_image, zeropad, boundbox

        #mode Falseならこちらの処理へ
        else:
            if self.kurikaeshi:
                print("mode:FALSE")
                self.kurikaeshi = False
            gbur = self._get_frame()
            fgmask = self._get_background_subtraction(self.default, gbur)
            #差分なしならモード切り替え

            if np.sum(fgmask > 1) <= self.default_threshold:
                self.mode = True
                self.preflame = None
                self._get_default()
                print("mode Trueへ変更")
                self.kurikaeshi = True
                if self.sound:
                    # 音声再生
                    pygame.mixer.music.play(2)
                    time.sleep(1)
                    pygame.mixer.music.stop()
            return detected_image, zeropad, boundbox  #None

def main():
    #実行すると検出物体を表示します
    det = detection()
    while True:
        dst, zero, baund = det.object_detection()

        if np.any(dst):
            #cv2.imshow("dst", dst)
            cv2.imshow("zero", zero)
            cv2.imshow("baund", baund)

            #エンターキーでブレイク
            k = cv2.waitKey(1)
            if k == 13:
                det.cap_release()
                cv2.destroyAllWindows()
                break

if __name__ == "__main__":
    main()
おまけ
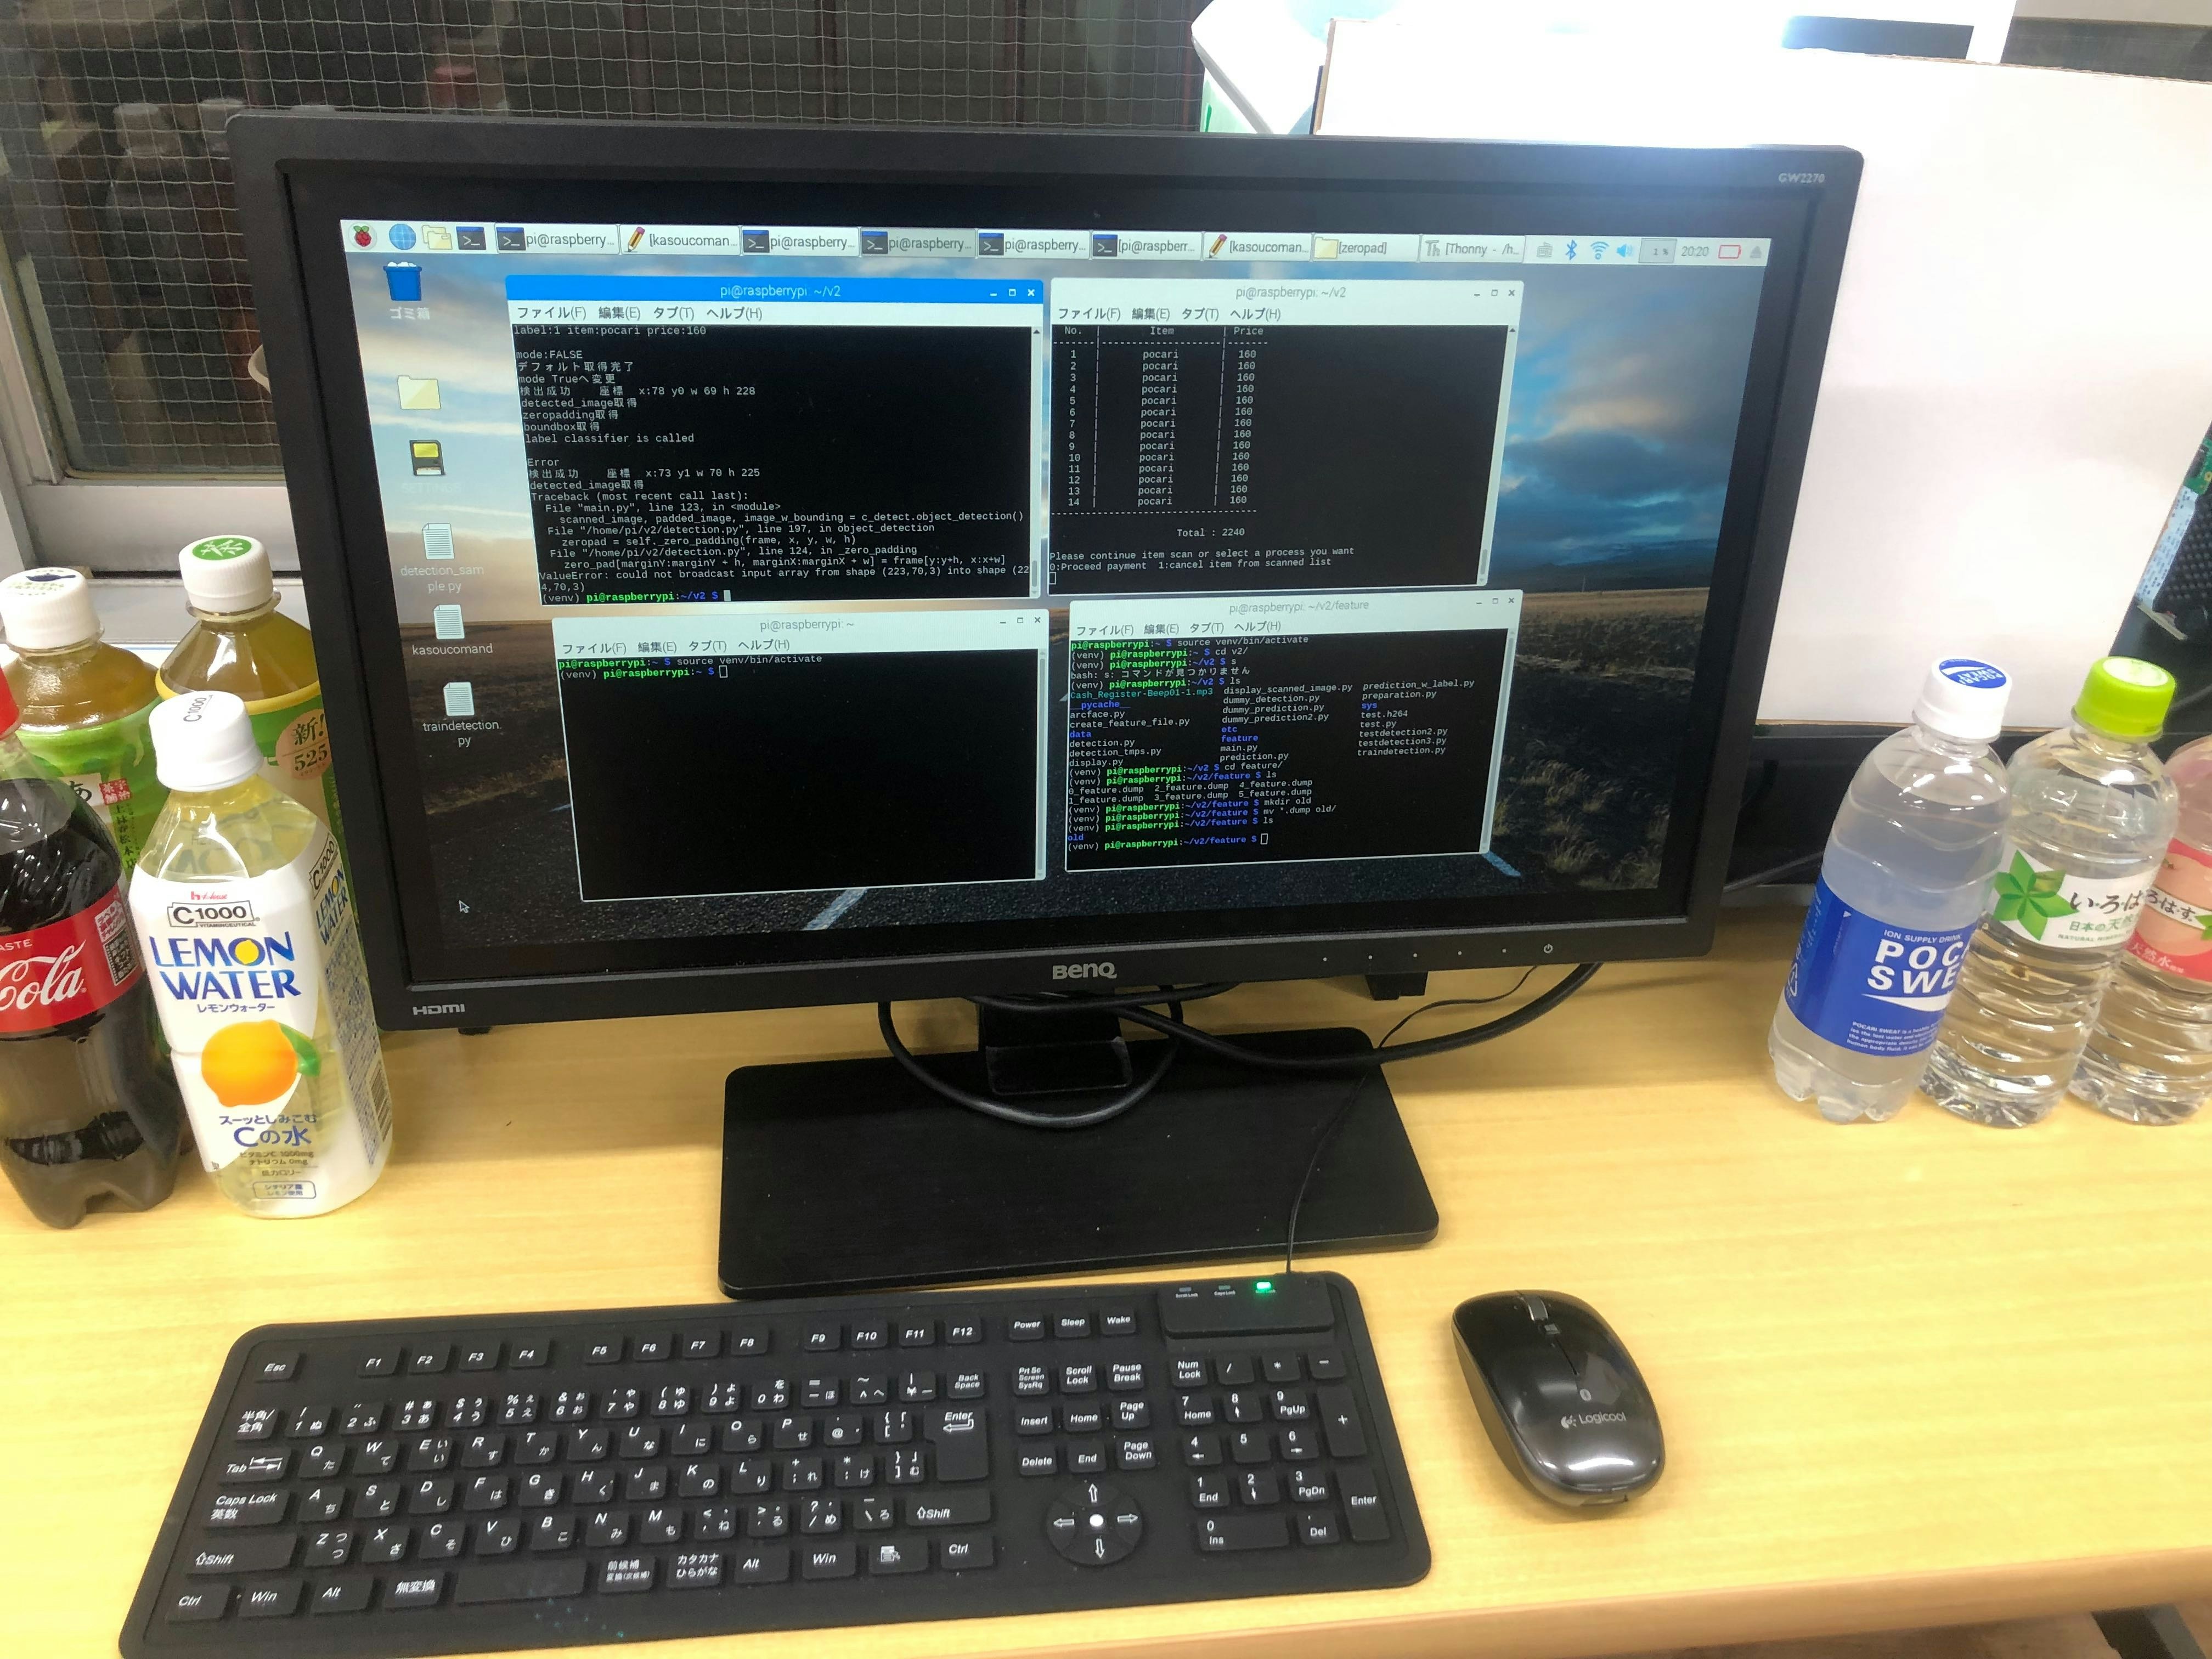
自動レジの画像
今回の手法で抜き出した画像