こんにちは、piyopiyo.ex共同開催者のnakoです。
本記事は 2021/11/6開催の piyopiyo.ex#1:Phoenix環境構築〜Hello,world! のMac環境向け振り返り記事です。
Windows向け内容は こちらのスライド をご覧ください。
本記事の内容は2021/11/6時点のものです。
Elixirをインストール
公式を参考にインストールしていきます。
ターミナルを起動
- DockでLaunchpadのアイコンをクリックして、検索フィールドに「ターミナル」と入力してから、「ターミナル」をクリック。
- もしくは、commandキー+スペースキーを押して、Spotlight(検索ツール)を起動、「ターミナル」と入力。
- すでにターミナルアプリをインストールしている方は好きなアプリを立ち上げてください。
homebrewでElixirをインストール
起動したターミナルで下記を実行。
$ brew install elixir
インストールが完了したらバージョン確認。
$ elixir -v
Erlang/OTP 24 [erts-12.1.4] [source] [64-bit] [smp:8:8] [ds:8:8:10] [async-threads:1] [jit] [dtrace]

Elixir 1.12.3 (compiled with Erlang/OTP 24)
ちなみにPhoenix v1.6はElixir v1.9以上が必要。
Phoenix v1.6 requires Elixir v1.9+.
Phoenixをインストール
ターミナルで下記を実行。バージョンは1.6.0をインストールします。
※2021/11/6時点では2021/8/26にリリースされた最新バージョンです。
$ mix archive.install hex phx_new 1.6.0
インストールできたらバージョンを確認します。
$ mix phx.new -v
Phoenix installer v1.6.0
Visual Studio Code(VSCode)のダウンロード
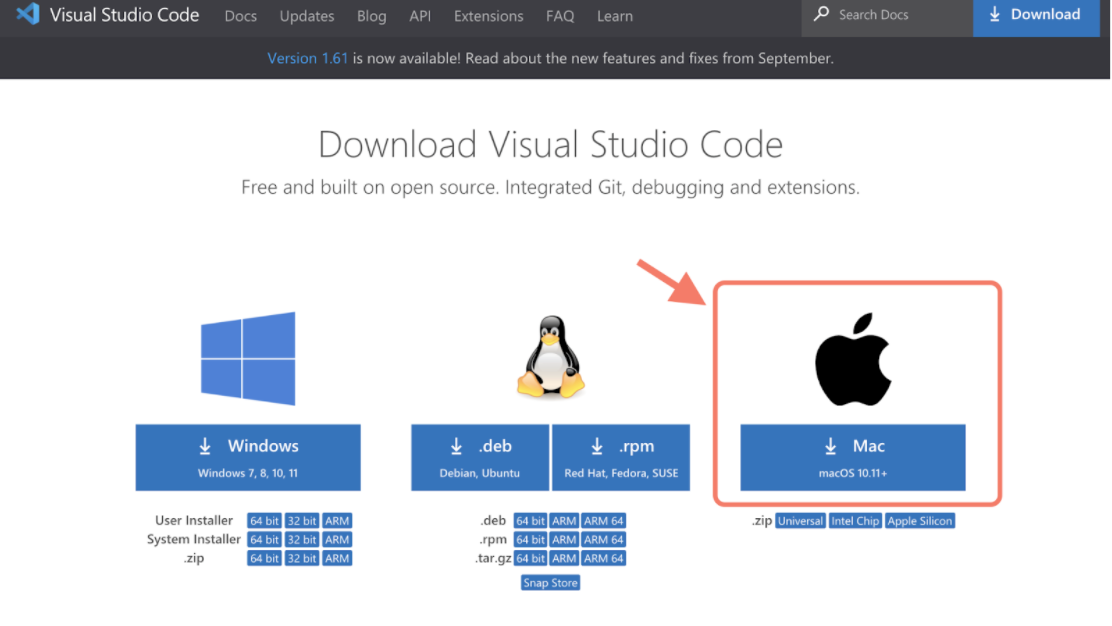
VSCodeのダウンロードページにアクセスします。
自分の使っているOS(ここではMac)を選んでポチーします。
 |
|---|
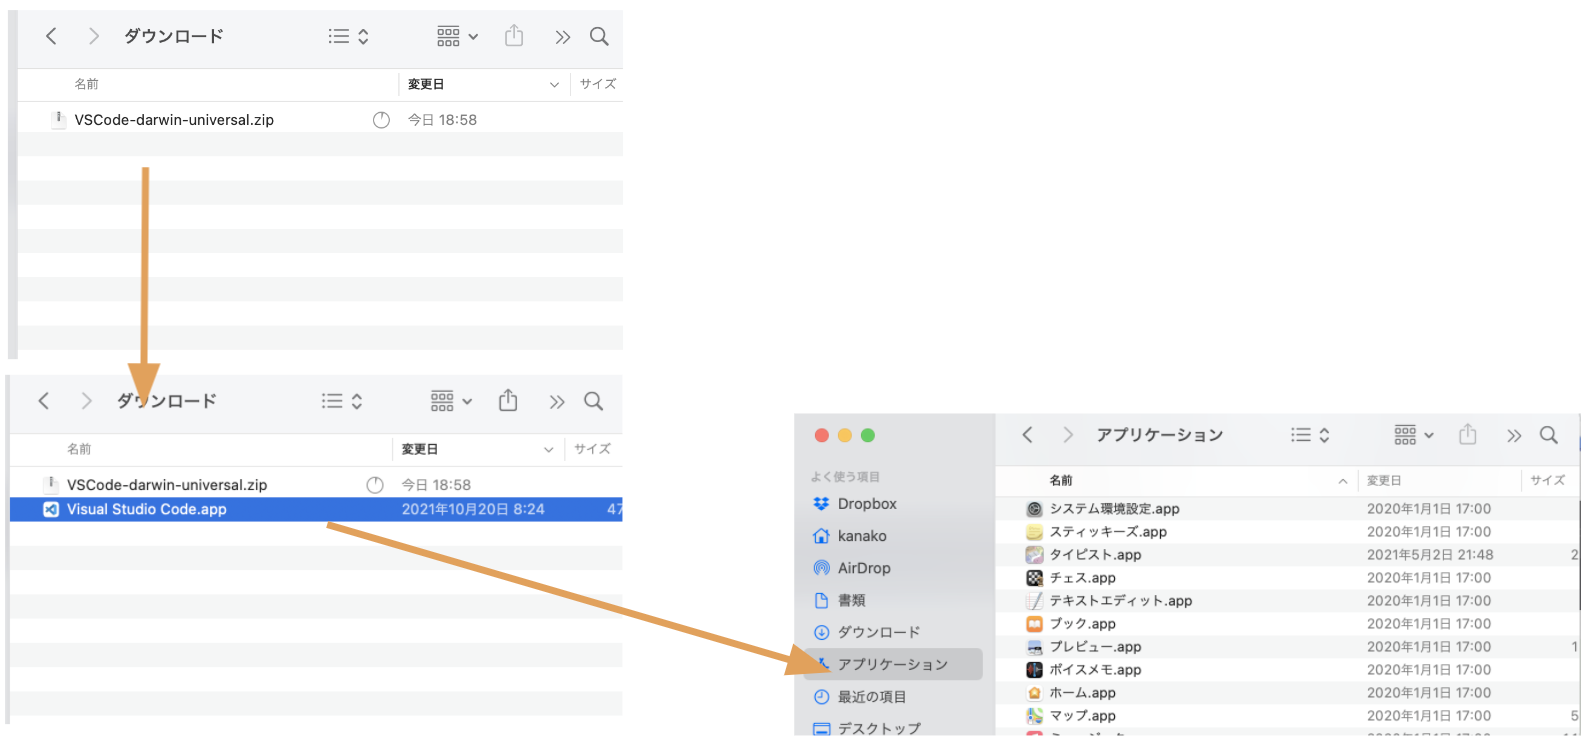
zipファイルがダウンロードできるので、ダブルクリックして展開しましょう。
展開したappファイルはアプリケーションフォルダに移動しましょう。
 |
|---|
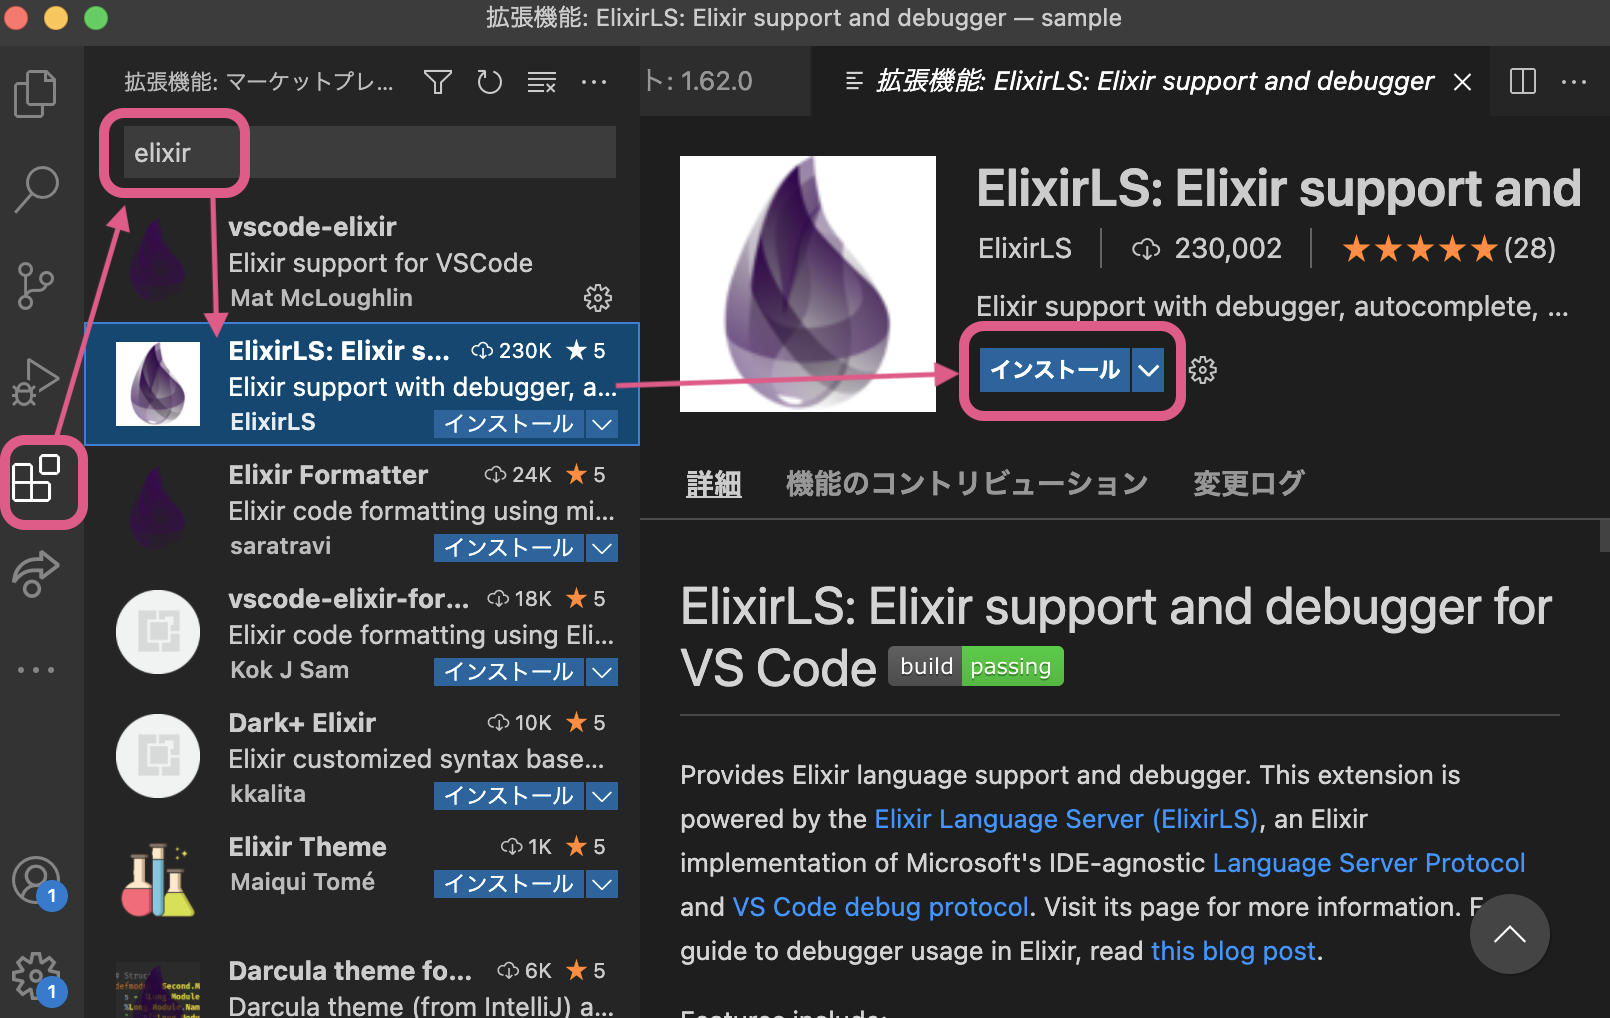
VSCodeのelixirの拡張機能をインストールする
VSCodeの拡張機能アイコンをクリックし、「elixir」と検索、「ElixirLS」をインストールします。
Hello, world!
Phoenixプロジェクトを作成する
今回はDBを使わないので--no-ectoオプションを指定します。
EctoはElixirのデータベースラッパーです。
$ mix phx.new sample --no-ecto
* creating sample/config/config.exs
* creating sample/config/dev.exs
* creating sample/config/prod.exs

〜略〜

Fetch and install dependencies? [Yn] Y # 途中で依存するライブラリのインストールをするか聞かれるのでYで
最後に作成されたプロジェクトの起動方法が表示されたら完了です。
We are almost there! The following steps are missing:
    $ cd sample

Start your Phoenix app with:
    $ mix phx.server

You can also run your app inside IEx (Interactive Elixir) as:
    $ iex -S mix phx.server
sampleディレクトリに移動して、アプリケーションを起動します。
$ cd sample/
$ mix phx.server
Compiling 13 files (.ex)
Generated sample app
[info] Running SampleWeb.Endpoint with cowboy 2.9.0 at 127.0.0.1:4000 (http)
[info] Access SampleWeb.Endpoint at http://localhost:4000
[debug] Downloading esbuild from https://registry.npmjs.org/esbuild-darwin-64/-/esbuild-darwin-64-0.12.18.tgz
[watch] build finished, watching for changes...
http://localhost:4000 をブラウザのアドレスバーに入力する。
 |
|---|
ビューを書き換えてHello,world!する
今回はビューのページを少し変更してみましょう。
sample/lib/sample_web/templates/page/index.html.heexを開いて、
2行目のh1タグを
<section class="phx-hero">
  <h1><%= gettext "Welcome to %{name}!", name: "Phoenix" %></h1>
このように書き換えてみましょう。
<section class="phx-hero">
  <h1>Hello, world!</h1>
無事変更されました。ようこそPhoenixへ!
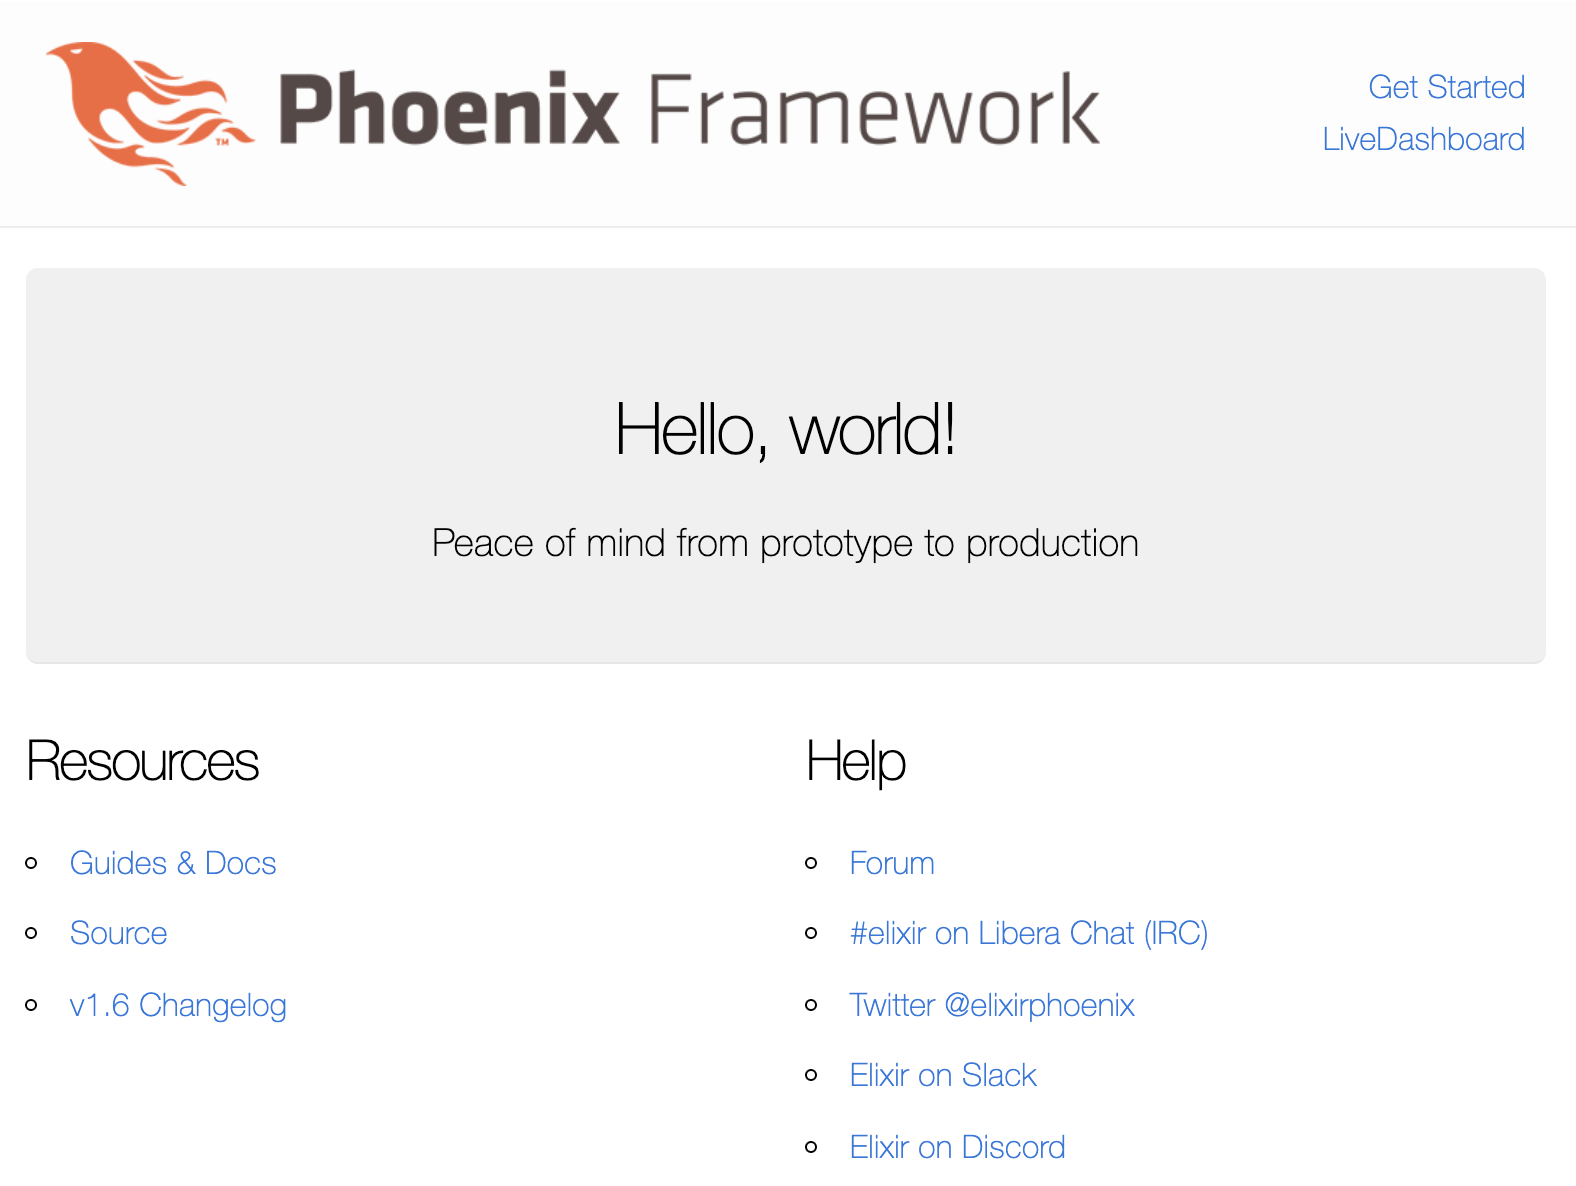 |
|---|
おわりに
elixir.jpコミュニティの方々に助けてもらいながら、無事piyopiyo.ex#1が開催できました。
本当にありがとうございます!
なお、本記事では説明をはしょりましたが、ディレクトリ構造については公式ドキュメントや、日本語訳ならこちらがおすすめです。