はじめに
回帰タスクをAzure AutoMLを使ってPythonから行ってみます。
二項分類のタスクについてはこちらをご参考ください。
開発環境
- OS Windows 10(NVIDIA GTX 1650Ti,16GB RAM, i5-10300H CPU)
- Visual Studio Code 1.73.1
- Python 3.8
- AzureML Python SDK v2
回帰タスクをPythonから行う際の流れ
今回使用するデータセット
Azureのデータセットにある「Automobile price data (Raw)」を使って自動車価格予測をやってみます。デザイナーからExportしてデータセットを取り出しました。
それではトレーニングから行います!
トレーニング
regression()で回帰タスクのジョブ送信します。
from azure.identity import DefaultAzureCredential
from azure.ai.ml import MLClient, Input, automl
from azure.ai.ml.constants import AssetTypes
from azure.ai.ml.entities import AmlCompute

credential = DefaultAzureCredential()

#ワークスペースへ接続
subscription_id="<ストレージアカウント名>"
resource_group="<リソースグループ名>"
workspace_name="<ワークスペース名>"

ml_client = MLClient(credential, subscription_id, resource_group, workspace_name)

#データ
my_training_data_input = Input(
    type=AssetTypes.MLTABLE, path="azureml://datastores/workspaceblobstore/paths/XXX/automobile"
)

#コンピューティングの作成
cpu_compute_target = "cpu-cluster"

try:
    ml_client.compute.get(cpu_compute_target)
except Exception:
    print("Creating a new cpu compute target...")
    compute = AmlCompute(
        name=cpu_compute_target, size="STANDARD_D2_V2",min_instances=0, max_instances=1
    )
    ml_client.compute.begin_create_or_update(compute).result()

#トレーニングの設定
regression_job = automl.regression(
    compute=cpu_compute_target,
    experiment_name="<実験名>",
    training_data=my_training_data_input,
    target_column_name="<ターゲット列>",
    primary_metric="r2_score",
    n_cross_validations=5,
    enable_model_explainability=True,
)

#ジョブ完了前に実験を終了
regression_job.set_limits(
    timeout_minutes=600,
    trial_timeout_minutes=100,
    max_trials=4,
)

regression_job.set_training(
    enable_onnx_compatible_models=True
)

#ジョブの送信
returned_job = ml_client.jobs.create_or_update(regression_job)

print(f"Created job: {returned_job}")

#ジョブステータスのURLを取得
returned_job.services["Studio"].endpoint
最初はワークスペースの接続・データセットの指定・コンピューティングリソースの作成を行っています。個々の詳細はこちらの記事をご覧ください。
また、トレーニングの設定部分のexperiment_nameには実験名となる任意の文字列を入れ、target_column_nameには予測対象の列名を入れます。今回の自動車価格予測ではpriceがターゲット列なので、次のように入力します。
target_column_name = "price"
primary_metricでは評価方法を選べます。
回帰タスクで使える評価方法は以下の4つがあります。
- spearman_correlation
- normalized_root_mean_squared_error
- r2_score
- normalized_mean_absolute_error
今回は「r2_score」にしました。
最後はジョブの実験設定を行ってトレーニングを開始します。
実行したら次のようにジョブの詳細が返ってきます。
Creating a new cpu compute target...
Created job: RegressionJob({'log_verbosity': <LogVerbosity.INFO: 'Info'>, 'target_column_name': 'price', 'weight_column_name': None, 'validation_data_size': None, 'cv_split_column_names': None, 'n_cross_validations': 5, 'test_data_size': None, 'task_type': <TaskType.REGRESSION: 'Regression'>, 'training_data': {'type': 'mltable', 'path': 'azureml://datastores/workspaceblobstore/paths/XXX/automobile'}, 'validation_data': {'type': 'mltable'}, 'test_data': None, 'environment_id': None, 'environment_variables': None, 'outputs': {}, 'type': 'automl', 'status': 'NotStarted', 'log_files': None, 'name': 'frank_napkin_4j75l9y52g', 'description': None, 'tags': {}, 'properties': {}, 'id': '/subscriptions/XXX', 'Resource__source_path': None, 'base_path': 'C:\\Users\\XXX', 'creation_context': <azure.ai.ml._restient.v2022_10_01_preview.models._models_py3.SystemData object at >, 'serialize': <msrest.serialization.Serializer object at >, 'inputs': {}, 'display_name': 'frank_napkin_4j75l9y52g', 'experiment_name': 't-kawano-0217', 'compute': 'cpu-cluster', 'services': {'Tracking': <azure.ai.ml._restclient.v2022_10_01_preview.models._models_py3.JobService object at >, 'Studio': <azure.ai.ml._restclient.v2022_10_01_preview.models._models_py3.JobService object at >}, 'resources': <azure.ai.ml._restclient.v2022_10_01_preview.models._models_py3.JobResourceConfiguration object at >, 'identity': None, 'featurization': None, 'limits': <azure.ai.ml.entities._job.automl.tabular.limit_settings.TabularLimitSettings object at >, 'training': <azure.ai.ml.entities._job.automl.training_settings.RegressionTrainingSettings object at >, 'primary_metric': <RegressionPrimaryMetrics.R2_SCORE: 'R2Score'>})
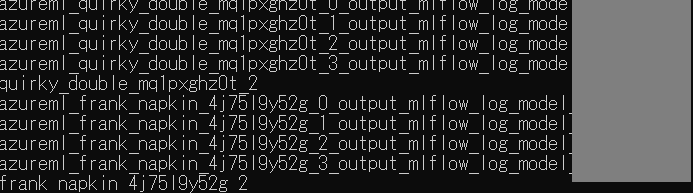
この中のnameには送ったジョブのIDが記載されています。
#ジョブID
'name': 'frank_napkin_4j75l9y52g_2',
このジョブIDを使って次はジョブが終わったかどうかを確認します。
ジョブのstatusを確認
MLClientクラスのJobsメソッドを使います。
from azure.ai.ml.entities import Job
from azure.identity import DefaultAzureCredential
from azure.ai.ml import MLClient

credential = DefaultAzureCredential()

subscription_id="<ストレージアカウント名>"
resource_group="<リソースグループ名>"
workspace_name="<ワークスペース名>"

ml_client = MLClient(credential, subscription_id, resource_group, workspace_name)

returned_job = ml_client.jobs.get(name="<ジョブID>")
print(returned_job)
MLClientクラスのnameに先ほど保存したジョブIDをコピペします。
実行してstatusを見るとジョブの状態を見れます。
'status': 'Completed', ... , 'automl_best_child_run_id': 'frank_napkin_4j75l9y52g_2'
statusがCompletedになっており、ジョブが終わったことを確認できました!
また一緒に返ってきたautoml_best_child_run_idには、作成されたモデルの中で一番精度の良かったモデルのrunIDが記載されています。この後ベストモデルを登録する際にこのrunIDが必要になるので保存しておきます。
モデルの登録
それでは先ほど取得したベストモデルのrunIDを使ってモデル登録を行います。
from azure.ai.ml.entities import Model
from azure.identity import DefaultAzureCredential
from azure.ai.ml import MLClient

subscription_id="<ストレージアカウント名>"
resource_group="<リソースグループ名>"
workspace_name="<ワークスペース名>"
ml_client = MLClient(
    DefaultAzureCredential(), subscription_id, resource_group, workspace
)

run_model = Model(
    path="azureml://subscriptions/<ストレージアカウント>/resourceGroups/<リソースグループ>/workspaces/<ワークスペース>/datastores/workspaceartifactstore/paths/ExperimentRun/dcid.<ベストモデル名>/outputs/mlflow-model/",
    name="<ベストモデル名>"
)

ml_client.models.create_or_update(run_model)
Modelクラスのパス名にあるdcid.の後ろと、nameに先ほど保存したベストモデルのrunIDを入力すればOKです。
登録は実行してすぐに完了しますが、一応これもPythonからモデル登録できたかモデルの一覧を出して確認します。
from azure.ai.ml.entities import Job
from azure.identity import DefaultAzureCredential
from azure.ai.ml import MLClient

credential = DefaultAzureCredential()

subscription_id="<ストレージアカウント名>"
resource_group="<リソースグループ名>"
workspace_name="<ワークスペース名>"

ml_client = MLClient(credential, subscription_id, resource_group, workspace_name)

returned_model = ml_client.models.list(name="")
for model in returned_model:
    print(model.name)
実行したら、結果の一番下に今回登録した「frank_napkin_4j75l9y52g_2」がリストの中にあるのを確認できます。
続いて登録したモデルをデプロイしていきますが、その前に!エンドポイントの作成が必要なので先に作ります。
エンドポイントの作成・status確認
エンドポイント作成はManegedOnlineEndpointクラスを使います。
from azure.ai.ml import MLClient
from azure.ai.ml.entities import ManagedOnlineEndpoint
from azure.ai.ml import MLClient
from azure.identity import DefaultAzureCredential

subscription_id="<ストレージアカウント名>"
resource_group="<リソースグループ名>"
workspace_name="<ワークスペース名>"
ml_client = MLClient(
    DefaultAzureCredential(), subscription_id, resource_group, workspace
)

endpoint_name = "<エンドポイント名>"
endpoint = ManagedOnlineEndpoint(
  name=endpoint_name, description="this is a sample local endpoint"
)

endpoint_result=ml_client.online_endpoints.begin_create_or_update(endpoint)
endpoint_nameには任意の文字列を入力します。
ここで注意点ですが、エンドポイントの名前には「_(アンダーバー)」が使えないので、「-(ハイフン)」を使うようにしましょう。
今回はモデルのrunIDの「_」を「-」に変更したものをエンドポイント名にします。
endpoint_name = "frank-napkin-4j75l9y52g-2"
ここでもエンドポイントが作成が終わったか状態を確認してみます。
from azure.ai.ml.entities import OnlineEndpoint
from azure.identity import DefaultAzureCredential
from azure.ai.ml import MLClient

credential = DefaultAzureCredential()

subscription_id="<ストレージアカウント名>"
resource_group="<リソースグループ名>"
workspace_name="<ワークスペース名>"

ml_client = MLClient(credential, subscription_id, resource_group, workspace_name)

endpoint = ml_client.online_endpoints.get(name="<エンドポイント名>")
print(endpoint)
nameにはエンドポイント作成時に入力した名前を入れ、実行します。
実行結果はこちらです。
ManagedOnlineEndpoint({'public_network_access': 'Enabled', 'provisioning_state': 'Succeeded', 'scoring_uri': 'https://XXX', 'openapi_uri': 'https://XXX', 'name': 'frank-napkin-4j75l9y52g-2', 'description': 'this is a sample local endpoint', 'tags': {}, 'properties': {'azureml.onlineendpointid': '/subscriptions/XXX', 'AzureAsyncOperationUri': 'https://management.azure.com/subscriptions/XXX'}, 'id': '/subscriptions/XXX', 'Resource__source_path': None, 'base_path': 'C:\\Users\\XXX', 'creation_context': None, 'serialize': <msrest.serialization.Serializer object at >, 'auth_mode': 'key', 'location': 'japaneast', 'identity': <azure.ai.ml.entities._credentials.IdentityConfiguration object at >, 'traffic': {'frank-napkin-4j75l9y52g-2': 0}, 'mirror_traffic': {}, 'kind': 'Managed'})
provisioning_stateがSucceededになっていたら、作成完了です!
また、scoring_uriにはRESTエンドポイントが記載されており、これは後ほど使うので保存します。
それではこのエンドポイントを使って今度はデプロイを行います。
デプロイ
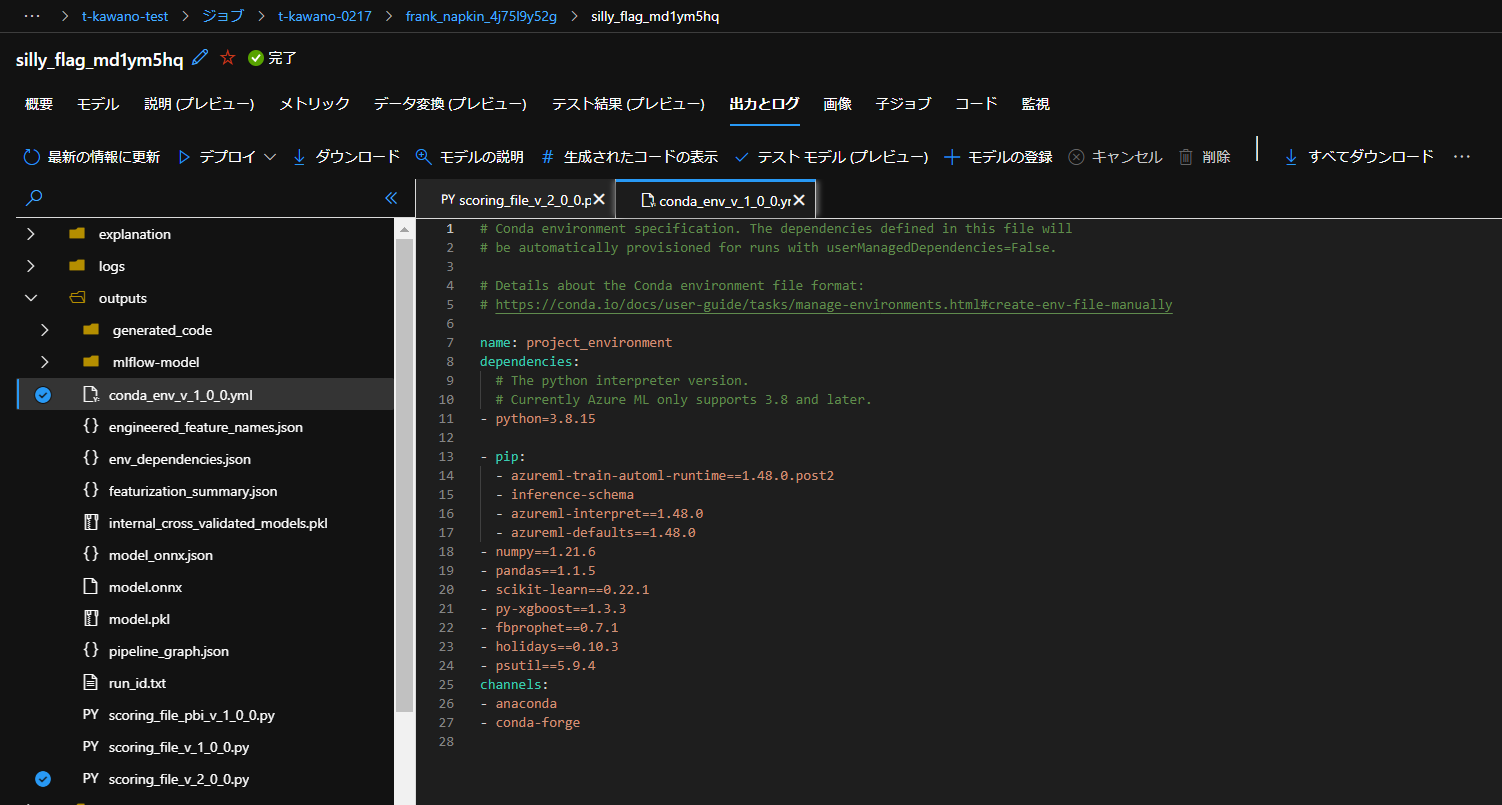
デプロイにあたって必要なファイルがあるのでダウンロードします。
必要なファイルはモデルの生成時に出力されるconda_env_v_1_0_0.ymlとscoring_file_v_2_0_0.pyの2つです。ダウンロードの方法はいくつかあるので紹介します。
ポータルサイトから
トレーニングで生成されたベストモデルの「出力とログ」から直接ダウンロードできます。
Pythonから
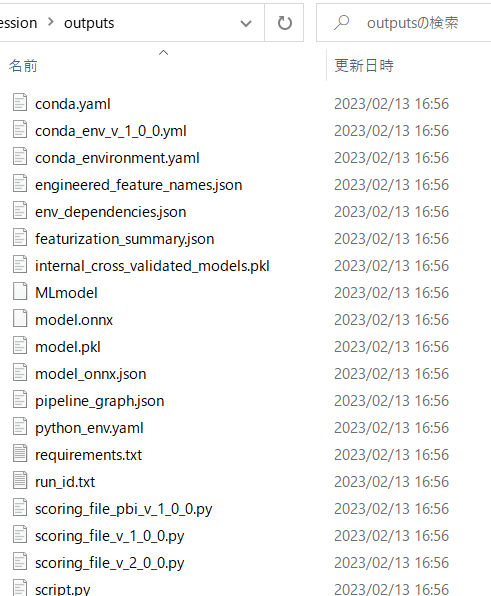
BLOBやSAS生成してダウンロードする方法もあります。
「outputs」フォルダに必要なファイルをダウンロードしました。
ダウンロードした「conda_env_v_1_0_0.yml」と「scoring_file_v_2_0_0.py」の中身も見てみましょう。
yamlファイルは他のデータセットを使ってもあまり中身は変わりませんが、時々バージョンが更新されているようです。
# Conda environment specification. The dependencies defined in this file will
# be automatically provisioned for runs with userManagedDependencies=False.

# Details about the Conda environment file format:
# https://conda.io/docs/user-guide/tasks/manage-environments.html#create-env-file-manually

name: project_environment
dependencies:
  # The python interpreter version.
  # Currently Azure ML only supports 3.8 and later.
- python=3.8.15

- pip:
  - azureml-train-automl-runtime==1.48.0.post2
  - inference-schema
  - azureml-interpret==1.48.0
  - azureml-defaults==1.48.0
- numpy==1.21.6
- pandas==1.1.5
- scikit-learn==0.22.1
- py-xgboost==1.3.3
- fbprophet==0.7.1
- holidays==0.10.3
- psutil==5.9.4
channels:
- anaconda
- conda-forge
scoringファイルの方はデータセットによって、data_sampleとresult_sampleが変わります。
# ---------------------------------------------------------
# Copyright (c) Microsoft Corporation. All rights reserved.
# ---------------------------------------------------------
import json
import logging
import os
import pickle
import numpy as np
import pandas as pd
import joblib

import azureml.automl.core
from azureml.automl.core.shared import logging_utilities, log_server
from azureml.telemetry import INSTRUMENTATION_KEY

from inference_schema.schema_decorators import input_schema, output_schema
from inference_schema.parameter_types.numpy_parameter_type import NumpyParameterType
from inference_schema.parameter_types.pandas_parameter_type import PandasParameterType
from inference_schema.parameter_types.standard_py_parameter_type import StandardPythonParameterType

data_sample = PandasParameterType(pd.DataFrame({"symboling": pd.Series(["example_value"], dtype="object"), "normalized-losses": pd.Series([0.0], dtype="float64"), "make": pd.Series(["example_value"], dtype="object"), "fuel-type": pd.Series(["example_value"], dtype="object"), "aspiration": pd.Series(["example_value"], dtype="object"), "num-of-doors": pd.Series(["example_value"], dtype="object"), "body-style": pd.Series(["example_value"], dtype="object"), "drive-wheels": pd.Series(["example_value"], dtype="object"), "engine-location": pd.Series(["example_value"], dtype="object"), "wheel-base": pd.Series([0.0], dtype="float64"), "length": pd.Series([0.0], dtype="float64"), "width": pd.Series([0.0], dtype="float64"), "height": pd.Series([0.0], dtype="float64"), "curb-weight": pd.Series([0], dtype="int64"), "engine-type": pd.Series(["example_value"], dtype="object"), "num-of-cylinders": pd.Series(["example_value"], dtype="object"), "engine-size": pd.Series([0], dtype="int64"), "fuel-system": pd.Series(["example_value"], dtype="object"), "bore": pd.Series([0.0], dtype="float64"), "stroke": pd.Series([0.0], dtype="float64"), "compression-ratio": pd.Series([0.0], dtype="float64"), "horsepower": pd.Series([0.0], dtype="float64"), "peak-rpm": pd.Series([0.0], dtype="float64"), "city-mpg": pd.Series([0], dtype="int64"), "highway-mpg": pd.Series([0], dtype="int64")}))
input_sample = StandardPythonParameterType({'data': data_sample})

result_sample = NumpyParameterType(np.array([0.0]))
output_sample = StandardPythonParameterType({'Results':result_sample})
sample_global_parameters = StandardPythonParameterType(1.0)

try:
    log_server.enable_telemetry(INSTRUMENTATION_KEY)
    log_server.set_verbosity('INFO')
    logger = logging.getLogger('azureml.automl.core.scoring_script_v2')
except:
    pass


def init():
    global model
    # This name is model.id of model that we want to deploy deserialize the model file back
    # into a sklearn model
    model_path = os.path.join(os.getenv('AZUREML_MODEL_DIR'), 'model.pkl')
    path = os.path.normpath(model_path)
    path_split = path.split(os.sep)
    log_server.update_custom_dimensions({'model_name': path_split[-3], 'model_version': path_split[-2]})
    try:
        logger.info("Loading model from path.")
        model = joblib.load(model_path)
        logger.info("Loading successful.")
    except Exception as e:
        logging_utilities.log_traceback(e, logger)
        raise

@input_schema('Inputs', input_sample)
@input_schema('GlobalParameters', sample_global_parameters, convert_to_provided_type=False)
@output_schema(output_sample)
def run(Inputs, GlobalParameters=1.0):
    data = Inputs['data']
    result = model.predict(data)
    return {'Results':result.tolist()}
この2つのファイルを手に入れたらManegedOnlineDeploymentクラスでデプロイします。
from azure.ai.ml import MLClient
from azure.ai.ml.entities import (
    ManagedOnlineDeployment,
    Model,
    Environment,
    CodeConfiguration,
)
from azure.identity import DefaultAzureCredential

subscription_id="<ストレージアカウント名>"
resource_group="<リソースグループ名>"
workspace_name="<ワークスペース名>"
ml_client = MLClient(
    DefaultAzureCredential(), subscription_id, resource_group, workspace
)

local_endpoint_name = "<エンドポイント名>"

model = Model(
    path="azureml://XXX/paths/ExperimentRun/dcid.<ベストモデル名>/outputs/mlflow-model/model.pkl",
    name="<ベストモデル名>"
)

env = Environment(
    conda_file="outputs/conda_env_v_1_0_0.yml",
    image="mcr.microsoft.com/azureml/minimal-ubuntu20.04-py38-cpu-inference:latest",
)
deployment = ManagedOnlineDeployment(
    name="<デプロイ名>",
    endpoint_name=local_endpoint_name,
    model=model,
    environment=env,
    code_configuration=CodeConfiguration(
        code="./",
        scoring_script="outputs/scoring_file_v_2_0_0.py"
    ),
    instance_type="Standard_DS2_v2",
    instance_count=1,
)

ml_client.online_deployments.begin_create_or_update(deployment=deployment)
ManegedOnlineDeployment()のnameには任意のデプロイ名を入力し、実行します。
今回はエンドポイント名と同じ名前に設定しました。
また、conda_fileとscoring_scriptには先ほどダウンロードしたファイルのパスを入力します。
デプロイの実行時間は今回おおよそ10~15分ほどかかりました。
デプロイ状況を確認できるコードも載せます。
from azure.ai.ml.entities import OnlineEndpoint
from azure.identity import DefaultAzureCredential
from azure.ai.ml import MLClient

credential = DefaultAzureCredential()

subscription_id="<ストレージアカウント名>"
resource_group="<リソースグループ名>"
workspace_name="<ワークスペース名>"

ml_client = MLClient(credential, subscription_id, resource_group, workspace_name)

deployment = ml_client.online_deployments.get(name="<デプロイ名>",endpoint_name="<エンドポイント名>")
print(deployment)
実行し、provisioning_stateがSucceededになればデプロイ完了です。
'provisioning_state': 'Succeeded'
デプロイ後は推論を行います。
推論
推論にあたってAPIキーが必要になるので取得します。
from azure.ai.ml.entities import OnlineEndpoint
from azure.identity import DefaultAzureCredential
from azure.ai.ml import MLClient

credential = DefaultAzureCredential()

subscription_id="<ストレージアカウント名>"
resource_group="<リソースグループ名>"
workspace_name="<ワークスペース名>"
ml_client = MLClient(credential, subscription_id, resource_group, workspace_name)

restendpoint = ml_client.online_endpoints.get(name="<エンドポイント名>")
print(restendpoint)

endpoint_cred = ml_client.online_endpoints.get_keys(name="<エンドポイント名>").primary_key
print(endpoint_cred)
実行したらAPIキーが返ってくるので、これを保存して推論を行います。
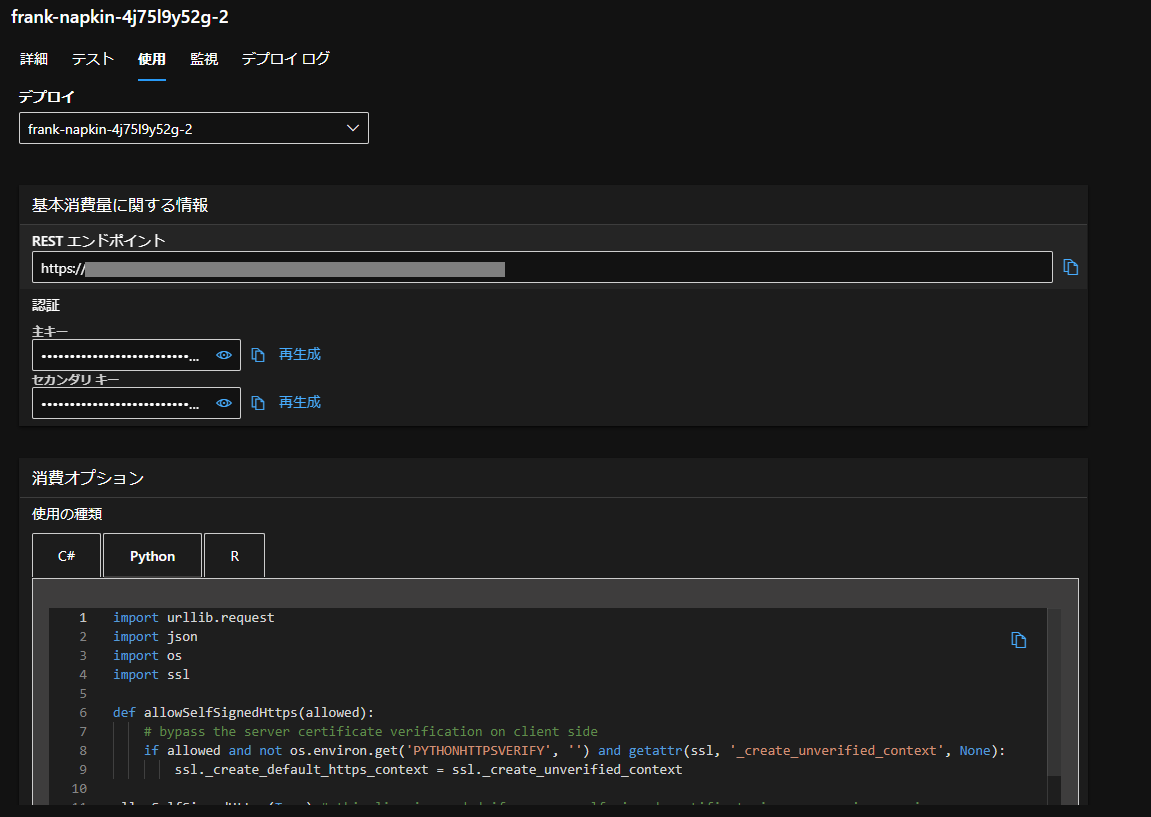
推論のPythonコードはStudioのエンドポイントの「使用」タブにあるものをコピペして使います。
import urllib.request
import json
import os
import ssl

def allowSelfSignedHttps(allowed):
    # bypass the server certificate verification on client side
    if allowed and not os.environ.get('PYTHONHTTPSVERIFY', '') and getattr(ssl, '_create_unverified_context', None):
        ssl._create_default_https_context = ssl._create_unverified_context

allowSelfSignedHttps(True) # this line is needed if you use self-signed certificate in your scoring service.

# Request data goes here
# The example below assumes JSON formatting which may be updated
# depending on the format your endpoint expects.
# More information can be found here:
# https://docs.microsoft.com/azure/machine-learning/how-to-deploy-advanced-entry-script
data =  {
  "Inputs": {
    "data": [
      {
        "symboling": 0,
        "normalized-losses": 0.0,
        "make": "audi",
        "fuel-type": "gas",
        "aspiration": "std",
        "num-of-doors": "two",
        "body-style": "sedan",
        "engine-location": "front",
        "wheel-base": 0.0,
        "drive-wheels":"rwd",
        "length": 0.0,
        "width": 0.0,
        "height": 0.0,
        "curb-weight": 0,
        "engine-type": "dohc",
        "num-of-cylinders": "four",
        "engine-size": 0,
        "fuel-system": "mpfi",
        "bore": 0.0,
        "stroke": 0.0,
        "compression-ratio": 0.0,
        "horsepower": 0.0,
        "peak-rpm": 0.0,
        "city-mpg": 0,
        "highway-mpg": 0
      }
    ]
  },
  "GlobalParameters": 0.0
}

body = str.encode(json.dumps(data))

url = 'https://XXX'
api_key = '<APIキー>'
if not api_key:
    raise Exception("A key should be provided to invoke the endpoint")

# The azureml-model-deployment header will force the request to go to a specific deployment.
# Remove this header to have the request observe the endpoint traffic rules
headers = {'Content-Type':'application/json', 'Authorization':('Bearer '+ api_key), 'azureml-model-deployment': 'loving-orange-g2lvdbgs2x-2' }

req = urllib.request.Request(url, body, headers)

try:
    response = urllib.request.urlopen(req)

    result = response.read()
    print(result)
except urllib.error.HTTPError as error:
    print("The request failed with status code: " + str(error.code))

    # Print the headers - they include the requert ID and the timestamp, which are useful for debugging the failure
    print(error.info())
    print(error.read().decode("utf8", 'ignore'))
urlにはエンドポイントのstatus確認の時に得た、RESTエンドポイントを入力します。
api_keyにも先ほど取得したAPIキーを入れます。
また、StudioにあるPythonコードをそのまま実行すると、各パラメータのデータ型がトレーニングデータと違ったり、パラメータが足りなかったりなどの問題があったので、data部分は編集が必要です。
推論結果はこちらです。
b'{"Results": [10217.479014915847]}'