概要
生成AI開発でのコード修正時の悩みの一つ「生成AIは使われているライブラリを知らない」は、開発が活発なライブラリを使用する場合に起きやすい。
以下のパスではその対策としてastライブラリを使った静的解析コードを紹介した。
今回は、JEDIライブラリで解析することで、定義元を範囲とともに特定し、ファイルの中身と一緒に渡せるようにする。
JEDIライブラリとは
JEDIは、Pythonのコード補完、静的解析、コードの移動などの機能を提供するライブラリ
定義元のジャンプ(VSCodeでいう「Go to Difinition」みたいなこと)が可能
今回のコードでできること
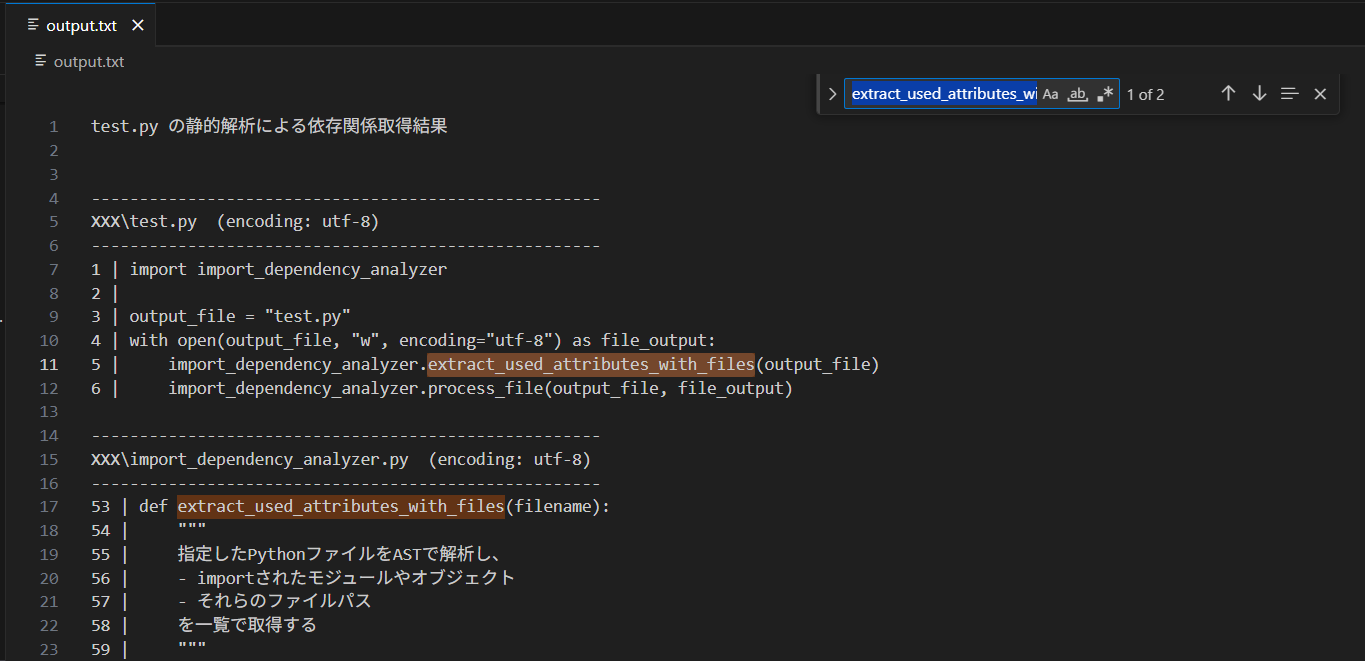
画像のようなPythonファイルを指定すると
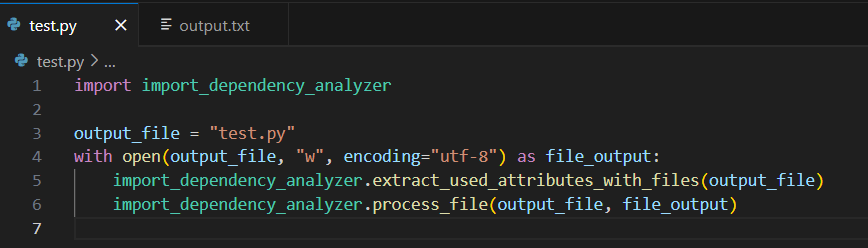
そのファイルに加えて、定義元の範囲を特定したコード箇所も一緒にテキスト化する。(下の画像は記事用にパスをXXXでマスク済み。実際はフルパスが表示される。)
動機
- コード修正時に対象のコードが使用しているライブラリのコードを必要な範囲に絞って一緒に渡して修正させたい
使い方
- "jedi_dependency_analyzer.py"ファイルを作成してエディタでソースコードを張り付ける
- "jedi_dependency_analyzer.py"をクリックして、指示に従って解析したいPythonファイルを指定する
- "output.txt"にテキスト化した結果が入っているので、生成AIへの質問等で活用する
ソースコード(Pythonファイル)
import jedi
import os

def remove_included_ranges(sorted_pairs):
    """
    同じファイル名内で、行範囲が他の範囲に完全に含まれているものを除外する関数。

    例:
        (fileA.py, 10, 50)
        (fileA.py, 20, 30) ← 上記範囲に含まれるので削除される
    """
    result = []
    from collections import defaultdict

    # ファイルごとに範囲をグループ化
    groups = defaultdict(list)
    for module_path, start_line, end_line in sorted_pairs:
        basename = os.path.basename(module_path)
        groups[basename].append((module_path, start_line, end_line))

    # 各ファイルごとに処理
    for basename, ranges in groups.items():
        # 開始行順にソート
        ranges.sort(key=lambda x: x[1])
        filtered = []
        for i, (module_path, start_line, end_line) in enumerate(ranges):
            included = False
            # 他の範囲に含まれているかチェック
            for j, (other_path, other_start, other_end) in enumerate(ranges):
                if i == j:
                    continue
                if (other_path == module_path and
                    other_start <= start_line and
                    other_end >= end_line):
                    included = True
                    break
            # 含まれていなければ追加
            if not included:
                filtered.append((module_path, start_line, end_line))
        result.extend(filtered)

    # ファイル名と開始行で再ソート
    result.sort(key=lambda x: (os.path.basename(x[0]), x[1]))
    return result


def extract_dependency_ranges(filename):
    """
    jediを使ってPythonファイルから依存関係(他ファイル内の定義)を抽出する。
    返り値は [(module_path, start_line, end_line), ...] の形式。
    """
    abs_filename = os.path.abspath(filename)
    with open(filename, encoding='utf-8') as f:
        source = f.read()

    # jediでソースコードを解析
    script = jedi.Script(source, path=filename)
    names = script.get_names(all_scopes=True, definitions=True, references=True)

    unique_pairs = set()

    # 各識別子ごとに定義元を探索
    for name in names:
        try:
            gotos = name.goto()  # 定義箇所へジャンプ
            if gotos:
                for goto in gotos:
                    try:
                        # 定義の開始・終了行を取得
                        start = goto.get_definition_start_position()
                        end = goto.get_definition_end_position()
                        pair = (goto.module_path, start[0], end[0])
                        unique_pairs.add(pair)
                    except Exception as e:
                        print(f'Inner Exception: {name} {e}')
                        continue
        except Exception as e:
            print(f'Outer Exception: {name} {e}')
            continue

    # 現在のファイル以外を対象にフィルタリング
    filtered_pairs = [
        (module_path, start_line, end_line)
        for module_path, start_line, end_line in unique_pairs
        if module_path and not os.path.samefile(module_path, abs_filename)
    ]

    # ファイル名と行番号でソート
    sorted_pairs = sorted(
        filtered_pairs,
        key=lambda x: (os.path.basename(x[0]), x[1])
    )

    # 他範囲に含まれる範囲を削除
    sorted_pairs = remove_included_ranges(sorted_pairs)
    return sorted_pairs


def process_file(file_path, file_output, current_dir, start_line=None, end_line=None, last_file_path=None, last_end_line=None):
    """
    ファイルを開き、指定行範囲(または全行)を output.txt に書き出す。
    エンコーディングを複数試行して安全に開く。
    """
    absolute_path = os.path.abspath(file_path)
    separator = " | "
    encodings_to_try = ["utf-8", "cp932", "shift_jis"]

    for enc in encodings_to_try:
        try:
            with open(file_path, "r", encoding=enc) as f:
                lines = f.readlines()
                total_lines = len(lines)

                # 範囲指定がある場合(依存箇所のみ)
                if start_line is not None and end_line is not None:
                    selected_lines = lines[start_line-1 : end_line]

                    # ファイルヘッダ(ファイル名など)は最初の一度だけ出力
                    if last_file_path is None or not os.path.samefile(absolute_path, last_file_path):
                        file_output.write("\n\n")
                        file_output.write("-----------------------------------------------------\n")
                        file_output.write(f"{absolute_path}  (encoding: {enc})\n")
                        file_output.write("-----------------------------------------------------\n")
                    else:
                        # 前回の範囲の直後でなければ省略マーク
                        if last_end_line is not None and last_end_line + 1 == start_line:
                            pass
                        else:
                            file_output.write("(省略)\n")

                    # 実際のソースコード行を書き込み
                    for idx, line in enumerate(selected_lines, start=start_line):
                        file_output.write(f"{idx}{separator}{line}")

                else:
                    # ファイル全体を出力
                    counter = 1
                    if last_file_path is None or not os.path.samefile(absolute_path, last_file_path):
                        file_output.write("\n\n")
                        file_output.write("-----------------------------------------------------\n")
                        file_output.write(f"{absolute_path}  (encoding: {enc})\n")
                        file_output.write("-----------------------------------------------------\n")
                    for line in lines:
                        file_output.write(f"{counter}{separator}{line}")
                        counter += 1
            break  # 成功したらエンコーディングループを抜ける
        except UnicodeDecodeError:
            # 次のエンコーディング候補を試す
            continue
    else:
        # どのエンコーディングでも開けなかった場合
        file_output.write(f"!!! {absolute_path} は開けませんでした。スキップします。\n\n")


def extract_dependency(filename, file_output, current_dir):
    """
    指定されたPythonファイルの依存関係を解析し、
    該当する依存先ファイルの定義コードを出力ファイルに書き出す。
    """
    pairs = extract_dependency_ranges(filename)
    if not pairs:
        file_output.write(f"{filename} には外部依存関係が見つかりませんでした。\n")
        return

    last_file_path = None
    last_end_line = None

    # まず元ファイル全体を出力
    process_file(filename, file_output, current_dir)

    # 依存先ファイルごとに処理
    for module_path, start_line, end_line in pairs:
        line = f"{module_path} : line {start_line} ~ line {end_line}\n"
        print(line, end="")  # コンソールにも出力
        process_file(module_path, file_output, current_dir, start_line, end_line, last_file_path, last_end_line)
        last_file_path = os.path.abspath(module_path)
        last_end_line = end_line

    file_output.write("\n")


def main():
    """
    メインエントリーポイント。
    ユーザーに解析対象ファイルを入力させ、結果をoutput.txtに保存する。
    """
    current_dir = os.getcwd()
    output_file = os.path.join(current_dir, "output.txt")

    # 入力受付
    file_path = input("Pythonファイルを入力してください: ")

    # 存在チェック
    if not os.path.isfile(file_path):
        with open(output_file, "w", encoding="utf-8") as file_output:
            file_output.write("指定されたPythonファイルは存在しません。\n")
        print("指定されたPythonファイルは存在しません。")
        return

    # 解析実行
    with open(output_file, "w", encoding="utf-8") as file_output:
        file_output.write(f"{file_path} の静的解析による依存関係取得結果\n")
        extract_dependency(file_path, file_output, current_dir)


if __name__ == "__main__":
    main()