pythonでGraphまわりを扱うために,networkxをdockerで使えるようにした時のメモ。
行ったこと
- Dockerfileを使ってpullしたimageをカスタマイズ
- dockerからmatplotlibの表示をpop up
ホストの環境
$ cat /etc/lsb-release
DISTRIB_ID=Ubuntu
DISTRIB_RELEASE=16.04
DISTRIB_CODENAME=xenial
DISTRIB_DESCRIPTION="Ubuntu 16.04.6 LTS"
dockerの環境
こちらで構築した環境を使っています。
1. Dockerfileを使ってpullしたimageをカスタマイズ
dockerのimageは必要なものをnvidia-dockerからpullしてきて使っていたが、graphを扱うnetworkxなどをinstallしたものが必要になったため、Dockerfileを作成しました。
Dockerfileの作成にあたっては、こちらのブログなどを参考にしました。
$ docker images
REPOSITORY                    TAG                            IMAGE ID            CREATED              SIZE
nvcr.io/nvidia/tensorflow     19.12-tf1-py3                  af027926c1a0        3 months ago         8.32GB
nvcr.io/nvidia/tensorflow     18.06-py3                      0d13c9061269        22 months ago        3.4GB
pullしてあるimageから、使用するimageとしてnvcr.io/nvidia/tensorflow:19.12-tf1-py3を選択して、以下のようなDockerfileを作成します。
FROM nvcr.io/nvidia/tensorflow:19.12-tf1-py3

ARG DEBIAN_FRONTEND=noninteractive

RUN apt-get update && \
    pip install networkx
networkxはインストール時にgeographic areaなどを選択して入力するステップがあるが、2行目の「ARG DEBIAN_FRONTEND=noninteractive」を追加すると、docker buildの際に入力操作が不要になります。
上記のDockerfileを作成した後、docker buildをします。
$cd **/work/  [Dockerfileのあるフォルダ]
$docker build -t [repository名]:[tag名] .
例)$docker build -t test:1 .
build処理が終了するとdocker imageが生成されます。
$ docker images
REPOSITORY                    TAG                            IMAGE ID            CREATED              SIZE
test                          1                              ca131395a6b9        About a minute ago   8.38GB
nvcr.io/nvidia/tensorflow     19.12-tf1-py3                  af027926c1a0        3 months ago         8.32GB
nvcr.io/nvidia/tensorflow     18.06-py3                      0d13c9061269        22 months ago        3.4GB
生成したimageからコンテナを作成すると、networkxが含まれたコンテナとなっていることが確認できました。
$docker run --gpus all -it --rm test:1

================
== TensorFlow ==
================

NVIDIA Release 19.12-tf1 (build 9258376)
TensorFlow Version 1.15.0

Container image Copyright (c)
(省略)....

# python
Python 3.6.9 (default, Nov  7 2019, 10:44:02)
[GCC 8.3.0] on linux
Type "help", "copyright", "credits" or "license" for more information.
>>> import networkx
>>>
2. dockerからmatplotlibの表示をpop up
次に、graphの構造などをmatplotlibで出力しながら確認したかったので、出力がpop upするように設定しました。行ったことは主に次の3つです。
・2.1 matplotlibのbackendの指定.
・2.2 tkinterのインストール
・2.3 出力先の設定.
2.1 matplotlibのbackendの指定.
matplotlibのbackendはデフォルトでAggになっているそうですが、これをTkAggに変更します。変更の方法としては、matplotlibrcを変更する方法などもあるようですが、ここではpythonのコードの中に記載しました。
import matplotlib
matplotlib.use('TkAgg')
2.2 tkinterのインストール
TkAggを指定すると、「tkinterというモジュールがありません」というエラーメッセージがでます。そこでtkinterをインストールするのですが、pip installではなく、apt-get install を使います。こちらもDockerfileに追加します。
FROM nvcr.io/nvidia/tensorflow:19.12-tf1-py3

ARG DEBIAN_FRONTEND=noninteractive

RUN apt-get update && \
    apt-get install -y python3-tk && \
    pip install networkx
dockerfileを変更したので、1と同様にdocker buildによりimageを作り直します。
2.3 出力先の設定
最後に、画像のpop upが可能となるように設定します。
$xhost +
$docker run --gpus all -it -v /tmp/.X11-unix:/tmp/.X11-unix -e DISPLAY=$DISPLAY test:1
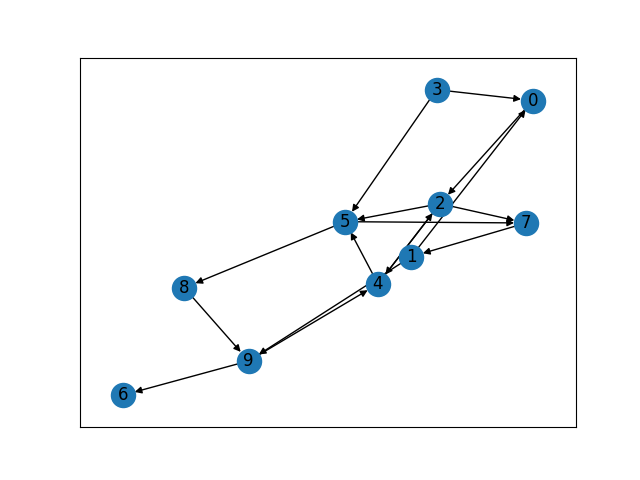
こうして、以下の簡単なサンプルコードを実行すると、グラフ構造がpop upされます。また、同じグラフがtemp.pngとしてpythonを実行したフォルダに出力されます。
import matplotlib
import matplotlib.pyplot as plt
import networkx as nx

matplotlib.use('TkAgg')
G = nx.DiGraph()
nx.add_path(G, [3, 5, 7, 1, 0, 2, 5, 8, 9, 6])
nx.add_path(G, [3, 0, 2, 4, 2, 7, 1, 9, 4, 5])

nx.draw_networkx(G)
plt.savefig('temp.png')
plt.show()
# python sample.py
2.4 参考資料
以下の記事を参考にさせていただきました。
2.5 関連記事
・pythonでgraphを扱うライブラリnetworkxを使う(その1:環境構築)
・pythonでgraphを扱うライブラリnetworkxを使う(その2:チュートリアル)
