はじめに
iOSアプリを作ってみたいけど
何から始めて良いのかわからない
とりあえず、
「やってみました」記事を参考に
地図アプリを真似てみようと思う
という記事の4回目です。
今回は、位置情報と連携した地図表示までします。
位置情報と連動した地図表示
-
MapKitをインポート
- 画面左側のファイルツリーから[ViewController.swift]を選択し、画面中央に表示されるエディタで、以下のように修正
- 【なぜ?】
- 地図ライブラリ(MapKit)を使うことを宣言することで、地図表示のプログラムを記述できるようになる
ViewController.swiftimport UIKit import CoreLocation import MapKit // この行を追加 class ViewController: UIViewController, CLLocationManagerDelegate { -
MapKit用の変数(mapView)を追加
- 同様に[ViewController.swift]を以下のように修正
- 【なぜ?】
- この変数を通してプログラムで地図位置を取り扱うため
ViewController.swiftclass ViewController: UIViewController, CLLocationManagerDelegate { @IBOutlet var mapView: MKMapView! // この行を追加 var locationManager: CLLocationManager! -
MapViewにおいて現在位置を表示するように設定
- 同様に[ViewController.swift]を以下のように修正
- 【なぜ?】
- 現在位置が表示された方が見やすいから
- 試しにtureではなくfalseを設定してみたら、透明人間みたいに表示されないから面白いかも(笑)
ViewController.swiftlocationManager.startUpdatingLocation() locationManager.requestWhenInUseAuthorization() mapView.showsUserLocation = true // この行を追加 } -
エディタ画面を2画面表示する
- 画面左側のファイルツリーから[Main storyboard]を選択し、[Add Editor on Right]ボタンをクリックし、[Main storyboard]が2画面表示されるようにする
- 【なぜ?】
- この後の処理で[Main storyboard]に表示されている[MapView]を[ViewController.swift]に関連づけしやすくするため
- この後の処理で[Main storyboard]に表示されている[MapView]を[ViewController.swift]に関連づけしやすくするため
 1. [ViewController.swift]と[Main storyboard]を同時に表示する
- 画面左側のファイルツリーから[ViewController.swift]を選択する
- 【なぜ?】
- [Main storyboard]と[ViewController.swift]が同時に表示されていると[MapView]の関連づけが容易にできるため
1. [ViewController.swift]と[Main storyboard]を同時に表示する
- 画面左側のファイルツリーから[ViewController.swift]を選択する
- 【なぜ?】
- [Main storyboard]と[ViewController.swift]が同時に表示されていると[MapView]の関連づけが容易にできるため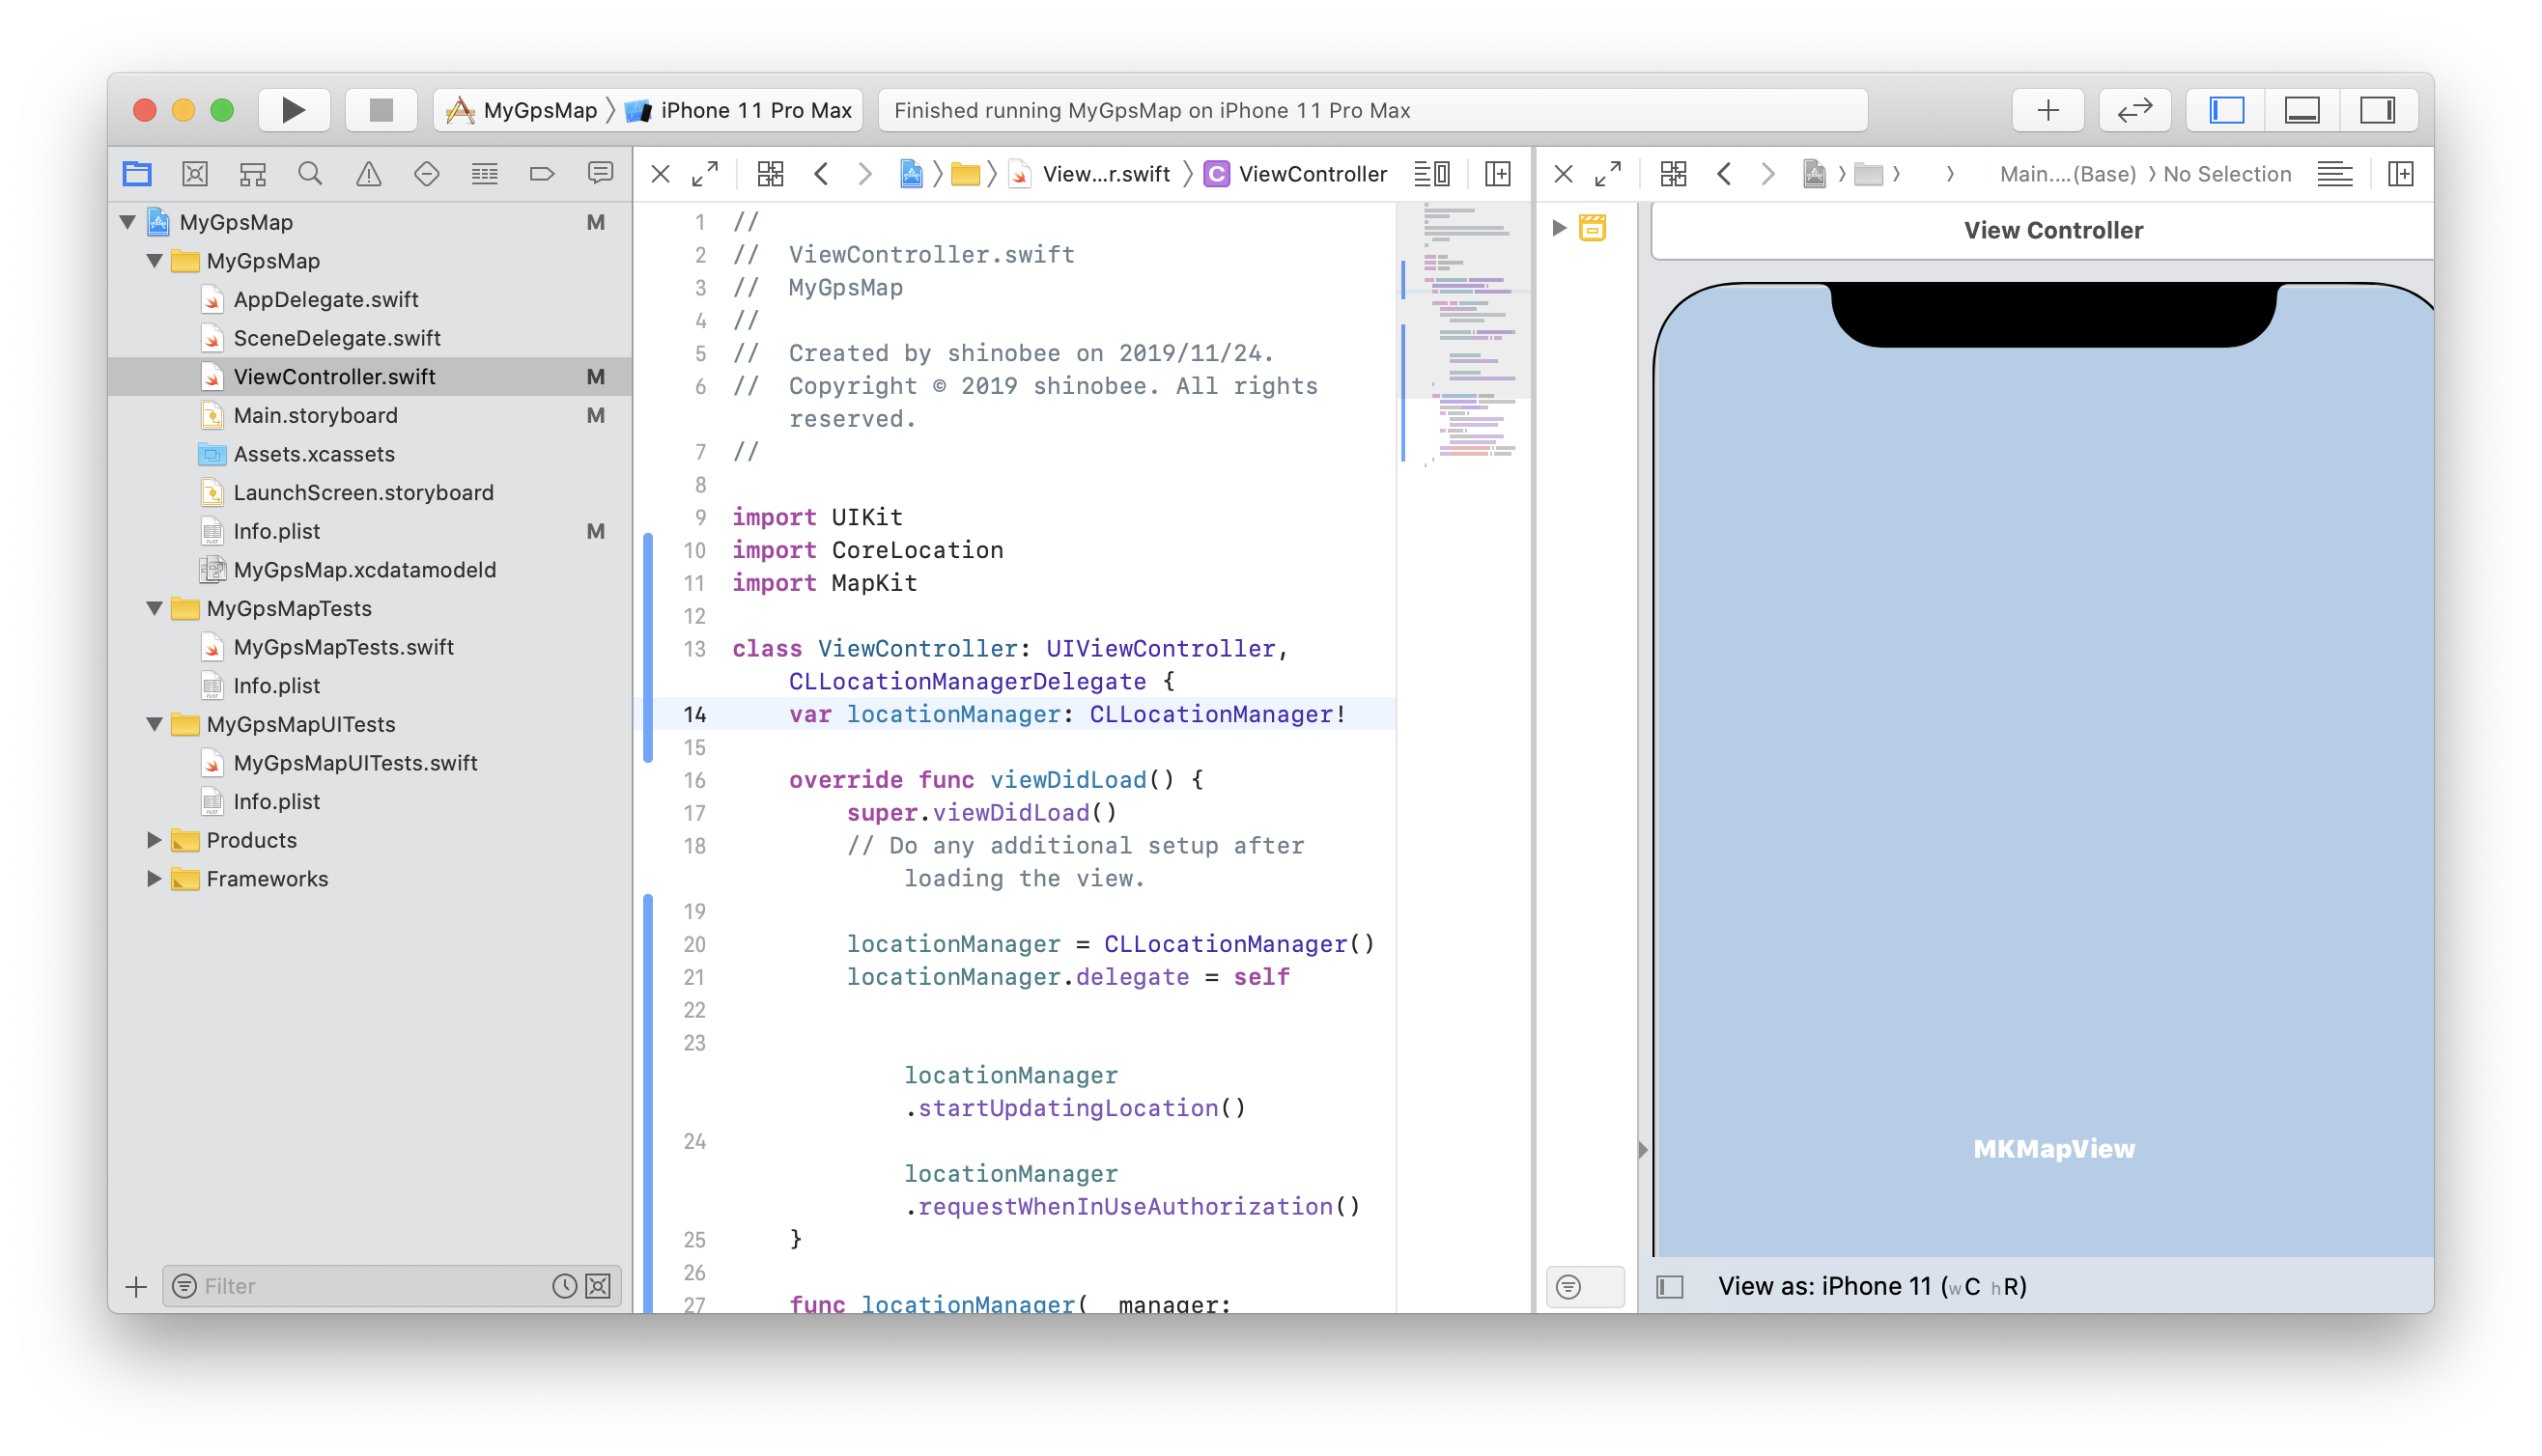 1. MapKit用の変数(mapView)とMapViewとを関連づける
- Ctrl+クリックで[MapView]を選択することでOutletを表示
1. MapKit用の変数(mapView)とMapViewとを関連づける
- Ctrl+クリックで[MapView]を選択することでOutletを表示 - [Referencing Outlets]の○印から、変数mapviewにドラッグ&ドロップで接続(connect)する
 1. 接続(connect)後の状態がこれ↓
 1. 最新の位置情報を画面の中心に設定
- 同様に[ViewController.swift]を以下のように修正
- 【なぜ?】
- 現在地が中心に表示されないと意味ないから
- 常に現在地しか表示されないのは、それはそれで使いにくいが.....
1. 最新の位置情報を画面の中心に設定
- 同様に[ViewController.swift]を以下のように修正
- 【なぜ?】
- 現在地が中心に表示されないと意味ないから
- 常に現在地しか表示されないのは、それはそれで使いにくいが.....
```swift:ViewController.swift
func locationManager(_ manager: CLLocationManager, didUpdateLocations locations:[CLLocation]) {
    let longitude = (locations.last?.coordinate.longitude.description)!
    let latitude = (locations.last?.coordinate.latitude.description)!
    print("[DBG]longitude : " + longitude)
    print("[DBG]latitude : " + latitude)

    mapView.setCenter((locations.last?.coordinate)!, animated: true)  // この行を追加
}
```
- テスト実行
- Xcode 左上の矢印アイコンをクリック
- Simulatorのメニューから[Debug]-[Location]-[City Run]など(移動するやつ)を選択
- 地図を拡大表示すると、地図上を移動していることを確認できる
今回の到達点
- Simulatorを使い、更新される位置情報に追従して地図上の位置(現在地)が移動するようになった
連載
- [はじめてのiOSアプリ]xcodeで地図アプリを作成(その1:プロジェクト作成)
- [はじめてのiOSアプリ]xcodeで地図アプリを作成(その2:地図表示)
- [はじめてのiOSアプリ]xcodeで地図アプリを作成(その3:位置情報取得)
- [はじめてのiOSアプリ]xcodeで地図アプリを作成(その4:位置情報と連携した地図表示)
- [はじめてのiOSアプリ]xcodeで地図アプリを作成(その5:アプリアイコン設定)
- [はじめてのiOSアプリ]xcodeで地図アプリを作成(その6:拡大・縮小ボタン追加)
- [はじめてのiOSアプリ]xcodeで地図アプリを作成(その7:地図を拡大・縮小)
- [はじめてのiOSアプリ]xcodeで地図アプリを作成(その8:地名表示)
- [はじめてのiOSアプリ]xcodeで地図アプリを作成(その9:ソースコード管理)