チーム内でバックエンドとフロントエンドを担当分けることになり、
僕はフロント側を担当することになりました。
APIだけ先に用意してほしいな〜ってことで、試しにSwaggerを使ってみたら、だいぶ楽だった。
使い方調べてたら、いくつも方法があるみたいなので、
整理を含めて書き残しておこうと思い立った次第です。
今回はSpring Bootを利用してボトムアップアプローチで設計書を書き起こしてみます。
ボトムアップ・アプローチ:ソースコードから書き起こす
ボトムアップアプローチというのは、ソースコードをベースにSwaggerを作成します。
ボトムアップアプローチの良いところは以下2点ですね。
- ソースコードベースで設計書が出来上がるので、ドキュメントとコードが乖離しにくくなる
- 設計書作ってからソースコード書くという二度手間がなくなる
「手戻り発生したら困るじゃないですか〜」みたいな話もありますが、
あくまで最初にAPIの口だけを定義するので、
ドキュメントとして作るのと作業時間は大差ないよねって思ってます。
今回調べてみたところ、SpringBootとSwaggerで大抵のことはできそうなので、
今後は積極的に使っていきたいなと思いました。
今回作成したコードはこちらに置いてあります。
Spring Bootのセッティング
Spring Foxの導入
Spring Foxを使うことでソースコードからAPIの設計書を書き起こしてくれます。
Spring Foxを導入するには、以下の依存関係を解決してあげればOKです。
repositories {
  jcenter()
}

dependencies {
    compile "io.springfox:springfox-swagger2:2.9.2"
    compile 'io.springfox:springfox-swagger-ui:2.9.2'  // Swagger UIを利用するため
}
Spring BootでSpring Foxを有効にする
package com.example.springbootswagger;

// import文省略

@SpringBootApplication
@EnableSwagger2
public class SpringBootSwaggerApplication {

    public static void main(String[] args) {
        SpringApplication.run(SpringBootSwaggerApplication.class, args);
    }

    // DocketはSpring Foxが提供するAPI。Swaggerで書き起こすために設定が必要
    @Bean
    public Docket petApi() {
        return new Docket(DocumentationType.SWAGGER_2)
                .select() // ApiSelector : Swaggerで書き起こすAPIを選択する。
                    .paths(PathSelectors.ant("/pets/**")) // 指定したパスに一致するものだけをSwaggerに起こしてくれる
                    .build() // ApiSelectorを作成
                .useDefaultResponseMessages(false) // 定義していないステータスコードを自動で付与してくれる。今回は自動付与をOFFに
                .host("springbootswagger.example.com")
                .apiInfo(apiInfo()); // APIのインフォメーションを設定
    }

    private ApiInfo apiInfo() {
        return new ApiInfoBuilder()
                .title("Pet Service")
                .description("This is a pet service api")
                .version("1.0.0")
                .build();
    }
}
公式ガイドを見ると、ここで他にも共通のレスポンスメッセージを返す設定や、
セキュリティに関する設定などができる。
今回はボリュームが多くなってしまうため割愛。
プロダクションにする際には、閲覧制限かける必要あるよなぁ。
どうやるんだろう。今度調べてみよう。
アノテーションを貼っていく
Spring Boot, Spring Foxの設定は完了したので、次は実際にSwaggerに書き起こしてもらうように
各種Resourceにアノテーションを貼っていく。
一番シンプルな状態で以下の通りに書けばひとまず仕様書が見れる。
package com.example.springbootswagger;
// import文省略

@RestController
@RequestMapping("/pets")
public class PetResource {

    @GetMapping
    public List<Map<String, String>> pets() {
        return new ArrayList<>();
    }

    @GetMapping("{id}")
    public Map<String, String> pet(@PathVariable String id) {
        return new HashMap<>();
    }

    @PutMapping("{id}")
    public void updatePet(@PathVariable String id) {
        return;
    }

    @PostMapping
    public int insertPet() {
        return 1;
    }

    @DeleteMapping
    public void deletePet() {
        return;
    }
}
通常、APIの各リソースに貼るアノテーションをつけてあげれば、
それだけでSwaggerに書き起こしてくれる。すごい。
Swagger UIの確認方法
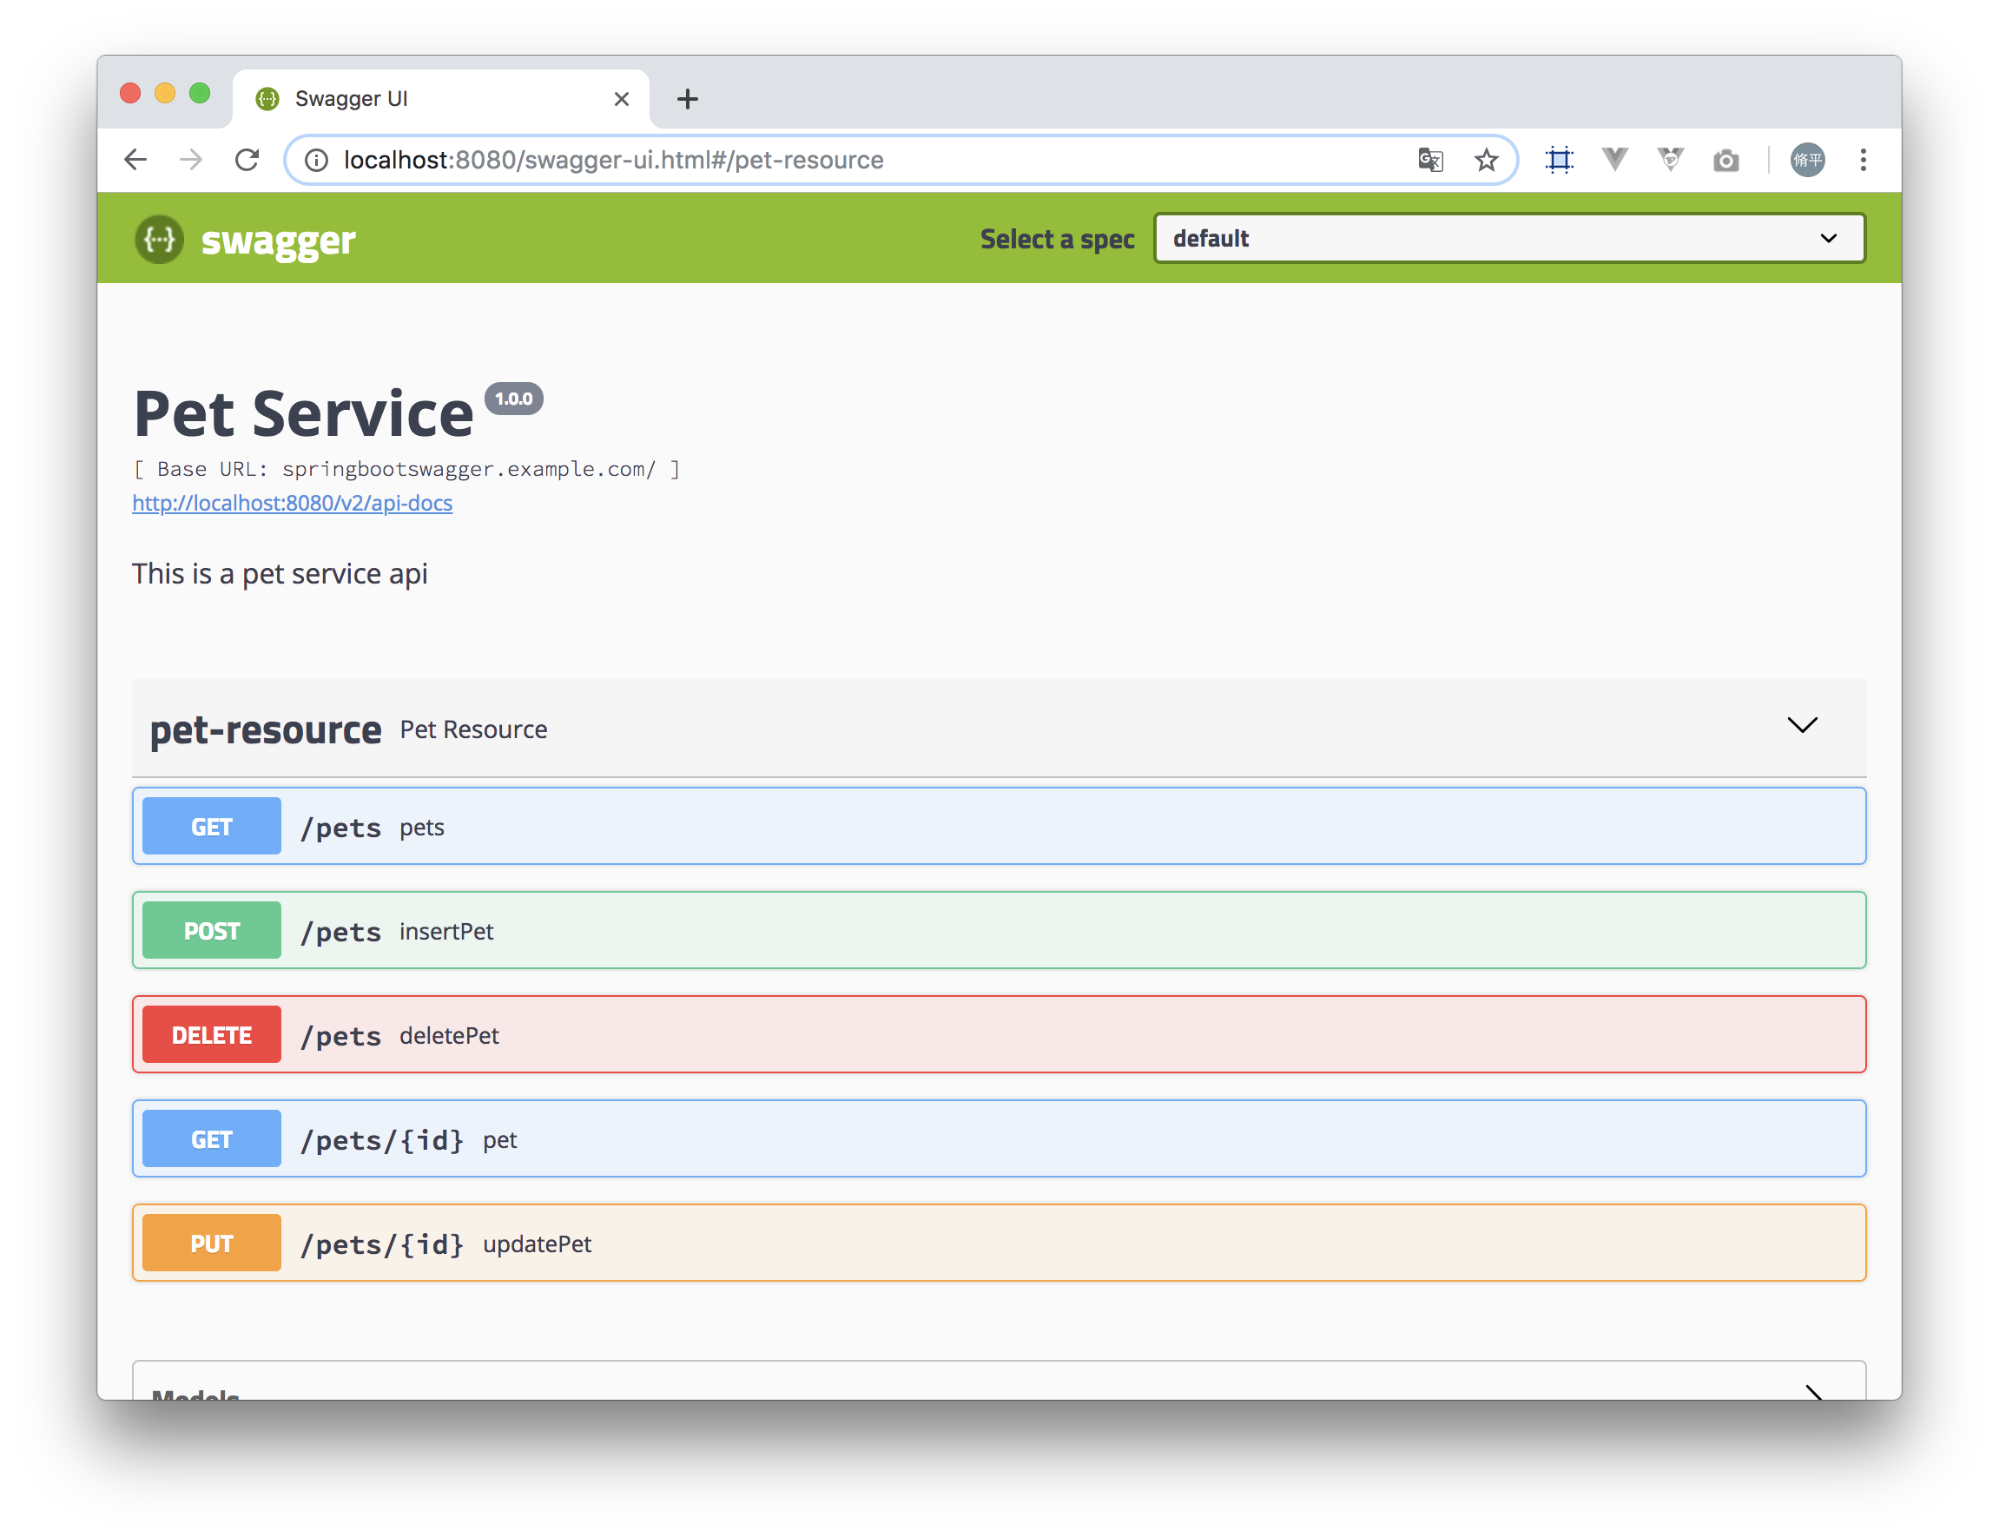
アプリケーションを起動して、http://localhost:8080/swagger-ui.html にアクセスすると
以下の画面が表示されます。
ちなみに、swagger-ui.htmlは定義せずとも
gradleでio.springfox:springfox-swagger-ui:2.9.2の依存関係を解決していれば、
勝手に生成してくれるみたい。
もっと細かくSwaggerを定義する
Springが提供しているController層のアノテーションであれば、
それに従ってSwaggerに反映してくれます。
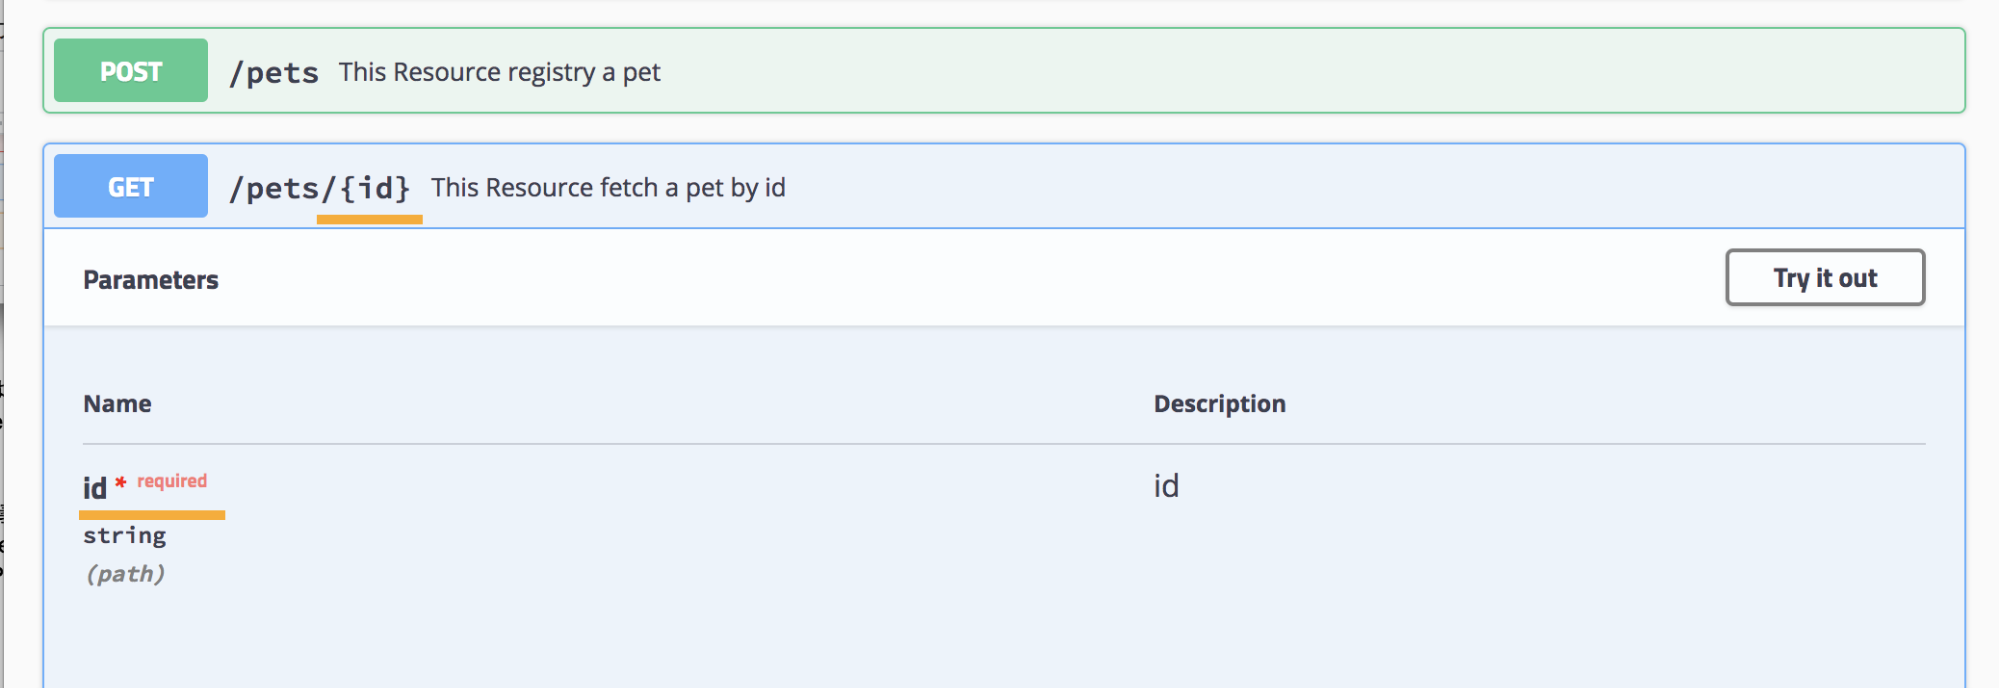
例えば、@PathVariableをつけてあげれば、以下のように反映されます。
しっかり必須項目も付いています。
その他、SpringではなくSwaggerが用意してくれているアノテーションをつけると、
より親切なAPI設計書が出来上がります。
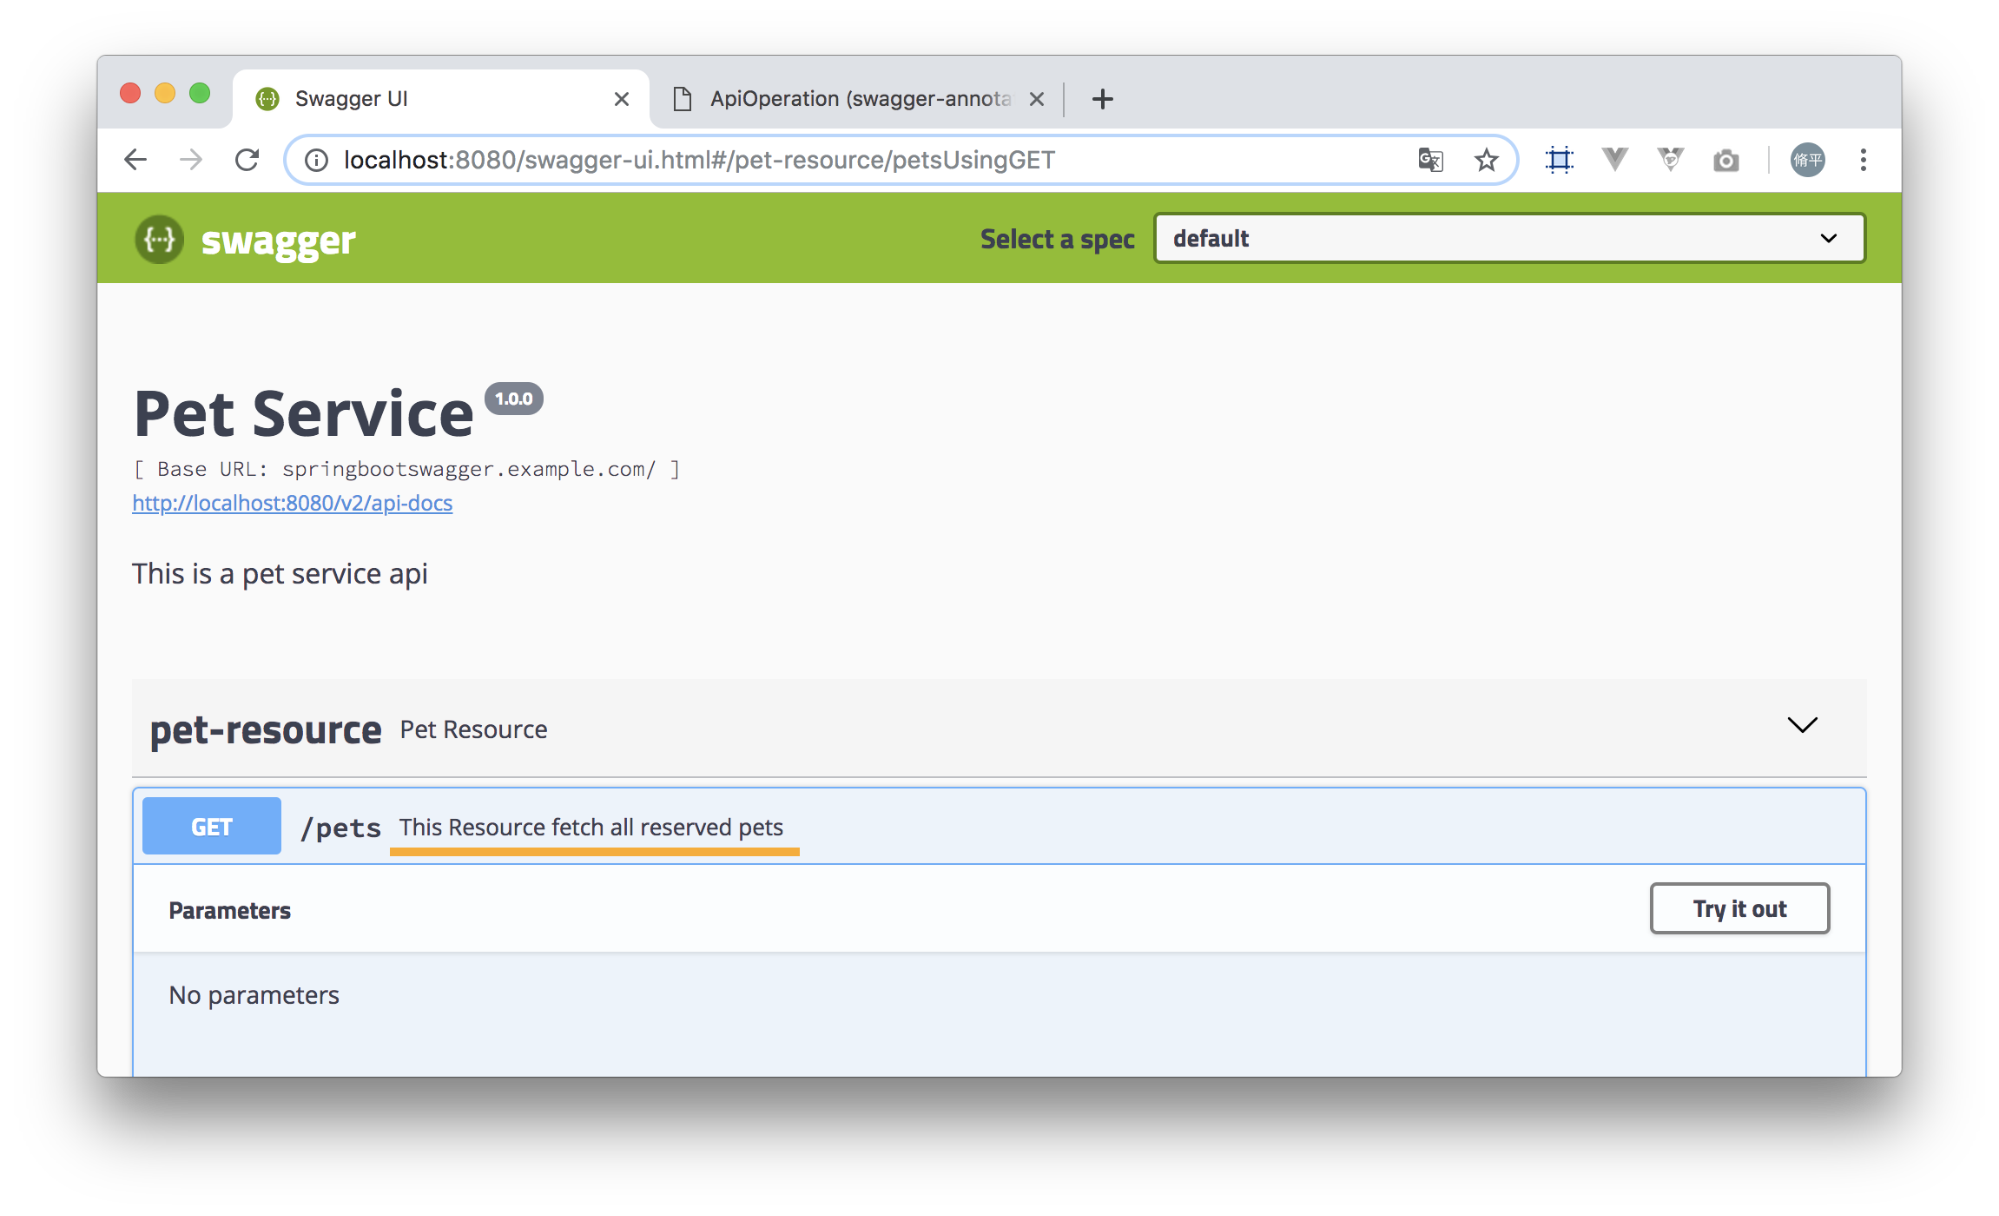
各リソースの概要を記載する
// import文省略

@RestController
@RequestMapping("/pets")
public class PetResource {

    // @ApiOperationでリソースの概要を設定
    @ApiOperation(value = "This Resource fetch all reserved pets")
    @GetMapping(produces = MediaType.APPLICATION_JSON_UTF8_VALUE)
    public List<PetDto> pets() {
        return new ArrayList<>();
    }
}
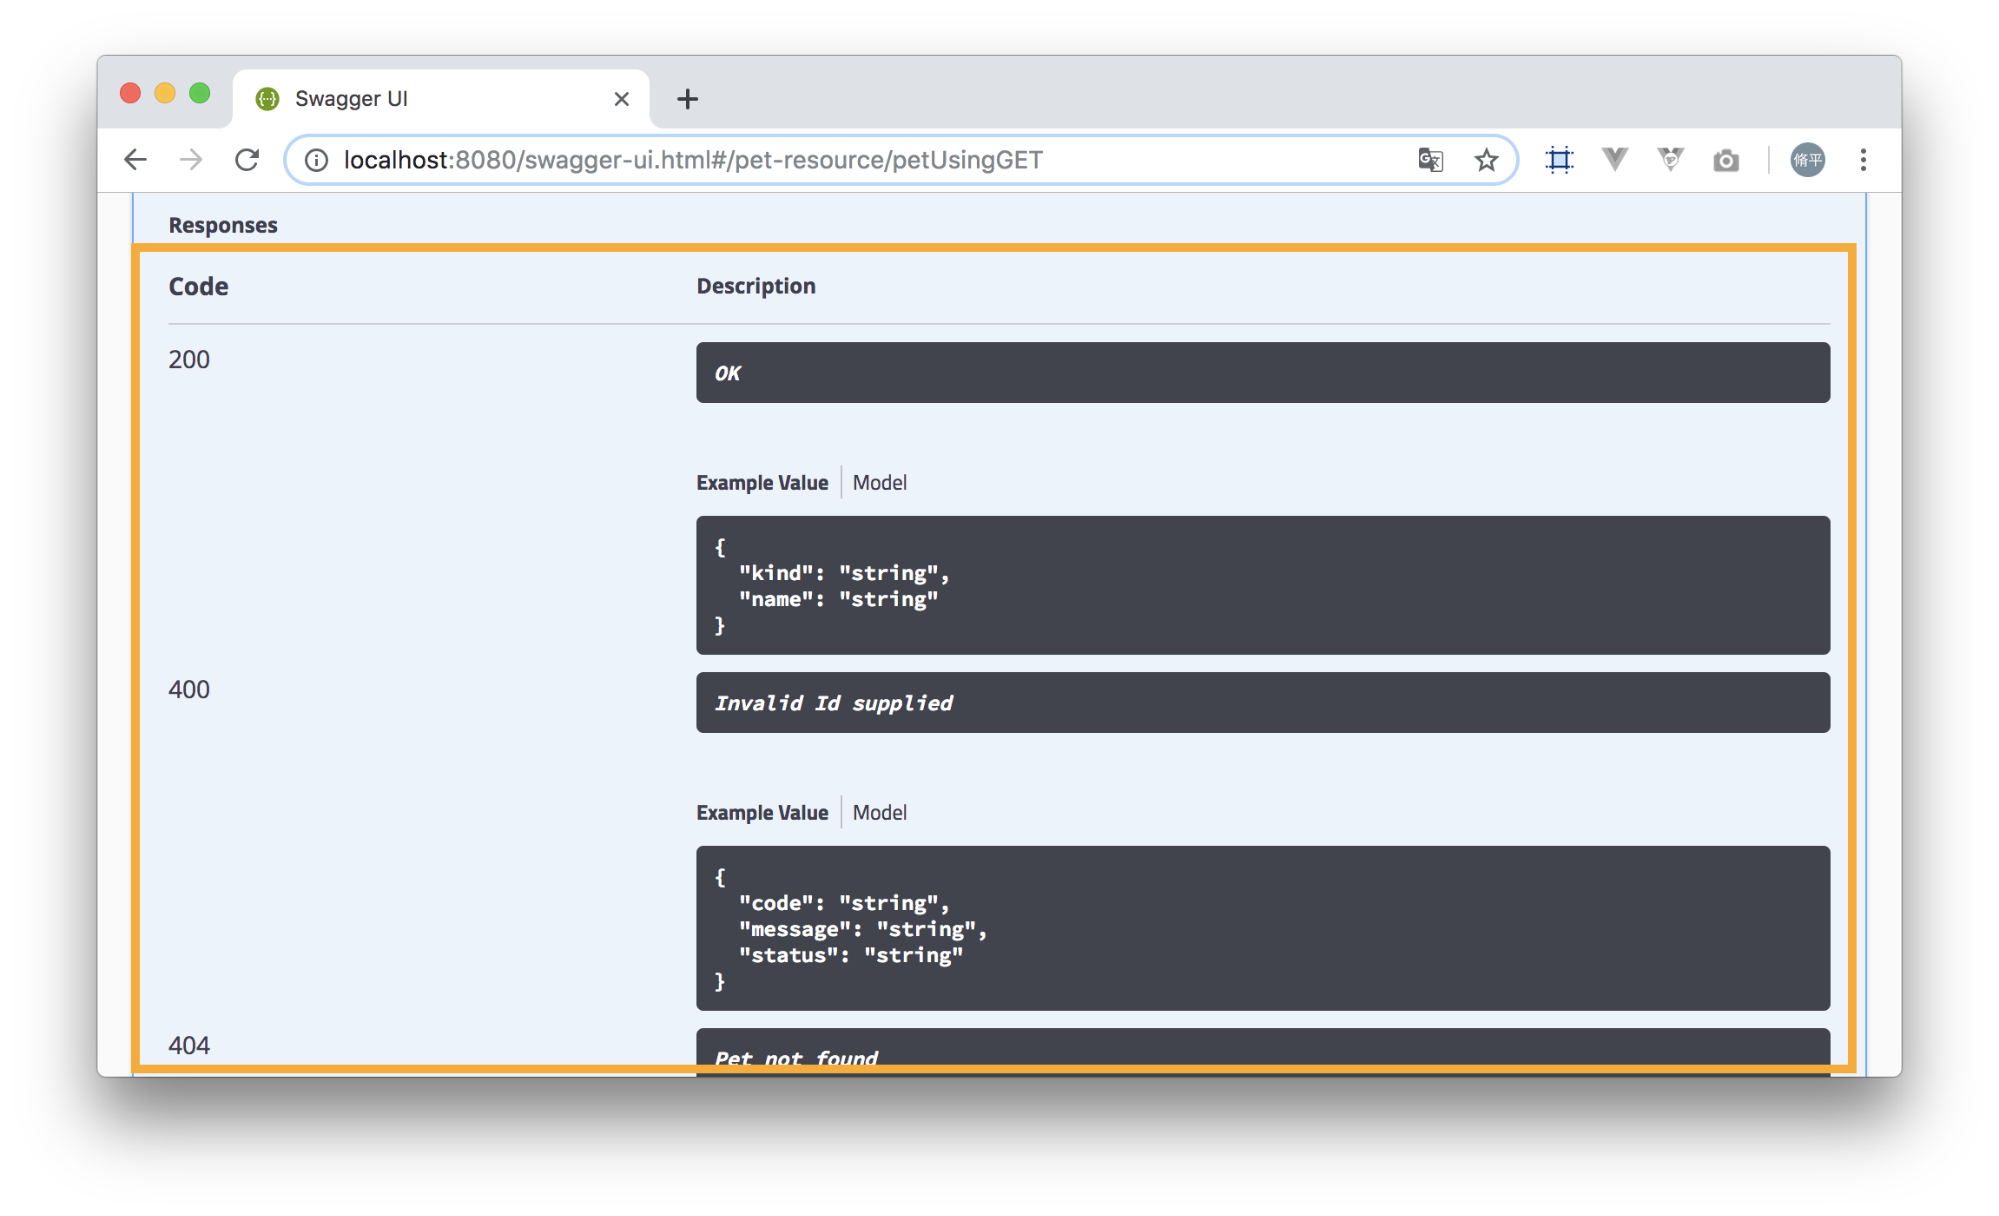
レスポンスのパターンを追加する
// import文省略

@RestController
@RequestMapping("/pets")
public class PetResource {

    @ApiOperation(value = "This Resource fetch a pet by id")
    // ApiResponsesで複数のレスポンスを定義できる。codeとmessageが必須項目。
    @ApiResponses(value = {@ApiResponse(code = 400, message = "Invalid Id supplied", response = ErrorDto.class), @ApiResponse(code = 404, message = "Pet not found")})
    @GetMapping(value = "{id}", produces = MediaType.APPLICATION_JSON_UTF8_VALUE)
    public PetDto pet(@PathVariable String id) {
        return new PetDto();
    }
}
あとがき
今回、セキュリティ周りのことはボリュームの都合で割愛したので、
別記事でまとめようかな〜と思います。
あとは、途中で書いた通りプロダクションでは見せないような工夫が必要なので、
そのやり方が気になっています。
SpringBoot使ってるから、SpringSecurityでなんやかんやするべきなのかな?
参考文献
導入する際の設定もろもろはこちら。
http://springfox.github.io/springfox/docs/current/#getting-started
Swaggerのアノテーションはこちら。
https://github.com/swagger-api/swagger-core/wiki/annotations


