概要
Jupyter Notebookをより便利に使うため、整理してまとめてみました。
テーマを変える
jupyterthemesを使うと、フォントや背景色、テーマを変えられます。
Jupyterを起動する前に、コマンドで変更します。
# install
pip install jupyterthemes
◆ サンプル
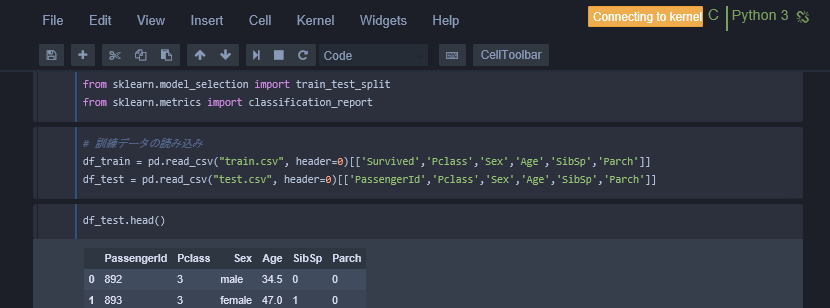
- ブラック系
# dark
jt -t onedork -fs 95 -altp -tfs 11 -nfs 115 -cellw 88% -T
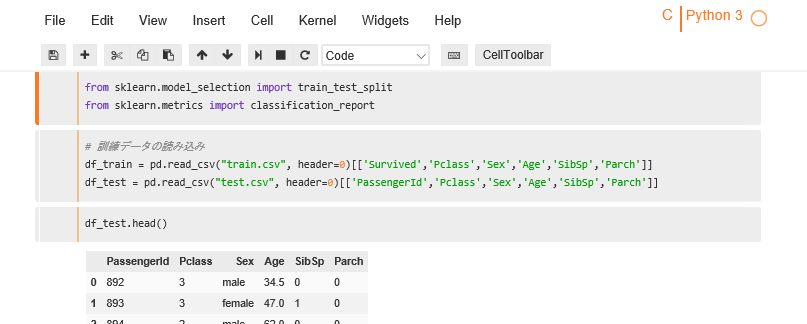
- ホワイト系
# light
jt -t grade3 -fs 95 -altp -tfs 11 -nfs 115 -cellw 88% -T
元に戻す
jt -r
他にも見栄えを変えるライブラリがありますが、個人的にはこれが一番綺麗かなと思いました。
モジュール自動リロード
importしている別ファイルモジュールを自動でリロードしてくれます。
モジュールを変更したときに、いちいちKernel再起動しなくてもOKです。
別ファイルからimportしたクラスの、生成済みのインスタンスに対しても、メソッド内の変更が自動で行われるので、とても便利です。
%reload_ext autoreload
%autoreload 2
参考
Qiita: ipython を起動しながら自作モジュールを修正した場合
ショートカットキー
Esc → hでショートカットキーの一覧が見れます。
よく使うショートカットキー
| Key | |
|---|---|
| Esc → m | マークダウンモードに変更 |
| Esc → y | コードモードに変更 |
| Esc → a | 上にセル追加 |
| Esc → b | 下にセル追加 |
| Esc → dd | セル削除 |
| Esc → l | 行数表示 |
| Ctrl + Enter | セル実行 |
| Alt + Enter | セル実行+下にセル追加 |
追記:2017/9/27
コメントより、Jupyterのconfig.js内の記載を変更することで、デフォルトで行数表示できると教えていただきました!
$(jupyter --config-dir)/config/config.js
require('notebook/js/cell').Cell.options_default.cm_config.lineNumbers = true;
# バックグラウンドジョブで動かす
この方法でJupyter Notebookを起動させれば、実行結果が戻ってこなくても、ssh切断して放置しても大丈夫です。

```bash
nohup jupyter notebook >> jupyter.log 2>&1 &
デバッグ
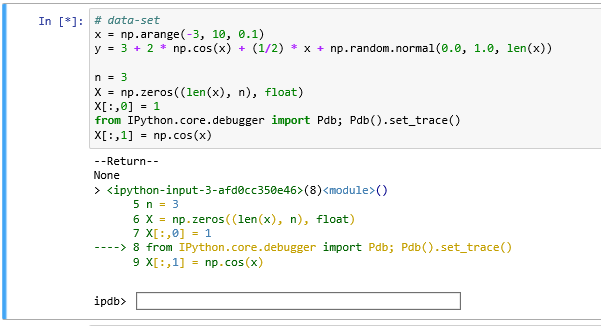
ソースの途中で以下のコードを挟むと、ブレークポイントになり、デバッグができます。
from IPython.core.debugger import Pdb; Pdb().set_trace()
変数を入力して値を確認したり、ステップインなどができます。
(とはいえ、ちょっと使いにくいと思います)
詳しくは
Qiita: JupyterまたはiPython Notebookでデバッグをする方法
リモートマシン上で使う
リモートマシン上にJupyterをインストールして、以下のコマンドでconfigファイルを作成。
configファイルにポートを設定。
リモートのJupyterのポートをトネリングでつないで、ローカルのブラウザから操作できるようになります。
jupyter notebook --generate-config
c.NotebookApp.open_browser = False
c.NotebookApp.ip = '0.0.0.0'
Pandas関連 - display()
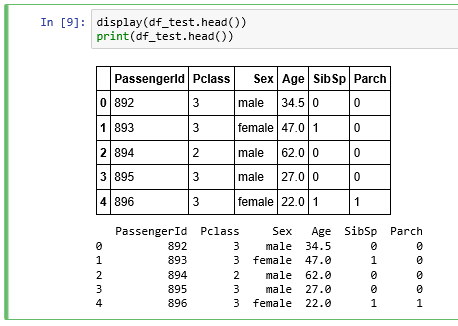
処理の途中でDataFrameを表示させるにはprint()ではなく、display()を使うと罫線つきでいつも通りに表示できます。
display(df)
Pandas関連 - set_option()
DataFrameの行や列が多いとデフォルトでは途中のデータが略されてしまいますが、set_optionで最大行数や列数を変更すると表示できます。
import pandas as pd
pd.set_option('display.max_rows', 500)
参考
http://songhuiming.github.io/pages/2017/04/02/jupyter-and-pandas-display/
Pandas関連 - tqdm
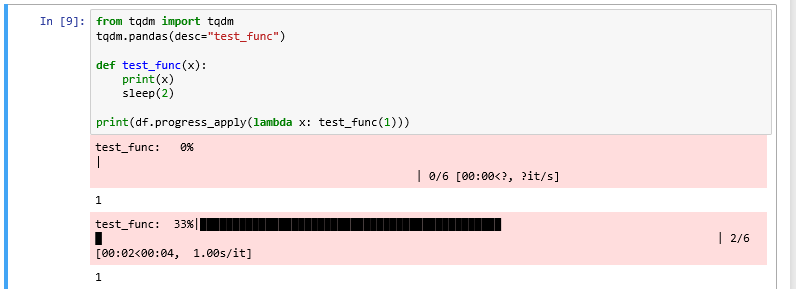
tqdmを使うとapplyの進捗を可視化して確認できます。もちろんfor文などでも使えます。
重い処理中、いつ終わるかそわそわしなくて済みます。
# install
pip install tqdm
参考
http://wonderwall.hatenablog.com/entry/2017/07/23/222856
追記:2017/9/27
コメントより、tqdm_notebookというのがあると教えてもらいました!
こちらの方がプログレスバーが綺麗で見やすいです。
# pandasのapplyで使うとき
from tqdm._tqdm_notebook import tqdm_notebook
tqdm_notebook.pandas(desc="hoge progress: ")

df.progress_apply(lambda x: x*3+1, axis=1)
HTML記載
マークダウンセルは、HTMLも書けます。
レポートを綺麗に書きたいときに使えます。
スライド化
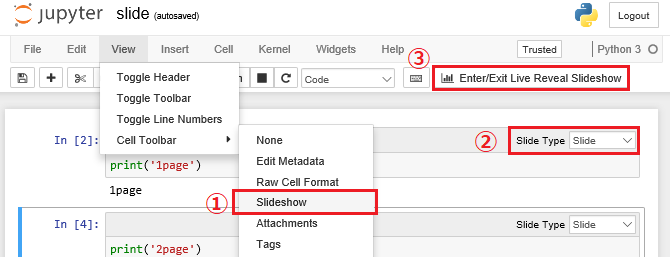
RISEを使うと、Jupyterのセルをスライド化できます。分析結果をプレゼントする時に便利です。
① [View]-[Cell Toolbar]-[Slideshow]を選択
② 各セルの右上の[Slide Type]を選択
③ Slideshowボタンをクリック
# install
pip install RISE
jupyter-nbextension install rise --py --sys-prefix
jupyter-nbextension enable rise --py --sys-prefix
参考
Qiita: Jupyter Notebookでプレゼンをするとっても便利な方法
.pyファイル変換
「test.ipynb」(ノート)を「test.py」(Pythonファイル)に変換したい場合は、以下のコマンドをたたきます。
# In [21]:といったノートの記載がコメントアウトになったPythonファイルが出力されます。
jupyter nbconvert --to python test.ipynb
おわり
他の方の記事のまとめになってしまいましたが、これからJupyter Notebookを使い始める方の参考になれたら嬉しいです。
もっと使いこなしていきたいです。
