作成の流れ
botの作成
-
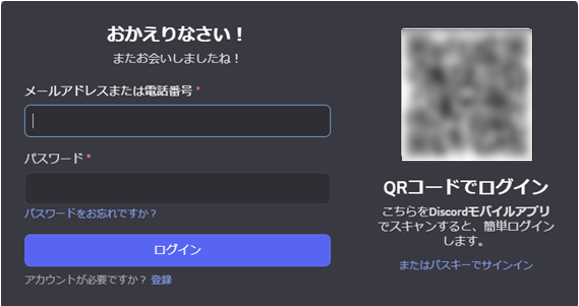
ログイン画面遷移後、画面の指示に従いログインする
-
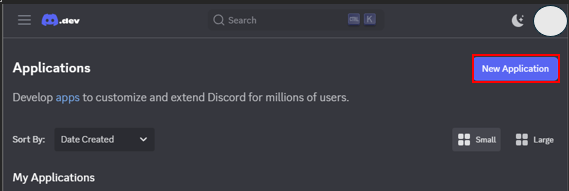
ログイン後、画面上部にある「New Application」からbotを作成する
-
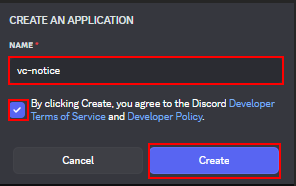
任意のbotの名前を入力。開発者の利用規約および開発者ポリシーを一読し、同意する場合のみチェックボックスを埋めて、「Create」を押下する
-
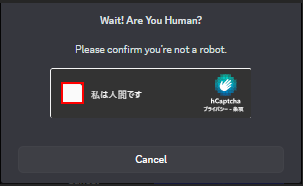
人間である場合のみチェックボックスを埋める。(笑)
-
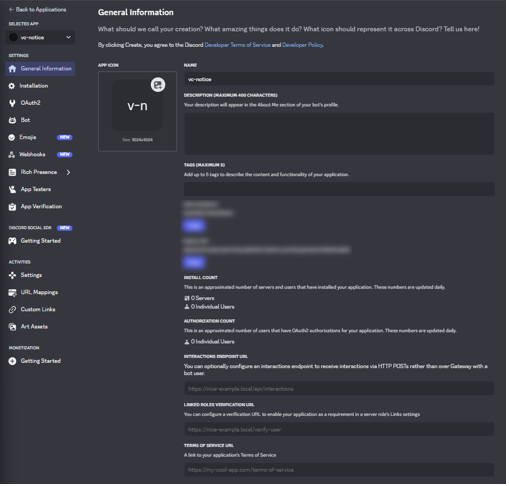
下記の画面が表示されれば、botの作成は完了!
botの設定
-
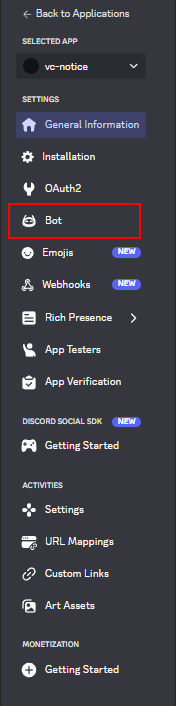
画面左のサイドバーから「Bot」を押下し遷移
-
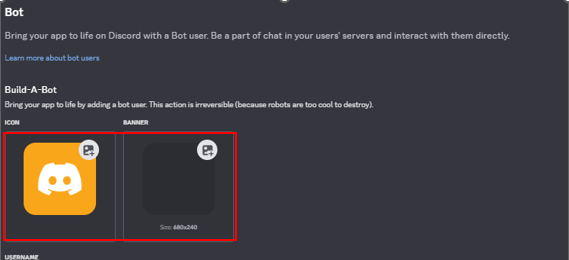
(任意)アイコンbotのアイコンを設定したい人は、ここを編集する。今回は、ボイスチャンネルに関連するbotなので、電話のロゴを設定した
-
トークンを作成・コピーしておく.ソースコード作成時に仕様するためどこかにメモしておく

-
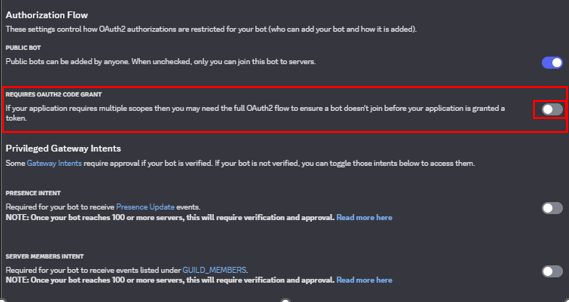
「Authorization Flow」> 「Requires OAuth2 Code Grant」がoffになっていることを確認。onの場合はoffに変更する
-
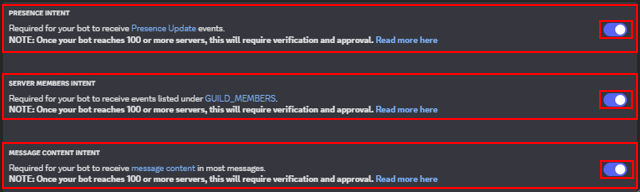
下記説明を読み、必要に応じて「Privileged Gateway Intents」> 「Presence Intent」,「Server Members Intent」,「Message Content Intent」をonにする。わからなければすべてonにしても問題ない
    Presence Intent        ・・・ ユーザーのオンライン状況オンライン/オフライン/取り込み中など)の取得
    Server Members Intent  ・・・ サーバーのメンバー情報(名前やID、参加状況)の取得
    Message Content Intent ・・・ ユーザーが送ったメッセージ本文を取得
-
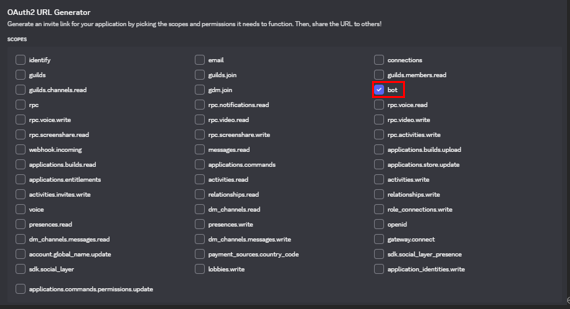
画面左のサイドバーから「OAuth2」を押下し遷移

-
「OAuth2 URL Generator」 から「bot」にチェックを入れる
-
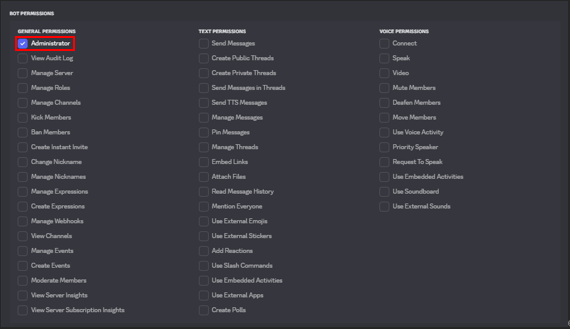
上記手順後、その下に「BOT PERMISSIONS」という欄が表示される.作成したいbotの用途に応じて、権限を選択する.今回は,テストサーバーにbotを招待するため,管理者権限(Administrator)を与える
-
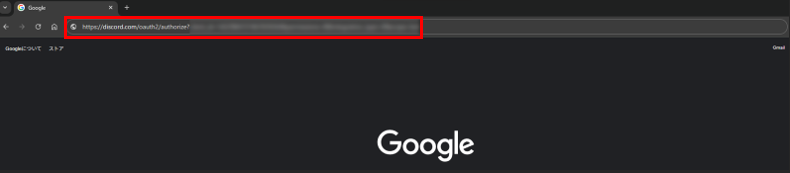
権限選択後、画面下部に「Generated URL」が生成されるので、コピーし、別タブでリンクにアクセスする

↓
-
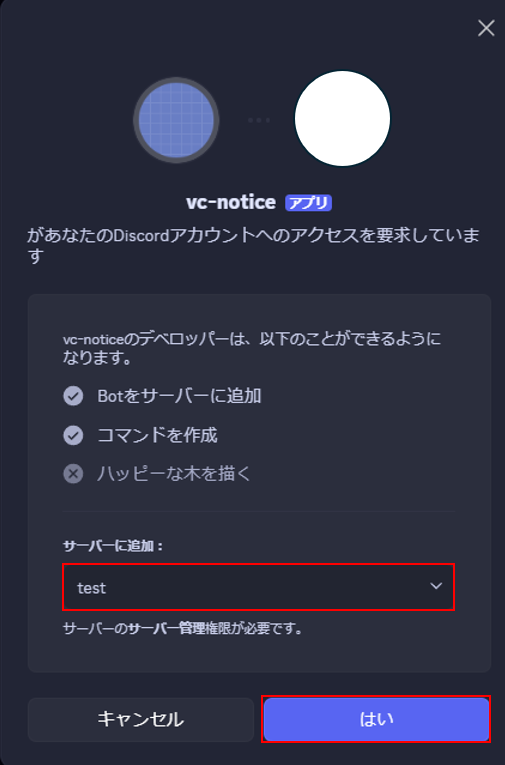
下記画面が表示されるので、追加したいサーバーを選択し、「はい」を押下する
-
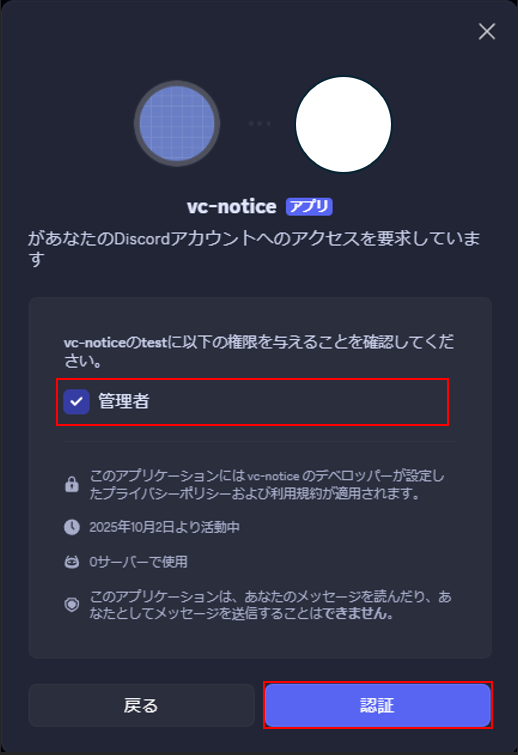
確認画面にて権限を確認し、問題がなければ「認証」を押下する
-
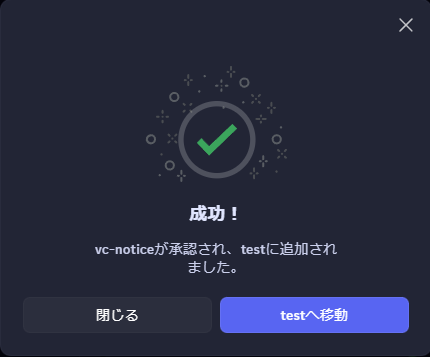
下記画面が表示されれば設定完了!
-
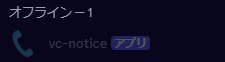
オフラインにbotの名前が表示されているはず
ソースコード作成
今回作るファイルは下記
env
index.js
package.json
package-lock.json
- envファイル
DISCORD_BOT_TOKEN=bot作成時にコピーしておいたトークンをコピペ
- index.jsを書く前に、テキストチャンネルIDを取得する
- 取得方法
- 通知を送りたいテキストチャンネルに、適当に文言を送信し、マウスカーソルを合わせ、「その他」を押下

- 展開したメニューから、「メッセージリンクをコピー」を選択・押下

- コピーしたリンクから、チャンネルIDを抽出する.下記のチャンネルIDをメモしておくこと
https://discord.com/channels/<サーバーID>/<チャンネルID>/<メッセージID>
- 通知を送りたいテキストチャンネルに、適当に文言を送信し、マウスカーソルを合わせ、「その他」を押下
- 取得方法
require('dotenv').config();

const http = require("http");
http.createServer(function (request, response) {
  response.writeHead(200, { "Content-Type": "text/plain" });
  response.end("Discord bot is active now \n");
}).listen(3000);

const { Client, GatewayIntentBits } = require("discord.js");

const LOG_CHANNEL_ID = "メモしたログチャンネルIDをコピペ";

const client = new Client({
  intents: [
    GatewayIntentBits.Guilds,
    GatewayIntentBits.GuildMessages,
    GatewayIntentBits.MessageContent,
    GatewayIntentBits.GuildVoiceStates,
  ],
});

client.login(process.env.DISCORD_BOT_TOKEN);

client.once("ready", () => {
  console.log("bot is ready!");
});

client.on("voiceStateUpdate", (oldState, newState) => {
  let newUserChannel = newState.channel;
  let oldUserChannel = oldState.channel;

  const logChannel = newState.guild.channels.cache.get(LOG_CHANNEL_ID);

  if (!oldUserChannel && newUserChannel) {
    logChannel.send(`${newState.member.user.username} が ${newUserChannel.name} を開始。 @everyone`);
  } else if (!newUserChannel && oldUserChannel) {
    logChannel.send(`${oldState.member.user.username} が ${oldUserChannel.name} を終了。`);
  }
});

if (!process.env.DISCORD_BOT_TOKEN) {
  console.log("please set ENV: DISCORD_BOT_TOKEN");
  process.exit(0);
}
サーバー準備
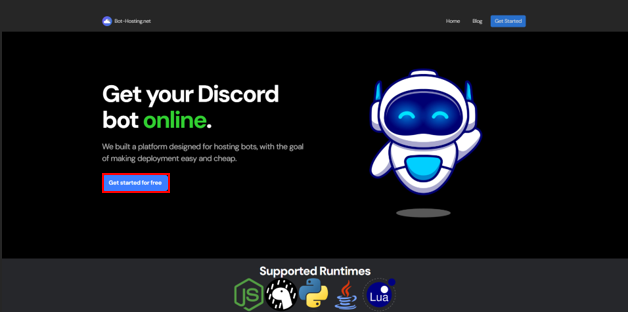
今回サーバーには、Bot-Hosting.netを使用する。
- Bot-Hosting.netのアカウント作成
Bot-Hosting.netにアクセスし、「Get started for free」押下
すると下記画面が開くので、「Earn Coins」を押下
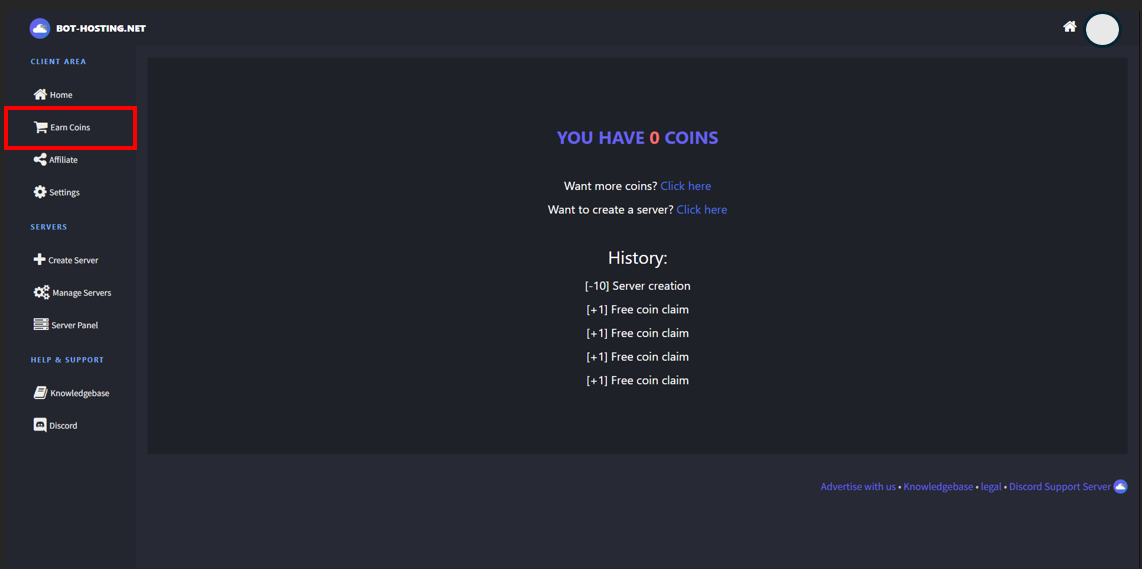
-
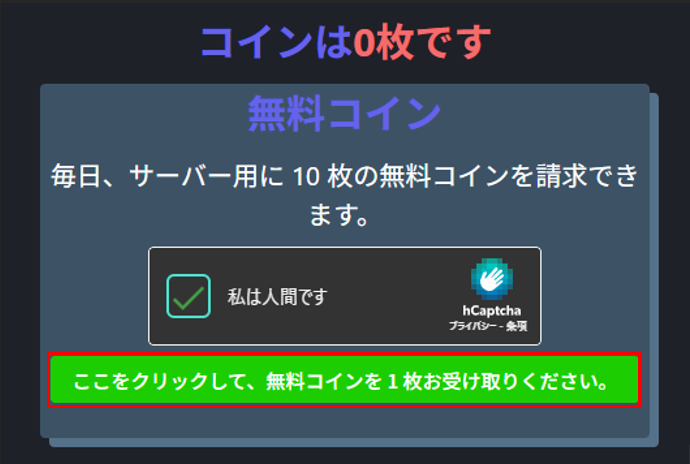
無料コイン1枚取得を10回実施し、10コイン取得する
(毎日10コイン取得でき、プランに応じて必要分取得すれば問題なく常時稼働できる。Starterの場合10コイン/週)
-
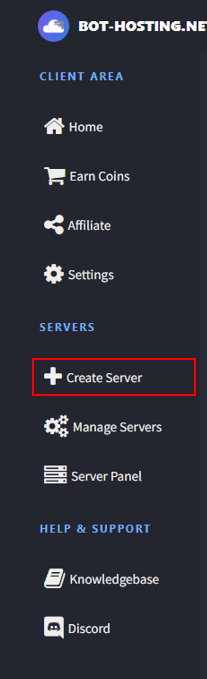
10コイン取得した後、「Create Server」を押下
-
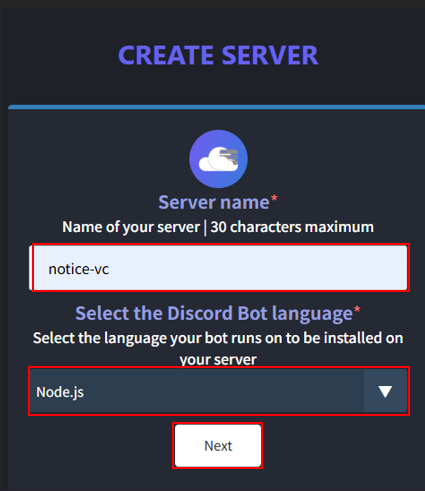
「Server name」 に任意のサーバー名を入力、「Select the Discord Bot langage」は、「Node.js」を選択し、「Next」を押下
-
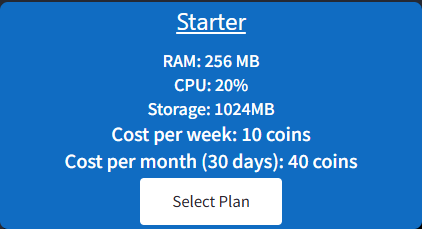
「CREATE SERVER」 ページに遷移後、「Starter」プランを押下する。(先ほど取得したコインで1週間稼働可能)
-
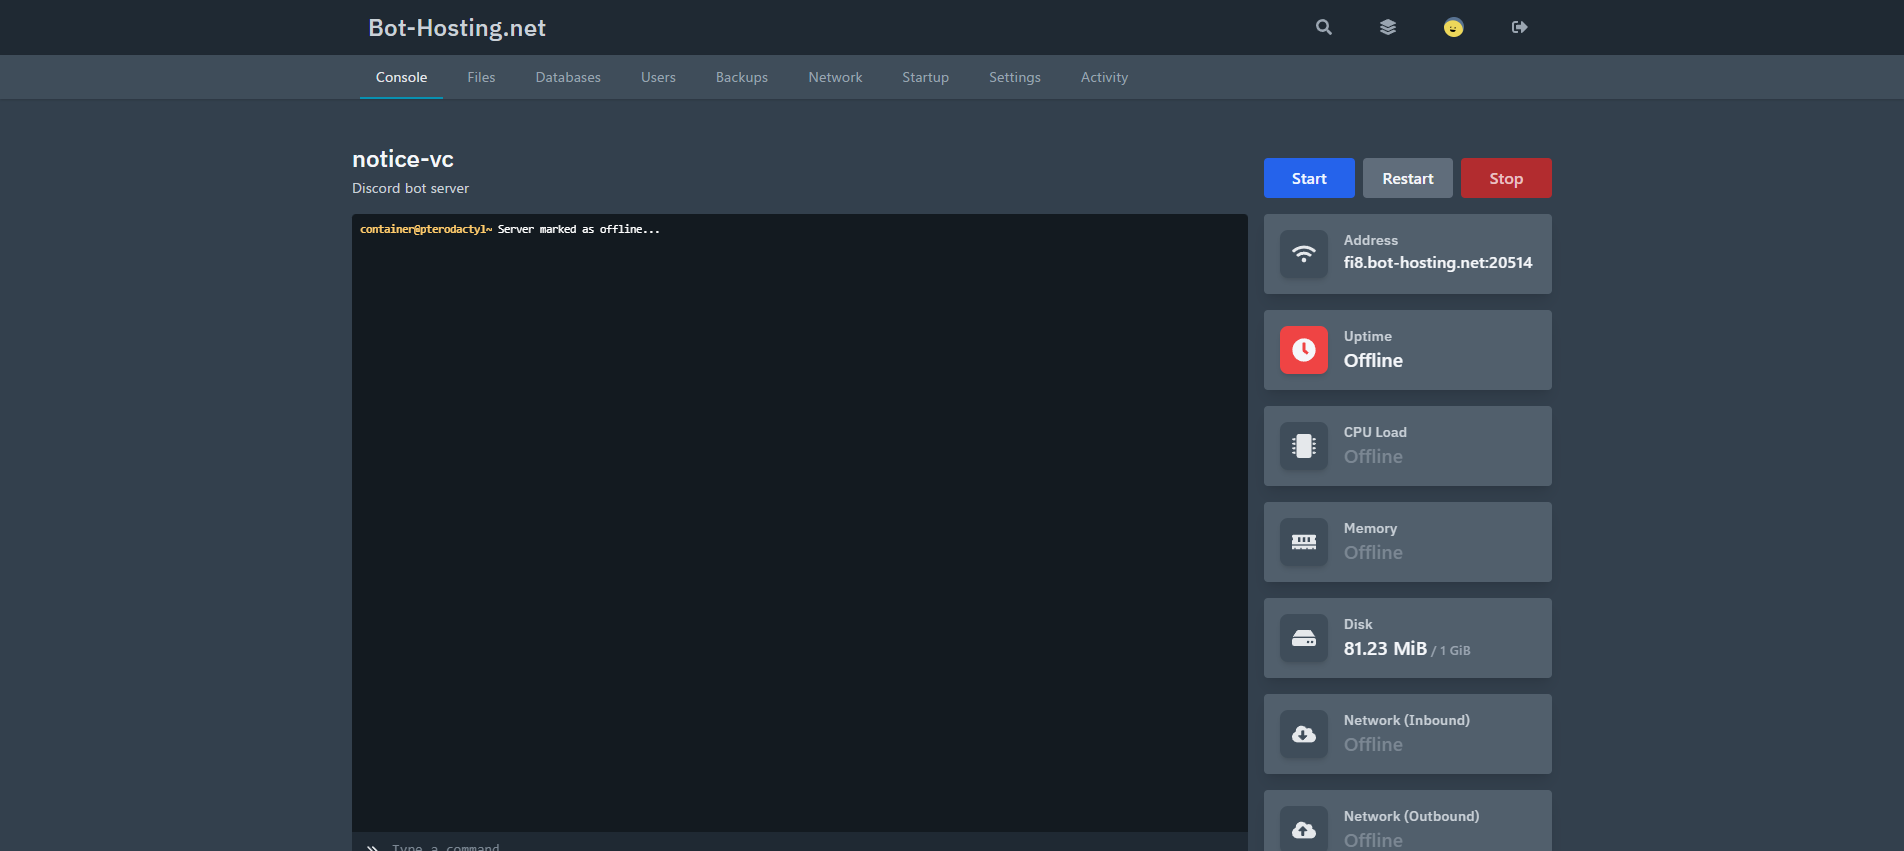
下記のコンソールの画面が表示されれば完了!
デプロイ手順
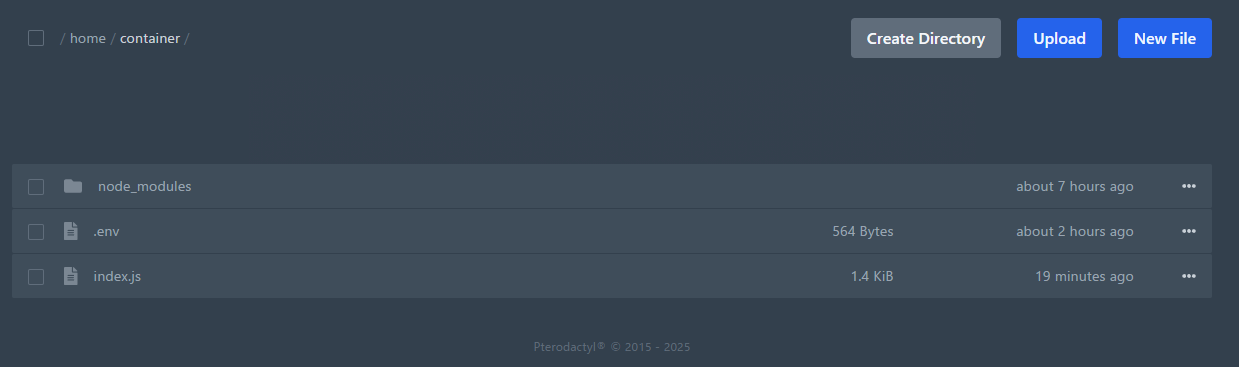
- 画面上部から「files」タブを選択

* 画面遷移後「Upload」を押下し、ソースコード作成にて作成したソースを選択し配置する。

↓
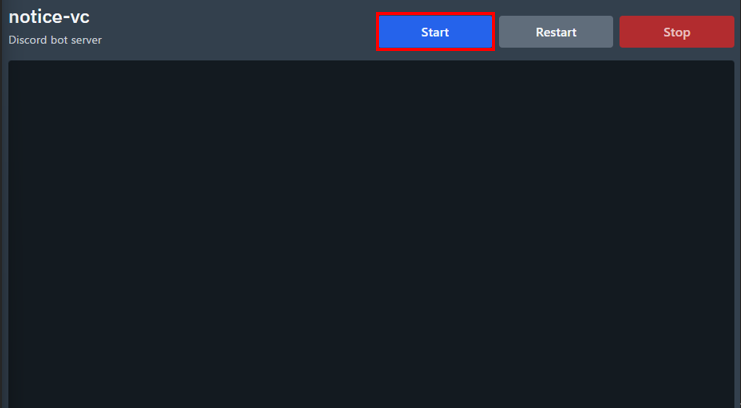
* 画面上部から「Console」タブを選択し、コンソール上部から「Start」ボタンを押下
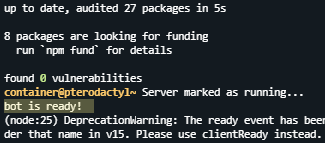
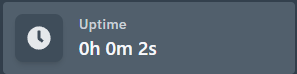
- 「bot is ready!」と出力される&コンソール下の「Uptime」に時間が動いていたら完了!
動作確認
-
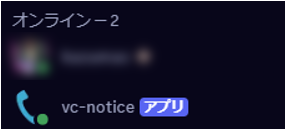
確認項目1
botを招待したサーバーを確認し、botがオンラインであることを確認する
-
確認項目2
vcに入退出したとき、指定したテキストチャンネルに通知されているか。

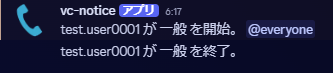
問題なし!これにて終了!