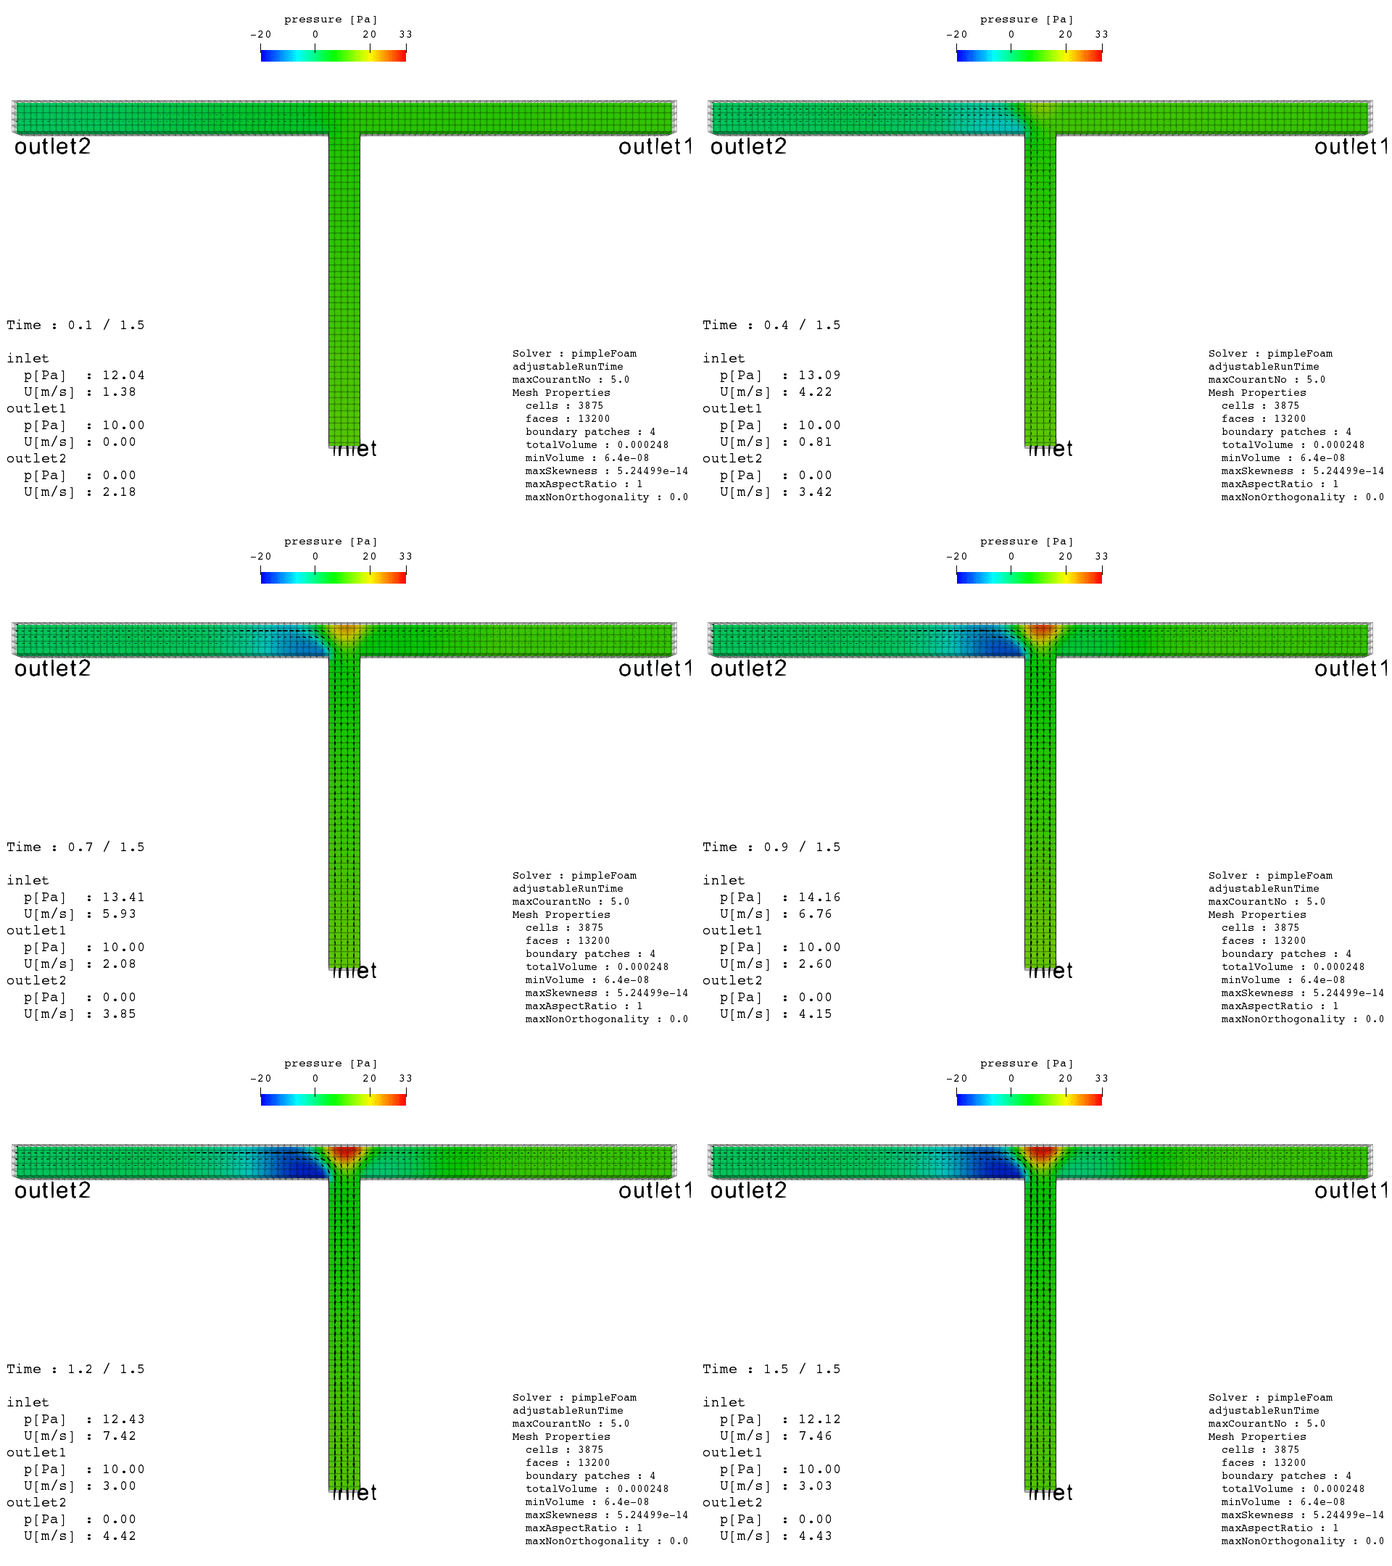
1. はじめに
ParaViewにOpenFOAMのケースの色々な情報を盛り込んでいきます。

2. スクリプト
GitHubにコードを残しています。
3. 中身
3.1. 実行スクリプト
例としては多分どのバージョンのチュートリアルにもあるTJunction(RAS)を使用します。あとついでにfunctionObjectを使ってpとUの出入り口における平均値も求めています。
# !/bin/bash
cd ${0%/*} || exit 1                        # Run from this directory
. $WM_PROJECT_DIR/bin/tools/RunFunctions    # Tutorial run functions

# チュートリアルからコピー
cp -r $FOAM_TUTORIALS/incompressible/pimpleFoam/RAS/TJunction ./
cd TJunction/
foamRunTutorials

# functionObjectの記載されたcontrolDictをコピー
mv system/controlDict system/controlDict.old
cp ../src/controlDict system/
# functionObjectだけ実行
runApplication postProcess -fields '(p U)'

# ParaViewスクリプトを実行
cp ../src/nomove.py ./
paraview --state=nomove.py
3.2. ParaView
3.2.1. 下準備とgifアニメの作成方法について
まず特筆すべき点として今回ParaViewの機能であるSave Anumationは使わない形で動画を作成しています。
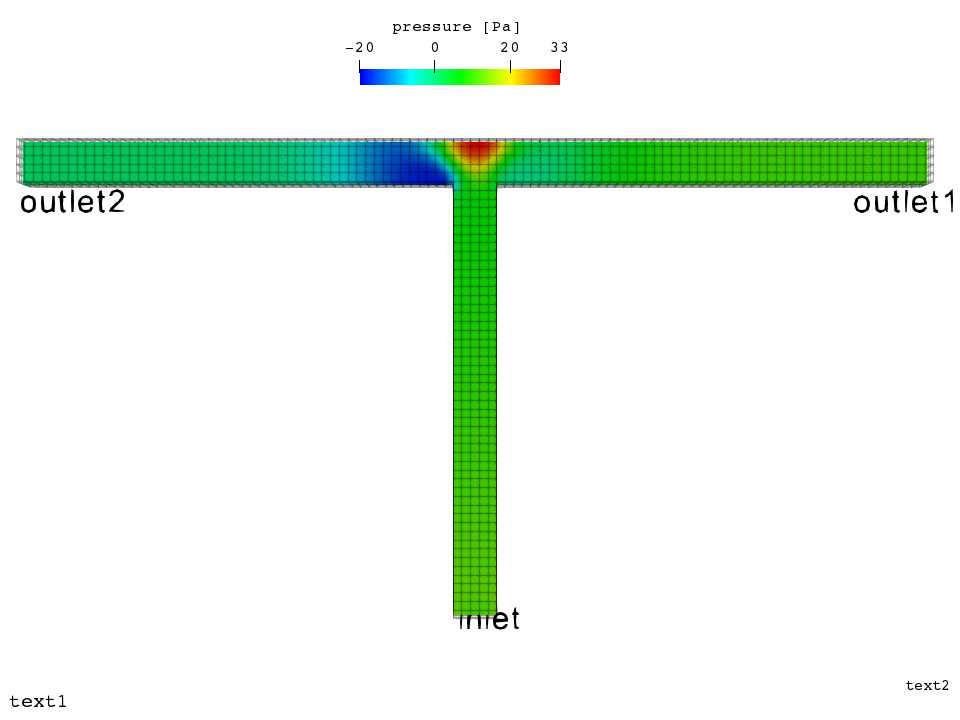
方法としてはまずGUIを使って以下のように普通の静止画を作成します。
そしてSave Stateで.py形式で保存します。(Python2系であることに注意してください。)
保存された.pyスクリプトの最後に以下のように追記します。
# (ここから上はSave Stateで保存されたスクリプトそのまま)

import os
import subprocess

picDir = 'pic'
figName = 'test'
pngDir = picDir + '/' + figName
if not os.path.isdir(pngDir):
	os.makedirs(pngDir)

n = 0
# 最初の方に"pVFoamReader1 = PVFoamReader(FileName='/home/user/../TJunction.OpenFOAM')"というのがあった場合
for time in pVFoamReader1.TimestepValues: # pVFoamReader1という名前でない可能性が高い。
	renderView1.ViewTime = time
	SaveScreenshot(pngDir+'/'+ figName + '_{0:04d}.png'.format(n), renderView1, ImageResolution=viewSize)
	n += 1

# うまく行かない場合はsudo apt-get -y install imagemagickでImagemagickをインストールする
cmd = 'convert -loop 0 -delay 20 {}/{}*.png {}/{}.gif'.format(pngDir,figName,picDir,figName)
subprocess.call(cmd.split(' '))
この中ではforループの中で時刻を進めており、各時刻でpngファイルに出力しています。その後subprocessという外部コマンドを実行するライブラリを用いてImagemagickのコマンドであるconvertを実行しています。これにより連番pngをgifアニメに変換します。
このようにforループで時刻毎に処理を行うことで色々と好きなものを出力できるようになります。
3.2.2. 出力するもの
この各画像の処理において以下のものを出力してみます。
- (a) controlDictの中の情報
- (b) functionObjectで出力されたpostProcessing/**.datファイル
- (c) checkMeshした際の情報
(a) controlDictの情報
PythonでcontrolDictの中身を呼び出すときにはPyFoamを使うと便利です。
from PyFoam.RunDictionary.ParsedParameterFile import ParsedParameterFile
controlDict = ParsedParameterFile('system/controlDict').content

foamProperties = 'Solver : ' + controlDict['application'] + '\n'
if controlDict['writeControl'] == 'adjustableRunTime':
    foamProperties += 'adjustableRunTime\nmaxCourantNo : ' + '{0:.1f}'.format(controlDict['maxCo']) + '\n'
else:
    foamProperties += 'deltaT : ' + '{0:.2e}'.format(controlDict['deltaT']) + '\n\n'

# あらかじめParaViewで作っておいた2Dtextの中身を更新する
text2.Text = foamProperties
この時controlDictは'system/controlDict'を辞書型で読み込んでくれていますので例えばcontrolDict['application']は'pimpleFoam'を返したりします。
(b) functionObjectで出力されたpostProcessing/**.datファイル
このファイルの中身は以下のようになっています。
# Region type : patch outlet1
# Faces       : 25
# Area        : 4.000000e-04
# Scale factor: 1.000000e+00
# Time        	areaAverage(p)	areaAverage(U)
0             	1.000000e+01	(0.000000e+00 0.000000e+00 0.000000e+00)
0.1           	1.000000e+01	(0.000000e+00 0.000000e+00 0.000000e+00)
0.2           	1.000000e+01	(0.000000e+00 0.000000e+00 0.000000e+00)
0.3           	1.000000e+01	(-1.054195e-07 -1.308877e-01 -6.788310e-07)
0.4           	1.000000e+01	(-1.456511e-07 -8.057690e-01 2.646541e-07)
0.5           	1.000000e+01	(-3.502631e-03 -1.359180e+00 -1.705094e-04)
0.6           	1.000000e+01	(-1.514736e-02 -1.762225e+00 -2.020270e-04)
0.7           	1.000000e+01	(-1.895001e-02 -2.080802e+00 2.882665e-04)
0.8           	1.000000e+01	(-2.115441e-02 -2.355495e+00 -8.210876e-05)
0.9           	1.000000e+01	(-2.303801e-02 -2.602506e+00 -1.220382e-04)
1             	1.000000e+01	(-2.493300e-02 -2.825718e+00 -1.612341e-05)
1.1           	1.000000e+01	(-2.662255e-02 -2.956741e+00 6.285795e-05)
1.2           	1.000000e+01	(-2.704210e-02 -3.001724e+00 6.343493e-05)
1.3           	1.000000e+01	(-2.713115e-02 -3.017487e+00 -1.222820e-05)
1.4           	1.000000e+01	(-2.719409e-02 -3.023010e+00 -5.762764e-05)
1.5           	1.000000e+01	(-2.727871e-02 -3.025023e+00 -2.872276e-05)
今回はpandasで読み込んでみましょう。
import numpy as np
import pandas as pd

boundaries = ['inlet', 'outlet1', 'outlet2']
files = {'inlet':'postProcessing/inletAverage/0/surfaceFieldValue.dat',
          'outlet1':'postProcessing/outlet1Average/0/surfaceFieldValue.dat',
          'outlet2':'postProcessing/outlet2Average/0/surfaceFieldValue.dat'}

p = pd.DataFrame()
magU = pd.DataFrame()
for b in boundaries:
    file = files[b]
    dat = pd.read_csv(file,sep='\t',header=4,index_col=0)
    tmpU = []
    for t in dat.index:
        uvec = dat['areaAverage(U)'].loc[t]
        uxyz = np.array(list(map(float, uvec[1:-1].split(' '))))
        tmpU.append(np.linalg.norm(uxyz))
    p[b] = dat['areaAverage(p)']
    magU[b] = pd.Series(tmpU,index=dat.index)

for time in pVFoamReader1.TimestepValues:
	renderView1.ViewTime = time

	tmpTxt = 'Time : {0:1.1f}'.format(time) + ' / {0:1.1f}\n\n'.format(controlDict['endTime'])
	for b in boundaries:
		tmpTxt += b + '\n  p[Pa]  : {0:3.2f}'.format(p[b][time]) + '\n  U[m/s] : {0:3.2f}'.format(magU[b][time]) + '\n'
	text1.Text = tmpTxt
	SaveScreenshot(pngDir+'/'+ figName + '_{0:04d}.png'.format(n), renderView1, ImageResolution=viewSize)
	n += 1
このように最初にデータフレームとして読み込んでおくことで最後の各時刻書き出しの際に数値を呼び出せるようになっています。これによって毎回圧力と速度の平均値をText1の一部として描画しています。
(c) checkMeshした際の情報
先程登場したsubprocessを使えばcheckMeshの結果を呼び出すこともできます。
import subprocess

checkMeshLines = subprocess.check_output('checkMesh').split('\n')
checkMesh = {}
tmpDict = {}
title = ''
nowLoading = False
for l in checkMeshLines:
    if nowLoading:
        if l == '':
            checkMesh[title] = tmpDict
            tmpDict = {}
            nowLoading = False
        elif title == 'Geometry':
            if l.find('Overall domain bounding box') > -1:
                tmpDict['boundaryBox'] = l.replace('Overall domain bounding box','').strip()
            elif l.find('Boundary openness') > -1:
                tmpDict['boundaryOpenness'] = l.replace('Boundary openness','').replace('OK.','').strip()
            elif l.find('Max cell openness =') > -1:
                tmpDict['maxCellOpenness'] = l.replace('Max cell openness =','').replace('OK.','').strip()
            elif l.find('Max aspect ratio = ') > -1:
                tmpDict['maxAspectRatio'] = l.replace('Max aspect ratio = ','').replace('OK.','').strip()
            elif l.find('Minimum face area') > -1:
                s = l.replace('    Minimum face area = ','').replace('. Maximum face area ','').replace('.  Face area magnitudes OK.','').split('=')
                tmpDict['minFaceArea'] = float(s[0].strip())
                tmpDict['maxFaceArea'] = float(s[1].strip())
            elif l.find('Min volume =') > -1:
                s = l.replace('Min volume =','').replace('. Max volume','').replace('.  Total volume','').replace('.  Cell volumes OK.','').split('=')
                tmpDict['minVolume'] = float(s[0].strip())
                tmpDict['maxVolume'] = float(s[1].strip())
                tmpDict['totalVolume'] = float(s[2].strip())
            elif l.find('Mesh non-orthogonality') > -1:
                s = l.replace('Mesh non-orthogonality Max:','').split('average:')
                tmpDict['maxNonOrthogonality'] = float(s[0].strip())
                tmpDict['meanNonOrthogonality'] = float(s[1].strip())
            elif l.find('Max skewness =') > -1:
                tmpDict['maxSkewness'] =float(l.replace('Max skewness =','').replace('OK.','').strip())
        elif title == 'Mesh stats':
            s = l.split(':')
            tmpDict[s[0].strip()] = int(s[1].strip())
    if l == 'Mesh stats':
        title = 'Mesh stats'
        tmpDict = {}
        nowLoading = True
    elif  l == 'Checking geometry...':
        title = 'Geometry'
        tmpDict = {}
        nowLoading = True

foamProperties = 'Solver : ' + controlDict['application'] + '\n'
if controlDict['writeControl'] == 'adjustableRunTime':
    foamProperties += 'adjustableRunTime\nmaxCourantNo : ' + '{0:.1f}'.format(controlDict['maxCo']) + '\n'
else:
    foamProperties += 'deltaT : ' + '{0:.2e}'.format(controlDict['deltaT']) + '\n\n'

foamProperties += 'Mesh Properties\n'
for key in ['cells','faces','boundary patches']:
    foamProperties += '  ' + key + ' : ' + str(checkMesh['Mesh stats'][key]) + '\n'
for key in ['totalVolume','minVolume','maxSkewness','maxAspectRatio','maxNonOrthogonality']:
    foamProperties += '  ' + key + ' : ' + str(checkMesh['Geometry'][key]) + '\n'

text2.Text = foamProperties
checkMeshの出力は文字列ですので抽出してやる必要が有りますが、上のように頑張って取り出すと以下のように辞書型に収めることができます。
{'Geometry': {'boundaryBox': '(0 -0.21 0) (0.22 0.21 0.02)',
  'boundaryOpenness': '(-1.57306e-17 2.95789e-17 8.86696e-17)',
  'maxAspectRatio': '1',
  'maxCellOpenness': '1.05879e-16',
  'maxFaceArea': 1.6e-05,
  'maxNonOrthogonality': 0.0,
  'maxSkewness': 5.24499e-14,
  'maxVolume': 6.4e-08,
  'meanNonOrthogonality': 0.0,
  'minFaceArea': 1.6e-05,
  'minVolume': 6.4e-08,
  'totalVolume': 0.000248},
 'Mesh stats': {'boundary patches': 4,
  'cell zones': 0,
  'cells': 3875,
  'face zones': 0,
  'faces': 13200,
  'faces per cell': 6,
  'internal faces': 10050,
  'point zones': 0,
  'points': 5616}}
3.2.3. まとめ
この辺を全部ひっくるめて出力した動画が以下のようになります。
4. おまけ
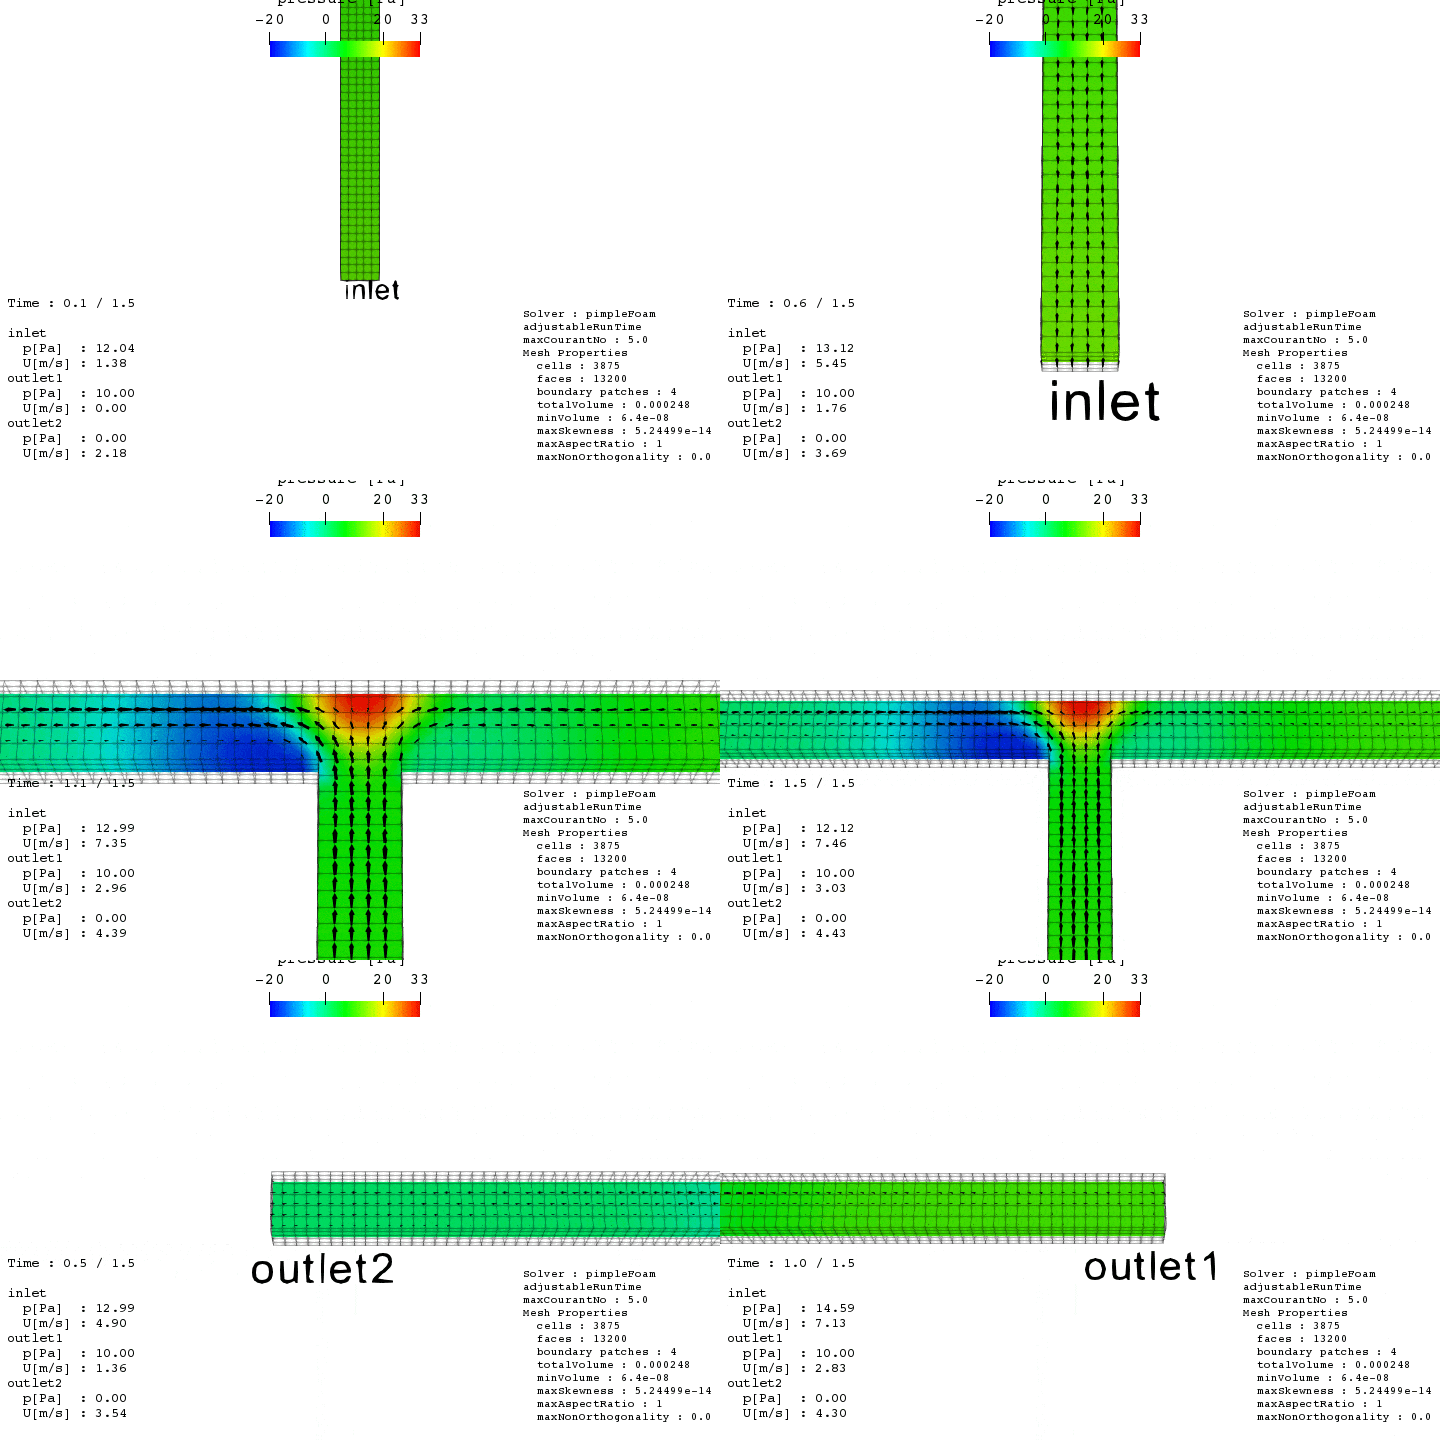
こちらの記事でも紹介がありますように、Pythonの中でカメラの移動などを行うことができます。これを各時刻で処理することでアングルの変わる動画を作成することができます。
スクリプトは上記GitHubのmove.pyです。
センスが無いせいかなんか酔いますね。

