Vonageアドベントカレンダーあとから記事追加組です
25日が埋まっていたので適当に開いていた日付に入れました
理想の会議記録とは
打合せが終わったら、録音記録と会話内容のテキストとその要約文が存在する。個人的な理想の会議記録はこれだと思っています。
今回は、VonageのVideo API (+認証のためにVonage SMS API)を使用して、この参加者別の録音記録を取得するところまでを実装します。
録音記録のところまでなのは、参加者別の音声さえ取得できれば、あとは無発声時間ごとに切り出し、発言開始時間ごとにソートしてGCPのSpeech-to-Text等のサービスに食わせれば記録のテキスト化などの見込みが付くからです。
環境
node.js: v18.12.1
Nextjs の環境作成
Nextjs利用者にはいつもおなじみcreate-next-appを実行します。
npx create-next-app --ts
importを楽にしたいので、tsconfig.jsonに追加します
{
  "compilerOptions": {
+   "baseUrl": ".",
    "target": "es5",
    "lib": ["dom", "dom.iterable", "esnext"],
    "allowJs": true,
    "skipLibCheck": true,
    "strict": true,
    "forceConsistentCasingInFileNames": true,
    "noEmit": true,
    "esModuleInterop": true,
    "module": "esnext",
    "moduleResolution": "node",
    "resolveJsonModule": true,
    "isolatedModules": true,
    "jsx": "preserve",
    "incremental": true
  },
  "include": ["next-env.d.ts", "**/*.ts", "**/*.tsx"],
  "exclude": ["node_modules"]
}
tailwind cssの追加
tailwindcssを導入したいのでライブラリを以下のコマンドで追加しinit
yarn add -D tailwindcss postcss autoprefixer
npx tailwindcss init -p
initで生成された設定ファイルを修正
/** @type {import('tailwindcss').Config} */
module.exports = {
  content: [
    "./pages/**/*.{js,ts,jsx,tsx}",
    "./components/**/*.{js,ts,jsx,tsx}",
  ],
  theme: {
    extend: {},
  },
  plugins: [],
}
styles/の下にある全体のcssファイルに追記
@tailwind base;
@tailwind components;
@tailwind utilities;
(オプション) Vonage SMS APIを用いた認証機能の設置
好き放題ぼこすか会議URLを生成されたくないので、Vonage SMS APIとSupabaseを用いたパスワードレスな認証を実装します。
ドキュメントはこちら
ただし、微妙に関数や返り値が異なったりなどがあるので一応手順を追って進めます。
Vonageのアカウントを作成
アドベントカレンダーに貼ってあったリンクから作成できます
注意点として、認証で必要になるのはVideo API 以外のAPI アカウントの作成の方です。
Video APIの方はまた別のタイミングで作成します。
supabaseアカウント作成
Supabaseはfirebase的なBaaSです。
こちらを利用すると認証が楽に実装できます。
こちらのヘッダーからアカウントを作成
今回は余裕で無料分におさまるので、課金は気にしなくてよいです。
作成後、プロジェクトを作成しダッシュボード画面の左にあるSQL EditorからQuick start > user management starterを選択し実行します。
SupabaseのVonage SMS有効化
ダッシュボード左の人のアイコンAuthentication > Providers と進むと各種認証方法の有効化画面が出ます。
電話のアイコンのPhoneをクリックし、SMS ProviderからVonageを選択
VonageのAPIKeyやAPI Secretなどを入力することを求められるので、コピペしていきます。
コピペ後、Vonage From (SMS受信時に表示される名前)に適当な文字列を入力してsAVEし有効化すれば準備は完了です。
認証画面の作成
ファイル名や場所は何でもいいですが、例えば/pages/auth.tsx等作成し認証画面を実装します。
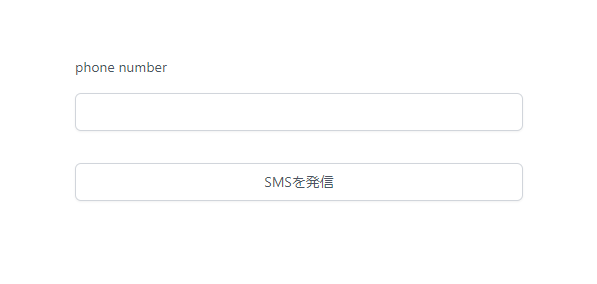
まずは入力フォーム
認証の手順として、電話番号入力 -> 届いたSMSのコード入力という順を取るので、出しわけのためのuseStateを一つとフォームが二つ、あとは送信ボタンが一つ必要です。
デザインは横着したいので@supabase/uiを使用します。
# supabase uiの追加 (通常の<input />などでも実装できるのでなくてもよい)
yarn add @supabase/ui
import { Input } from "@supabase/ui";
import { NextPage } from "next";
import { useState } from "react";

const Auth: NextPage = () => {
  const [isAuth, setIsAuth] = useState(false);
  const [phone, setPhone] = useState("");
  const [code, setCode] = useState("");

  const handleSubmit = async (e) => {
    e.preventDefault();
  };
  return (
    <div>
      <form onSubmit={handleSubmit}>
        {isAuth ? (
          <Input
            value={code}
            label="SMS code"
            onChange={(e) => setCode(e.target.value)}
          />
        ) : (
          <Input
            value={phone}
            label="phone number"
            onChange={(e) => setPhone(e.target.value)}
          />
        )}
        <Input type="submit" value={isAuth ? "認証" : "SMSを発信"} />
      </form>
    </div>
  );
};

export default Auth;

不格好なのでcssを追加します。
import { Input } from "@supabase/ui";
import { NextPage } from "next";
import { useState } from "react";

const Auth: NextPage = () => {
  const [isAuth, setIsAuth] = useState(false);
  const [phone, setPhone] = useState("");
  const [code, setCode] = useState("");

  const handleSubmit = async (e) => {
    e.preventDefault();
  }
  return (
-    <div
+    <div className="min-h-screen h-full w-full flex items-center">
      <form
        onSubmit={handleSubmit}
+        className="w-full max-w-sm md:max-w-md mx-auto flex flex-col gap-8"
      >
        {isAuth ? (
          <Input
            value={code}
            label="SMS code"
            onChange={(e) => setCode(e.target.value)}
+            className="w-full"
          />
        ) : (
          <Input
            value={phone}
            label="phone number"
            onChange={(e) => setPhone(e.target.value)}
+            className="w-full"
          />
        )}
        <Input type="submit" value={isAuth ? "認証" : "SMSを発信"} />
      </form>
    </div>
  );
};

export default Auth;
ここから先には supabaseによる認証が必要なので、以下のコマンドで認証関係のライブラリを追加してpages/_app.tsxを書き換えます
yarn add @supabase/auth-helpers-nextjs @supabase/auth-helpers-react @supabase/supabase-js
import '../styles/globals.css'
import type { AppProps } from 'next/app'
import { createBrowserSupabaseClient } from "@supabase/auth-helpers-nextjs";
import { SessionContextProvider, Session } from "@supabase/auth-helpers-react";
import { useState } from 'react';


function MyApp({
  Component,
  pageProps,
}: AppProps<{
  initialSession: Session;
}>) {
  // Create a new supabase browser client on every first render.
  const [supabaseClient] = useState(() => createBrowserSupabaseClient());

  return (
    <SessionContextProvider
      supabaseClient={supabaseClient}
      initialSession={pageProps.initialSession}
    >
      <Component {...pageProps} />
    </SessionContextProvider>
  );
}

export default MyApp
これで認証が楽にできるようになります。
pages/_app.tsxが変更されていることを確認したら、supabaseにVonageを使用してSMSを送るよう処理を追加します
追加する箇所はフォームの送信ボタンをクリックすると発火するhandleSubmit関数です
+ import { createBrowserSupabaseClient } from "@supabase/auth-helpers-nextjs";
+ import { useRouter } from "next/navigation";

const Auth: NextPage = () => {
// ...
+ const supabaseClient = createBrowserSupabaseClient();
+ const router = useRouter();
  const handleSubmit = async (e) => {
    e.preventDefault();
+   if (isAuth) {
+      let { data, error } = await supabaseClient.auth.verifyOtp({
+        phone: `81${phone}`,
+        token: code,
+        type: "sms",
+      });
+      if (data) {
+        router.refresh();
+      }
+    } else {
+      const { error } = await supabaseClient.auth.signInWithOtp({
+        phone: `81${phone}`,
+      });
+      if (!error) {
+        setIsAuth(true);
+      }
    }
  };
処理の流れとしては、
-
supabaseClient.auth.signInWithOtpでSMSを発信 - 無事に送信できていれば isAuthの値をsetIsAuthを利用して書き換えることで 表示を切り替え
- code入力後
supabaseClient.auth.verifyOtpで電話番号と合わせて送信 - 問題なければページを再読み込み
という形になります。
APIで渡す際、電話番号の頭に81とついているのは、国別のprefix codeです。日本の番号の場合は81になっています。
今回の場合直書きしていますが、本当はユーザーの入力にドロップダウン等で含ませた方がよいです。
あとは、認証状態であれば/にリダイレクトするようuseEffectを書けば完了です。
// ...
const Auth: NextPage = () => {
  const supabaseClient = createBrowserSupabaseClient();
  const router = useRouter();
+ const user = useUser();

// ...
  const [code, setCode] = useState("");

+  useEffect(() => {
+    if (user) router.push("/");
+  }, [user]);

  const handleSubmit = async (e) => {
// ...
完成後のコードはこんな感じ。
import { createBrowserSupabaseClient } from "@supabase/auth-helpers-nextjs";
import { useUser } from "@supabase/auth-helpers-react";
import { Input } from "@supabase/ui";
import { NextPage } from "next";
import { useRouter } from "next/navigation";
import { useEffect, useState } from "react";

const Auth: NextPage = () => {
  const supabaseClient = createBrowserSupabaseClient();
  const router = useRouter();
  const user = useUser();

  const [isAuth, setIsAuth] = useState(false);
  const [phone, setPhone] = useState("");
  const [code, setCode] = useState("");

  useEffect(() => {
    if (user) router.push("/");
  }, [user]);

  const handleSubmit = async (e) => {
    e.preventDefault();
    if (isAuth) {
      let { data, error } = await supabaseClient.auth.verifyOtp({
        phone: `81${phone}`,
        token: code,
        type: "sms",
      });
      if (data) {
        router.refresh();
      }
    } else {
      const { error } = await supabaseClient.auth.signInWithOtp({
        phone: `81${phone}`,
      });
      if (!error) {
        setIsAuth(true);
      }
    }
  };
  return (
    <div className="min-h-screen h-full w-full flex items-center">
      <form
        onSubmit={handleSubmit}
        className="w-full max-w-sm md:max-w-md mx-auto flex flex-col gap-8"
      >
        {isAuth ? (
          <Input
            value={code}
            label="SMS code"
            onChange={(e) => setCode(e.target.value)}
            className="w-full"
          />
        ) : (
          <Input
            value={phone}
            label="phone number"
            onChange={(e) => setPhone(e.target.value)}
            className="w-full"
          />
        )}
        <Input type="submit" value={isAuth ? "認証" : "SMSを発信"} />
      </form>
    </div>
  );
};

export default Auth;
ちなみに、SMSの送信料が0.07€ (10円弱) かかるので連打には気を付けましょう。
VonageのVideo APIを使って会議画面を作成
Vonageのアカウントを作成
アドベントカレンダーに貼ってあったリンクから作成できます
今度はVideo APIの方です。
実装について
/session/createにアクセスすると、Web会議用のURLを/session/<uuid>形式でを発行するようにします。
Web会議には、VonageのAPI KeyとSession ID, tokenが必要です。
これらのうちsession idとtokenをNext.jsのAPI Routeの中で作成し、これらを画面側に渡します。
同じ部屋に入るためにsession idとtokenを共有する必要があるのですが、これをURLに含ませるとあまりにもURLが長くなるので、カギとなるuuidを生成し、API RouteでDB等にsession IDなどと合わせて引き渡す処理が必要です。
今回は、テストなのでDB役にjson-serverを置いてfetchしています。
以後、json-serverへの接続にはdbClientという関数を利用して接続するので、参考にする場合はdbClientの実装を任意のDB向けに書き換えてください。
ちなみに、dbClientの内容は以下の通りです。
import axios from "axios";

export const dbClient = axios.create({
  baseURL: "http://localhost:8000", // json-serverの稼働先
});
axiosのbaseURLをjson-serverに向けているだけのお手軽処理です。
また、原則としてサーバーサイド側のVideo API関連の処理は、Node.jsのSDKではなくREST APIを利用します。その方がリプレース時なんかに他言語に展開しやすいためです。
ただ、サーバーサイド側の処理で一か所だけどうしようもない場所があったのでそこだけ利用しています。
Vonage Video APIの認証を解決する
ドキュメントはこちら
まず、Vonage Video APIを叩きに行くclientを作成します。
これを作成しておくと、認証関連の時にヘッダー等を毎度設定しなくて済むためです。
Vonage Video APIを叩くためには、X-OPENTOK-AUTHヘッダーにSeacret Keyを鍵としてHS256で署名した以下の内容のJWTを含む必要があります。
{
    "iss": "your_api_key",
    "ist": "project",
    "iat": current_timestamp_in_seconds, # 作成日時 (sec)
    "exp": expire_timestamp_in_seconds, # 有効期限 (sec)
    "jti": "jwt_nonce" # uniqな文字列 (option)
}
jwtの署名に利用できる各言語のライブラリはこちらを参照してください。
Node.jsではjsonwebtokenを利用することが一般的なので、今回はこちらを利用します。
yarn add jsonwebtoken
jtiに必要なランダムな文字列の作成には、組み込みのcryptoを使用します。
import axios from "axios";
import { sign } from "jsonwebtoken";
import { randomUUID } from "crypto";

const apiKey = process.env.API_KEY;
const seacretKey = process.env.SEACRET;

export const opentokServerClient = () => {
  const baseJson = {
    iss: apiKey,
    ist: "project",
    iat: Math.floor(Date.now() / 1000),
    exp: Math.floor(Date.now() / 1000) + 60,
    jti: randomUUID(),
  };
  const authJWT = sign(baseJson, seacretKey, { algorithm: "HS256" });
  return axios.create({
    baseURL: "https://api.opentok.com/",
    headers: {
      "X-OPENTOK-AUTH": authJWT,
    },
  });
};
これで、あとはVonage Video APIへの接続のたびにこの関数を実行することで、毎度の認証の手間をなくします。
Session IDとtokenとそれらと結びつくkeywordの作成
Session IDの作成 -> Session IDを使ってtokenを生成 -> それらを保管し呼び出せるkeywordの作成、という手順を取ります。
これらの処理は、Next.jsのAPI Routeに実装します。
まず、sessionID と token とapikeyとURLに使うkeywordを返すエンドポイントを作成します。
パスは/api/opentok/createとします。
import type { NextApiRequest, NextApiResponse } from "next";

type Data = {
  sessionId: string;
  token: string;
  apiKey: string;
  keyword: string;
};

const handler = async (req: NextApiRequest, res: NextApiResponse<Data>) => {
    res
      .status(200)
      .json({ sessionId, token, apiKey: process.env.API_KEY, keyword });
  } catch (error) {
    console.error(error);
    res.status(400);
  }
};
export default handler;
APIKeyだけはもうわかっているので先に返してしまいます。
次にSessionIDを取得します。
先に作成したVideo API用のクライアントを使用します。
// ...
const handler = async (req: NextApiRequest, res: NextApiResponse<Data>) => {
+ const client = opentokServerClient();
+   const { data } = await client.post(
+     "/session/create",
+     {
+       "archiveMode": "manual",
+       "p2p.preference": "disabled",
+     },
+     {
+       headers: {
+         "Content-Type": "application/x-www-form-urlencoded",
+         Accept: "application/json",
+       },
+     }
+   );
  res
      .status(200)
      .json({ sessionId, token, apiKey: process.env.API_KEY, keyword });
// ...
SessionIDを生成してくれるエンドポイントは/session/createです。
archiveModeとp2p.preferenceは録画の実行等にかかってくる値です。今回は個人ごとの録画を行いたいので、これらの値を設定します。
この時のレスポンスは配列となっているので気を付ける必要があります。
次にtokenを生成します。
ここについてはREST APIで解決できそうになかったので、ライブラリを使用しています。
yarn add opentok
opentokライブラリは Video APIにおけるサーバーサイド側のSDKです。
こんな感じで利用します。
import OpenTok from "opentok";
const opentok = new OpenTok(process.env.API_KEY, process.env.SEACRET);
const token: string = opentok.generateToken(sessionId);
importして初期化して、generateTokenに先ほど発行したsession idを渡すだけで大丈夫です。
あとは、Keywordを認証のためにクライアントを生成する関数を作成した箇所で使ったものと同じ関数でランダム文字列を生成し、keywordとして設定してストレージに保存します。
    const keyword: string = randomUUID();
    dbClient.post("/list", { token, keyword, sessionId });
以上で処理は完了です。
一通り書くとこんな感じになります。
import type { NextApiRequest, NextApiResponse } from "next";
import { randomUUID } from "crypto";
import { opentokServerClient } from "libs/opentokServerClient";
import { dbClient } from "libs/dbClient";
import OpenTok from "opentok";
const opentok = new OpenTok(process.env.API_KEY, process.env.SEACRET);

type Data = {
  sessionId: string;
  token: string;
  apiKey: string;
  keyword: string;
};

const handler = async (req: NextApiRequest, res: NextApiResponse<Data>) => {
  const client = opentokServerClient();
  try {
    const { data } = await client.post(
      "/session/create",
      {
        "archiveMode": "manual",
        "p2p.preference": "disabled",
      },
      {
        headers: {
          "Content-Type": "application/x-www-form-urlencoded",
          Accept: "application/json",
        },
      }
    );
    const sessionId: string = data[0].session_id;
    const token: string = opentok.generateToken(sessionId);
    const keyword: string = randomUUID();
    dbClient.post("/list", { token, keyword, sessionId });
    res
      .status(200)
      .json({ sessionId, token, apiKey: process.env.API_KEY, keyword });
  } catch (error) {
    console.error(error);
    res.status(400);
  }
};
export default handler;
あとはgetServerSidePropsでこれを叩く画面側の処理を実装すればURL発行画面が完成です。
import type { InferGetServerSidePropsType, NextPage } from "next";
import Head from "next/head";
import { apiClient } from "libs/apiClient";
import Link from "next/link";

type Props = InferGetServerSidePropsType<typeof getServerSideProps>;

const Home: NextPage<Props> = (props) => {
  return (
    <div>
      <main>
        <Link href={`/session/${props.keyword}`}>Link</Link>
      </main>
    </div>
  );
};

export const getServerSideProps = async () => {
  const {
    data: { apiKey, sessionId, token, keyword },
  } = await apiClient.get("/api/opentok/create");
  return {
    props: { apiKey, sessionId, token, keyword },
  };
};

export default Home;
/session/createに遷移すると、会議用URLが発行されます。
会議画面を作る
/session/<uuid>のようなURLにアクセスすることで会議画面を開けるようにします。
Session ID等の取得
画面を作るには、先に作成したエンドポイントでDBに保存したデータを取得する処理を実装して画面までSessionID等を持ってくる必要があります。
getServerSidePropsで実装しても良いですが、せっかくなのでこれらもAPI routeから叩いてくる形にしましょう。
とはいってもやることは非常にシンプルなので
import type { NextApiRequest, NextApiResponse } from "next";
import { dbClient } from "libs/dbClient";

type Data = {
  sessionId: string;
  token: string;
  apiKey: string;
};

const handler = async (req: NextApiRequest, res: NextApiResponse<Data>) => {
  try {
    const { keyword } = req.query
    const { data } = await dbClient.get(`/list?keyword=${keyword}`)
    const { token, sessionId } = data[0]
    res.status(200).json({ sessionId, token, apiKey: process.env.API_KEY });
  } catch (error) {
    console.error(error);
    res.status(400);
  }
};
export default handler;
これだけで終わりです。
URLからreq.queryでKeywordを取得し、そのKeywordでDBからデータを取得する。それだけのすごいシンプルな処理となっています。
あとはこれをVideo画面のgetServerSidePropsで使用するだけです。
import type {
  GetServerSidePropsContext,
  InferGetServerSidePropsType,
  NextPage,
} from "next";
import Head from "next/head";
import dynamic from "next/dynamic";
import { apiClient } from "libs/apiClient";
import styles from "styles/SessionKeyword.module.css";

const OT = dynamic(() => import("components/opentok"), {
  ssr: false,
});

const SessionKeyword: NextPage<InferGetServerSidePropsType<typeof getServerSideProps>> = (
  props
) => {
  return (
    <div className={styles.gray}>
      <Head>
        <title>{props.keyword}</title>
        <meta name="description" content="Generated by create next app" />
        <link rel="icon" href="/favicon.ico" />
      </Head>

      <main>
        <OT {...props} />
      </main>
    </div>
  );
};

export const getServerSideProps = async ({
  query,
}: GetServerSidePropsContext<Props>) => {
  const { keyword } = query;
  if (!keyword)
    return {
      redirect: {
        destination: "/",
        permanent: false,
      },
    };
  const {
    data: { apiKey, sessionId, token },
  } = await apiClient.get(`/api/opentok/${keyword}`);
  return {
    props: { apiKey, sessionId, token, keyword: `${keyword}` },
  };
};

export default SessionKeyword;
画面実装の箇所に関しては別のコンポーネントに切り出しています。
これは、処理の切り分けという意味もありますが、VideoAPIのクライアント側のライブラリである@opentok/clientがreact向けの実装をされておらず、グローバルオブジェクトであるwindowを触っているため、そのままimportするとエラーで怒られるからです。
そのあたりは別途記事にしたのでこちらを読んでもらえると助かります。
Web会議画面のコンポーネント
基本的にドキュメントにあったHTML, JSをReact向けに若干読み替えて使用しています。
import { FC, useState } from "react";
import OT from "@opentok/client";
import styles from "styles/Opentok.module.css";
import { apiClient } from "libs/apiClient";

type Props = {
  apiKey: string;
  sessionId: string;
  token: string;
  keyword: string;
};

export const Opentcok: FC<Props> = ({ apiKey, sessionId, token, keyword }) => {
  const [isVideo, setIsVideo] = useState(false);

  const handleError = (error: any) => {
    if (error) {
      alert(error.message);
    }
  };
  const initializeSession = () => {
    var session = OT.initSession(apiKey, sessionId);
    // Subscribe to a newly created stream
    session.on("streamCreated", async function (event) {
      } catch (error) {
        console.error(error);
      }
      session.subscribe(
        event.stream,
        "subscriber",
        {
          insertMode: "append",
        },
        handleError
      );
    });

    // Create a publisher
    var publisher = OT.initPublisher(
      "publisher",
      {
        insertMode: "append",
      },
      handleError
    );

    // Connect to the session
    session.connect(token, function (error) {
      // If the connection is successful, initialize a publisher and publish to the session
      if (error) {
        handleError(error);
      } else {
        session.publish(publisher, handleError);
      }
    });
  };

  const onClickStart = () => {
    setIsVideo(true);
    setTimeout(() => {
      initializeSession();
    }, 10);
  };

  return (
    <>
      {isVideo ? (
        <>
        <div id="videos" className={styles.video}>
          <div id="subscriber" className={styles.subscriber}></div>
          <div id="publisher" className={styles.publisher}></div>
        </div>
        </>
      ) : (
        <button onClick={onClickStart}>start video</button>
      )}
    </>
  );
};

export default Opentcok;
違いとしては、開いた瞬間に画面が出るのではなく、一度ボタンをクリックする段階を挟んだことです。
これは、初期化関数であるinitializeSessionをそのまま書くと、実行時にイベントの追加先である"subscriber"などが存在せずにエラーを吐くためです。
useEffectを使用すればクリックの手間をなくせますが、GoogleMeetやTeamsなどは一度待機画面を出すようにしているので、それらに倣った方がよいと考えました。
ちなみに、もしuseEffectを使用する場合、通常だと開発環境では2度useEffect(()=>{},[])が実行される関係で画面が倍に増えるという面白現象が起こります。(windowに直接足しているので)
prod環境ではそのあたりの問題は発生しないので見なかったことにして大丈夫です。参考にする人は気を付けてください。
ともあれ、CSSきちんと書いていないのであまりきれいではないですが、無事に表示されます。
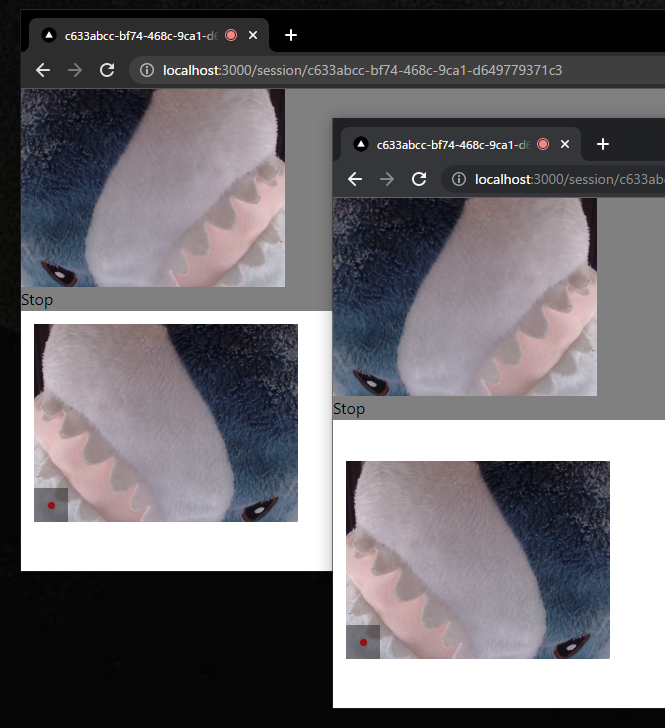
IKEAのサメかわいいですね。
Video APIで作ったWeb会議を録音する
録画もできますが、今回の趣旨的に不要なので録音します。
といってもやることは簡単で、sessinonのStreamCreated(会議参加者が2人以上になったタイミングで発火するイベント)で録画をスタートさせる処理を走らせるだけです。
    session.on("streamCreated", async function (event) {
+     try {
+       await apiClient.post("/api/opentok/recode", {
+         keyword,
+       });
+     } catch (error) {
+       console.error(error);
+     }
      session.subscribe(
        event.stream,
        "subscriber",
        {
          insertMode: "append",
        },
        handleError
      );
    });
ついでに画面終了ボタンを追加して、録画停止機能を組み込みます
  const onClickStop = async () => {
    setIsVideo(false);
    apiClient.post("/api/opentok/recode/stop", {
      keyword,
    });
  }
あとはAPI Routeを書けば録画機能の利用は完成です。
録音開始
/v2/project/<API Key>/archive
こちらのエンドポイントに、録画に関する諸情報を渡すことで録画を開始できます。
{
    "sessionId" : "session_id",
    "hasAudio" : true,
    "hasVideo" : true,
    "layout" : {
      "type": "custom",
      "stylesheet": "the layout stylesheet (only used with type == custom)",
      "screenshareType": "the layout type to use when there is a screen-sharing stream (optional)"
    },
    "name" : "archive_name",
    "outputMode" : "composed",
    "resolution" : "640x480",
    "streamMode" : "auto"
}
今回は録音なので、動画保存のフラグであるhasVideoなどを無効にしています。
画質の指定などもここからできるのは便利ですね。
個人の音声を別々に保存するには、"outputMode" : "individual"を指定する必要があるので、それだけ忘れないようにしましょう。
レスポンスでは保存設定した対象のIDが返ってくるので、大切に保存します。
これがないと録画を止めたりダウンロードできないためです。
import type { NextApiRequest, NextApiResponse } from "next";
import { randomUUID } from "crypto";
import { opentokServerClient } from "libs/opentokServerClient";
import { dbClient } from "libs/dbClient";

const handler = async (req: NextApiRequest, res: NextApiResponse) => {
  const { keyword } = req.body;
  const { data } = await dbClient.get(`/list?keyword=${keyword}`);
  const client = opentokServerClient();
  try {
    const archived = await dbClient.get(`/archive?keyword=${keyword}`);
    if (archived.data.every((item) => item.keyword !== keyword)) {
      const {
        data: { id },
      } = await client.post(
        `/v2/project/${process.env.API_KEY}/archive`,
        {
          sessionId: data[0].sessionId,
          hasAudio: true,
          hasVideo: false,
          name: keyword,
          outputMode: "individual",
          streamMode: "auto",
          multiArchiveTag: randomUUID(),
        },
        {
          headers: {
            "Content-Type": "application/json",
          },
        }
      );
      await dbClient.post("/archive", { mediaId: id, keyword });
    }

    res.status(200);
  } catch (error) {
    console.error(error);
    res.status(400);
  }
};
export default handler;
録音終了
v2/project/<API Key>/archive/<id>/stop
このエンドポイントにPOSTすることで録画を停止できます。
中身は空でよいです。
一応、このエンドポイントを叩かなくてもしばらくすると停止します。
しますが、まあデータを少なくするためにも早く終わるに越したことはないので設定しておいて損はないです。
以下の実装では、誰か一人でも終了すれば録音が止まるようにしています。
途中退出等を見込むのであれば、もう少し実装を工夫する必要がありますね。
import type { NextApiRequest, NextApiResponse } from "next";
import { opentokServerClient } from "libs/opentokServerClient";
import { dbClient } from "libs/dbClient";

const handler = async (req: NextApiRequest, res: NextApiResponse) => {
  const { keyword } = req.body;
  const client = opentokServerClient();
  try {
    const { data } = await dbClient.get(`/archive?keyword=${keyword}`);
    await Promise.all(
      data.map(async ({ mediaId, id }) => {
        const { data } = await client.post(
          `v2/project/${process.env.API_KEY}/archive/${mediaId}/stop`
        );
        dbClient.delete(`/archive/${id}`)
        return data;
      })
    );
    res.status(200);
  } catch (error) {
    console.error(error);
    res.status(400);
  }
};
export default handler;
それでは音声を確認してみましょう。
APIを叩いて取得もできますが、今回はダウンロードした先の処理をしないのでダッシュボードから手動で取得します。
Projectを選択し、画面の下の方に行くとArchivingという項目があります。
そこでArchive listを選択すると、これまでの録画一覧が保存されています。
試しにダウンロードすると、圧縮ファイルでこのようにwebm形式のファイルが保存されていました。
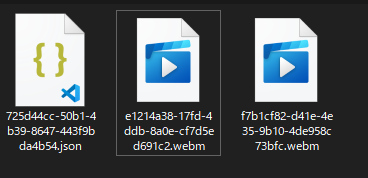
試しに聞いたところ、問題なく個別に録音されていました。
ちなみに、"outputMode" : "composed"にしていると単一の音声ファイルとして出力されます。
(オプション) Vonage SMS APIを用いた認証でsession IDの生成を阻止する
認証機能を実装していると、Next.jsのmiddlewareを使用して該当ページへのアクセスを阻止できます。
先のSupabase + Vonage SMS APIの認証で得たsessionから認証に使用した電話番号を取得し、もし'/session/create'アクセス時に取得できなかったら/にリダイレクトするという処理を書いてみました。
import { createMiddlewareSupabaseClient } from '@supabase/auth-helpers-nextjs'
import { NextResponse } from 'next/server'
import type { NextRequest } from 'next/server'

export async function middleware(req: NextRequest) {
  const res = NextResponse.next()
  const supabase = createMiddlewareSupabaseClient({ req, res })
  const {
    data: { session },
  } = await supabase.auth.getSession()

  if (session?.user.phone) {
    return res
  }

  const redirectUrl = req.nextUrl.clone()
  redirectUrl.pathname = '/'
  return NextResponse.redirect(redirectUrl)
}

export const config = {
  matcher: '/session/create',
}
この例では電話番号さえ持っていればOKとしていますが、例えばDBとつなげて特定のロールを持つ番号でなければリダイレクトさせるなんてことも当然できます。
理想の会議記録は作れそうか
思ったよりも簡単に実装できて拍子抜けといった感じでした。
この記事のためにVonage Video APIのアカウントを作成し実装を始めたのが24日の夜なので、睡眠時間を考えるとここまでの実装に20時間も経っていないです。
個別の音声データ取得まで行けたので、このままGCPに渡せばテキスト化までは行けそうです。
要約はまた別のパワーが必要ですし、音声の切り出しなんかもいろいろ苦労しそうな気配はありますが、個人別の発生記録テキスト化だけでもかなり便利そうなのは確かです。
理想の会議記録、その道筋を見いだせるだけの結果にはなったのではないでしょうか