呼称
蜂の巣に代表される六角形が敷き詰められた形状。
いろいろ呼称があるが、ここでは「ハニカム格子(Hex Map)」とする。
他には、
Hex
Honeycomb Grid
Honeycomb Lattice
Hexagonal Lattice
などがある。
最初に使われたのは1961年。
Gettysburgというボードゲームが1958年に発売され、その後1961年に再リリースした際、六角形のマップに変更されたのが、始まりと記述がある。
はじめに
正方形で構成されるグリッドは簡単だが、六角形や三角形のグリッドはちょっとややこしい。本稿では、六角形で構成されるハニカム格子の描画について紹介する。
ひとつめは、正方格子をずらす方法。これはよくやる。
ふたつめは、120°で分かれるY字状の3軸で管理する方法。
とても詳しい説明は下記参照。
見れば、何となく分かる。必須。
①正方格子をずらす方法
偶数奇数を利用して計算する。
六角形の向きが2種類あり、まず六角形の左右が垂直タイプから。
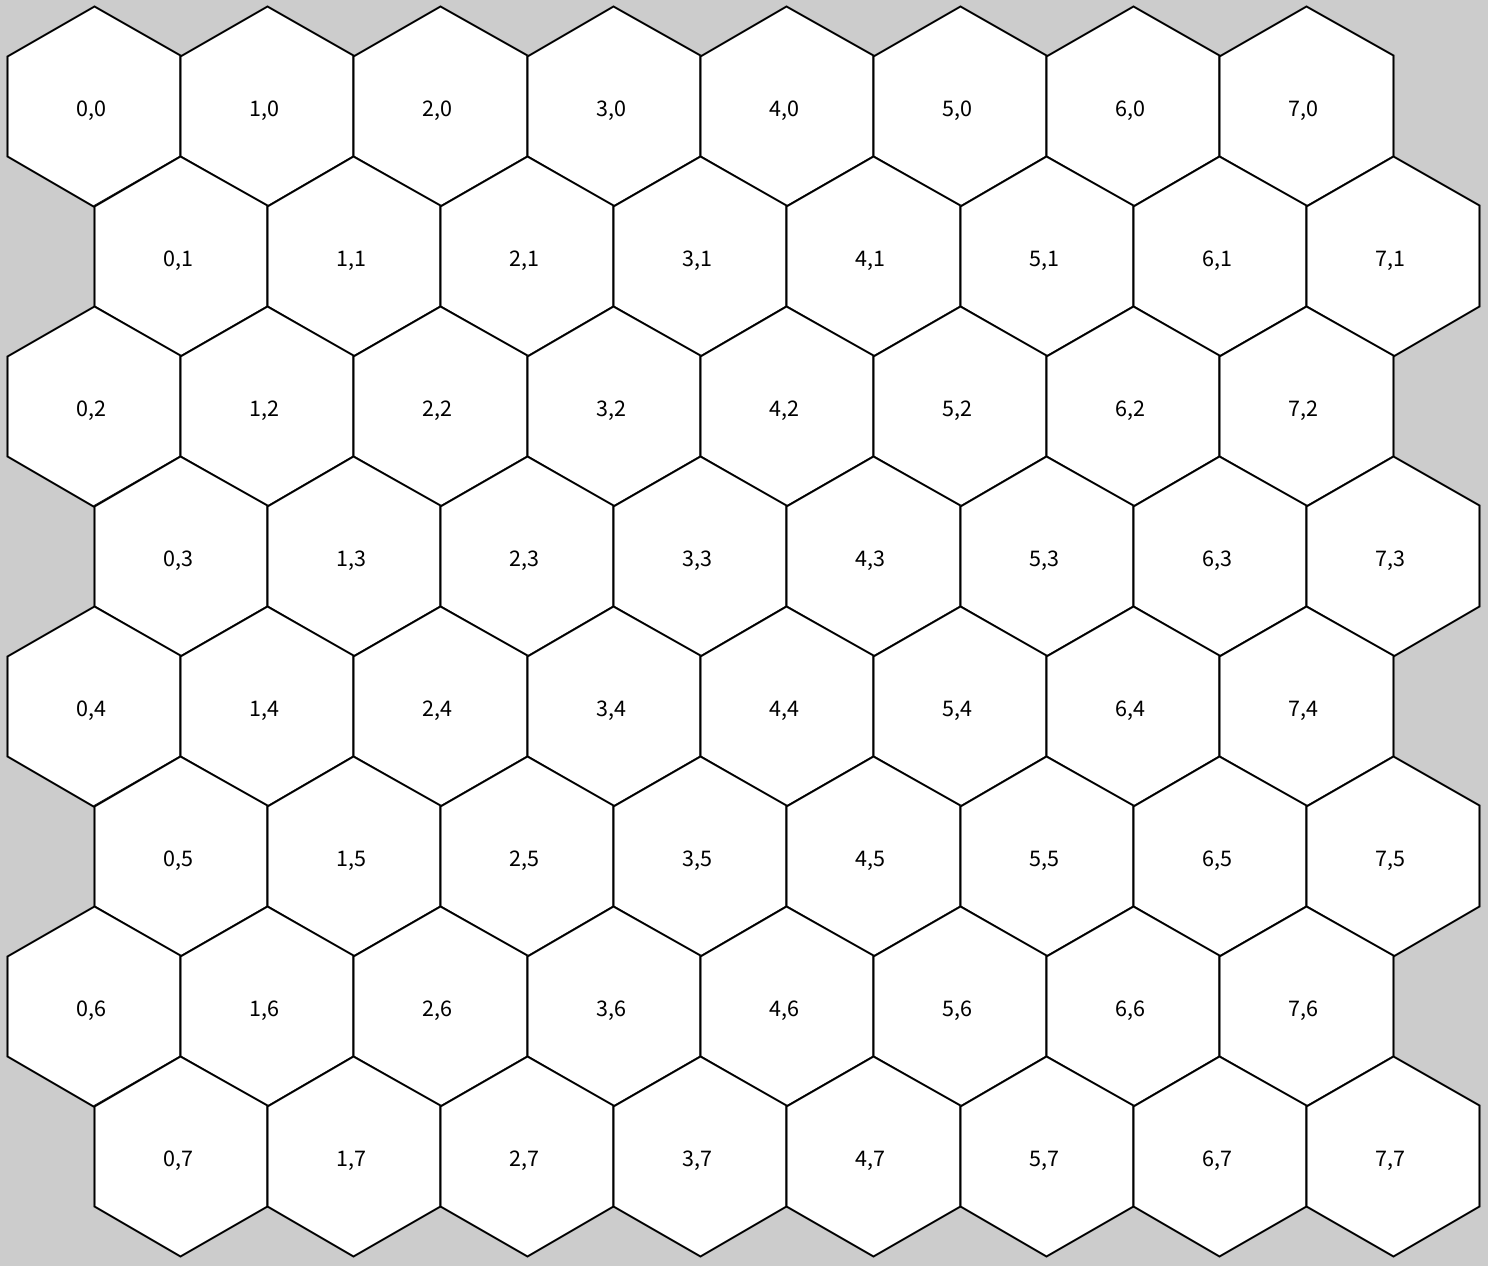
float rr = 50;
float hex_w = rr * sqrt(3);
float hex_h = rr * 1.5;

void setup() {
  size(800, 800);
  translate(100, 100);

  for (int y=0; y<8; y++) {
    for (int x=0; x<8; x++) {
      push();
      float tx = (x+0.5*(y%2)) * hex_w;
      float ty = y * hex_h;
      translate(tx, ty);
      drawHex(rr);
      fill(0);
      text(x+","+y, -10, 5);
      pop();
    }
  }
}

void drawHex(float r) {
  beginShape();
  for (int th = 30; th < 390; th+=60) {
    float x = r * cos(radians(th));
    float y = r * sin(radians(th));
    vertex(x, y);
  }
  endShape(CLOSE);
}
次に、六角形の上下が水平タイプ。
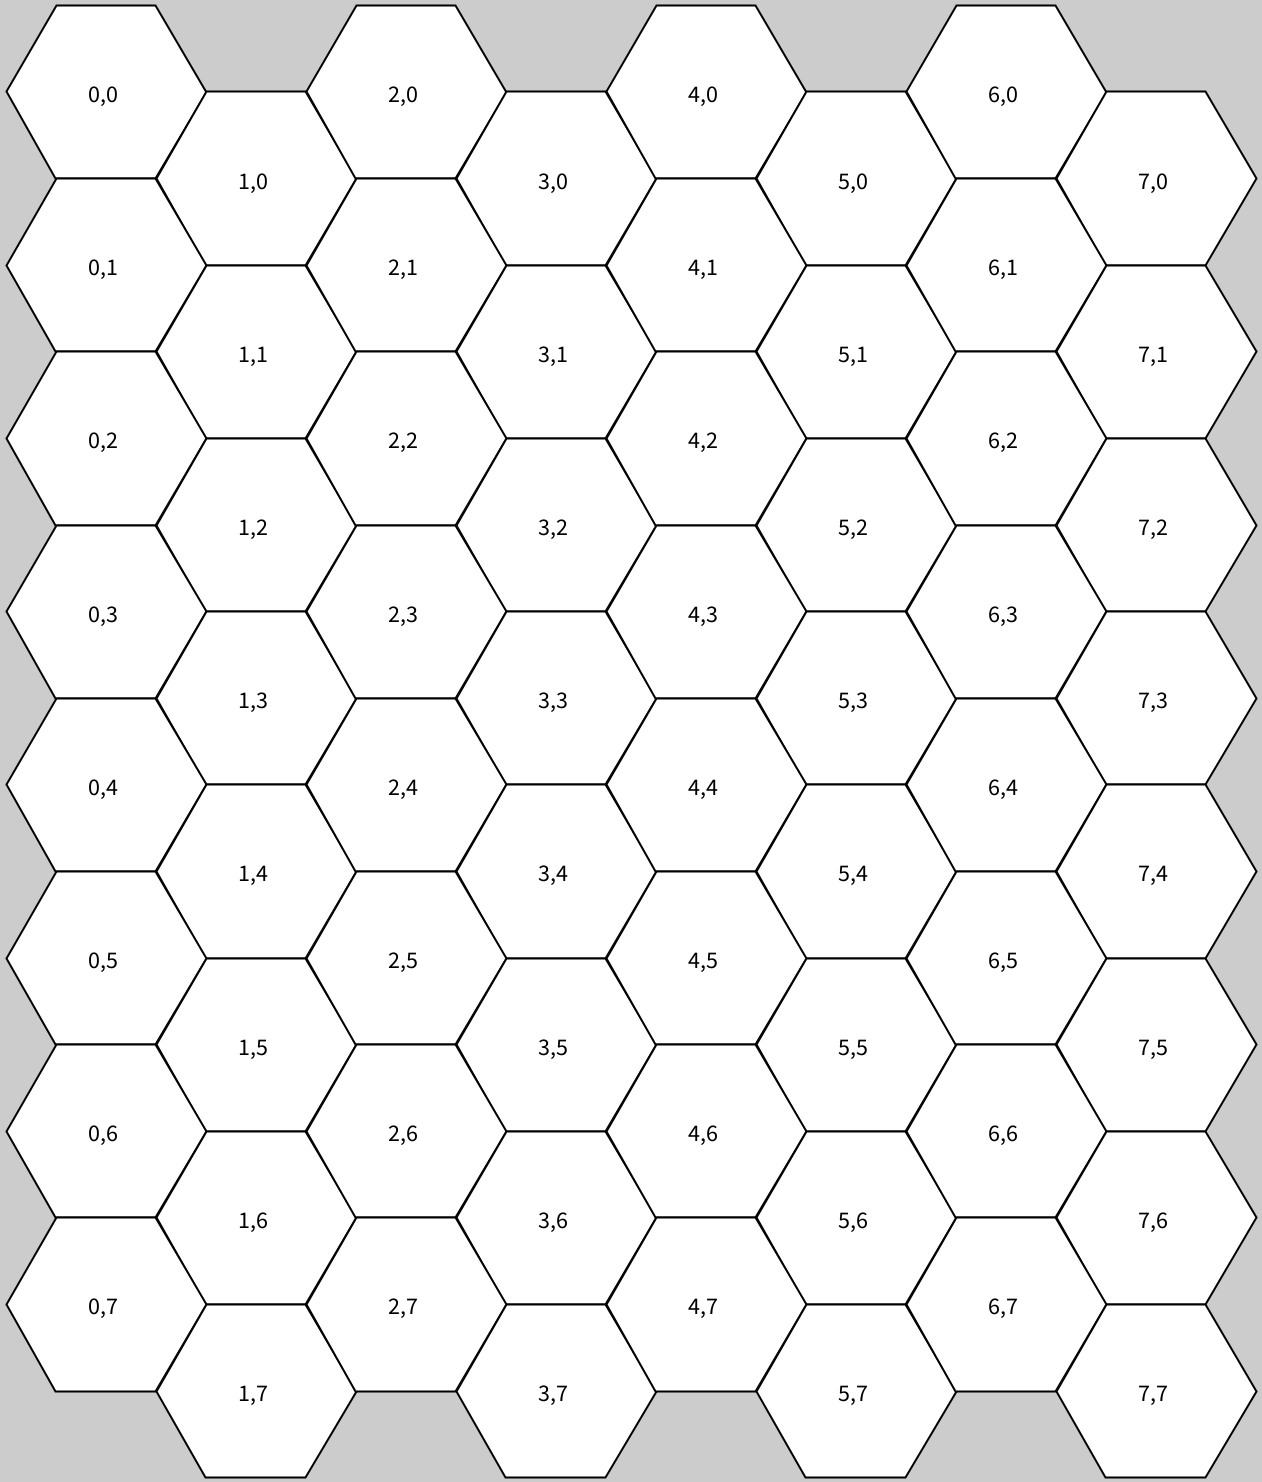
float rr = 50;
float hex_w = rr * 1.5;
float hex_h = rr * sqrt(3);

void setup() {
  size(800, 800);
  translate(100, 100);

  for (int y=0; y<8; y++) {
    for (int x=0; x<8; x++) {
      push();
      float tx = x * hex_w;
      float ty = (y+0.5*(x%2)) * hex_h;
      translate(tx, ty);
      drawHex(rr);
      fill(0);
      text(x+","+y, -10, 5);
      pop();
    }
  }
}

void drawHex(float r) {
  beginShape();
  for (int th = 0; th < 360; th+=60) {
    float x = r * cos(radians(th));
    float y = r * sin(radians(th));
    vertex(x, y);
  }
  endShape(CLOSE);
}
②Y字状の3軸で管理する方法
3つの軸をq,r,sと定義する。
q+r+s=0と定義し、s=-q-rとなる。
q,rが決まると、sが決まるので、sは不表記。
q,rのみ表記。
int R = 5; // 中心からHexの数
float rr = 30;

void setup() {
  size(800, 800);
  translate(width/2, height/2);

  // Y字座標 (q, r) を半径 R 以内で走査
  for (int q = -R; q <= R; q++) {
    int rMin = max(-R, -q - R);
    int rMax = min( R, -q + R);
    for (int r = rMin; r <= rMax; r++) {
      PVector p = hexToPixel(q, r, rr);
      push();
      translate(p.x, p.y);
      drawHex(rr);
      fill(0);
      text(q+","+r, -10, 5);
      pop();
    }
  }
}

// axial coords (q, r) を (x, y) に変換
PVector hexToPixel(int q, int r, float size) {
  float x = size * (3.0/2.0 * q);
  float y = size * (sqrt(3)/2.0 * q + sqrt(3) * r);
  return new PVector(x, y);
}

void drawHex(float r) {
  beginShape();
  for (int th = 0; th < 360; th+=60) {
    float x = r * cos(radians(th));
    float y = r * sin(radians(th));
    vertex(x, y);
  }
  endShape(CLOSE);
}