手段
Lambda は ECR のイメージからコンテナを展開し、その中の関数を使うことができます
というわけで以下のフローで実現します
- TensorFlow が使えるイメージ作成
- ECR にプッシュ
- Lambda にデプロイ
ツール
- Docker
- AWS CLI
- serverless(lambdaにデプロイするのに使います。
npm install serverlessで導入できます。)
実装
それでは実装していきましょう
イメージ作成
以下のような構成を作成します
project
├── Dockerfile
├── app.py
└── requirements.txt
Dockerfile 作成
AWS のパブリックイメージからビルドしていきます
FROM public.ecr.aws/lambda/python:3.8

COPY . ${LAMBDA_TASK_ROOT}
RUN pip install -r requirements.txt
CMD ["app.handler"]
requirements.txt 作成
python で必要になるライブラリを書いていきます
今回は TensorFlow が必要なので、こちらを記述します
必要があれば、numpy なども書いておきましょう
tensorflow==2.5.0
app.py 作成
今回は TensorFlow を動かしたいだけなので、動作確認だけします
import tensorflow as tf


def handler(event, context):
    return {
        'statusCode': 200,
        'body':
            {
                'predict': tf.__version__,
            }
    }
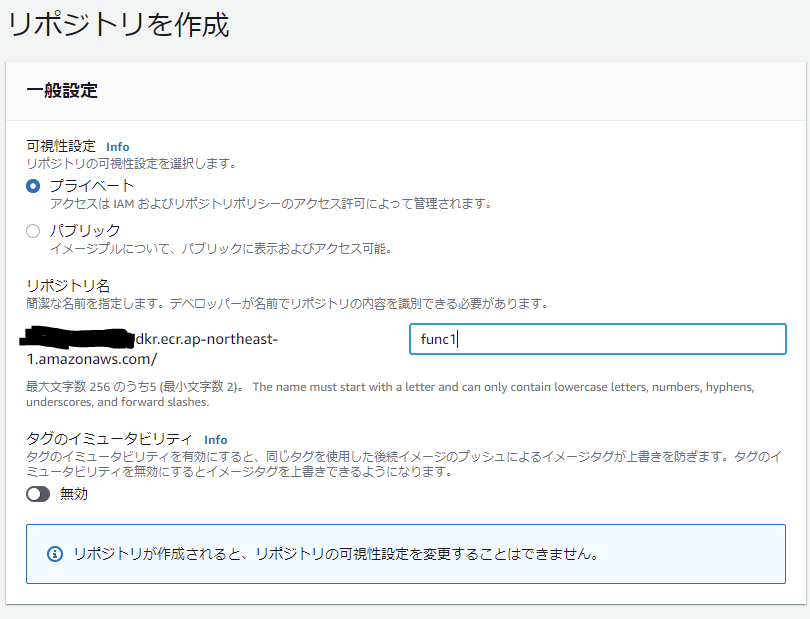
ECR にプライベートリポジトリを作成
ECR にプライベートリポジトリを作りましょう
今回は、func1 という名前のリポジトリにしました

ECR にプッシュ
まずは、パブリックイメージをプルできるように認証を得ておきます
$ aws ecr-public get-login-password --region us-east-1 | docker login --username AWS --password-stdin public.ecr.aws
次に、プライベートリポジトリにプッシュできるよう認証を得ておきます
$ aws ecr get-login-password | docker login --username AWS --password-stdin {アカウントID}.dkr.ecr.{リージョン}.amazonaws.com.
その後、イメージを作成してプッシュしましょう
プッシュすると、ダイジェストが返ってくるので控えておいてください
$ docker build -t func1 .
$ docker tag func1 {アカウントID}.dkr.ecr.{リージョン}.amazonaws.com/func1
$ docker push {アカウントID}.dkr.ecr.{リージョン}.amazonaws.com/func1
digest:  sha256:~~~~~~~~~~~~~~~~~~~~~~~~~~~~~~~~~~~~~~~~~~~~~~~~~~~~~~~~ # 控えておく
Serverless でデプロイ
serverless を使って、lambda にデプロイしていきます
serverless.yml 作成
プロジェクト配下に作成します
project
├── Dockerfile
├── app.py
├── requirements.txt
└── serverless.yml
Lambda にデプロイする際の設定を書きます
先ほど控えたダイジェストを使って、ECR にあげたイメージを指定します
service: tf-test

provider:
  name: aws
  stage: dev
  region: ap-northeast-1

functions:
  hello:
    image: {アカウントID}.dkr.ecr.{リージョン}.amazonaws.com/func1@sha256:{ダイジェスト}
    memorySize: 2048
    timeout: 180
serverless を AWS にアクセスできるようにする
serverless用に AWS の IAM ユーザーを作成しておきます
プログラムによるアクセスにチェックを入れておいてください
アクセス権限は AdministratorAccess をアタッチします
作成時に取得したアクセスキーとシークレットアクセスキーで、serverless にアクセス権限を付与します
$ serverless config credentials --provider aws --key {アクセスキー} --secret {シークレットアクセスキー}
デプロイ
以下のコマンドでデプロイ完了です!
$ serverless deploy