全体像
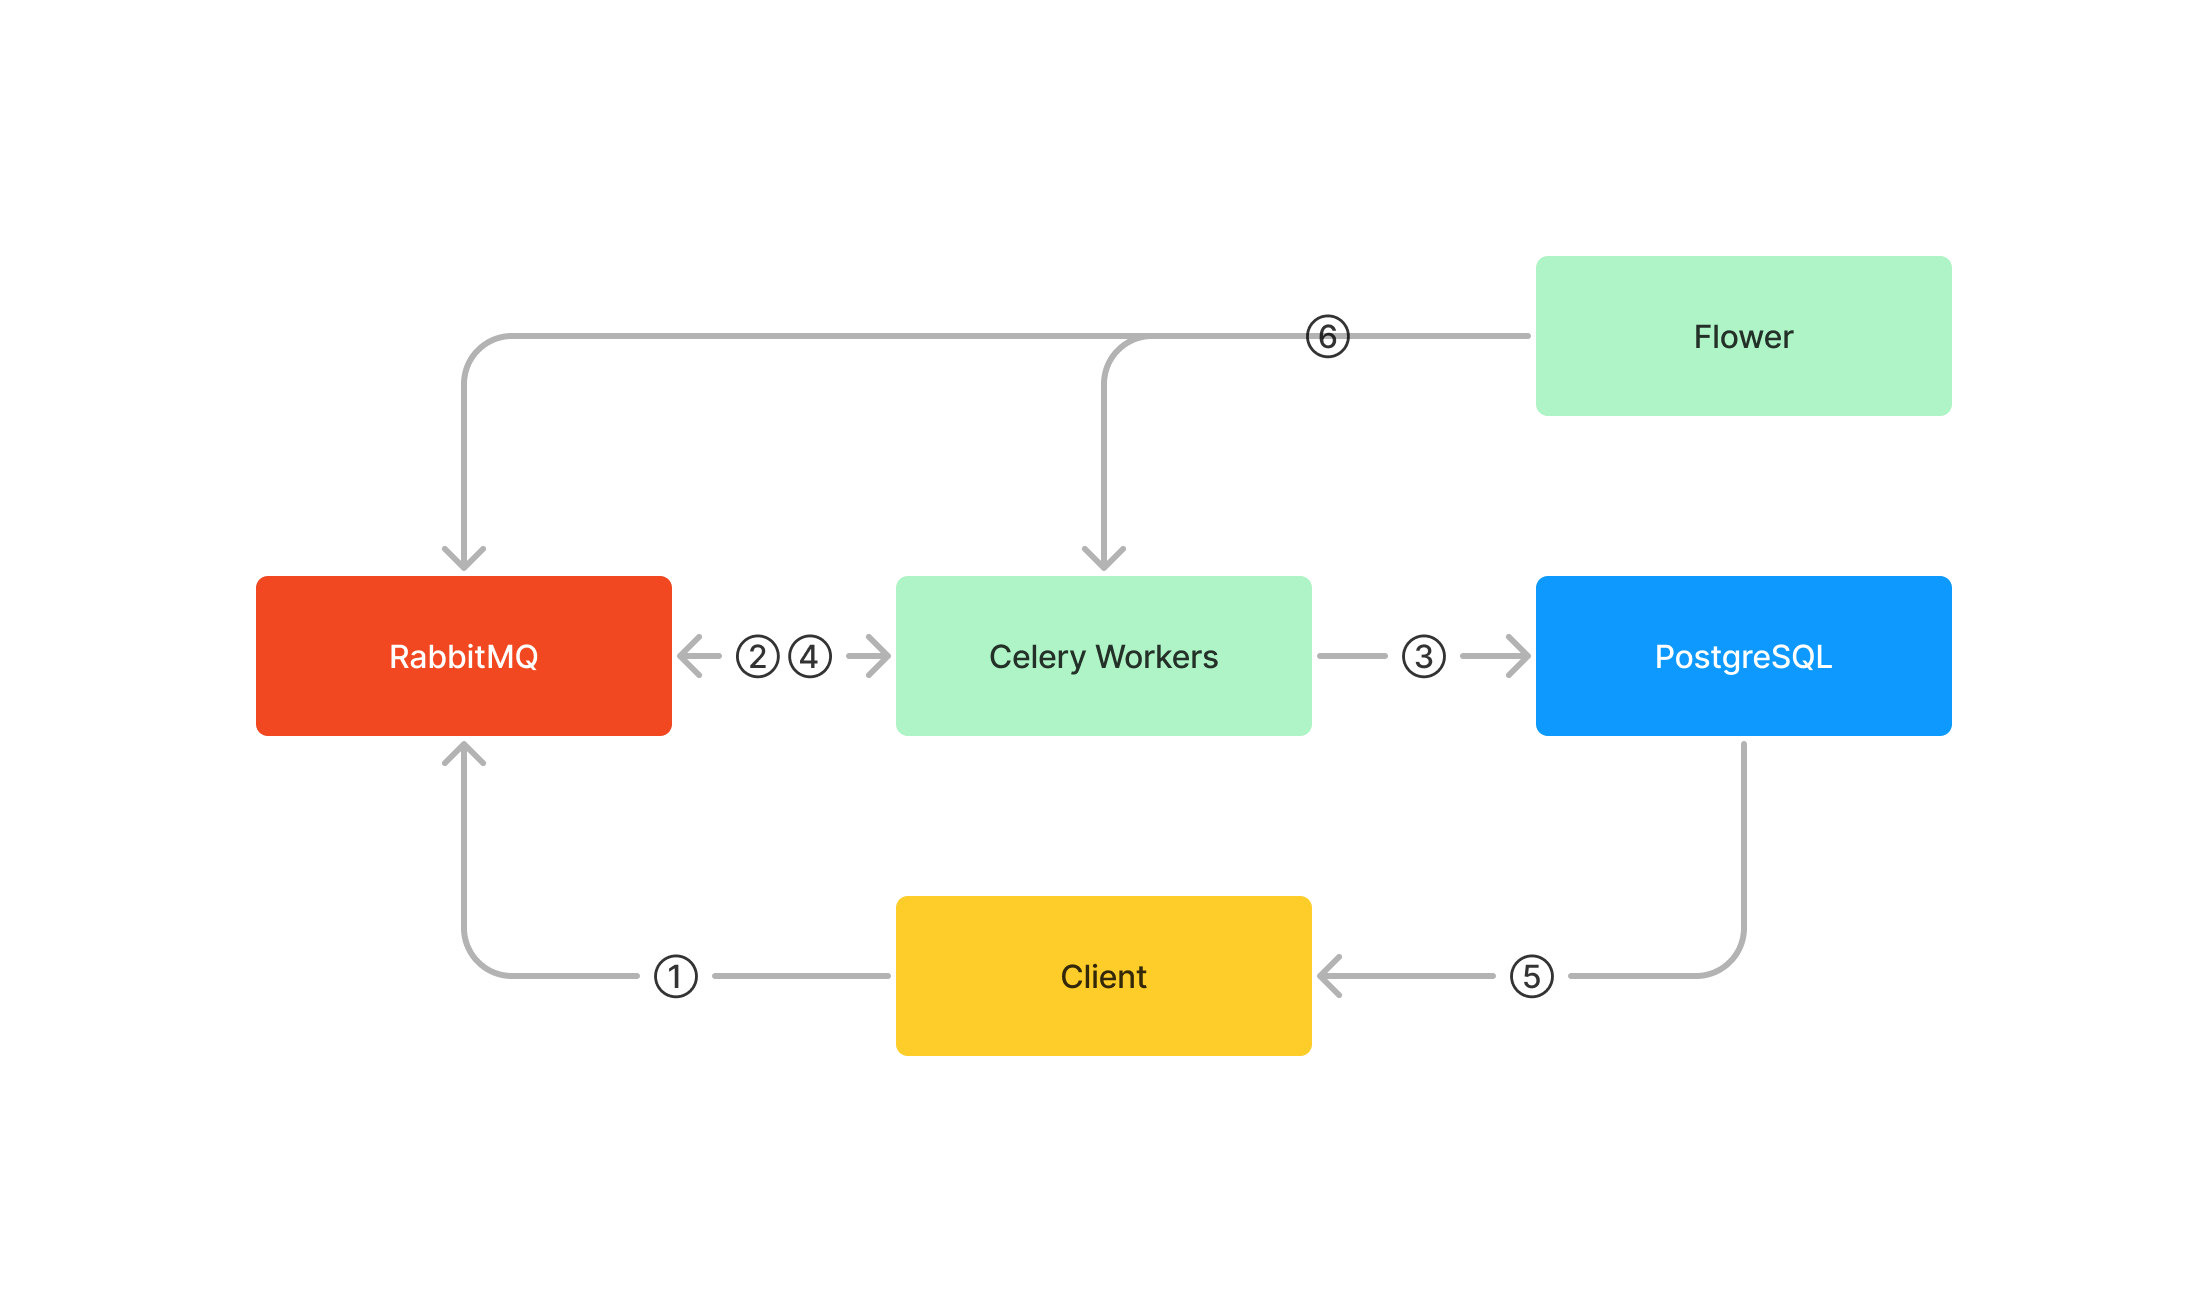
- クライアントアプリケーションはRabbitMQにタスクを登録する
- CeleryのワーカーがRabbitMQからタスクを取得し、実行
- 実行結果をPostgreSQLに保存
- 実行結果をRabbitMQに返却
- クライアントアプリケーションはPostgreSQLから実行結果を取得
- Flowerはワーカーやタスクの実行状況を監視
使用技術
RabbitMQ
- メッセージキューを実現するためのOSSで、メッセージブローカと呼ばれる
- 詳しくはDocker Composeで立てたRabbitMQにpikaで接続してみるを参照
Celery
- Pythonで非同期タスク処理を行うライブラリ
- RabbitMQ以外にもRedis等、様々なメッセージブローカに対応している
- GitHub: https://github.com/celery/celery
Flower
- Celery専用のモニタリングツール
- GitHub: https://github.com/mher/flower
PostgreSQL
- いわずもがなRDBMS
- 今回は実行結果の永続化に使用する
- 実行結果を永続化しない場合、クライアントアプリケーションから実行結果を取得できなくなる
環境構築
Docker Composeの設定
- RabbitMQとPostgreSQLのDockerコンテナを起動する
compose.yml
services:

  rabbitmq:
    image: rabbitmq:3.11.7-management
    container_name: rabbitmq
    ports:
      - 5672:5672
      - 15672:15672
    environment:
      - RABBITMQ_DEFAULT_USER=root
      - RABBITMQ_DEFAULT_PASS=password
    volumes:
      - ./docker/rabbitmq/data:/var/lib/rabbitmq

  postgresql:
    image: postgres:latest
    container_name: postgresql
    ports:
      - 5432:5432
    environment:
      - POSTGRES_DB=celery
      - POSTGRES_USER=postgres
      - POSTGRES_PASSWORD=postgres
      - PGDATA=/var/lib/postgresql/data/pgdata
    volumes:
      - ./docker/postgresql/data:/var/lib/postgresql/data
# Dockerコンテナの起動
$ docker compose up -d

# Dockerコンテナが起動していることを確認
$ docker compose ps
NAME                COMMAND                  SERVICE             STATUS              PORTS
postgresql          "docker-entrypoint.s…"   postgresql          running             0.0.0.0:5432->5432/tcp
rabbitmq            "docker-entrypoint.s…"   rabbitmq            running             0.0.0.0:5672->5672/tcp, 0.0.0.0:15672->15672/tcp

# RabbitMQに接続できることを確認
$ open http://localhost:15672

# PostgreSQLに接続できることを確認
$ psql -h localhost -p 5432 -U postgres -d celery
Password for user postgres:
psql (14.5 (Homebrew), server 15.2 (Debian 15.2-1.pgdg110+1))
WARNING: psql major version 14, server major version 15.
         Some psql features might not work.
Type "help" for help.

celery=#
ライブラリのインストール
$ pipenv install celery
$ pipenv install flower

# CeleryからPostgreSQLを操作するために必要
$ pipenv install SQLAlchemy
$ pipenv install psycopg2
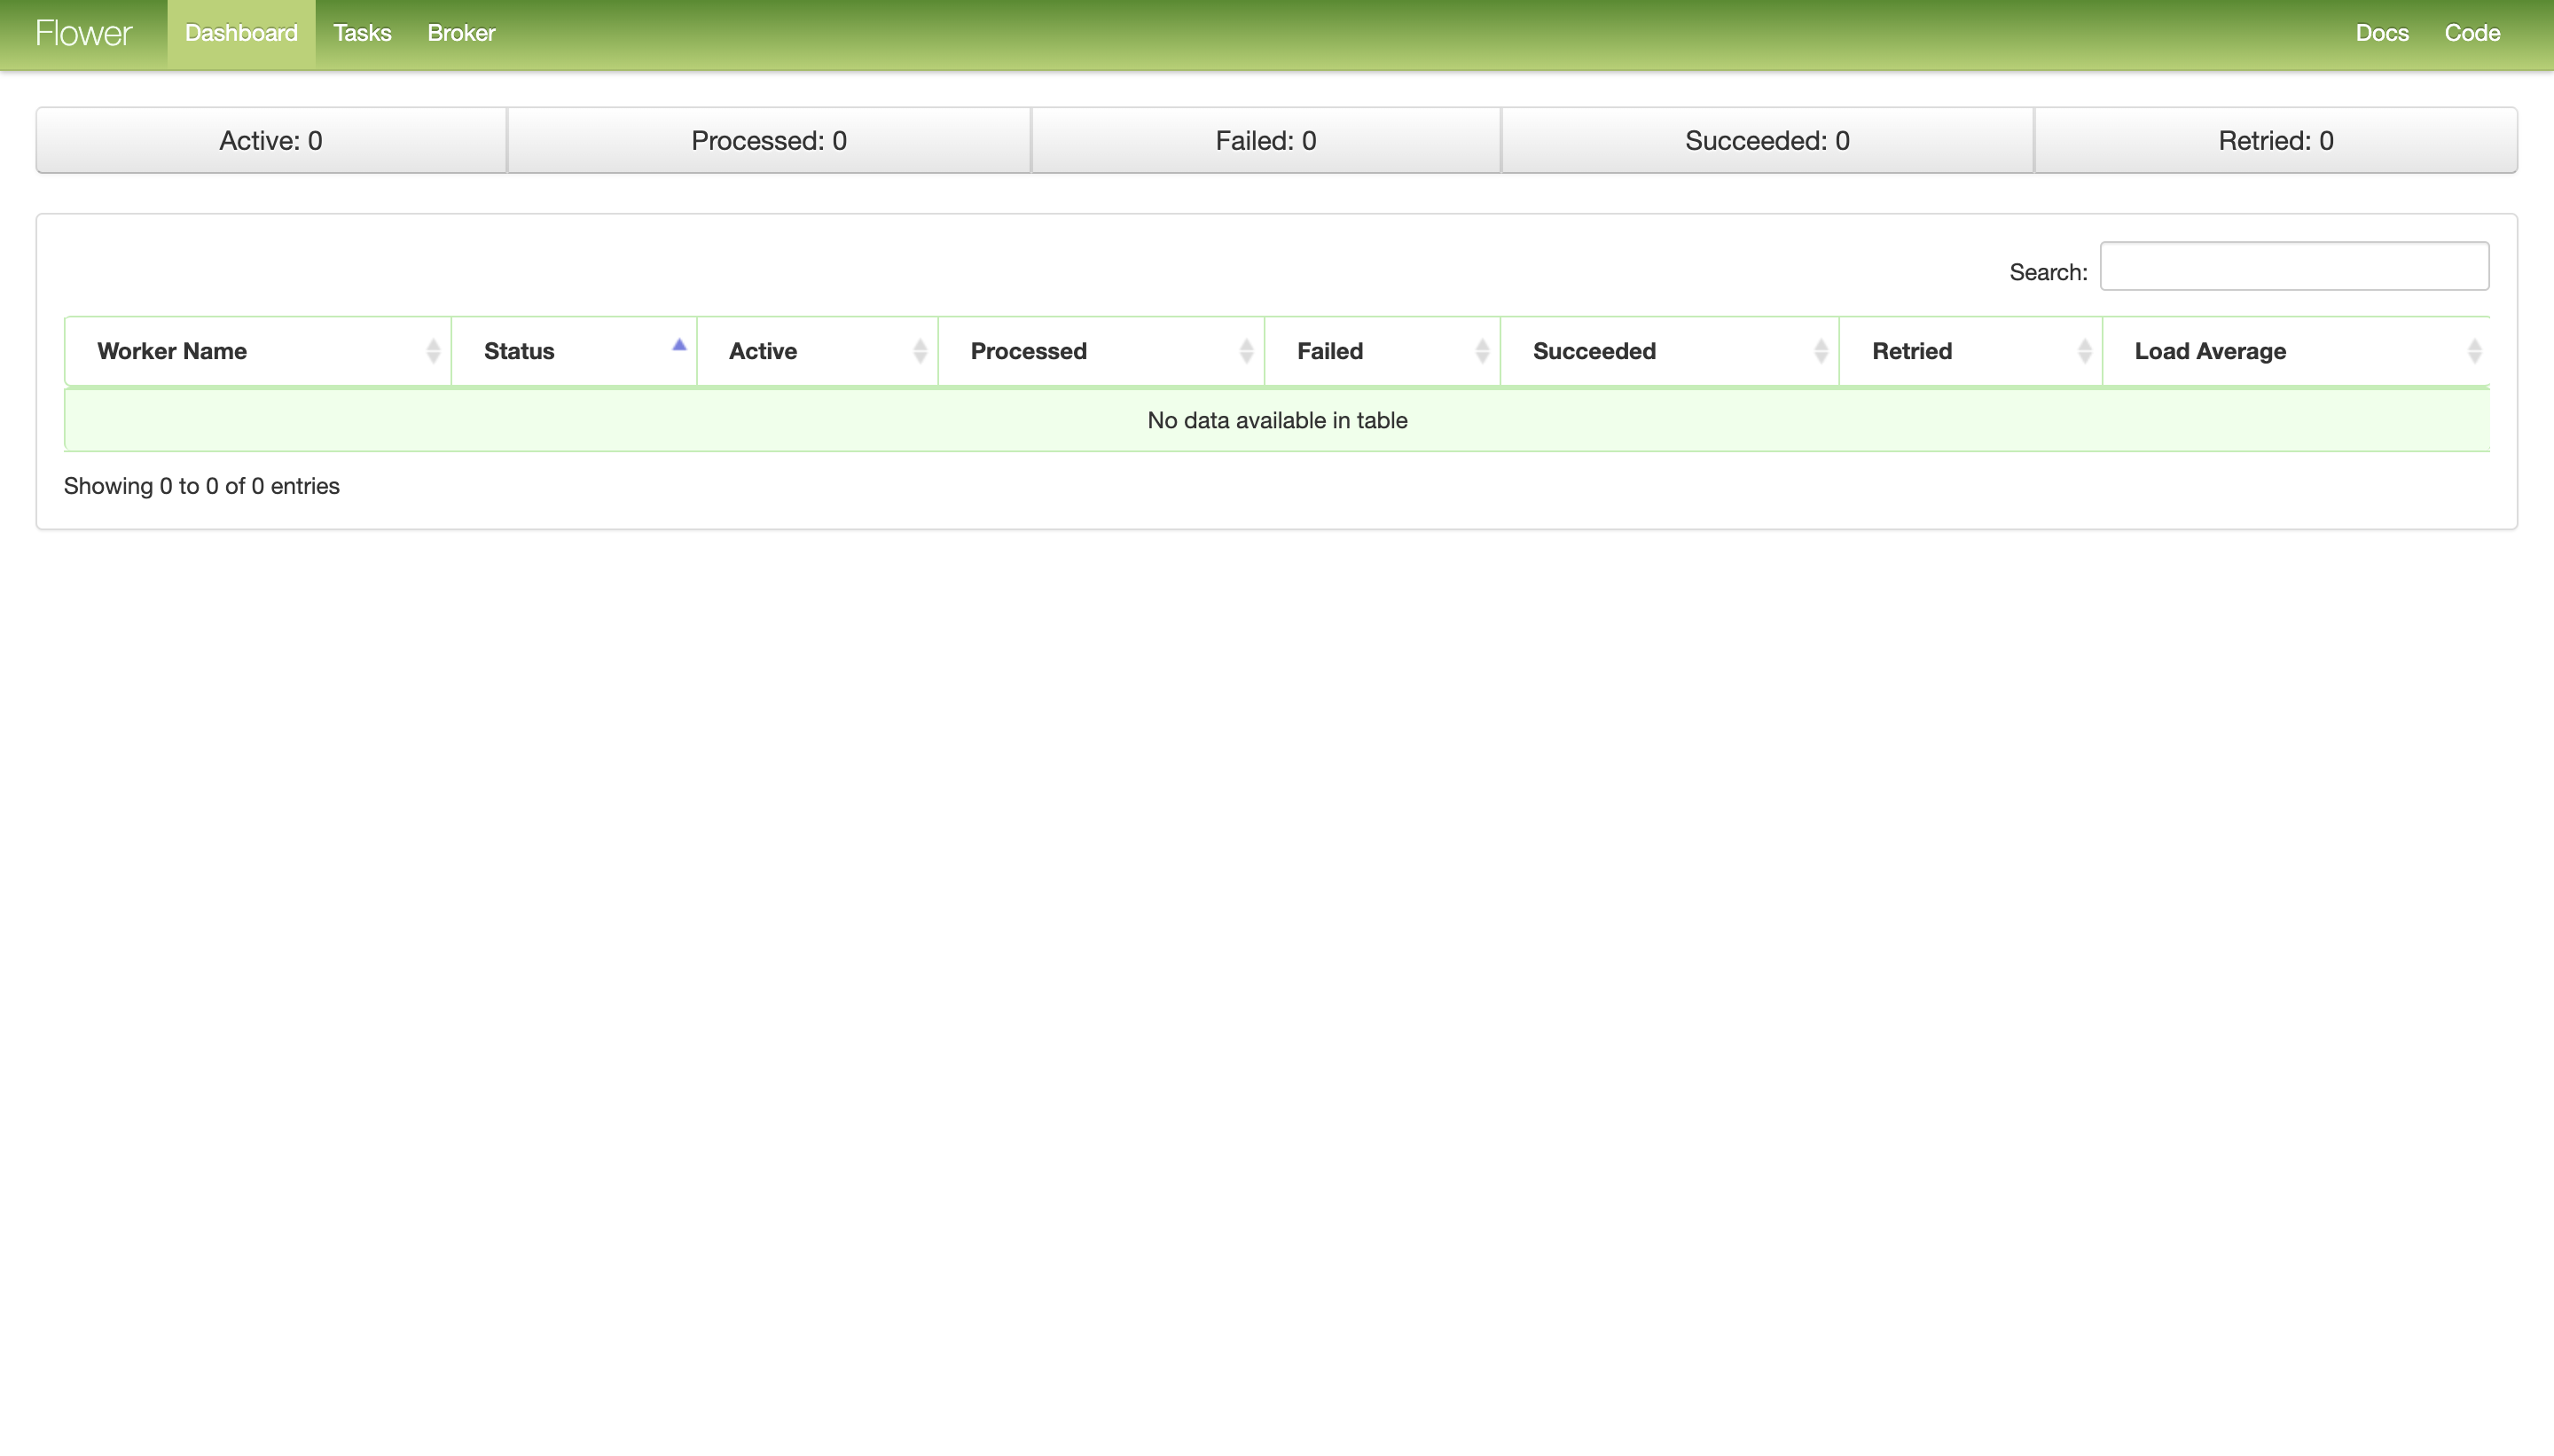
Flowerの起動
$ celery --broker=amqp://root:password@localhost:5672// flower
$ open localhost:5555
タスクの実装
tasks.py
from celery import Celery

# brokerにはRabbitMQ、backendにはPostgreSQLの接続情報を記述する
celery = Celery(
    "tasks",
    broker="amqp://root:password@localhost:5672//",
    backend="db+postgresql://postgres:postgres@localhost:5432/celery",
)

# 名前を受け取って挨拶を返すタスク
# Celery.taskデコレータを付与することで、Celeryのタスクとして登録される
@celery.task
def greet(name: str):
    return "hello, {name}!".format(name=name)
ワーカーの起動
$ celery -A tasks worker --loglevel=INFO
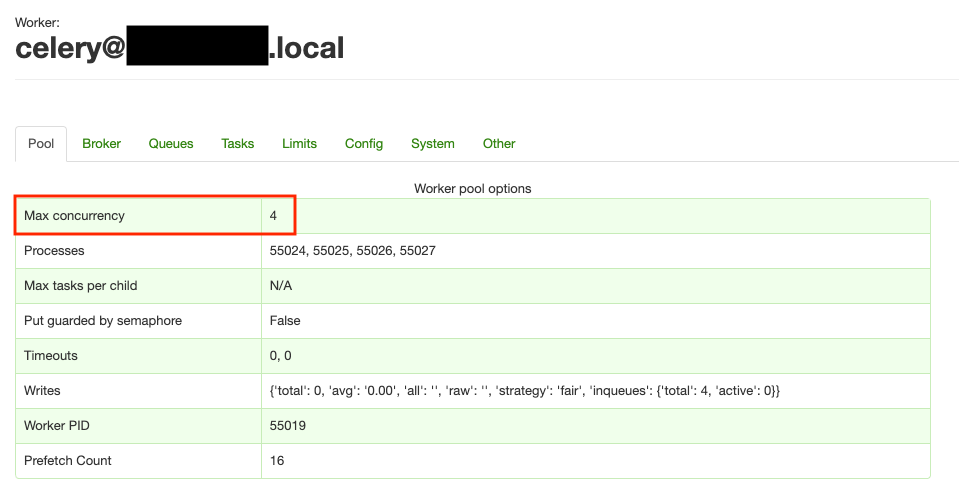
# ワーカーの並列数を指定する場合
$ celery -A tasks worker --concurrency 4 --loglevel=INFO
- ワーカーの並列数を指定した場合、Flower上の「Max concurrency」が指定した値になっている
- ちなみにデフォルトの並列数は
8
- ちなみにデフォルトの並列数は
タスクの実行
client.py
from tasks import greet

# タスクの実行
res = greet.delay("takashi")

# タスクの実行結果の取得
msg = res.get(timeout=1)
print(msg)
$ python client.py
hello, takashi!
FlowerとPostgreSQLの確認
- Flower上の「Processed」と「Succeeded」が増加している

- PostgreSQL上に実行結果を保存するテーブルが作成されている
$ psql -h localhost -p 5432 -U postgres -d celery
Password for user postgres:
psql (14.5 (Homebrew), server 15.2 (Debian 15.2-1.pgdg110+1))
WARNING: psql major version 14, server major version 15.
         Some psql features might not work.
Type "help" for help.

celery=# \dt
               List of relations
 Schema |        Name        | Type  |  Owner
--------+--------------------+-------+----------
 public | celery_taskmeta    | table | postgres
 public | celery_tasksetmeta | table | postgres
(2 rows)