タイトル通り,Windows Server 2019のHyper-Vで動かすUbuntu18.04にJupyterHub環境を構築した際の備忘録です.
Windows Server 2019でWSLやHyper-V上のUbuntu18.04にCUDA環境を構築しようとして断念
の,Hyper-V部分(Python環境構築)です.
Hyper-VでUbuntu18.04を動かすまでは
Windows Server 2019でHyper-V上にUbuntu18.04をインストール
↑こちら
はじめに
本来はDDA(Discrete Device Assignment)でHyper-V上のLinuxへGPU passthroughしたかったのですが,
Windows Server 2019でHyper-V上のUbuntu18.04にCUDA環境を構築(断念)
にある通り,無理でした.
まぁ何かしらアップデートされればいける気がするので,WSL同様にPython環境を構築していきます.
(同様にというかほぼ同じ手順です,一応どちらもUbuntu18.04なので当然ですが)
Anaconda3
WSLではせっかくGUI環境を作ったのでGUIで https://www.anaconda.com/ から落としましたが,今回は逆にCUIでいきます.
Anaconda3のインストール
2019年6月半ば時点では「2019.03」な「Anaconda3-2019.03-Linux-x86_64.sh」が最新なので,rootさんで入れる前提だと
$ cd ~/Downloads/
$ wget https://repo.anaconda.com/archive/Anaconda3-2019.03-Linux-x86_64.sh
$ sudo su
# bash Anaconda3-2019.03-Linux-x86_64.sh

Welcome to Anaconda3 2019.03

In order to continue the installation process, please review the license
agreement.
Please, press ENTER to continue
>>>
Enterを押してLicense確認して
Please answer 'yes' or 'no':'
>>> yes
インストール先を聞かれるので
Anaconda3 will now be installed into this location:
/root/anaconda3

  - Press ENTER to confirm the location
  - Press CTRL-C to abort the installation
  - Or specify a different location below

[/root/anaconda3] >>> /usr/local/lib/anaconda3
として,
PREFIX=/usr/local/lib/anaconda3
installing: python-3.7.3-h0371630_0 ...
Python 3.7.3
installing: xxx ...
そこそこ待つと
installation finished.
Do you wish the installer to initialize Anaconda3
by running conda init? [yes|no]
[no] >>>
と聞かれる.
WSLでも書きましたが,公式のFrequently asked questionsに「We do not recommend adding Anaconda to the PATH manually.」とあるのにdefaultはno(笑)
今回もrootで入れているのでnoを選び,
PyCharmをオススメされてインストール完了.
[no] >>> no

You have chosen to not have conda modify your shell scripts at all.
To activate conda's base environment in your current shell session:

eval "$(/usr/local/lib/anaconda3/bin/conda shell.YOUR_SHELL_NAME hook)"

To install conda's shell functions for easier access, first activate, then:

conda init

If you'd prefer that conda's base environment not be activated on startup,
   set the auto_activate_base parameter to false:

conda config --set auto_activate_base false

Thank you for installing Anaconda3!

===========================================================================

Anaconda and JetBrains are working together to bring you Anaconda-powered
environments tightly integrated in the PyCharm IDE.

PyCharm for Anaconda is available at:
https://www.anaconda.com/pycharm
パスを通す
WSLの時と同様に
``profile.d``へ通す作業…
echo 'export PATH="/usr/local/lib/anaconda3/bin:$PATH"' >> /etc/profile.d/anaconda.sh
>
とし,さらにrootがprofile.dを読んでくれるよう
>
```shell-session
# sudo visudo
で
# Defaults       env_reset
Defaults        env_keep += "PATH"
Defaults        mail_badpass
# Defaults       secure_path="/usr/local/sbin:/usr/local/bin:/usr/sbin:/usr/bin:/sbin:/bin:/snap/bin"
``/etc/sudoers.d/``推奨
Please consider adding local content in /etc/sudoers.d/ instead of
# directly modifying this file.
とあるので,以下のように設定した.
通常のパス
↑のechoでも良いけど,複数回追加されるのをどうしても回避できなかったので,Anacondaさんが標準でinitializeする際に追加してくれるスクリプトを書くことにした.
$ sudo vi /etc/profile.d/anaconda.sh
# export PATH="/usr/local/lib/anaconda3/bin:$PATH"

# >>> conda initialize >>>
# !! Contents within this block are managed by 'conda init' !!
__conda_setup="$('/usr/local/lib/anaconda3/bin/conda' 'shell.bash' 'hook' 2> /dev/null)"
if [ $? -eq 0 ]; then
    eval "$__conda_setup"
else
    if [ -f "/usr/local/lib/anaconda3/etc/profile.d/conda.sh" ]; then
        . "/usr/local/lib/anaconda3/etc/profile.d/conda.sh"
    else
        export PATH="/usr/local/lib/anaconda3/bin:$PATH"
    fi
fi
unset __conda_setup
# <<< conda initialize <<<
最初の1行はただの元のechoのexportの残骸です.
sudoでのパス
前述の通り/etc/sudoersは触らずに/etc/sudoers.d/へ
$ sudo visudo -f /etc/sudoers.d/anaconda3
などと作成し,/etc/sudoersのsecure_pathに/usr/local/lib/anaconda3/binを追加したもので置き換えてあげる.
Defaults secure_path="/usr/local/sbin:/usr/local/bin:/usr/sbin:/usr/bin:/sbin:/bin:/snap/bin:/usr/local/lib/anaconda3/bin"
とする.
(visudoだと.tmpを編集して構文チェックかけてから本体に保存するんですね.)
ちなみに/etc/sudoersのsecure_pathに+=的な事が出来ないかと調べましたが,無理そうです.
rootでのパス
↑でsudoはできるけどsudo suで通らないので.bashrcに追記.
$ sudo su
# cat /etc/profile.d/anaconda.sh >> ~/.bashrc
パスが通ったか確認
ここまで来たらログインし直して
$ conda --version
conda 4.6.11
$ sudo conda --version
conda 4.6.11
$ sudo su
# conda --version
conda 4.6.14
こんなノリでcondaが使える事を確認.
ちなみに一人で使うだけだったりユーザが各自で入れるのであればyesにして
``modified /home/(user_name)/.bashrc``
[no] >>> yes
WARNING: The conda.compat module is deprecated and will be removed in a future release.
no change     /usr/local/lib/anaconda3/condabin/conda
no change     /usr/local/lib/anaconda3/bin/conda
no change     /usr/local/lib/anaconda3/bin/conda-env
no change     /usr/local/lib/anaconda3/bin/activate
no change     /usr/local/lib/anaconda3/bin/deactivate
no change     /usr/local/lib/anaconda3/etc/profile.d/conda.sh
no change     /usr/local/lib/anaconda3/etc/fish/conf.d/conda.fish
no change     /usr/local/lib/anaconda3/shell/condabin/Conda.psm1
no change     /usr/local/lib/anaconda3/shell/condabin/conda-hook.ps1
no change     /usr/local/lib/anaconda3/lib/python3.7/site-packages/xonsh/conda.xsh
no change     /usr/local/lib/anaconda3/etc/profile.d/conda.csh
modified      /home/(user_name)/.bashrc

==> For changes to take effect, close and re-open your current shell. <==

If you'd prefer that conda's base environment not be activated on startup,
   set the auto_activate_base parameter to false:

conda config --set auto_activate_base false

Thank you for installing Anaconda3!

===========================================================================

Anaconda and JetBrains are working together to bring you Anaconda-powered
environments tightly integrated in the PyCharm IDE.

PyCharm for Anaconda is available at:
https://www.anaconda.com/pycharm
# >>> conda initialize >>>
# !! Contents within this block are managed by 'conda init' !!
__conda_setup="$('/usr/local/lib/anaconda3/bin/conda' 'shell.bash' 'hook' 2> /dev/null)"
if [ $? -eq 0 ]; then
    eval "$__conda_setup"
else
    if [ -f "/usr/local/lib/anaconda3/etc/profile.d/conda.sh" ]; then
        . "/usr/local/lib/anaconda3/etc/profile.d/conda.sh"
    else
        export PATH="/usr/local/lib/anaconda3/bin:$PATH"
    fi
fi
unset __conda_setup
# <<< conda initialize <<<
こんな感じの文言が追加される.
(はい,以上が寝ぼけてsudo bashした上にyesにしてしまった際のログです,結果的に↑でパス通す時に役立った笑)
そして,パスが2回追加される現象がどうしても回避できなくて調べている間に
zsh(やshやbash)でパス系環境変数の重複を除去する
優秀な後輩くんの記事とか発見した笑
JupyterHub環境の構築
WindowsでJupyterHubを使いたくて始めたことなのでここが本番.
JupyterHubのインストール
$ sudo conda install jupyterhub
途中でconda 4.6.11-py37_0 --> 4.6.14-py37_0とcondaのバージョン上げるねって言われたりしつつ,インストール完了後
$ sudo jupyterhub --no-ssl
と叩き,Firefoxとかで http://localhost:8000/ にアクセスして
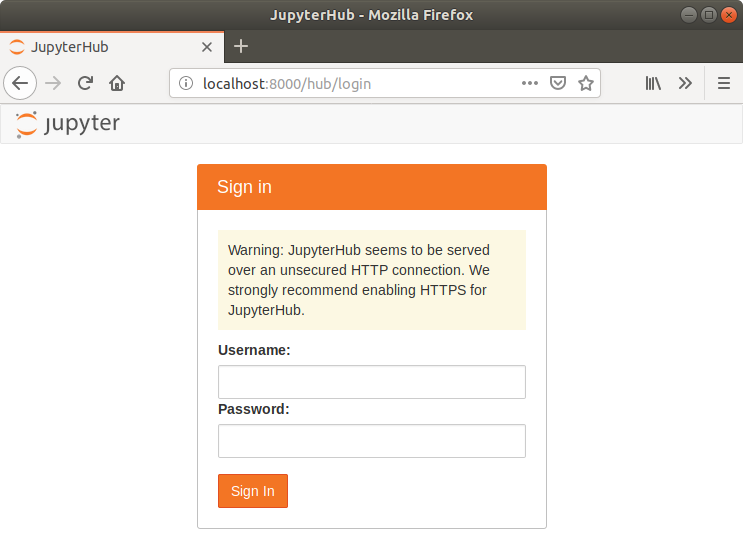
こんなログイン画面が出ればとりあえずOK.
一応ログインもしてみると,http://localhost:8000/user/(user_name)/treeというURLになり,ログインしたユーザのhomeが見えるはず.
JupyterHubの設定
homeからスタートするのは微妙な気がするので,
$ cd /usr/local/lib/anaconda3
$ sudo jupyterhub --generate-config
Writing default config to: jupyterhub_config.py
でdefaultのjupyterhub_config.pyを作り,
$ sudo vi jupyterhub_config.py
で編集.
## Path to the notebook directory for the single-user server.
#
#  The user sees a file listing of this directory when the notebook interface is
#  started. The current interface does not easily allow browsing beyond the
#  subdirectories in this directory's tree.
#
#  `~` will be expanded to the home directory of the user, and {username} will be
#  replaced with the name of the user.
#
#  Note that this does *not* prevent users from accessing files outside of this
#  path! They can do so with many other means.
# c.Spawner.notebook_dir = ''
辺りを探して
c.Spawner.notebook_dir = '~/notebooks'
とする.
当然,普通にadduserしただけではnotebooksなんてディレクトリは作られないので,
$ sudo mkdir /etc/skel/notebooks
で/etc/skel/にnotebooksディレクトリを用意しておく.
既存ユーザにも無いので,
$ mkdir ~/notebooks
既にいっぱいユーザが居るなら…頑張って作って回るか,スクリプト書く.
さらに,いかにもな8000番ポートは嫌なので,
## The public facing port of the proxy.
#
#  This is the port on which the proxy will listen. This is the only port through
#  which JupyterHub should be accessed by users.
#
#  .. deprecated: 0.9
#      Use JupyterHub.bind_url
# c.JupyterHub.port = 8000
辺りを探して
c.JupyterHub.port = [お好きなポート番号]
とする.ちなみにWSLで同じ設定をしているので,同時に走らせる事はないだろうけれど別のポートにした.
さらに,テストでログイン画面出した際にWarningが出ていた通りhttpsで通信したいので,WSLのときと同様にSSLの設定を
$ cd /usr/local/lib/anaconda3
$ sudo su
# mkdir cert
# chmod 600 cert
# cd cert
# openssl req -x509 -nodes -newkey rsa:2048 -keyout secret.key > jupyter.pem
とりあえずCommon NameにIPかドメイン(orマシン)名,後は適当に埋めるか空欄で
Country Name (2 letter code) [AU]:JP
Common Name (e.g. server FQDN or YOUR name) []:xxx.xxx.xxx.xxx
jupyter.pemとsecret.keyを作成.
再度jupyterhub_config.pyを編集して
c.JupyterHub.ssl_cert = '/usr/local/lib/anaconda3/cert/jupyter.pem'
c.JupyterHub.ssl_key = '/usr/local/lib/anaconda3/cert/secret.key'
と設定.
今度はssl有り起動で
$ (cd /usr/local/lib/anaconda3 && sudo jupyterhub)
https://localhost:[お好きなポート番号]/ に繋がればOK.
うまく出来ていれば
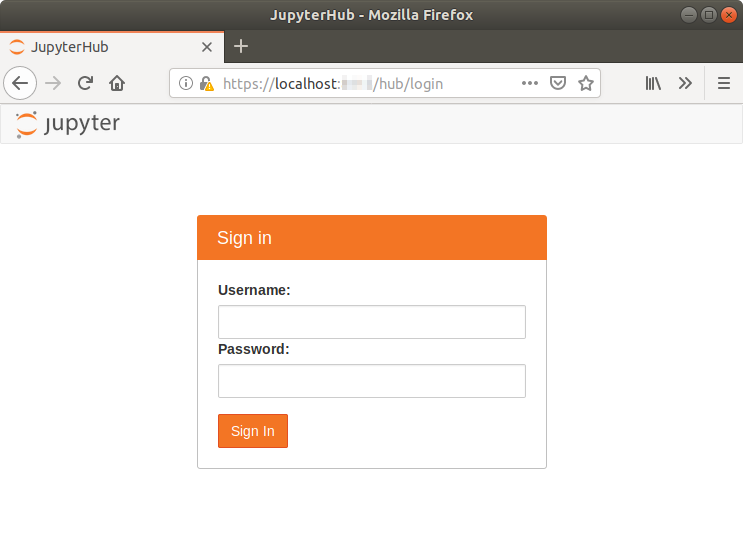
のようにWarning無しのログイン画面になる.
JupyterHubの自動起動
辺りを参考に,systemdでJupyterHubが自動起動するように設定.
すんなりいかなかったけど,とりあえず以降の手順で動いた.
必要ライブラリのインストール
nodejsとconfigurable-http-proxyを入れる.
$ sudo apt install nodejs
$ sudo npm install -g configurable-http-proxy
configurable-http-proxyの方は
$ sudo npm install -g configurable-http-proxy
/usr/local/lib/anaconda3/bin/configurable-http-proxy -> /usr/local/lib/anaconda3/lib/node_modules/configurable-http-proxy/bin/configurable-http-proxy
- ms@2.1.1 node_modules/configurable-http-proxy/node_modules/logform/node_modules/ms
/usr/local/lib/anaconda3/lib
└─┬ configurable-http-proxy@4.1.0
  ├─┬ http-proxy@1.17.0
  │ ├── eventemitter3@3.1.2
  │ └─┬ follow-redirects@1.7.0
  │   └── debug@3.2.6
  └─┬ winston@3.2.1
    ├── async@2.6.2
    ├─┬ diagnostics@1.1.1
    │ └── colorspace@1.1.2
    ├─┬ logform@2.1.2
    │ ├── colors@1.3.3
    │ └── ms@2.1.2
    ├─┬ readable-stream@3.4.0
    │ └── string_decoder@1.2.0
    └─┬ winston-transport@4.3.0
      └─┬ readable-stream@2.3.6
        └── string_decoder@1.1.1
こんな実行結果が出る.
jupyterhub_config.pyの設定
続いて,
$ sudo vi /usr/local/lib/anaconda3/jupyterhub_config.py
でjupyterhub_config.pyを再度編集し,
configurable-http-proxyとjupyterhub-singleuserにパスを通す.
↓Use ConfigurableHTTPProxy.commandって書いてあるから従っておく.
## DEPRECATED since version 0.8. Use ConfigurableHTTPProxy.command
# c.JupyterHub.proxy_cmd = []
c.ConfigurableHTTPProxy.command = '/usr/local/lib/anaconda3/bin/configurable-http-proxy'
↓なんで通らないのかわかってないけどとりあえずフルパスを
#  python environment (with virtualenv/conda) than JupyterHub itself.
#
#  Some spawners allow shell-style expansion here, allowing you to use
#  environment variables. Most, including the default, do not. Consult the
#  documentation for your spawner to verify!
# c.Spawner.cmd = ['jupyterhub-singleuser']
c.Spawner.cmd = ['/usr/local/lib/anaconda3/bin/jupyterhub-singleuser']
サービスの登録
適当な名前.serviceを作成し,
$ sudo vi /lib/systemd/system/jupyterhub.service
root動作想定で入れたので
[Unit]
Description=Jupyterhub

[Service]
User=root
ExecStart=/usr/local/lib/anaconda3/bin/jupyterhub
WorkingDirectory=/usr/local/lib/anaconda3

[Install]
WantedBy=multi-user.target
こんな感じに.
あとは
$ sudo systemctl enable jupyterhub
$ sudo systemctl start jupyterhub
$ sudo systemctl status jupyterhub
この辺りのコマンドで動作確認.
逐一statusを確認していくと
$ sudo systemctl status jupyterhub
● jupyterhub.service - Jupyterhub
   Loaded: loaded (/lib/systemd/system/jupyterhub.service; disabled; vendor pres
   Active: inactive (dead)
$ sudo systemctl enable jupyterhub
Created symlink /etc/systemd/system/multi-user.target.wants/jupyterhub.service → /lib/systemd/system/jupyterhub.service.
$ sudo systemctl status jupyterhub
● jupyterhub.service - Jupyterhub
   Loaded: loaded (/lib/systemd/system/jupyterhub.service; enabled; vendor prese
   Active: inactive (dead)
$ sudo systemctl start jupyterhub
$ sudo systemctl status jupyterhub
● jupyterhub.service - Jupyterhub
   Loaded: loaded (/lib/systemd/system/jupyterhub.service; enabled; vendor prese
   Active: active (running) since xxx ago
 Main PID: 61478 (jupyterhub)
    Tasks: 7 (limit: 19104)
   CGroup: /system.slice/jupyterhub.service
           ├─61478 /usr/local/lib/anaconda3/bin/python /usr/local/lib/anaconda3/
           └─61483 node /usr/local/lib/anaconda3/bin/configurable-http-proxy --i
こうなります.