タイトル通り,Windows Server 2019上のWSL (Windows Subsystem for Linux)にJupyterHub環境を構築した際の備忘録です.
Windows Server 2019でWSLやHyper-V上のUbuntu18.04にCUDA環境を構築しようとして断念
の,WSL部分(Python環境構築)です.
勘違いをしていましたが,WSLはVT-x使ってないのですね.(おかげでVirtualBoxと共存可)
そして直接GPU等のデバイスをサポートしてくれるわけでもなく,DDAも使えないので,後述のaliasでもない限りCUDAは使えません.
完全なLinuxがWindows 10上で稼働する? 「WSL 2」とは
とかも出てきたので,Hyper-V上に乗っかるこちらならいけるのかも知れません.
(現時点ではHyper-V上のUbuntu18.04でもうまくGPU passthrough出来なかったのでわかりませんが.)
その上で,とりあえずCPU OnlyなPython環境のJupyterHub構築メモ.
WSLでUbuntu18.04を動かすまでは
Windows Server 2019のWSLにUbuntu18.04をインストール
↑こちら
はじめに
冒頭で書いた通り,JupyterHub環境を構築します.
辺りを参考にしました.
パスを通すのに横着していますが,実際運用するなら(これで良いかはさておき)
Windows Server 2019でHyper-V上のUbuntu18.04にJupyterHub環境を構築
のように,もしくは他の方法で,ちゃんと通した方が良いと思います.
Anaconda3
せっかくChromeを入れたので,GUIで
https://www.anaconda.com/
のDownloadから「for Linux Installer」を落としてインストール.
2019年6月半ば時点では「2019.03」な「Anaconda3-2019.03-Linux-x86_64.sh」が最新.
以下,rootさんで入れる前提だと
$ cd ~/Downloads/
$ sudo su
# bash Anaconda3-2019.03-Linux-x86_64.sh

Welcome to Anaconda3 2019.03

In order to continue the installation process, please review the license
agreement.
Please, press ENTER to continue
>>>
Enterを押してLicense確認して
Please answer 'yes' or 'no':'
>>> yes
インストール先を聞かれるので/usr/local/lib/anaconda3へ入れるため
Anaconda3 will now be installed into this location:
/root/anaconda3

  - Press ENTER to confirm the location
  - Press CTRL-C to abort the installation
  - Or specify a different location below

[/root/anaconda3] >>> /usr/local/lib/anaconda3
として,
PREFIX=/usr/local/lib/anaconda3
installing: python-3.7.3-h0371630_0 ...
Python 3.7.3
installing: xxx ...
そこそこ待つと
installation finished.
Do you wish the installer to initialize Anaconda3
by running conda init? [yes|no]
[no] >>>
と聞かれる.
公式のFrequently asked questionsに「We do not recommend adding Anaconda to the PATH manually.」とあるのだが,defaultはnoという(笑)
環境混在等々色々あるならnoで自分で設定すべきだろうし,そうでないならnoで自分でやるべきだろうし.
自動だと.bashrcに通してくれるけれど,とりあえず今回はrootだし参考記事同様に
[no] >>> no

You have chosen to not have conda modify your shell scripts at all.
To activate conda's base environment in your current shell session:

eval "$(/usr/local/lib/anaconda3/bin/conda shell.YOUR_SHELL_NAME hook)"

To install conda's shell functions for easier access, first activate, then:

conda init

If you'd prefer that conda's base environment not be activated on startup,
   set the auto_activate_base parameter to false:

conda config --set auto_activate_base false

Thank you for installing Anaconda3!

===========================================================================

Anaconda and JetBrains are working together to bring you Anaconda-powered
environments tightly integrated in the PyCharm IDE.

PyCharm for Anaconda is available at:
https://www.anaconda.com/pycharm
で,
# echo 'export PATH="/usr/local/lib/anaconda3/bin:$PATH"' >> /etc/profile.d/anaconda.sh
として
# exit
exit
$ exit
logout
> wsl
$ conda --version
conda 4.6.11
こんなノリでcondaが使える事を確認.
このままだとrootはprofile.dを読みに行かないので,rootでcondaするならsudo -iと打つ.
ただしファイル入出力が絡む場合はカレントディレクトリが面倒な事になるので,
$ sudo visudo
で(sudo vi /etc/sudoersは怖いので避ける)
# Defaults       env_reset
Defaults        env_keep += "PATH"
Defaults        mail_badpass
# Defaults       secure_path="/usr/local/sbin:/usr/local/bin:/usr/sbin:/usr/bin:/sbin:/bin:/snap/bin"
こうしておく.
なお冒頭に書いた通りこれは横着で,これだと/usr/sbinが実行出来ないなどがあるのでHyper-Vではこうした.
JupyterHub環境の構築
WindowsでJupyterHubを使いたくて始めたことなのでここが本番.
JupyterHubのインストール
$ sudo conda install jupyterhub
インストール完了後
$ (cd /usr/local/lib/anaconda3 && sudo jupyterhub --no-ssl)
と叩き, http://localhost:8000/ にアクセスして
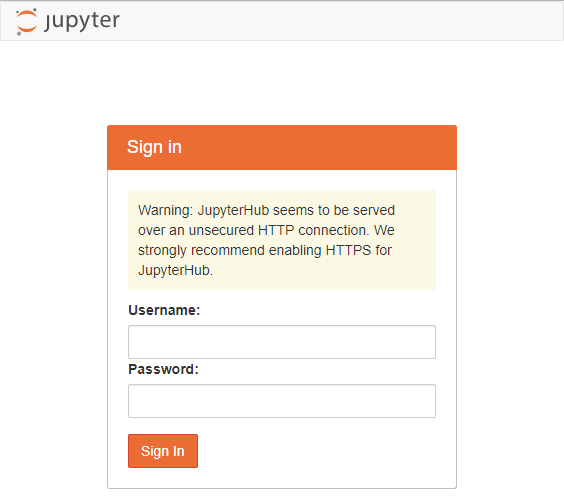
こんなログイン画面が出ればとりあえずOK.
一応ログインもしてみると,homeが見えるはず.
JupyterHubの設定
homeが見えると書いた通り,そんな所からスタートするのもアレなので,
$ (cd /usr/local/lib/anaconda3 && sudo jupyterhub --generate-config)
Writing default config to: jupyterhub_config.py
でdefaultのjupyterhub_config.pyを作り,
$ (cd /usr/local/lib/anaconda3 && sudo vi jupyterhub_config.py)
で編集.
## Path to the notebook directory for the single-user server.
#
#  The user sees a file listing of this directory when the notebook interface is
#  started. The current interface does not easily allow browsing beyond the
#  subdirectories in this directory's tree.
#
#  `~` will be expanded to the home directory of the user, and {username} will be
#  replaced with the name of the user.
#
#  Note that this does *not* prevent users from accessing files outside of this
#  path! They can do so with many other means.
# c.Spawner.notebook_dir = ''
辺りを探してこのコメントアウトを外し,
c.Spawner.notebook_dir = '~/notebooks'
とする.
当然,普通にadduserしただけではnotebooksなんてディレクトリは作られないので,
$ sudo mkdir /etc/skel/notebooks
で/etc/skel/にnotebooksディレクトリを用意しておく.
既存ユーザにも無いので,
$ mkdir ~/notebooks
既にいっぱいユーザが居るなら…頑張って作って回るか,スクリプト書く.
あと,ポートが8000なのは嫌なので,
c.JupyterHub.port = [お好きなポート番号]
さらに,テストでログイン画面出した際にWarningが出ていた通りhttpsで通信したいので,参考記事同様にSSLの設定を
$ cd /usr/local/lib/anaconda3
$ sudo su
# mkdir cert
# chmod 600 cert
# cd cert
# openssl req -x509 -nodes -newkey rsa:2048 -keyout secret.key > jupyter.pem
とりあえずCommon NameにIPかドメイン(orマシン)名,後は適当に埋めるか空欄で
Country Name (2 letter code) [AU]:JP
Common Name (e.g. server FQDN or YOUR name) []:xxx.xxx.xxx.xxx
jupyter.pemとsecret.keyを作成.
再度編集して
c.JupyterHub.ssl_cert = '/usr/local/lib/anaconda3/cert/jupyter.pem'
c.JupyterHub.ssl_key = '/usr/local/lib/anaconda3/cert/secret.key'
と設定.
今度はssl有り起動で
$ (cd /usr/local/lib/anaconda3 && sudo jupyterhub)
https://localhost:[お好きなポート番号]/ に繋がればOK.
うまく出来ていれば

のようにWarning無しのログイン画面になる.
CUDA関連
結局動かなかったわけですが,一応CuPyを入れてみた際のメモ.
nvidiaドライバ
これで入ったけど,結局使えないので無駄作業です.
WSLはKernelが無いので,頑張って落としてきてみたり,build-essentialに入ってたgccではバージョンが合わなかったりと色々試行錯誤しましたが,
の手順で入りました.
まずは既存のものが無いか確認&パージ
$ dpkg -l | grep nvidia
$ dpkg -l | grep cuda
$ sudo apt-get --purge remove nvidia-*
$ sudo apt-get --purge remove cuda-*
WSLなら普通は入ってない,意味ないわけですし.
続いてリポジトリを追加
$ sudo add-apt-repository ppa:graphics-drivers/ppa
色々表示されるけどとりあえずEnter
Press [ENTER] to continue or Ctrl-c to cancel adding it.

Get:1 http://ppa.launchpad.net/graphics-drivers/ppa/ubuntu bionic InRelease [21.3 kB]
Hit:2 http://security.ubuntu.com/ubuntu bionic-security InRelease
Ign:3 http://dl.google.com/linux/chrome/deb stable InRelease
Hit:4 http://dl.google.com/linux/chrome/deb stable Release
Hit:5 http://jp.archive.ubuntu.com/ubuntu bionic InRelease
Get:6 http://jp.archive.ubuntu.com/ubuntu bionic-updates InRelease [88.7 kB]
Get:7 http://jp.archive.ubuntu.com/ubuntu bionic-backports InRelease [74.6 kB]
Get:8 http://ppa.launchpad.net/graphics-drivers/ppa/ubuntu bionic/main amd64 Packages [24.0 kB]
Get:10 http://jp.archive.ubuntu.com/ubuntu bionic-updates/main amd64 Packages [644 kB]
Get:11 http://jp.archive.ubuntu.com/ubuntu bionic-updates/universe amd64 Packages [954 kB]
Get:12 http://ppa.launchpad.net/graphics-drivers/ppa/ubuntu bionic/main Translation-en [6252 B]
Get:13 http://jp.archive.ubuntu.com/ubuntu bionic-backports/universe amd64 Packages [3728 B]
Fetched 1816 kB in 9s (207 kB/s)
Reading package lists... Done
で,
$ sudo apt-get update
$ apt-cache search 'nvidia-[0-9]+$'
入れられそうなバージョンを確認
$ apt-cache search 'nvidia-[0-9]+$'
nvidia-331 - Transitional package for nvidia-331
nvidia-346 - Transitional package for nvidia-346
nvidia-352 - Transitional package for nvidia-361
nvidia-361 - Transitional package for nvidia-367
nvidia-367 - Transitional package for nvidia-375
nvidia-375 - Transitional package for nvidia-384
nvidia-384 - Transitional package for nvidia-driver-390
nvidia-headless-no-dkms-390 - NVIDIA headless metapackage - no DKMS
xserver-xorg-video-nvidia-390 - NVIDIA binary Xorg driver
nvidia-340 - NVIDIA binary driver - version 340.107
nvidia-304 - NVIDIA legacy binary driver - version 304.137
nvidia-387 - Transitional package for nvidia-driver-390
nvidia-390 - Transitional package for nvidia-driver-390
nvidia-headless-no-dkms-396 - NVIDIA headless metapackage - no DKMS
nvidia-headless-no-dkms-410 - NVIDIA headless metapackage - no DKMS
nvidia-headless-no-dkms-415 - NVIDIA headless metapackage - no DKMS
nvidia-headless-no-dkms-418 - NVIDIA headless metapackage - no DKMS
nvidia-headless-no-dkms-430 - NVIDIA headless metapackage - no DKMS
xserver-xorg-video-nvidia-396 - NVIDIA binary Xorg driver
xserver-xorg-video-nvidia-410 - NVIDIA binary Xorg driver
xserver-xorg-video-nvidia-415 - NVIDIA binary Xorg driver
xserver-xorg-video-nvidia-418 - NVIDIA binary Xorg driver
xserver-xorg-video-nvidia-430 - NVIDIA binary Xorg driver
$ sudo apt install nvidia-390
CUDA10.1, cuDNN
こちらも,結局使えないので無駄作業です.
CUDA10.1
https://developer.nvidia.com/cuda-downloads の「Linux→x86_64→Ubuntu→18.04→deb(network)」に従い,
$ cd ~/Downloads/
$ wget http://developer.download.nvidia.com/compute/cuda/repos/ubuntu1804/x86_64/cuda-repo-ubuntu1804_10.1.168-1_amd64.deb
$ sudo dpkg -i cuda-repo-ubuntu1804_10.1.168-1_amd64.deb
$ sudo apt-key adv --fetch-keys https://developer.download.nvidia.com/compute/cuda/repos/ubuntu1804/x86_64/7fa2af80.pub
$ sudo apt update
そして入れられそうなバージョンの確認
$ apt show cuda -a
wgetしてる段階で当然ですが,6月半ば時点では
10.1.168-1
$ apt show cuda -a
Package: cuda
Version: 10.1.168-1
Priority: optional
Section: multiverse/devel
Maintainer: cudatools <cudatools@nvidia.com>
Installed-Size: 25.6 kB
Depends: cuda-10-1 (>= 10.1.168)
Download-Size: 2512 B
APT-Sources: http://developer.download.nvidia.com/compute/cuda/repos/ubuntu1804/x86_64  Packages
Description: CUDA meta-package
 Meta-package containing all the available packages required for native CUDA
 development. Contains the toolkit, samples, driver and documentation.

Package: cuda
Version: 10.1.105-1
Priority: optional
Section: multiverse/devel
Maintainer: cudatools <cudatools@nvidia.com>
Installed-Size: 25.6 kB
Depends: cuda-10-1 (>= 10.1.105)
Download-Size: 2514 B
APT-Sources: http://developer.download.nvidia.com/compute/cuda/repos/ubuntu1804/x86_64  Packages
Description: CUDA meta-package
 Meta-package containing all the available packages required for native CUDA
 development. Contains the toolkit, samples, driver and documentation.

Package: cuda
Version: 10.0.130-1
Priority: optional
Section: multiverse/devel
Maintainer: cudatools <cudatools@nvidia.com>
Installed-Size: 25.6 kB
Depends: cuda-10-0 (>= 10.0.130)
Download-Size: 2514 B
APT-Sources: http://developer.download.nvidia.com/compute/cuda/repos/ubuntu1804/x86_64  Packages
Description: CUDA meta-package
 Meta-package containing all the available packages required for native CUDA
 development. Contains the toolkit, samples, driver and documentation.
$ sudo apt install cuda
…とすると,えらく依存関係で怒られる.仕方ないので辿っていって1つずつ入れる.
$ sudo apt install libnvidia-encode-418
$ sudo apt install cuda-drivers
$ sudo apt install cuda
cuDNN
とりあえず,リポジトリを追加してキー追加してupdate,そして入れられそうなバージョンの確認
$ echo "deb https://developer.download.nvidia.com/compute/machine-learning/repos/ubuntu1804/x86_64 /" | sudo tee /etc/apt/sources.list.d/nvidia-ml.list
$ apt-key adv --keyserver keyserver.ubuntu.com --recv-keys --recv-keys F60F4B3D7FA2AF80
$ sudo apt update
$ apt show libcudnn7-dev -a
6月半ば時点では
libcudnn7-dev=7.6.0.64-1+cuda10.1
$ apt show libcudnn7-dev -a
Package: libcudnn7-dev
Version: 7.6.0.64-1+cuda10.1
Priority: optional
Section: multiverse/devel
Source: cudnn
Maintainer: cudatools <cudatools@nvidia.com>
Installed-Size: 388 MB
Depends: libcudnn7 (= 7.6.0.64-1+cuda10.1)
Download-Size: 154 MB
APT-Manual-Installed: yes
APT-Sources: https://developer.download.nvidia.com/compute/machine-learning/repos/ubuntu1804/x86_64  Packages
Description: cuDNN development libraries and headers
 cuDNN development libraries and headers. cuDNN provides primitives for deep
 neural networks.

Package: libcudnn7-dev
Version: 7.6.0.64-1+cuda10.0
Priority: optional
Section: multiverse/devel
Source: cudnn
Maintainer: cudatools <cudatools@nvidia.com>
Installed-Size: 375 MB
Depends: libcudnn7 (= 7.6.0.64-1+cuda10.0)
Download-Size: 145 MB
APT-Sources: https://developer.download.nvidia.com/compute/machine-learning/repos/ubuntu1804/x86_64  Packages
Description: cuDNN development libraries and headers
 cuDNN development libraries and headers. cuDNN provides primitives for deep
 neural networks.

Package: libcudnn7-dev
Version: 7.5.1.10-1+cuda10.1
Priority: optional
Section: multiverse/devel
Source: cudnn
Maintainer: cudatools <cudatools@nvidia.com>
Installed-Size: 367 MB
Depends: libcudnn7 (= 7.5.1.10-1+cuda10.1)
Download-Size: 148 MB
APT-Sources: https://developer.download.nvidia.com/compute/machine-learning/repos/ubuntu1804/x86_64  Packages
Description: cuDNN development libraries and headers
 cuDNN development libraries and headers. cuDNN provides primitives for deep
 neural networks.

Package: libcudnn7-dev
Version: 7.5.1.10-1+cuda10.0
Priority: optional
Section: multiverse/devel
Source: cudnn
Maintainer: cudatools <cudatools@nvidia.com>
Installed-Size: 354 MB
Depends: libcudnn7 (= 7.5.1.10-1+cuda10.0)
Download-Size: 140 MB
APT-Sources: https://developer.download.nvidia.com/compute/machine-learning/repos/ubuntu1804/x86_64  Packages
Description: cuDNN development libraries and headers
 cuDNN development libraries and headers. cuDNN provides primitives for deep
 neural networks.

Package: libcudnn7-dev
Version: 7.5.0.56-1+cuda10.1
Priority: optional
Section: multiverse/devel
Source: cudnn
Maintainer: cudatools <cudatools@nvidia.com>
Installed-Size: 367 MB
Depends: libcudnn7 (= 7.5.0.56-1+cuda10.1)
Download-Size: 148 MB
APT-Sources: https://developer.download.nvidia.com/compute/machine-learning/repos/ubuntu1804/x86_64  Packages
Description: cuDNN development libraries and headers
 cuDNN development libraries and headers. cuDNN provides primitives for deep
 neural networks.

Package: libcudnn7-dev
Version: 7.5.0.56-1+cuda10.0
Priority: optional
Section: multiverse/devel
Source: cudnn
Maintainer: cudatools <cudatools@nvidia.com>
Installed-Size: 354 MB
Depends: libcudnn7 (= 7.5.0.56-1+cuda10.0)
Download-Size: 140 MB
APT-Sources: https://developer.download.nvidia.com/compute/machine-learning/repos/ubuntu1804/x86_64  Packages
Description: cuDNN development libraries and headers
 cuDNN development libraries and headers. cuDNN provides primitives for deep
 neural networks.

Package: libcudnn7-dev
Version: 7.4.2.24-1+cuda10.0
Priority: optional
Section: multiverse/devel
Source: cudnn
Maintainer: cudatools <cudatools@nvidia.com>
Installed-Size: 346 MB
Depends: libcudnn7 (= 7.4.2.24-1+cuda10.0)
Download-Size: 137 MB
APT-Sources: https://developer.download.nvidia.com/compute/machine-learning/repos/ubuntu1804/x86_64  Packages
Description: cuDNN development libraries and headers
 cuDNN development libraries and headers. cuDNN provides primitives for deep
 neural networks.

Package: libcudnn7-dev
Version: 7.4.1.5-1+cuda10.0
Priority: optional
Section: multiverse/devel
Source: cudnn
Maintainer: cudatools <cudatools@nvidia.com>
Installed-Size: 348 MB
Depends: libcudnn7 (= 7.4.1.5-1+cuda10.0)
Download-Size: 137 MB
APT-Sources: https://developer.download.nvidia.com/compute/machine-learning/repos/ubuntu1804/x86_64  Packages
Description: cuDNN development libraries and headers
 cuDNN development libraries and headers. cuDNN provides primitives for deep
 neural networks.

Package: libcudnn7-dev
Version: 7.3.1.20-1+cuda10.0
Priority: optional
Section: multiverse/devel
Source: cudnn
Maintainer: cudatools <cudatools@nvidia.com>
Installed-Size: 346 MB
Depends: libcudnn7 (= 7.3.1.20-1+cuda10.0)
Download-Size: 138 MB
APT-Sources: https://developer.download.nvidia.com/compute/machine-learning/repos/ubuntu1804/x86_64  Packages
Description: cuDNN development libraries and headers
 cuDNN development libraries and headers. cuDNN provides primitives for deep
 neural networks.

Package: libcudnn7-dev
Version: 7.3.0.29-1+cuda10.0
Priority: optional
Section: multiverse/devel
Source: cudnn
Maintainer: cudatools <cudatools@nvidia.com>
Installed-Size: 330 MB
Depends: libcudnn7 (= 7.3.0.29-1+cuda10.0)
Download-Size: 136 MB
APT-Sources: https://developer.download.nvidia.com/compute/machine-learning/repos/ubuntu1804/x86_64  Packages
Description: cuDNN development libraries and headers
 cuDNN development libraries and headers. cuDNN provides primitives for deep
 neural networks.
$ sudo apt install libcudnn7-dev=7.6.0.64-1+cuda10.1
で入ります.
1803でのバグ
ちなみにWin10でテストしていた際,1803だとこれではそれぞれキー追加時に
Executing: /tmp/apt-key-gpghome.dAsJ4VKeIP/gpg.1.sh --fetch-keys https://developer.download.nvidia.com/compute/cuda/repos/ubuntu1804/x86_64/7fa2af80.pub
gpg: requesting key from 'https://developer.download.nvidia.com/compute/cuda/repos/ubuntu1804/x86_64/7fa2af80.pub'
gpg: connecting dirmngr at '/tmp/apt-key-gpghome.dAsJ4VKeIP/S.dirmngr' failed: IPC connect call failed
gpg: WARNING: unable to fetch URI https://developer.download.nvidia.com/compute/cuda/repos/ubuntu1804/x86_64/7fa2af80.pub: No dirmngr
とか
Executing: /tmp/apt-key-gpghome.VgdiwVpfMG/gpg.1.sh --keyserver keyserver.ubuntu.com --recv-keys --recv-keys F60F4B3D7FA2AF80
gpg: connecting dirmngr at '/tmp/apt-key-gpghome.VgdiwVpfMG/S.dirmngr' failed: IPC connect call failed
gpg: keyserver receive failed: No dirmngr
のようなエラーでキー追加できませんでした.
【期間限定】WSLのUbuntu 18.04でapt-keyコマンドを実行した時に「IPC connect call failed」のエラーになった時のワークアラウンド
を見ると,1809以降で修正されているそうですが,とりあえず記事のような感じで
curl -sL http://developer.download.nvidia.com/compute/cuda/repos/ubuntu1604/x86_64/7fa2af80.pub | sudo apt-key add
curl -sL "http://keyserver.ubuntu.com/pks/lookup?op=get&search=0xF60F4B3D7FA2AF80" | sudo apt-key add
としてあげると「OK」と言ってくれるので,引き続きsudo apt updateしてsudo apt showでどれ入れよう?って進んでいけばOK.
CuPy, Chainer
こちらも,CuPyは結局使えないので無駄作業です.Chainerは動きますけど.
$ sudo pip install cupy-cuda101
$ sudo pip install chainer
あとは
$ python -c 'import chainer; chainer.print_runtime_info()'
して
Platform: Linux-4.4.0-17763-Microsoft-x86_64-with-debian-buster-sid
Chainer: 6.0.0
NumPy: 1.16.2
CuPy:
  CuPy Version          : 6.0.0
  CUDA Root             : /usr/local/cuda
  CUDA Build Version    : 10010
  CUDA Driver Version   : 10010
  CUDA Runtime Version  : CUDARuntimeError('cudaErrorNoDevice: no CUDA-capable device is detected')
  cuDNN Build Version   : 7500
  cuDNN Version         : 7500
  NCCL Build Version    : 2402
  NCCL Runtime Version  : 2402
iDeep: Not Available
という結果を見て(´・ω・`)となれば成功です.
WSLで頑張ってGPU演算を使う
WSLの良い所はWindows側のバイナリを呼び出せる点.
というわけで,
GPU Support for Deep Learning on Windows Subsystem Linux(WSL) with Conda
にあるように,
$ vi ~/.bashrc
なり何なりで各ユーザの.bashrcに
alias conda="/mnt/c/Users/(user_name)/Anaconda3/Scripts/conda.exe"
alias python="/mnt/c/Users/(user_name)/Anaconda3/python.exe"
alias ipython="/mnt/c/Users/(user_name)/Anaconda3/Scripts/ipython.exe"
alias nosetests="/mnt/c/Users/(user_name)/Anaconda3/Scripts/nosetests.exe"
alias pip="/mnt/c/Users/(user_name)/Anaconda3/Scripts/pip.exe"

cd /mnt/c/Users/(user_name)
とかを書いておき,
$ source ~/.bashrc
もしくはログインし直して反映させ,
$ python -c 'import chainer; chainer.print_runtime_info()'
してあげれば,
Platform: Windows-10-10.0.17763-SP0
Chainer: 6.0.0
NumPy: 1.16.2
CuPy:
  CuPy Version          : 6.0.0
  CUDA Root             : C:\Program Files\NVIDIA GPU Computing Toolkit\CUDA\v10.1
  CUDA Build Version    : 10010
  CUDA Driver Version   : 10020
  CUDA Runtime Version  : 10010
  cuDNN Build Version   : 7500
  cuDNN Version         : 7500
  NCCL Build Version    : None
  NCCL Runtime Version  : None
iDeep: Not Available
当然だけどWindows側で構築した環境での結果が返ってきます.
パスがUsers以下になっているのは↑の記事に書いた通り「それぞれJust Meで入れる」という形にしたからです.
ただし,JupyterHub経由で呼び出すとUbuntu側が呼ばれるので無理です.
(New→TerminalならTerminalなのでエイリアスが効いてます.)
jupyterhub_config.pyとかjupyter_notebook_config.pyとか弄れば使えるのかも知れませんが,
そもそもこうなってくるとJupyterHubのメリットを見失い始めるのでここで終了.