状況
Youtubeチャンネルの素材用にTinderの模擬アプリを作成する際、
1つのStoryboardでTabBarControllerと遷移先のVCを置く場合
カスタマイズは
-
Storyboard上でそのままやってしまう -
TabBarControllerかTabBarのcustomclassを作って紐づける
のどちらかだと思うのですが
StoryboardReferenceを用いてTabBarControllerを実装した際
これだとうまくいかなかったのでメモしておきます
参考
1つのStoryboardでTabBarControllerと遷移先のVCを置く場合の参考文献です
・tabBarControllerとUINavigationControllerを同時に使いたい! - Takahiro Octopress Blog
・NavigationController とTabBarControllerを一緒に使う方法 - marikoootaの日記
・【Swift4】StoryboardでUINavigationControllerやUITabBarControllerを設定する方法【Xcode9】 | ニートに憧れるプログラム日記
・iOSアプリ開発入門#3 ~UITabBarController~ - Qiita
対策
StoryboardReferenceを用いてTabBarControllerを実装した場合
tabBarをカスタマイズ
-
TabBarControllerのTabBarをStoryboardで直接編集する
->TabBar表示されない -
Storyboard Referenceで紐づいている遷移先のVCでカスタマイズしてみる
->tabBarController, tabBarのカスタムクラス作ってtabController.storyboardのそれに紐づければおそらくいける
->VCとtabbarのstoryboardが別だから見た目変化なし -
tabBarItemでcustomclass作る
->tagで仕分けて実装したらカスタマイズできた
->見た目に関しては各VCで設置したtabBarItemしか反応しないのかも
※TabBarControllerでもきちんと準備をしておかないとTabが表示されないことがある
->
import UIKit
class StyledTabBarItem: UITabBarItem {
//storyboardで設置した時
required init?(coder aDecoder: NSCoder) {
super.init(coder: aDecoder)!
setAppearance()
}
private func setAppearance() {
//ライフサイクル内ならselfでVCから参照すれば使わなくてもいける->NCのみ
//tabBarの画像は30*30px(Retinaだと60*60)
switch self.tag {
case 0:
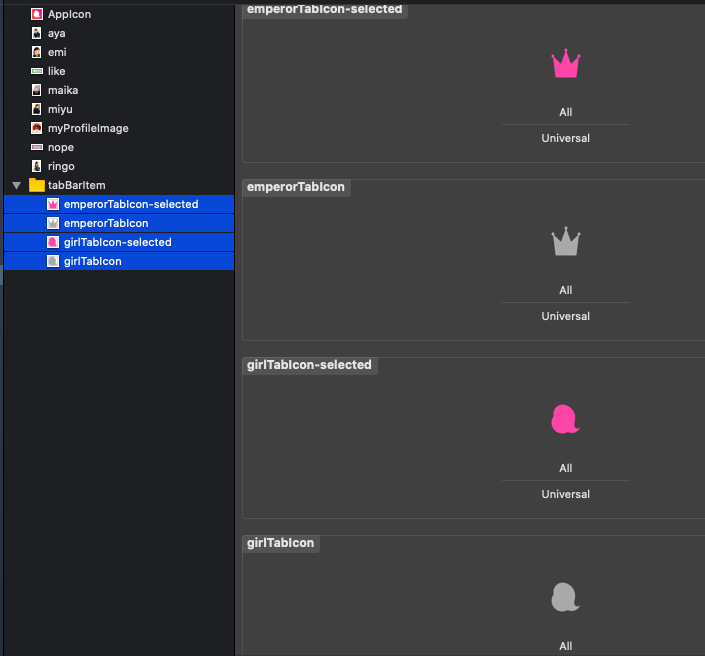
self.setTabBarItem(title: "", image: UIImage(named: "girlTabIcon")!, selectedImage: UIImage(named: "girlTabIcon-selected")!)
case 1:
self.setTabBarItem(title: "", image: UIImage(named: "emperorTabIcon")!, selectedImage: UIImage(named: "emperorTabIcon-selected")!)
default:
break
}
}
func setTabBarItem(title: String, image: UIImage, selectedImage: UIImage) -> Void {
self.title = title
self.image = image//.withRenderingMode(.alwaysOriginal)<-PDFの時はこの設定いらない
self.selectedImage = selectedImage//.withRenderingMode(.alwaysOriginal)<-PDFの時はこの設定いらない
}
}
アイコン画像の設定
- KeynoteとかAdobeXDで適当にアイコン用に正方形の画像(300*300pxとか)作って設定したらむちゃくちゃはみ出した
->30*30pxの画像を用意したらできた
->アイコン画像にPDFを使うと
single scaleかつPreserve Vector dataにチェックで
30*30pxのデータのみでretina(60*60px)にも対応できる
->しかしこれだとtabBar.tintColor = UIColor.pink, tabBar.unselectedItemTintColor = UIColor.grayなどが使えないので
選択時と非選択時のデータを両方用意する必要がある
->後述のwithRenderingMode(.alwaysOriginal)を使えば選択時の画像のみで良い
- アイコン画像のカスタマイズ時の注意点(PDFとPNGの違い)
->PDFだと用意するサイズは1種類でいい(↑の設定でretinaサイズにも対応できる)
->withRenderingMode(.alwaysOriginal)を使えばPDFでも選択時の画像のみで良い
//PNGのみ
tabBar.tintColor = UIColor.pink
tabBar.unselectedItemTintColor = UIColor.gray
または
//PNGでもPDFでも使える
tabBarItem.selectedImage = selectedImage.withRenderingMode(.alwaysOriginal)
//↑これしないとtemplate扱いになって勝手に他の色に塗りつぶされる
tabBar.image = image
//↑非選択時で勝手にグレーになってもいいならこっち(あるいは.withRenderingMode(.alwaysTemplate))
tabbarの上線消す方法
これに関してはtabBarItemからカスタマイズした影響でうまくやるやり方がわかりませんでした
->tabBar.shadowImage = UIImageというやり方をしたいけど
tabBarにアクセスしてカスタマイズする or tabBar(Controller)からtabBarItemをカスタマイズする
方法が分かっていないから
別の方法
-
storyboardReference側からtabBarItemを編集する
->tabbBarControlllerやtabBarの変更が反映されないのは
遷移先でtabbarItemを新たに作っているせいかもしれない
->遷移先VCのtabBarItemを消去 & storyboardReferenceのtabBarItemをcustom classに準拠
->tabBarが表示されない
-
tabBarItemをNCではなくVCに移動する
->VC側でself.tabBarController.tabBar.shadowImage = UIImage()
->VCに移動しても影響はなかったが変更が反映されなかった
titleをカスタマイズ(NavigationControllerを導入している画面のVC)
-
navigationBarとTabBarのtitleが同じでいい場合
ViewControllerに(self.)title = "hoge" -
navigationBarとTabBarのtitleを別にしたい場合
ViewControllerに(self.)title = "hoge"(TabBar)
ViewControllerに(self.)navigationItem.title = "hoge"(navigationBar)
・UITabBarControllerのTabBarItemのタイトルが勝手に変わってしまう場合の対処 - Qiita
参考
・【Swift4】Storyboardを分割してプロジェクトを作成する方法【iOS11】【Xcode9】 | ニートに憧れるプログラム日記
・【Xcode】Storyboard Referenceを活用してみた - Qiita
・Storyboard Reference がいい感じ - SH Lab の アプリ開発部屋
->遷移先のVCをそれぞれのStoryboardにする場合と遷移先のVCのみ1つのStoryboardにまとめてしまう(TabBarControllerは別)場合別のやり方が書いてある
・UITabBarControllerをStoryboardで設定する時にTabBarItemが表示されない - Qiita
->本記事でも書いたようにTabBarControllerと遷移先VCを分けた場合はTabBarItemを遷移先VCにそれぞれ加えないとダメだと書いてある
・iOS Swiftチートシート・ライブラリまとめ UITabBar・UITabBarItem編 - Qiita
->tabBar.unselectedItemTintColor = UIColor.whiteなど
・iOS - UITabbarの中央アイコンをタブバーをはみ出したデザインにしたい|teratail
->HELargeCenterTabBarControllerの紹介
・【Swift5】UITabBarの色、背景画像、サイズやアイコン文字の色、フォント、サイズ、位置の調整まで網羅フルカスタマイズまとめ【Objective-C】 | ニートに憧れるプログラム日記
・UINavigationBar・UITabBar のカスタマイズ方法について - Qiita
->カスタマイズのTips.(appearance()なくてもいけるからこれの存在意義はよくわからない。。。)
・UITabBarControllerの基本
->storyboardReference側からtabbarItemを編集するやり方が書いてある
・[Swift]UIImageのレンダリングモードまとめ - Qiita(rederingModerでのやり方)
・[Swift] iOS で画像の色を動的に変える - Qiita(rederingModerでのやり方)
・[Swift] 画像の色を変更する - Qiita(tintColorでのやり方)
・[Swift] iOS で画像の色を動的に変える - Qiita(rederingModeでのやり方)
->今回のようにPDFではなくPNGでtabbarのアイコン作った場合は必要。
・【Swift】 アセット画像を3種類も書き出したくない - Qiita
->PDFでのやり方はこっち。
・【iOS】Tabbar メニューの画像のサイズや解像度に関して - 東京伊勢海老通信
->tabbarの画像サイズは30*30でないとダメ。