目的
- よく使うであろうUITabBarControllerを使用したアプリをStoryboardありとなしでサクッと作れるようになる
- ありなしの両方を試すことで、Storyboardが何をやっているのかなんとなくイメージできるようになる
Step1. 爆速でUITabBarController管理化
前回のコード をベースに作業。
今回もひとまずStoryboardではなくコード側で実装してみる
1.1. AppDelegateの修正
まずはAppDelegateを以下のように修正。
前回のUINavigationControllerの時と同様、Storyboardですでに初期化済みのwindowがバインドされているので、ここのrootViewController(StoryboardでUINavigationControllerに設定済み)をUITabBarControllerに付け替える。
--- a/PracticeApp/AppDelegate.swift
+++ b/PracticeApp/AppDelegate.swift
@@ -16,6 +16,22 @@ class AppDelegate: UIResponder, UIApplicationDelegate {

     func application(_ application: UIApplication, didFinishLaunchingWithOptions launchOptions: [UIApplication.LaunchOptionsKey: Any]?) -> Bool {
         // Override point for customization after application launch.
+
+        var vcs: [UIViewController] = []
+
+        // 1st vc
+        let navc: UINavigationController = window?.rootViewController as! UINavigationController
+        navc.tabBarItem = UITabBarItem(tabBarSystemItem: .recents, tag: 0)
+        vcs.append(navc)
+
+        // 2nd vc
+        let vc: UIViewController = UIViewController()
+        vc.tabBarItem = UITabBarItem(tabBarSystemItem: .bookmarks, tag: 1)
+        vcs.append(vc)
+
+        let tabc: UITabBarController = UITabBarController(nibName: nil, bundle: Bundle.main)
+        tabc.setViewControllers(vcs, animated: true)
+        window?.rootViewController = tabc
         return true
     }
ポイントとしては
- tab要素そのものの見た目はTabBarControllerではなく、それに追加するViewController側のtabBarItemを設定することで編集できる
- UITabBarItemのtagは、tab押下時などにtabを識別するために使用する模様
- UITabBarControllerのsetViewControllersでtabに対応するViewControllerの配列を渡す
1.2. 起動
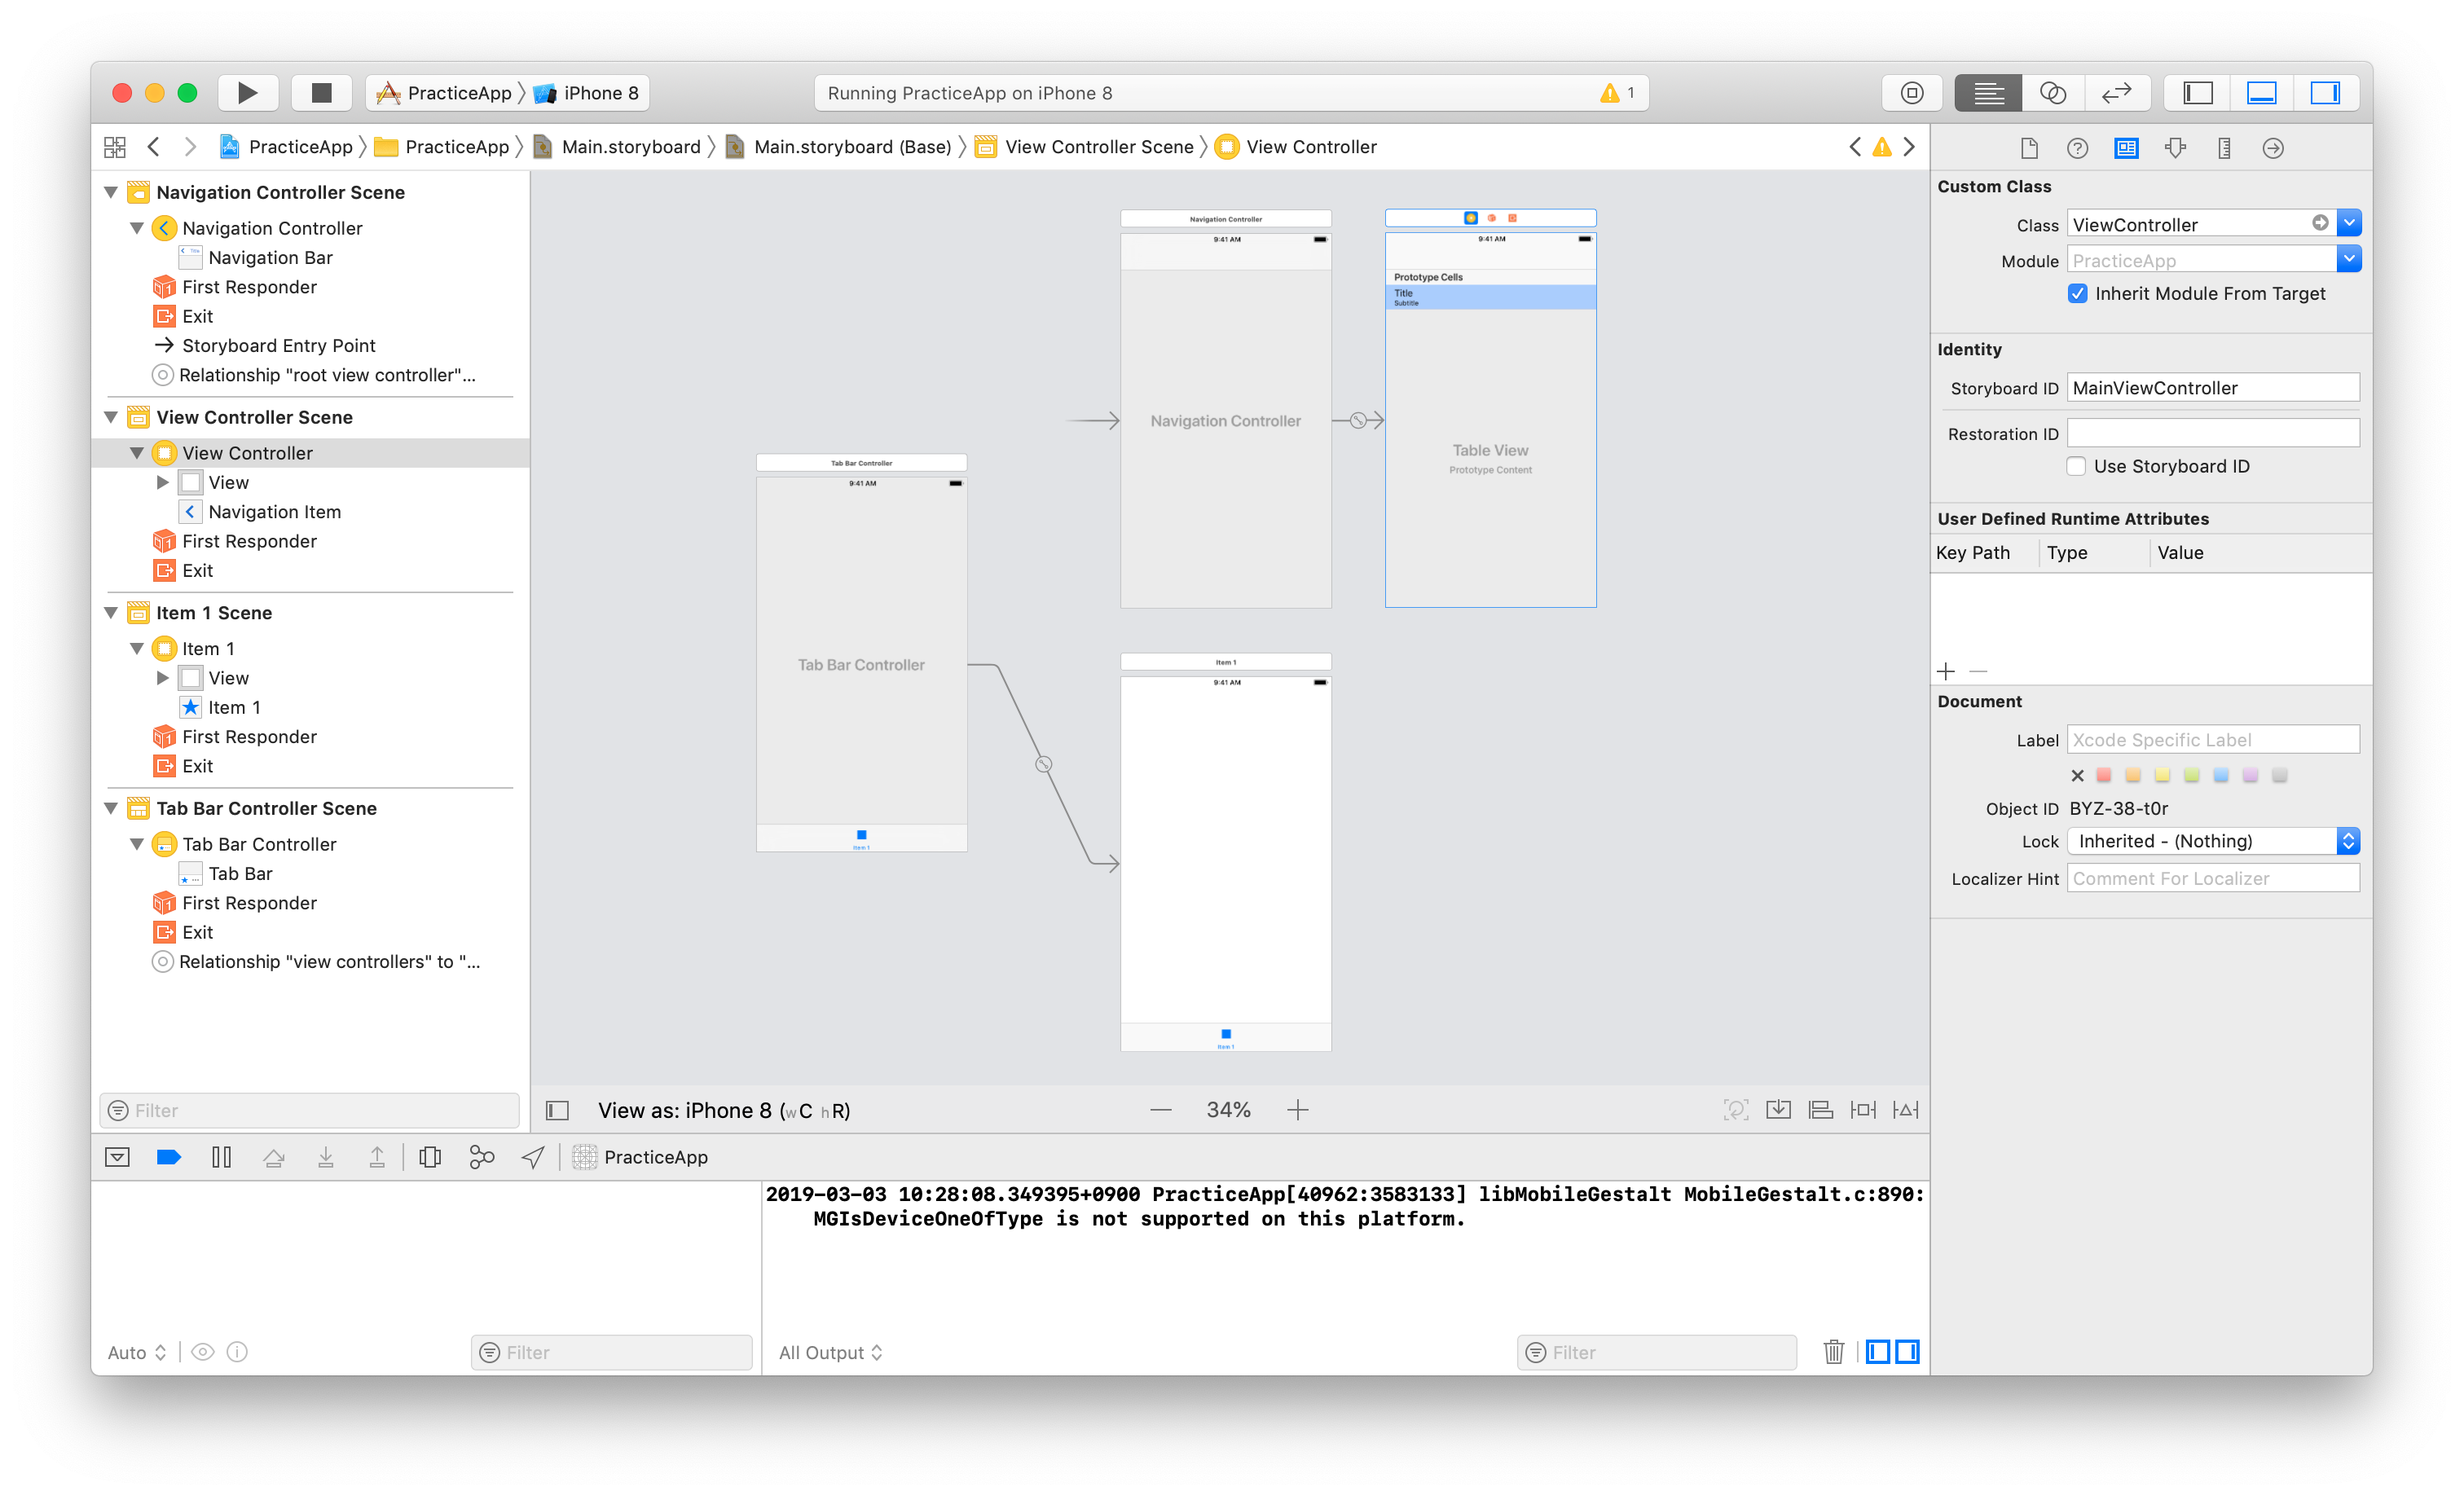
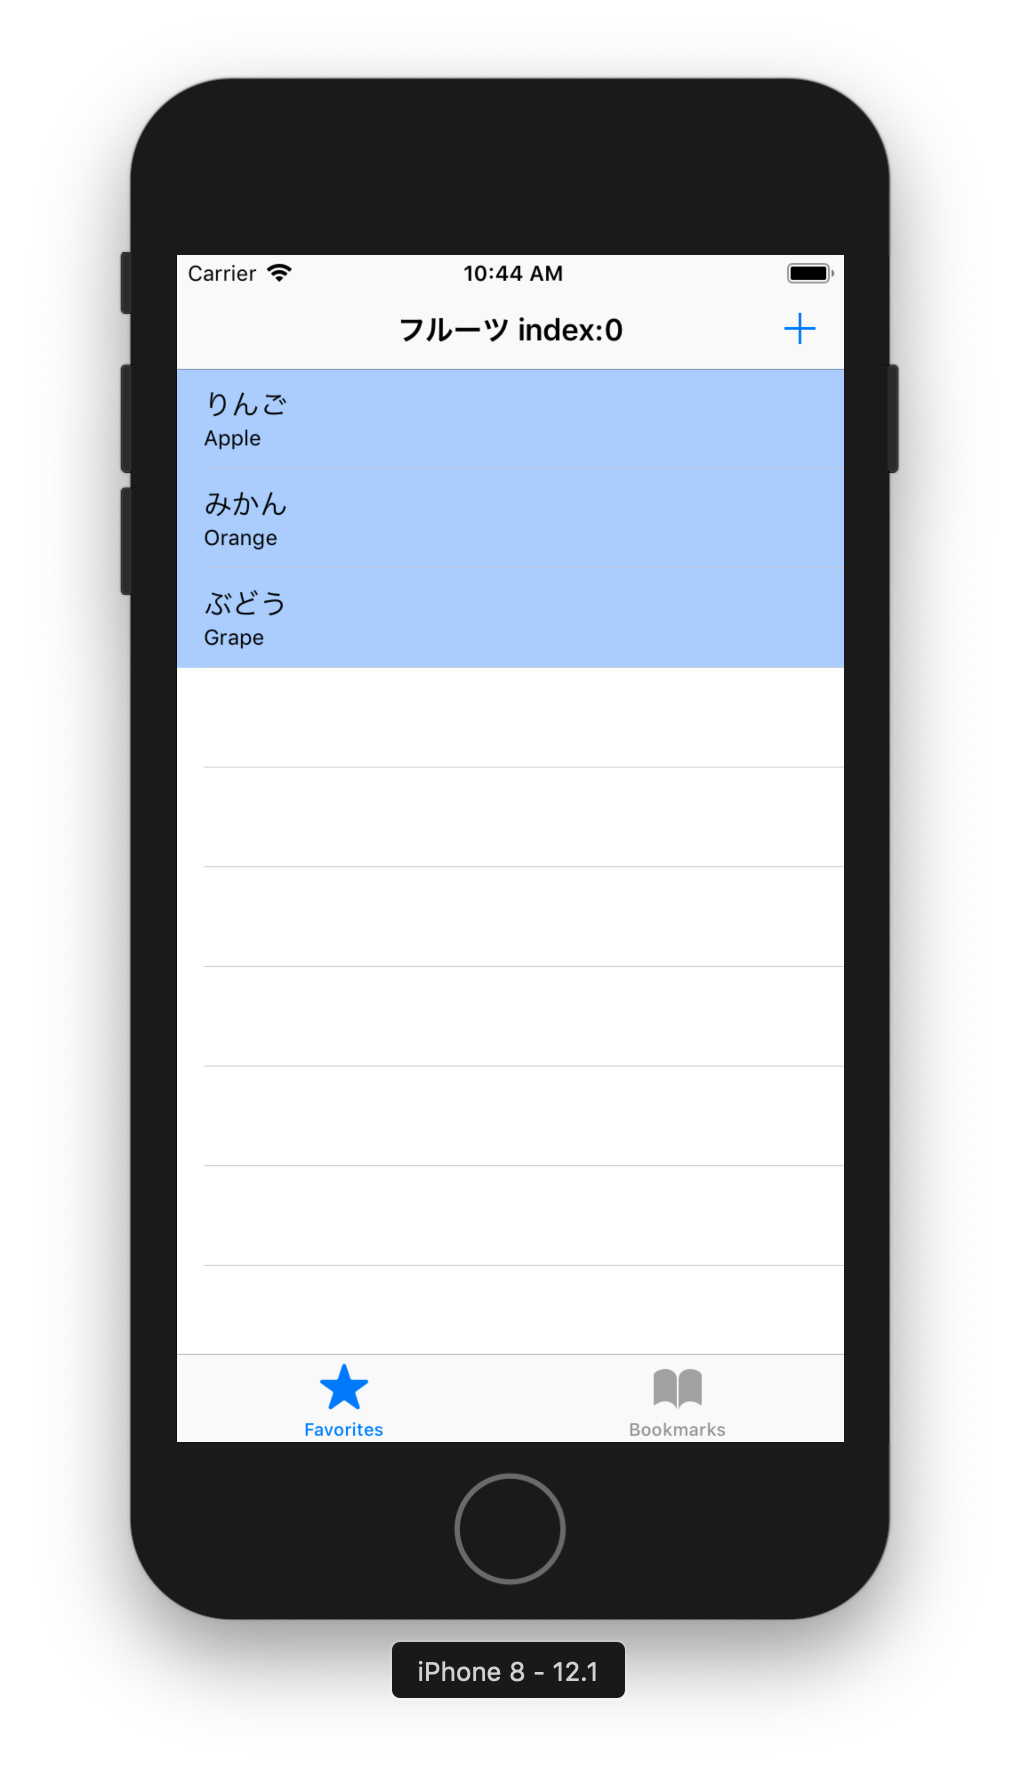
たったこれだけで一応tab化できる(すでにUINavigationControllerの設定はできているので、tabとnavigationの組み合わせ画面となる)
Step2. Storyboardを使ってみる
特にカスタマイズしたいところもないので、早速Storyboardにお任せする
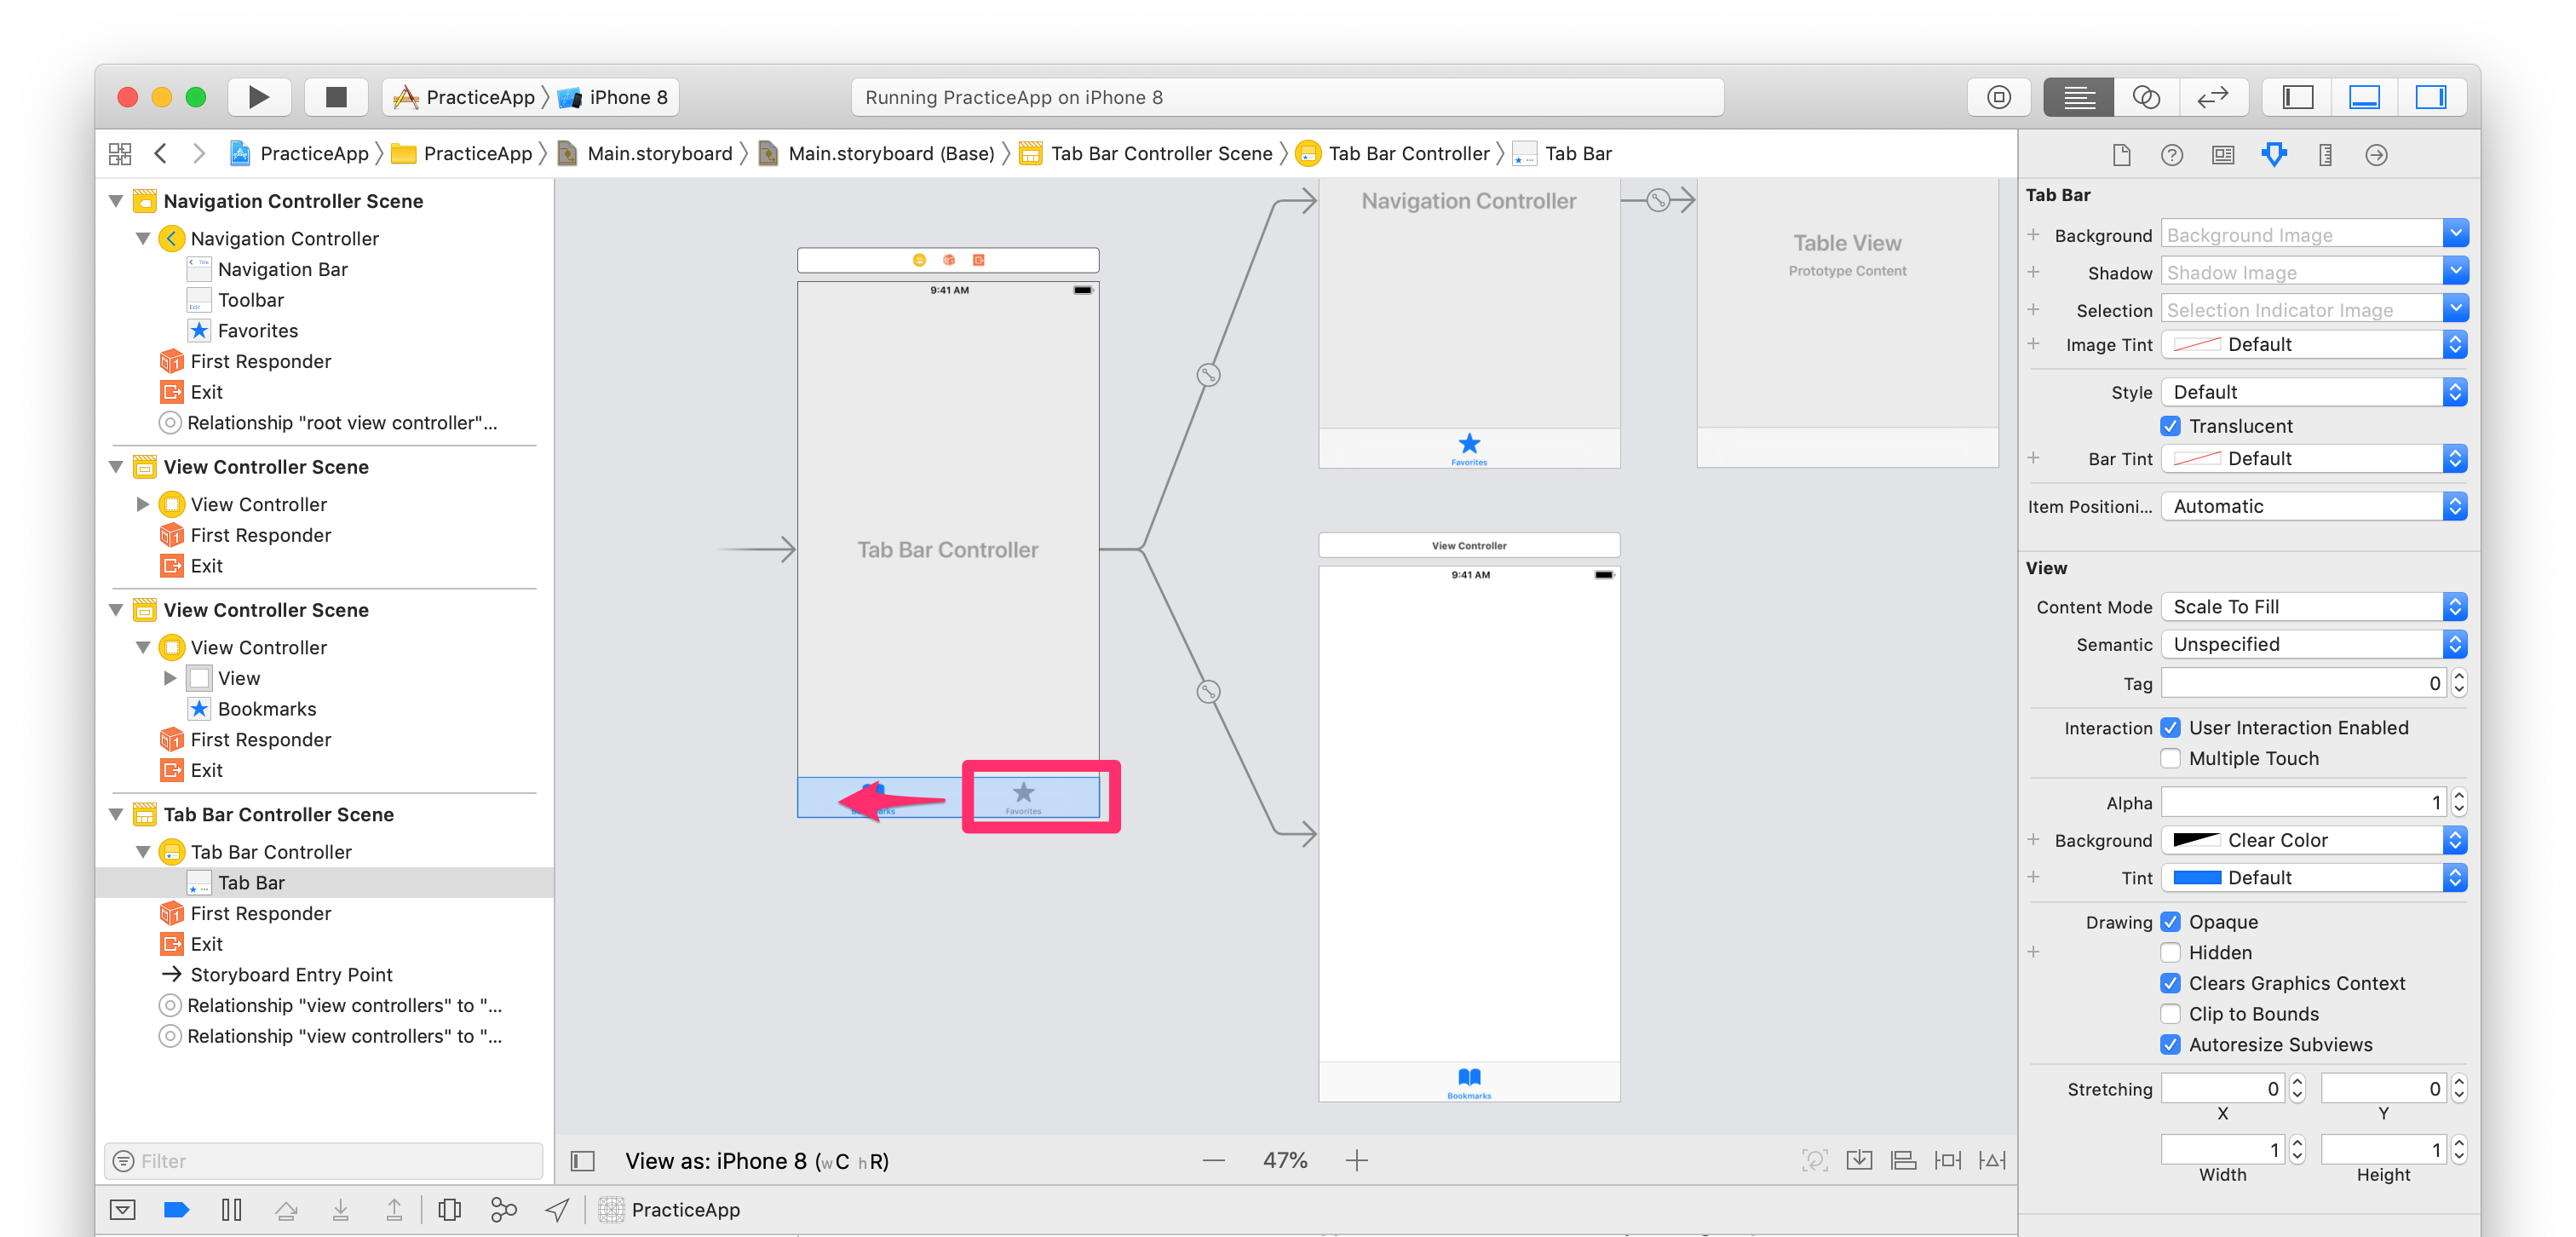
2.1. UITabBarControllerの追加
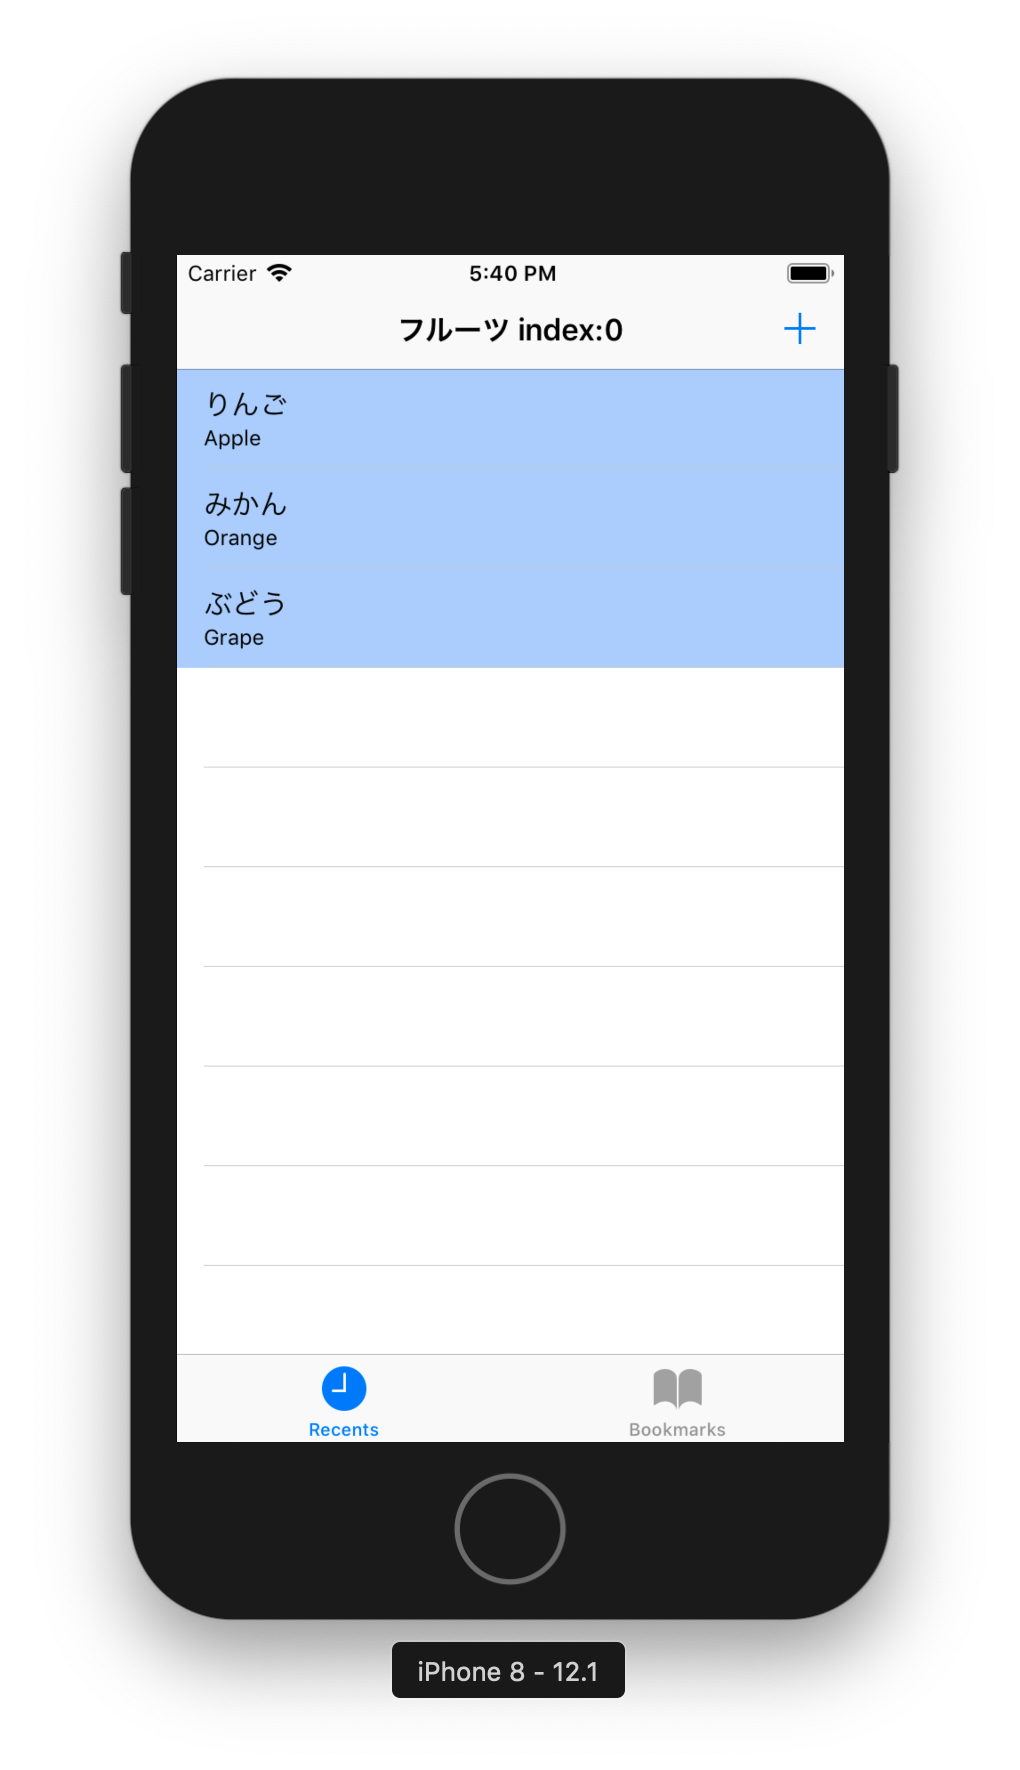
例によってStoryboard右上のボタンからコンポネント追加
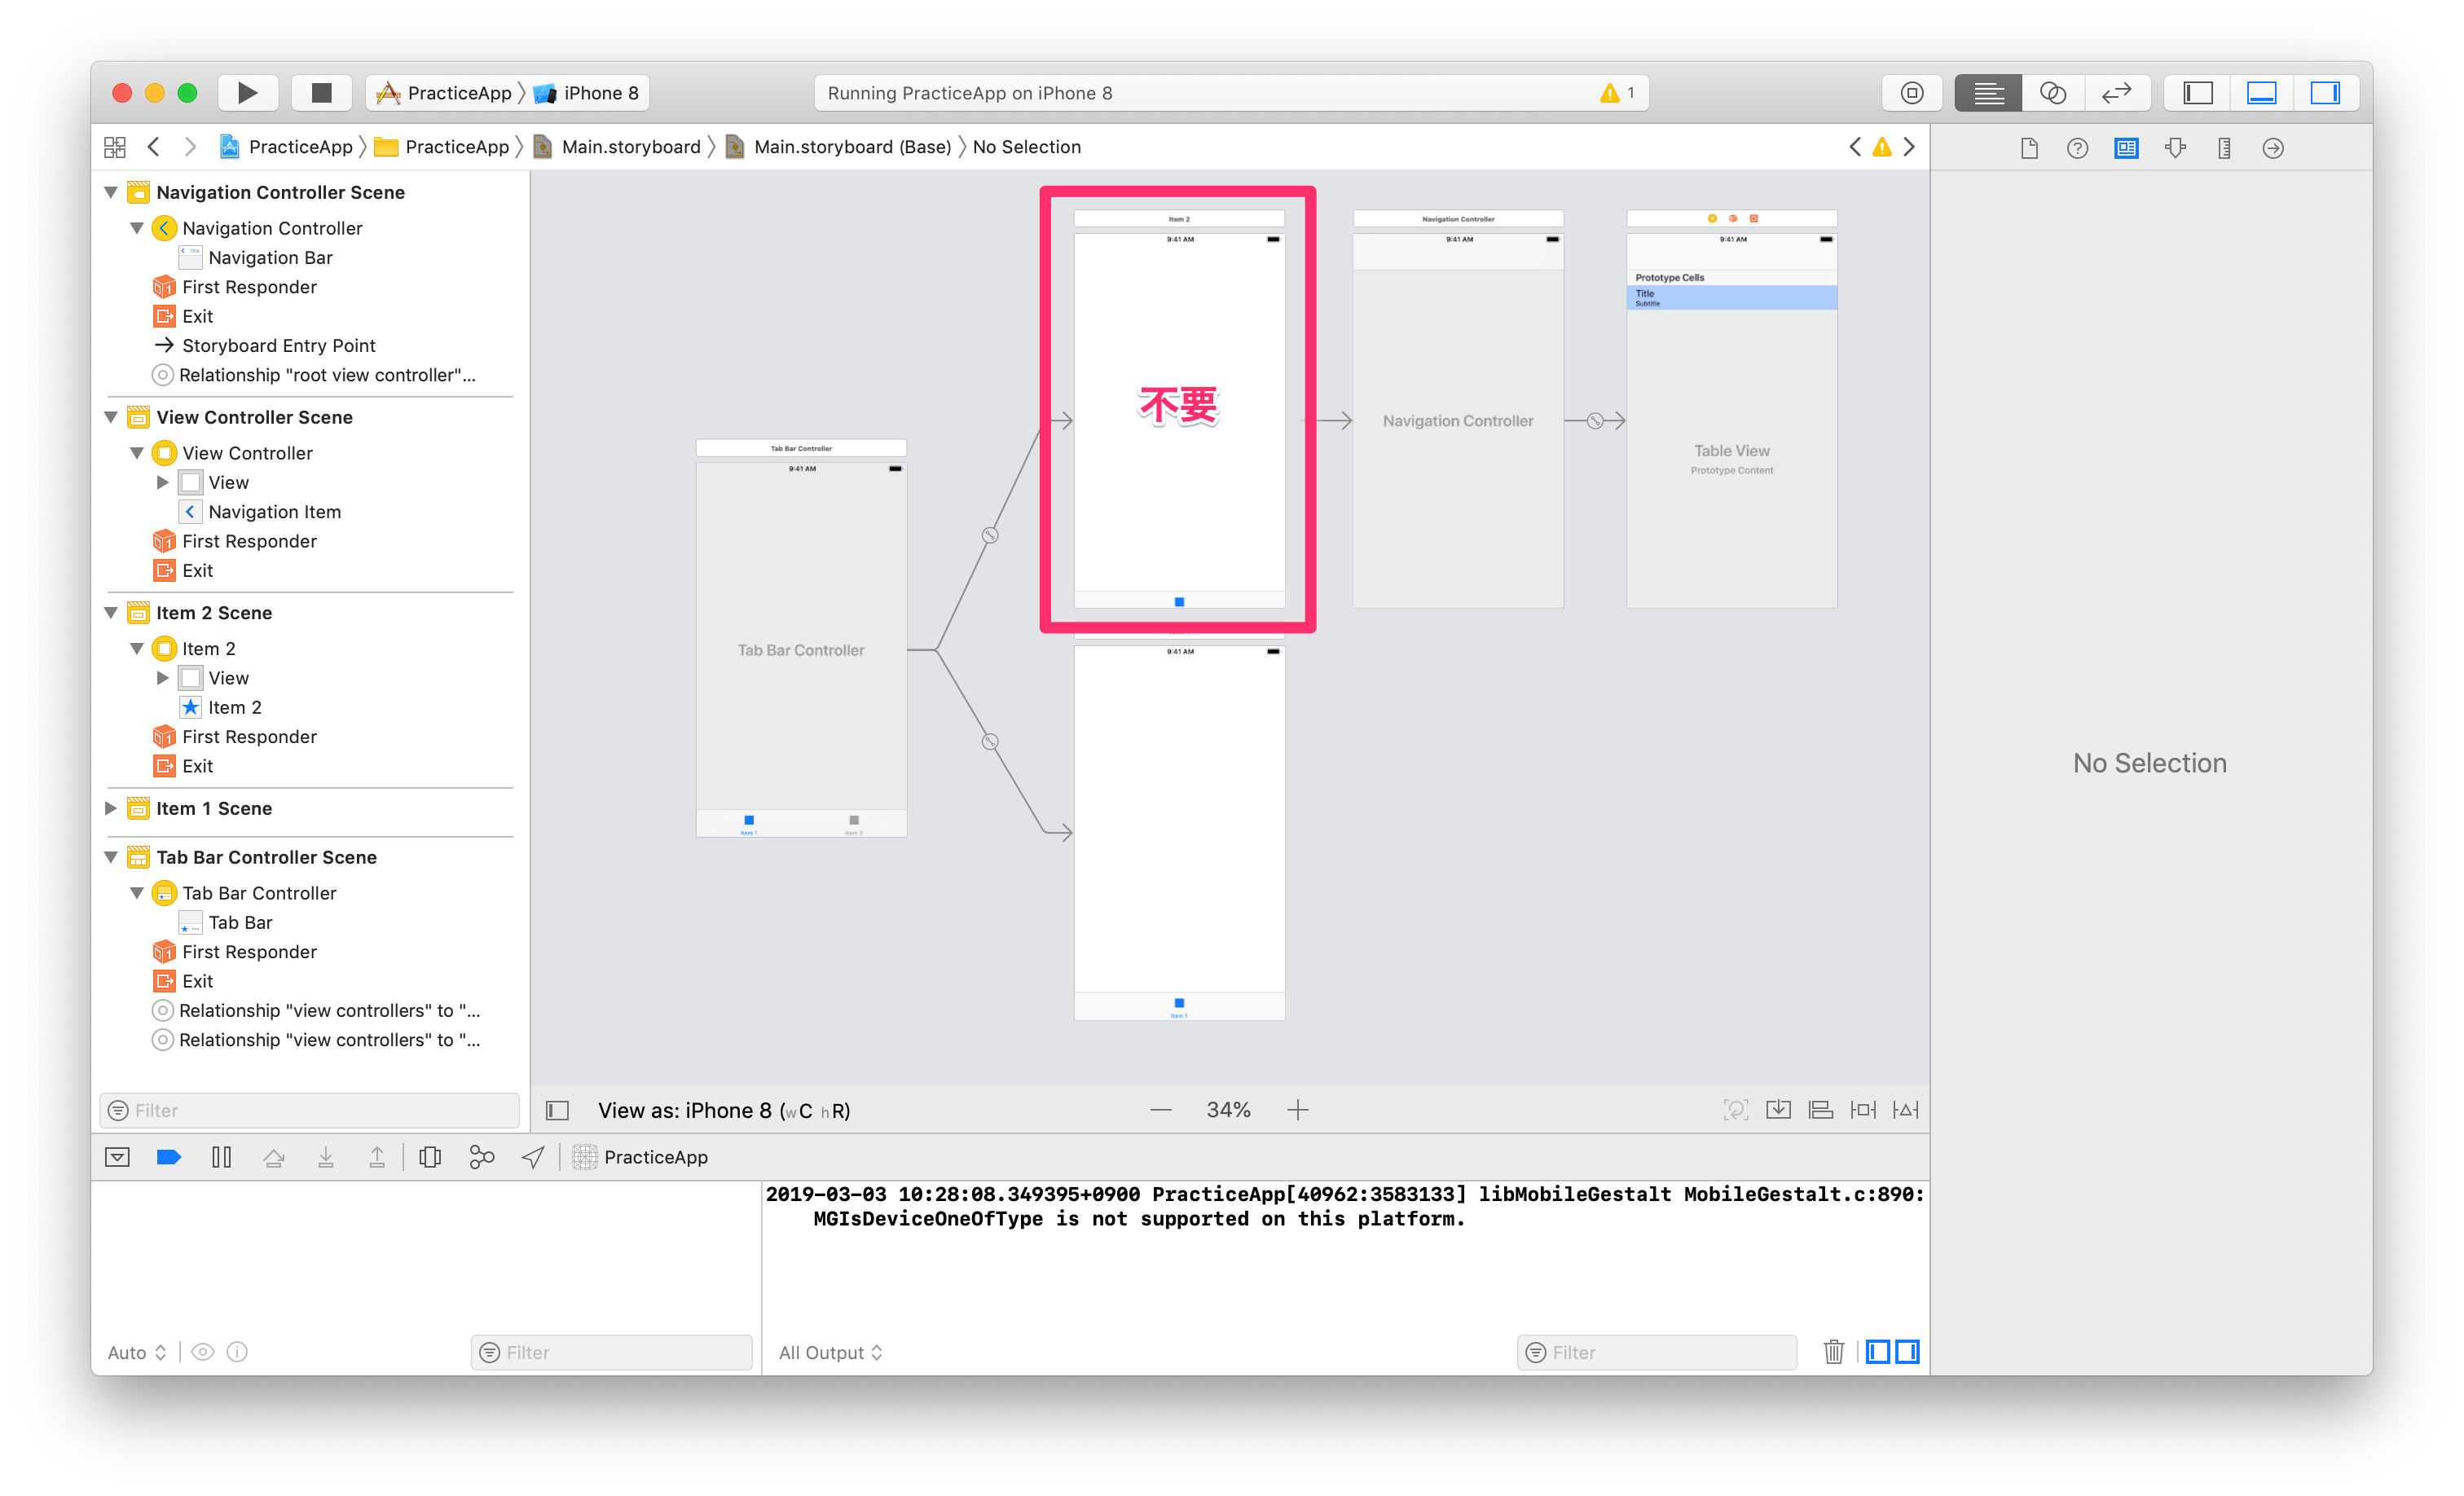
例によってここから追加すると、すでにtabが2つ紐づいた状態で配置されてとても邪魔。
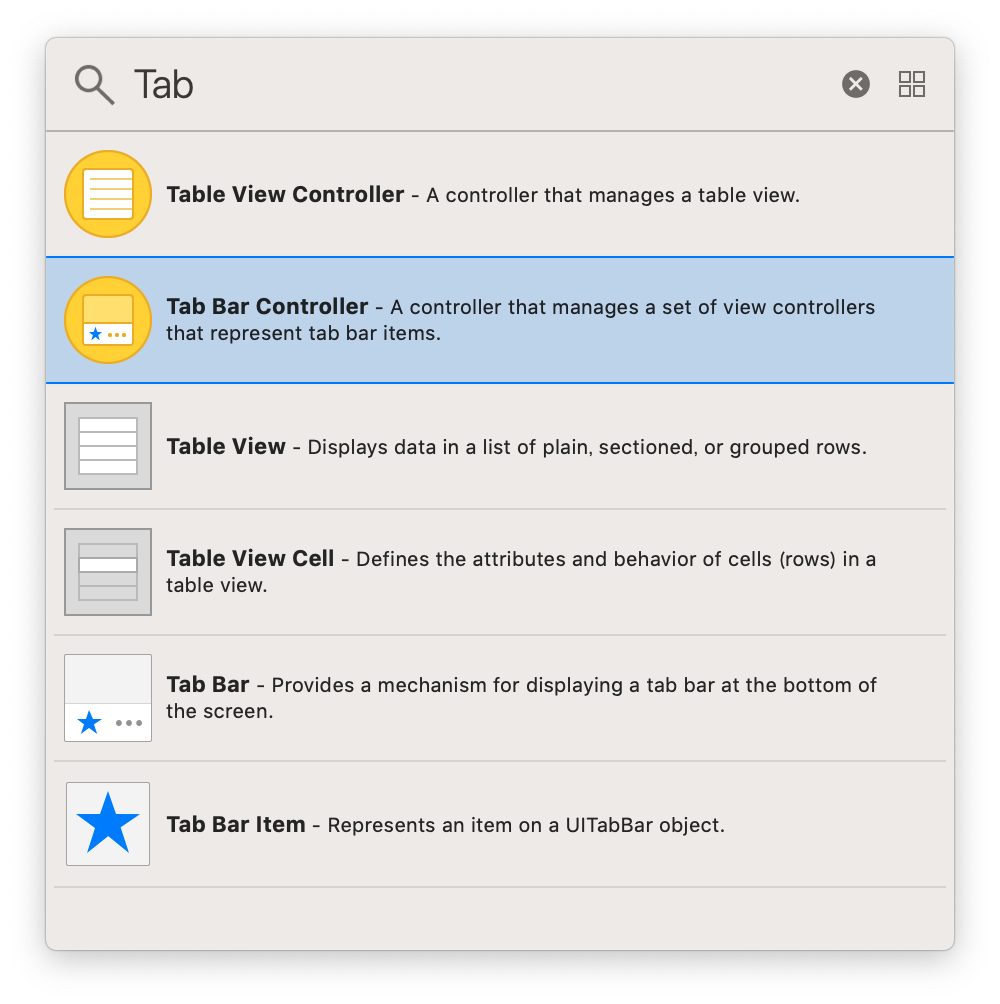
爆速で消しにかかる。
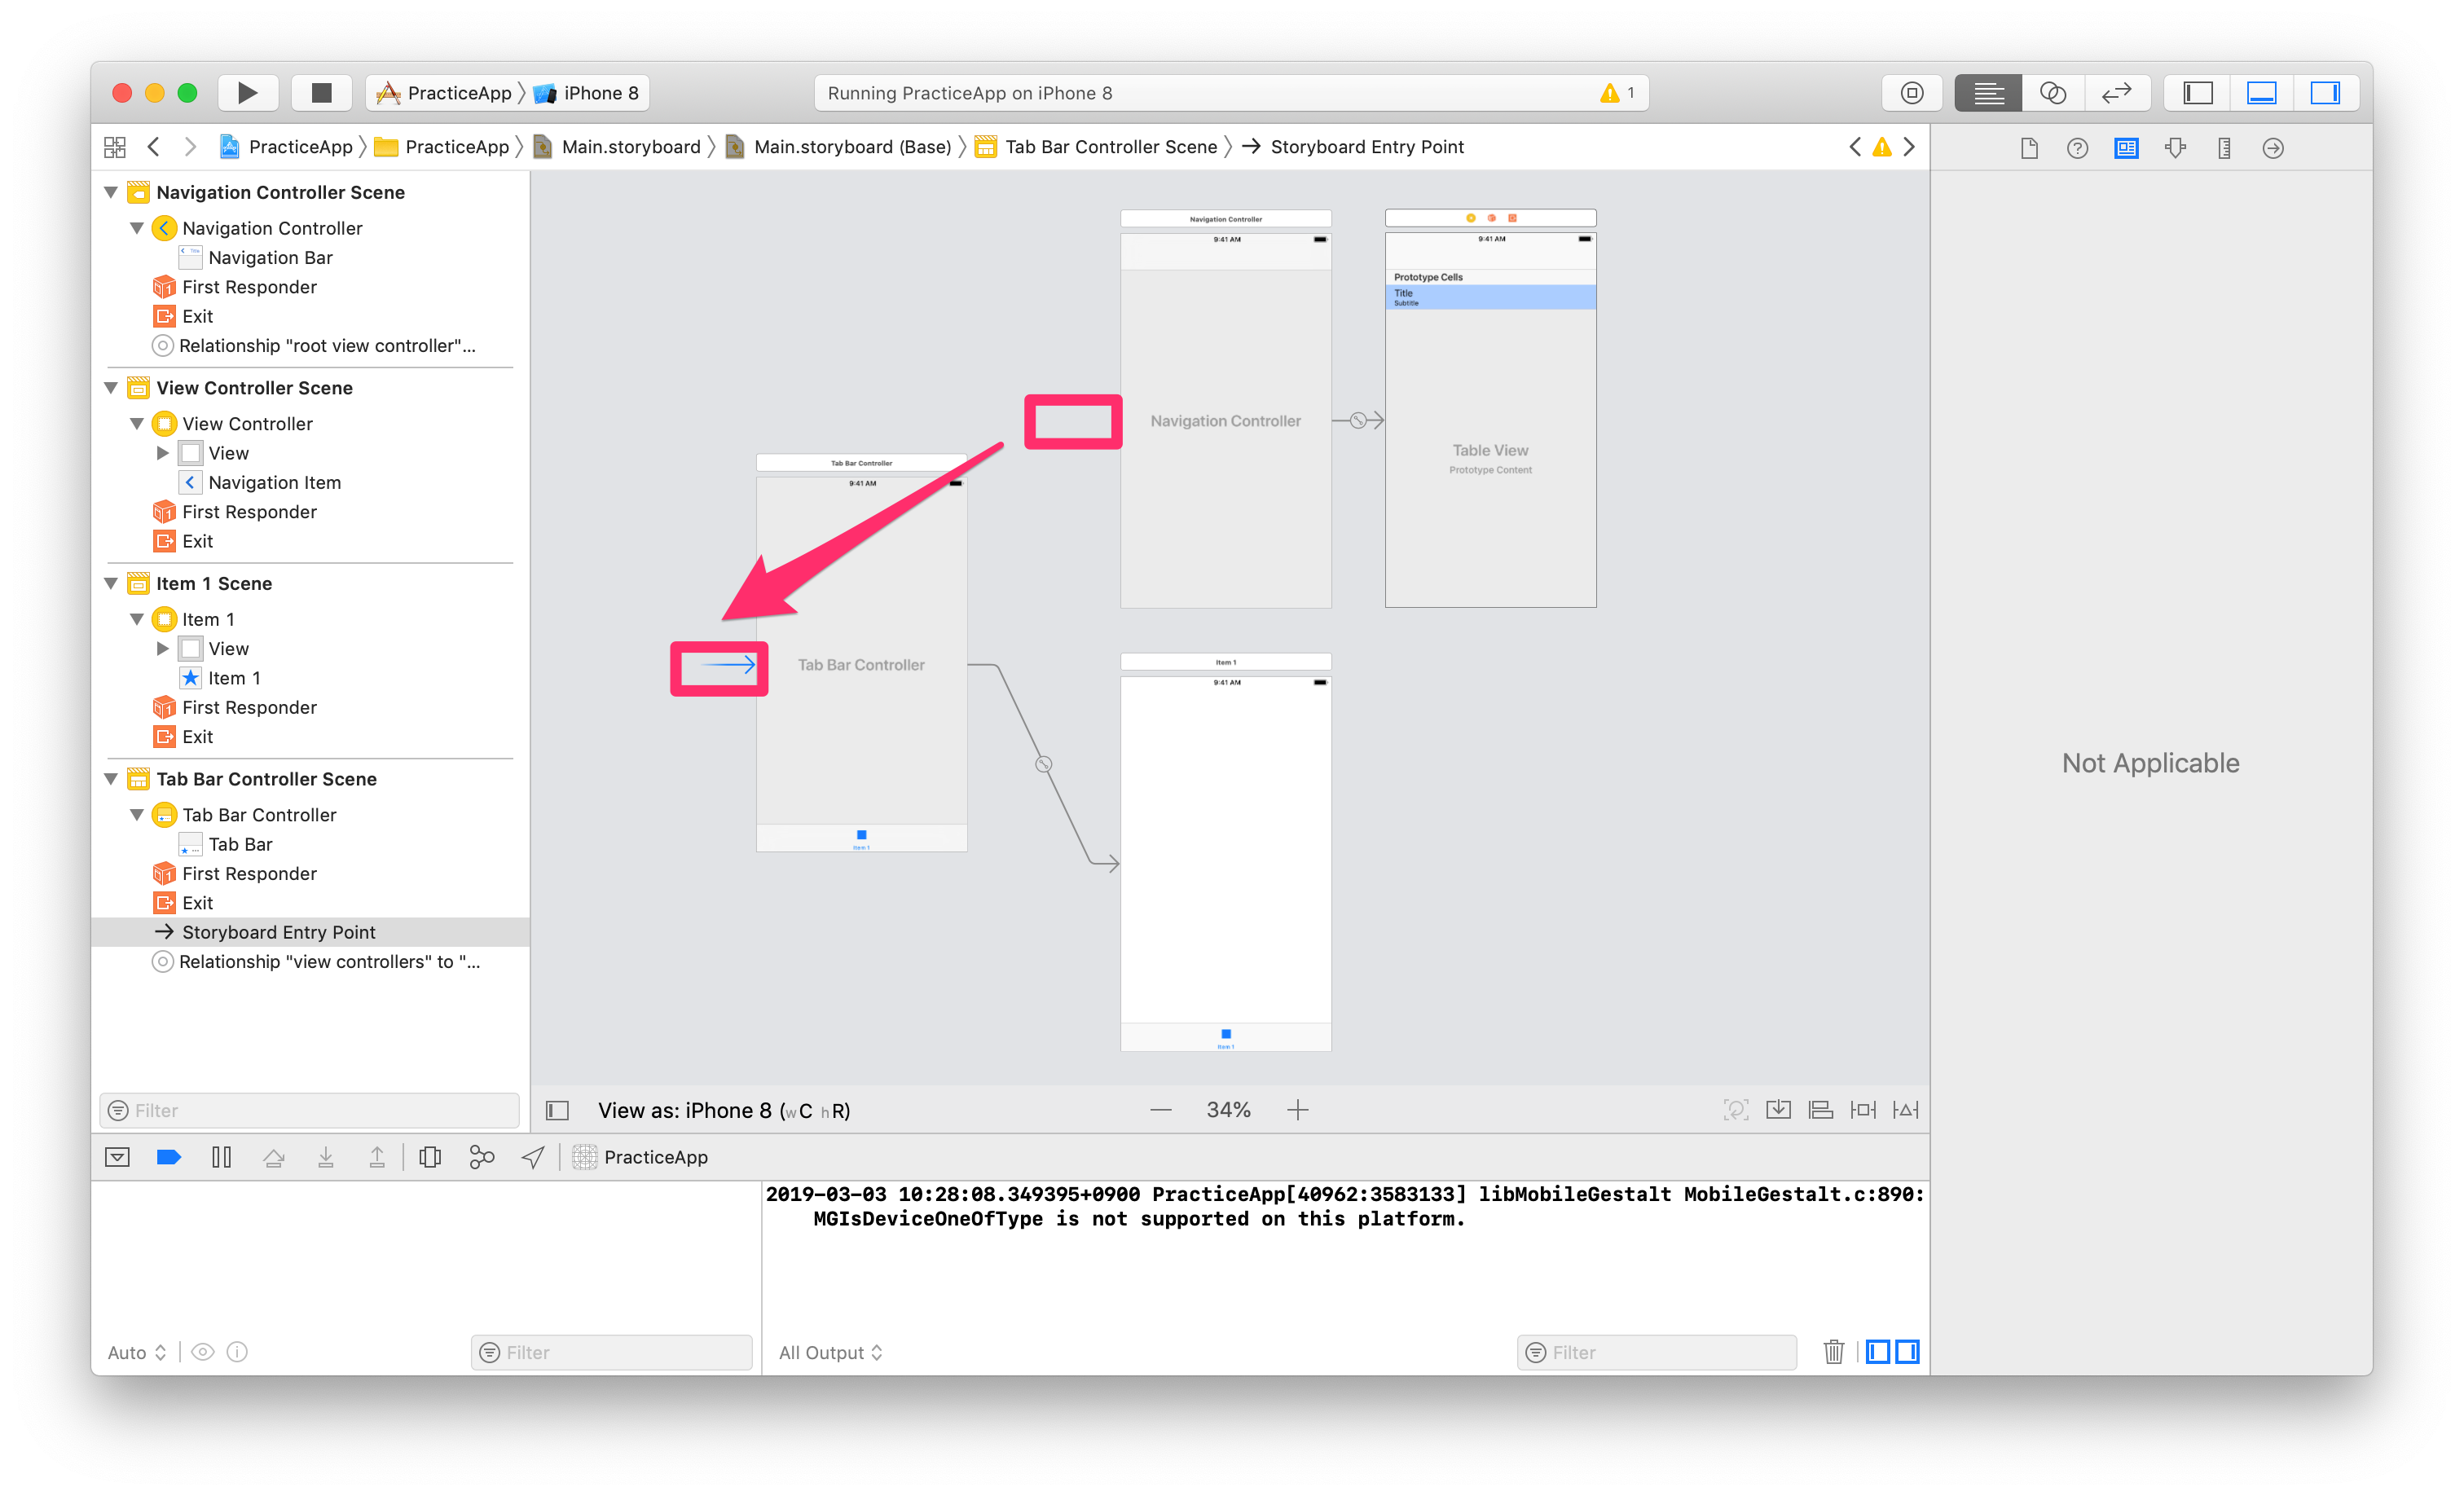
また、EntrypointをUITabBarController側に変更する
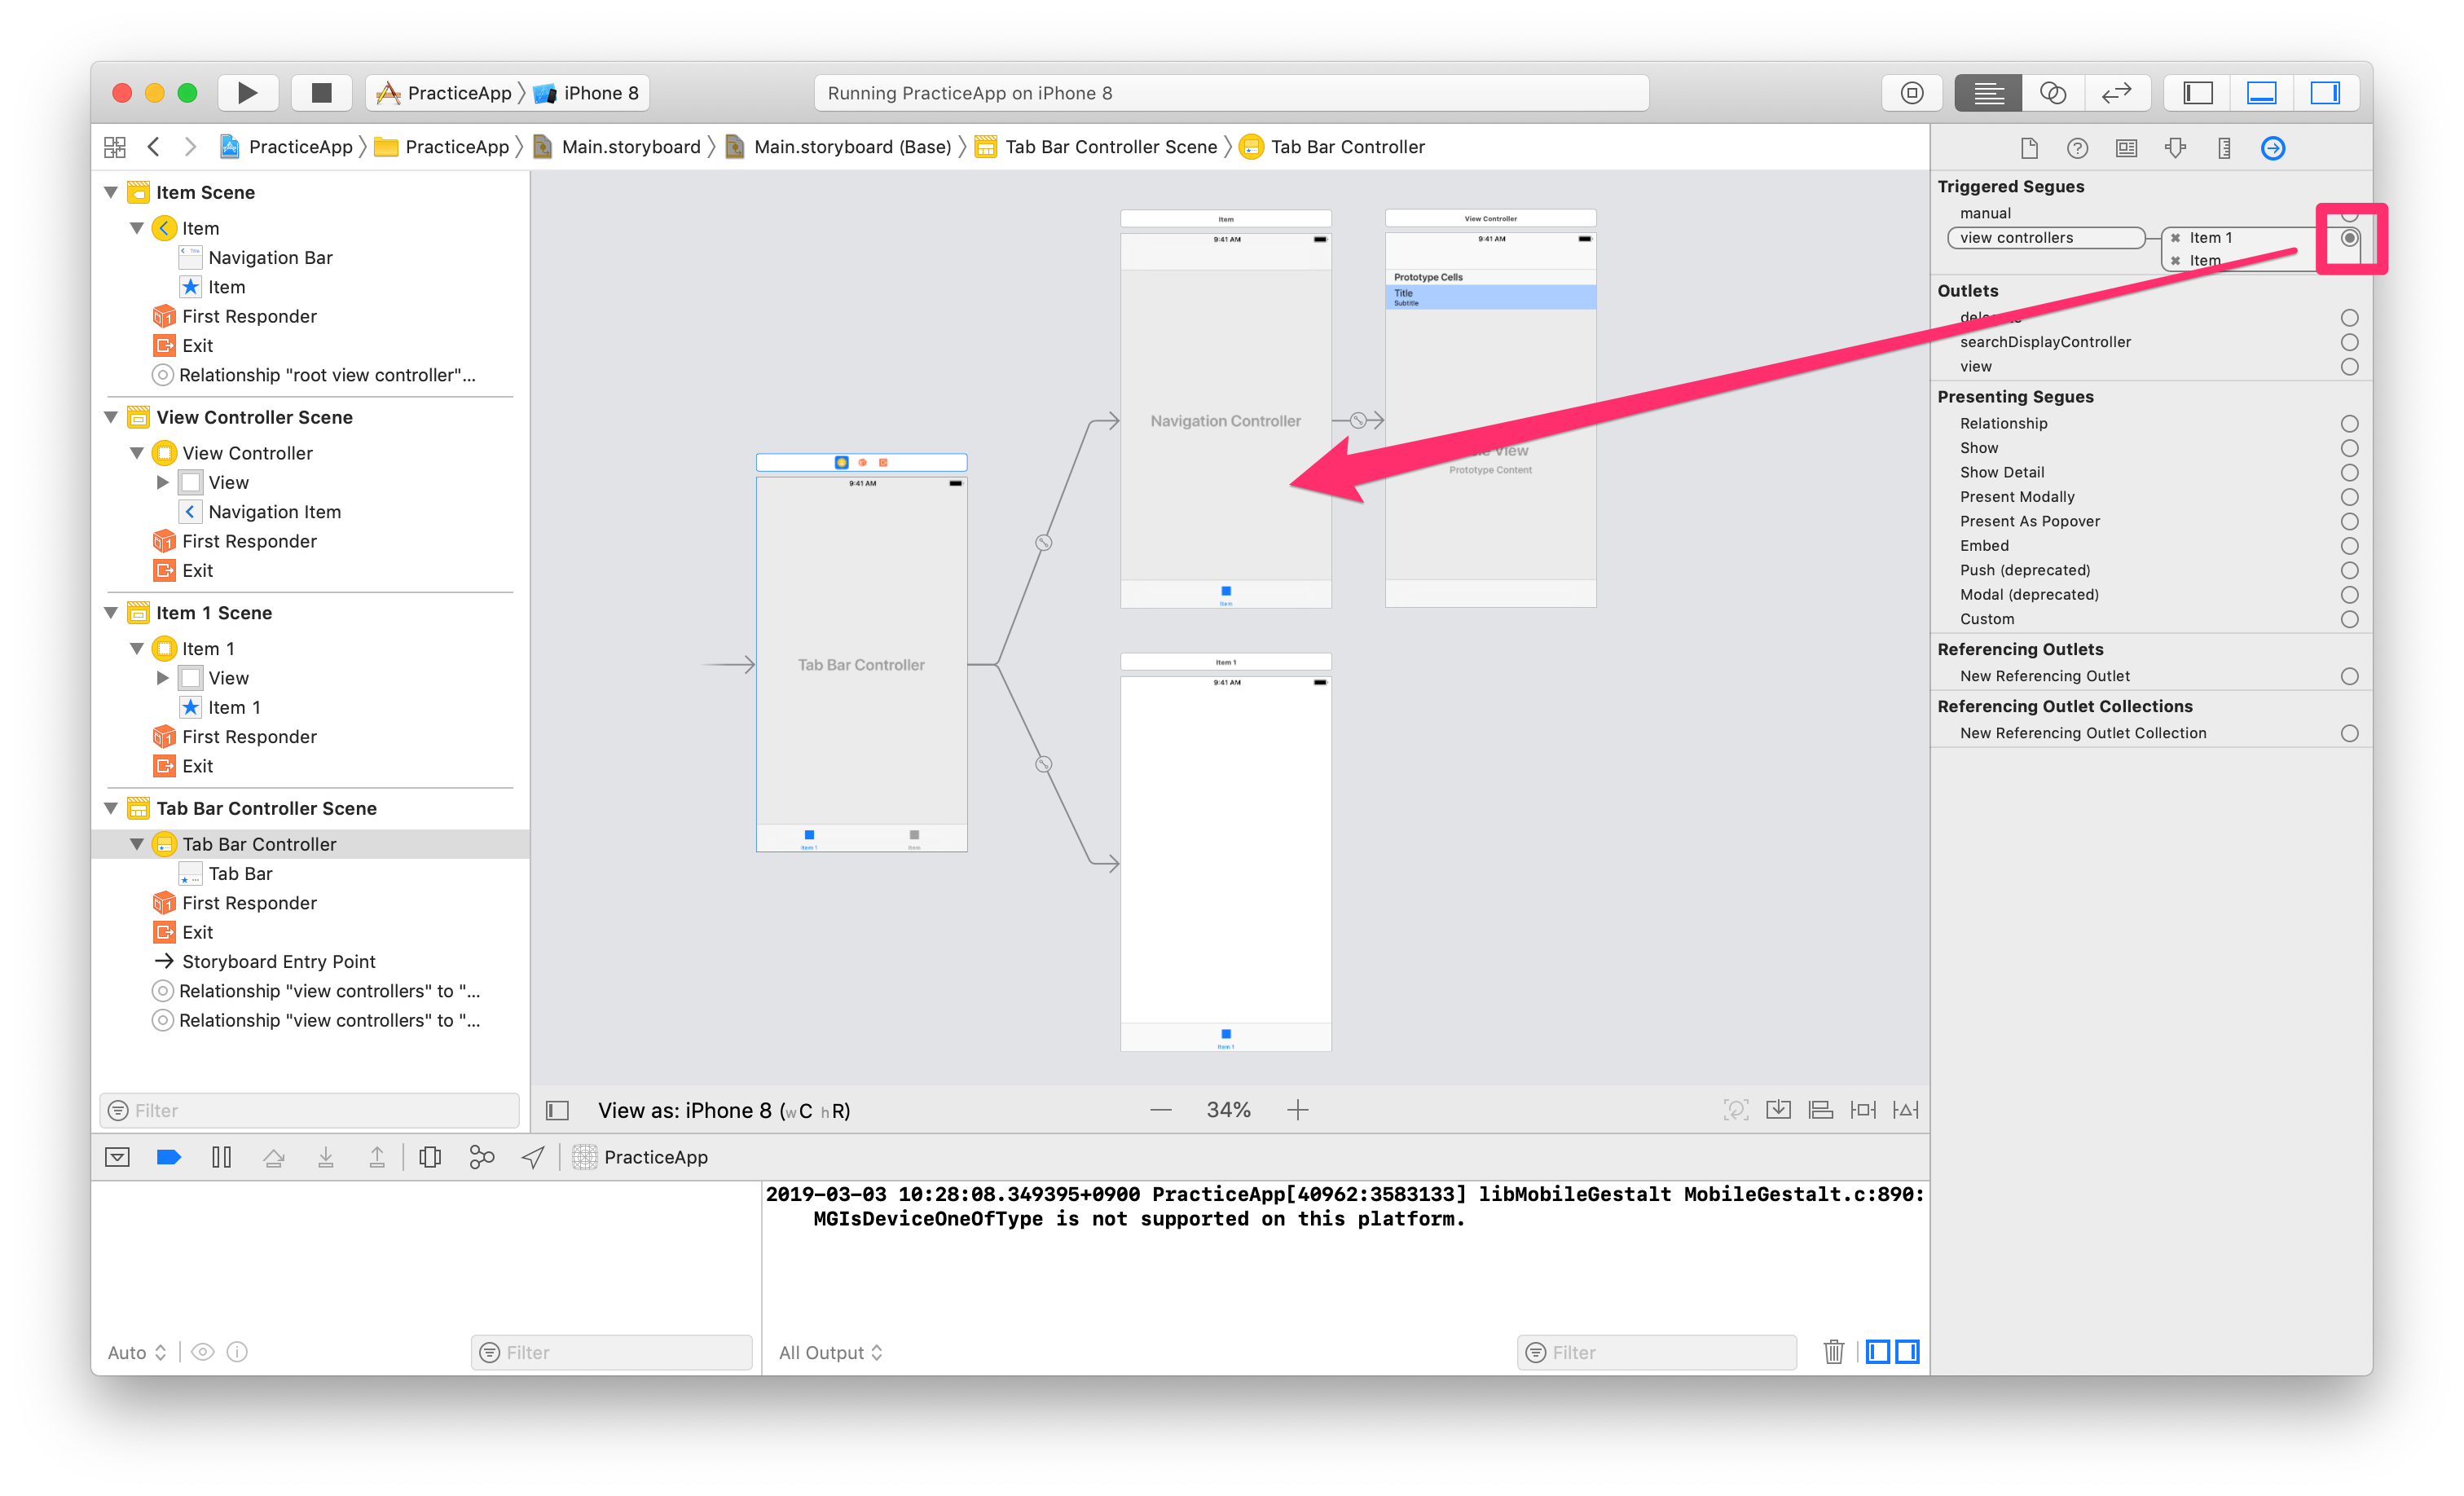
UITabBarControllerのrootViewControllerとして既存のUINavigationControllerをバインドする
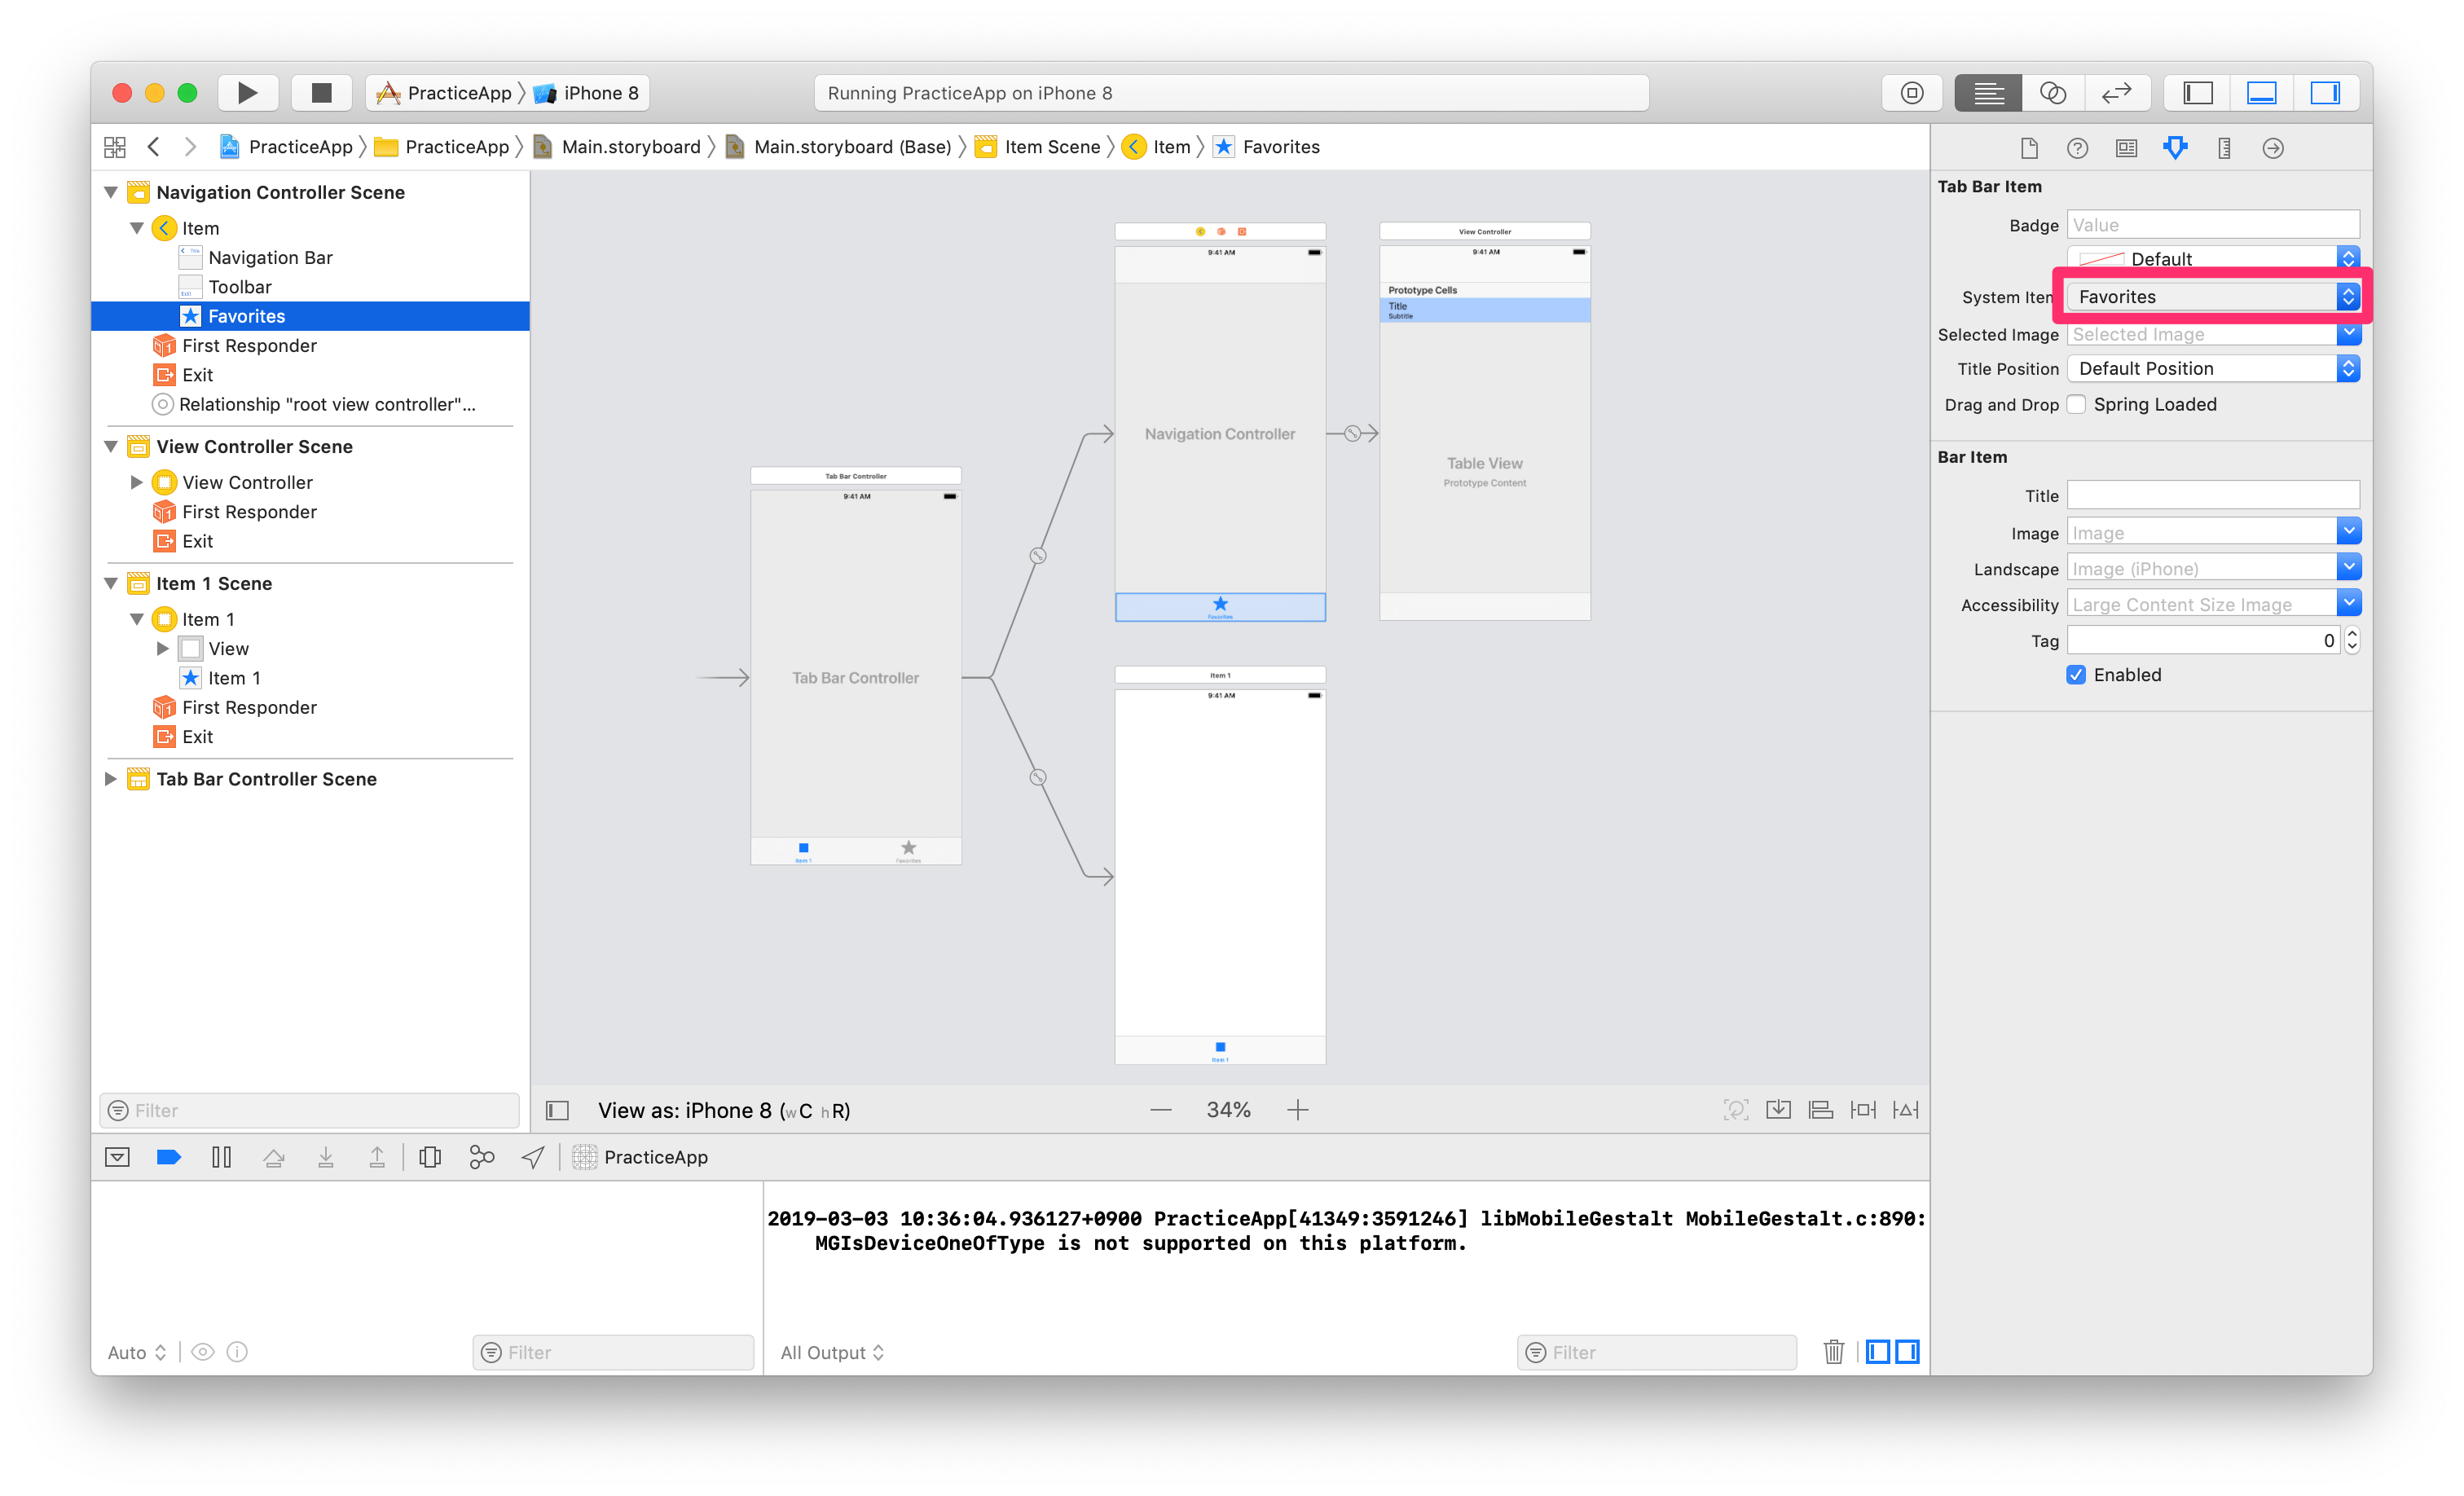
TabBarItem要素を選択し、「System Item」を変更し、アイコンを設定する
最後に、TabBarのtab要素をドラッグし、順番を入れ替える
2.2. コード修正
これによって以下のコードが削減できる。
--- a/PracticeApp/AppDelegate.swift
+++ b/PracticeApp/AppDelegate.swift
@@ -17,21 +17,6 @@ class AppDelegate: UIResponder, UIApplicationDelegate {
     func application(_ application: UIApplication, didFinishLaunchingWithOptions launchOptions: [UIApplication.LaunchOptionsKey: Any]?) -> Bool {
         // Override point for customization after application launch.

-        var vcs: [UIViewController] = []
-
-        // 1st vc
-        let navc: UINavigationController = window?.rootViewController as! UINavigationController
-        navc.tabBarItem = UITabBarItem(tabBarSystemItem: .recents, tag: 0)
-        vcs.append(navc)
-
-        // 2nd vc
-        let vc: UIViewController = UIViewController()
-        vc.tabBarItem = UITabBarItem(tabBarSystemItem: .bookmarks, tag: 1)
-        vcs.append(vc)
-
-        let tabc: UITabBarController = UITabBarController(nibName: nil, bundle: Bundle.main)
-        tabc.setViewControllers(vcs, animated: true)
-        window?.rootViewController = tabc
         return true
     }
ポイントは特にない。この辺りはStoryboardに一任できそう。
2.3. 起動
3. まとめ
コードは前回と変わらないため割愛
