環境構築はこちらのページとほぼ同様です。
Quickstart: Compose and Django
Web と DB の2つのコンテナを作成します。
環境構築
mkdir proj01
cd proj01/
次の3つのファイルが必要です。
Dockerfile
requirements.txt
docker-compose.yml
フォルダー構造
$ tree proj01
proj01
├── docker-compose.yml
├── Dockerfile
└── requirements.txt
Dockerfile
# syntax=docker/dockerfile:1
FROM python:3
ENV PYTHONDONTWRITEBYTECODE=1
ENV PYTHONUNBUFFERED=1
WORKDIR /code
COPY requirements.txt /code/
RUN pip install -r requirements.txt
COPY . /code/
requirements.txt
Django>=6.0,<7.0
psycopg2>=2.9
docker-compose.yml
services:
  db:
    image: postgres
    volumes:
      - ./data/db:/var/lib/postgresql/data
    environment:
      - POSTGRES_DB=postgres
      - POSTGRES_USER=postgres
      - POSTGRES_PASSWORD=postgres
  web:
    build: .
    command: python manage.py runserver 0.0.0.0:8000
    volumes:
      - .:/code
    ports:
      - "8000:8000"
    environment:
      - POSTGRES_NAME=postgres
      - POSTGRES_USER=postgres
      - POSTGRES_PASSWORD=postgres
    depends_on:
      - db
プロジェクトの作成
docker-compose run web django-admin startproject proj01 .
実行後のフォルダー構造
$ tree proj01
proj01
├── data
│   └── db [error opening dir]
├── docker-compose.yml
├── Dockerfile
├── manage.py
├── proj01
│   ├── asgi.py
│   ├── __init__.py
│   ├── settings.py
│   ├── urls.py
│   └── wsgi.py
└── requirements.txt
この時点でサーバーの起動
docker-compose up -d
何故か PostgreSQL が立ち上がらないので、次のコマンドで立ち上げる
docker run -e POSTGRES_PASSWORD=postgres postgres
Web サーバーと DB サーバーが動いていることを確認
$ docker ps
$ docker ps
CONTAINER ID   IMAGE        COMMAND                   CREATED          STATUS          PORTS                                         NAMES
384366d54cb7   postgres     "docker-entrypoint.s…"   10 seconds ago   Up 10 seconds   5432/tcp                                      trusting_cannon
3497724fd8c8   proj01_web   "python manage.py ru…"   19 minutes ago   Up 19 minutes   0.0.0.0:8000->8000/tcp, [::]:8000->8000/tcp   proj01_web_1
ブラウザーで http://localhost:8000/ にアクセス

ファイル属性の変更
sudo chown -R uchida:uchida .
Web サーバーにアクセス
$ docker exec -it proj01_web_1 bash
root@e0a8f67628b5:/code#
DB サーバーにアクセス
$ docker exec -it trusting_cannon bash
root@384366d54cb7:/#
Django のプログラムを改造してみます。
こちらと同様の変更を行います。
Django で Hello World
python manage.py migrate
python manage.py startapp home
フォルダー構造
$ tree -L 1 proj01
proj01
├── data
├── db.sqlite3
├── docker-compose.yml
├── Dockerfile
├── home
├── manage.py
├── proj01
└── requirements.txt
次を作成または編集します。
home/views.py
home/urls.py
proj01/settings.py
proj01/urls.py
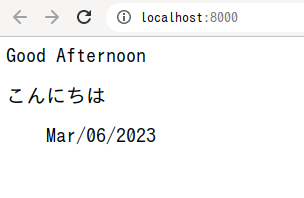
home/view.py
from django.http import HttpResponse

def index(request):
    str_out = "<p>Good Afternoon</p>"
    str_out += "<p>こんにちは</p>"
    str_out += "<blockquote>"
    str_out += "<p>Mar/06/2023</p>"
    str_out += "</blockquote>"
    return HttpResponse(str_out)
home/urls.py
from django.urls import path

from . import views

urlpatterns = [
    path('', views.index, name='index'),
]
proj01/urls.py
from django.contrib import admin
from django.urls import include
from django.urls import path

urlpatterns = [
    path('', include('home.urls')),
    path('admin/', admin.site.urls),
]
proj01/settings.py の編集
'home' を加えます。
proj01/settings.py
(省略)
INSTALLED_APPS = [
    'home',
    'django.contrib.admin',
    'django.contrib.auth',
    'django.contrib.contenttypes',
    'django.contrib.sessions',
    'django.contrib.messages',
    'django.contrib.staticfiles',
]
(省略)
ブラウザーで http://localhost:8000/ にアクセス
PostgreSQL を使ってみます。
ユーザーの作成
データベースの作成
psql を起動してデータベースの選択
$ docker exec -it trusting_cannon bash
root@384366d54cb7:/# su postgres
postgres@384366d54cb7:/$ createuser scott -P
Enter password for new role:
Enter it again:
postgres@384366d54cb7:/$ createdb city
postgres@384366d54cb7:/$ psql
psql (18.3 (Debian 18.3-1.pgdg13+1))
Type "help" for help.

postgres=# \c city
You are now connected to database "city" as user "postgres".
city=#
テーブルの作成
データの入れ込み
データの表示
city=# create table cities (id varchar(10) primary key, name text, population int, date_mod date);
CREATE TABLE
city=# insert into cities values ('t3461','広島',72814,'2001-6-14');
INSERT 0 1
city=# insert into cities values ('t3462','福山',81738,'2001-7-11');
INSERT 0 1
city=# insert into cities values ('t3463','東広島',93513,'2001-6-12');
INSERT 0 1
city=# select * from cities;
  id   |  name  | population |  date_mod
-------+--------+------------+------------
 t3461 | 広島   |      72814 | 2001-06-14
 t3462 | 福山   |      81738 | 2001-07-11
 t3463 | 東広島 |      93513 | 2001-06-12
(3 rows)

city=#
psql の終了
city=# exit
postgres@4c30256e6c8e:/$
参考
ユーザーにテーブルへのアクセス権限をつける方法
city=# grant all on cities to scott;
GRANT