概要
Cソースコードのテスト自動化をgoogletestで行うの2記事目です。
本記事では、VSCodeで環境構築し、Cソースコードに対して1記事目でインストールしたgoogletestを用いてテストを実行します。
VSCodeでのプロジェクトの構築、ビルド設定、オブジェクトコードの実行について知りたい方にも役に立てばと思います。
全体の流れ
- googletest導入編
- VSCodeでgoogletestを実行する編(本記事の内容)
- サンプルプログラムの作成
- ビルドの設定
- 実行
- ソースコードの修正
- intellisenseの設定
- テスト自動化(作成予定でしたが、別記事で似た内容を記載しました。)
- GitHubの導入
- Jenkinsサーバーの導入
VSCodeのプロジェクト作成
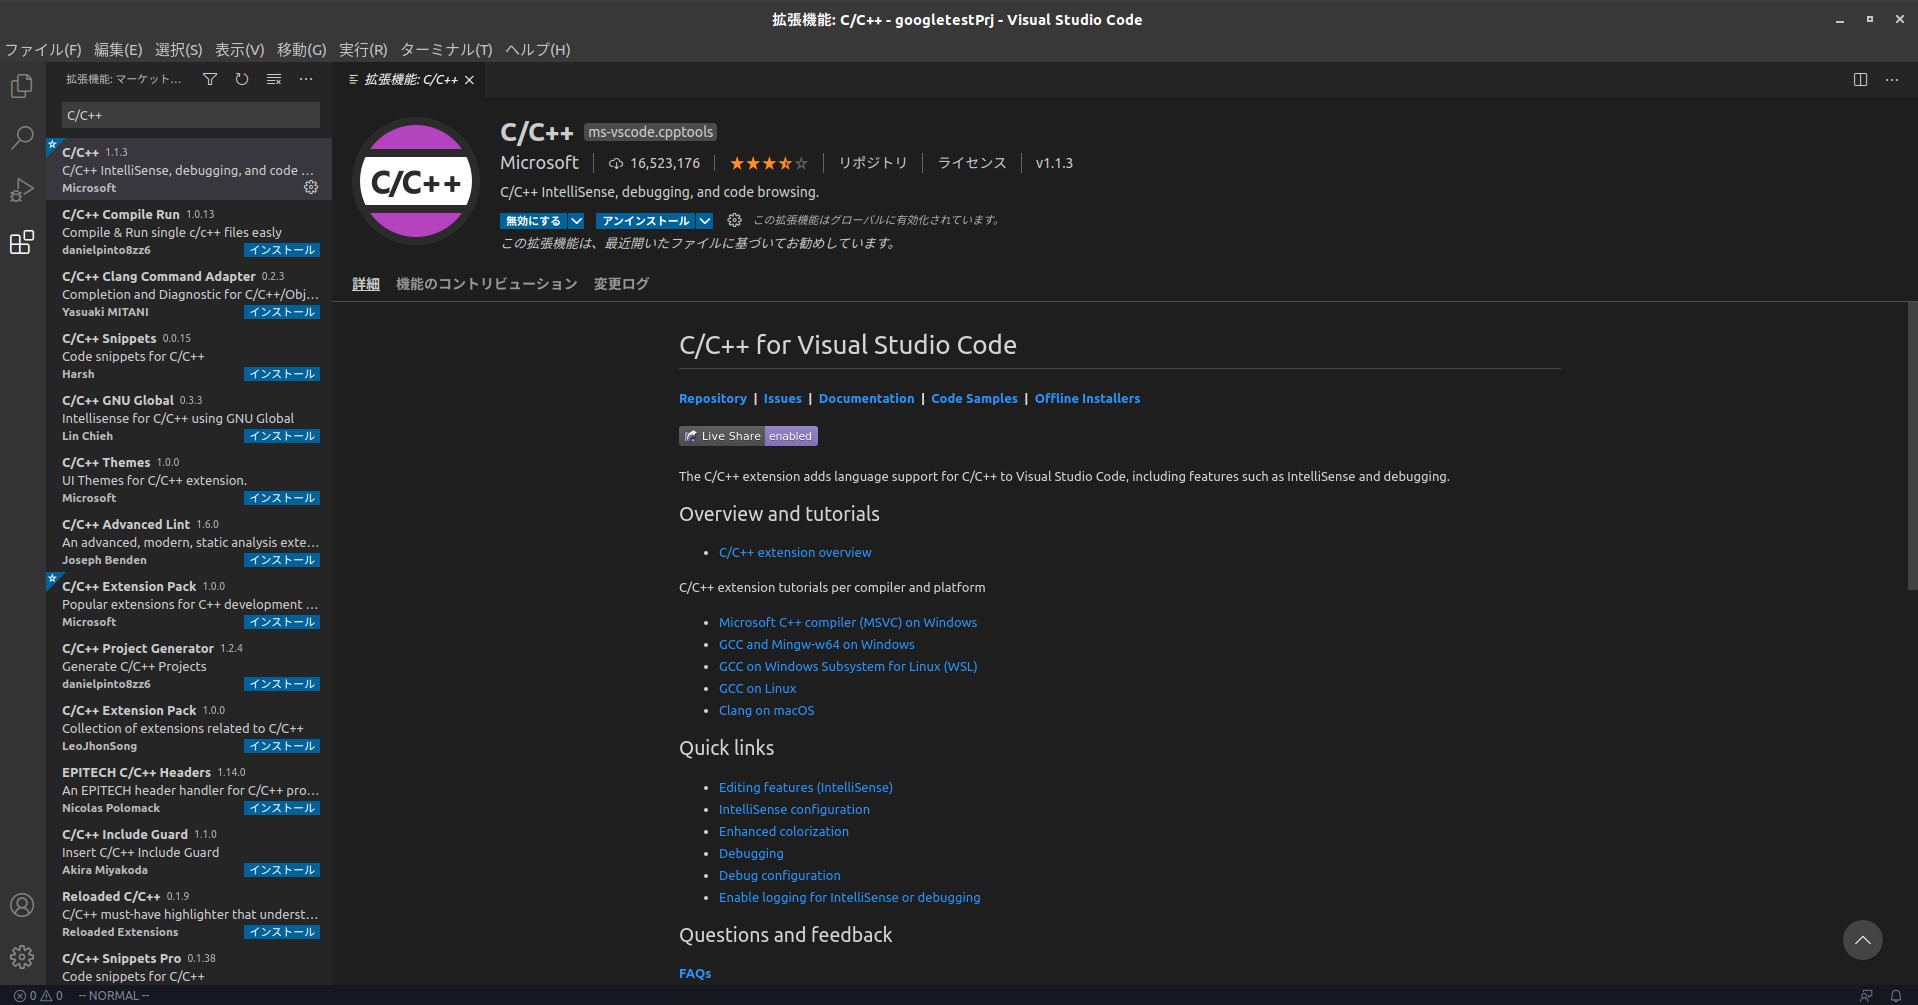
C/C++ for Visual Studio Codeのインストール
VSCodeの拡張機能から、C/C++を検索し、インストールします。

サンプルプログラムの作成
適当なフォルダを作成し、VSCodeのファイルからフォルダーを開くを選択します(今回は"googletestPrj"フォルダで勧めます)

テスト用サンプルスクリプトを作成します
addTest.cc
# include <gtest/gtest.h>
# include "add.h"

TEST(AddTest, onePlusTwoGivesThree){
    EXPECT_EQ(3, add(1,2));
}
次に、テスト対象ファイルを作成します
add.c
# include "add.h"

int add(int i1, int i2){
    return 0;
}
add.h
# ifndef ADD_H_
# define ADD_H_

# ifdef __cplusplus
extern "C" {
# endif
int add(int i1, int i2);

# ifdef __cplusplus
}
# endif

# endif /* ADD_H_*/
ビルドの設定
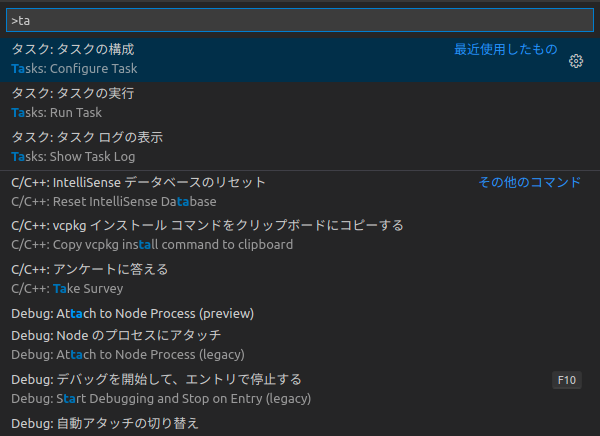
コマンドパレットを開き(Ctrl + Shift + P)、
Tasks: Configure Task → テンプレートから tasks.json を生成 → Others 任意の外部コマンドを実行する例 を選択


テンプレートが作成されるので、下記のように修正
- "command" : シェルを実行するコマンド。(g++が無い場合は適宜インストールしてください。)
- "args" : コンパイラに渡す引数
- "*.c" "*.cc" → コンパイル対象。
- "-g" → デバッグ時にブレイクを貼るため
- "-pthread" "-lgtest_main" "-lgtest" → googletestとのリンクに必要
- "group" : "kind"属性を"build"にすることで、"Ctrl + Shift + b"押下時にこのtasks.jsonが実行されるようになる
{
    // See https://go.microsoft.com/fwlink/?LinkId=733558
    // for the documentation about the tasks.json format
    "version": "2.0.0",
    "tasks": [
        {
            "label": "addTest",
            "type": "shell",
            "command": "g++",
            "args": [
                "add.c",
                "addTest.cc",
                "-g",
                "-pthread",
                "-lgtest_main",
                "-lgtest",
            ],
            "group": {
                "kind": "build",
                "isDefault": true
            }
        }
    ]
}
Ctrl + Shift + B でビルドを実行すると、a.outが作成されます。

実行
作成したa.outを実行しましょう。
デバッグの開始(F5)を押し、
C++(GDB/LLDB) を選択

テンプレート(launch.json)が作成されるので、下記のように修正
- "program" : 実行するプログラム。今回のファイルパスに修正
{
    // IntelliSense を使用して利用可能な属性を学べます。
    // 既存の属性の説明をホバーして表示します。
    // 詳細情報は次を確認してください: https://go.microsoft.com/fwlink/?linkid=830387
    "version": "0.2.0",
    "configurations": [
        {
            "name": "(gdb) 起動",
            "type": "cppdbg",
            "request": "launch",
            "program": "${workspaceFolder}/a.out",
            "args": [],
            "stopAtEntry": false,
            "cwd": "${workspaceFolder}",
            "environment": [],
            "externalConsole": false,
            "MIMode": "gdb",
            "setupCommands": [
                {
                    "description": "gdb の再フォーマットを有効にする",
                    "text": "-enable-pretty-printing",
                    "ignoreFailures": true
                }
            ]
        }
    ]
}
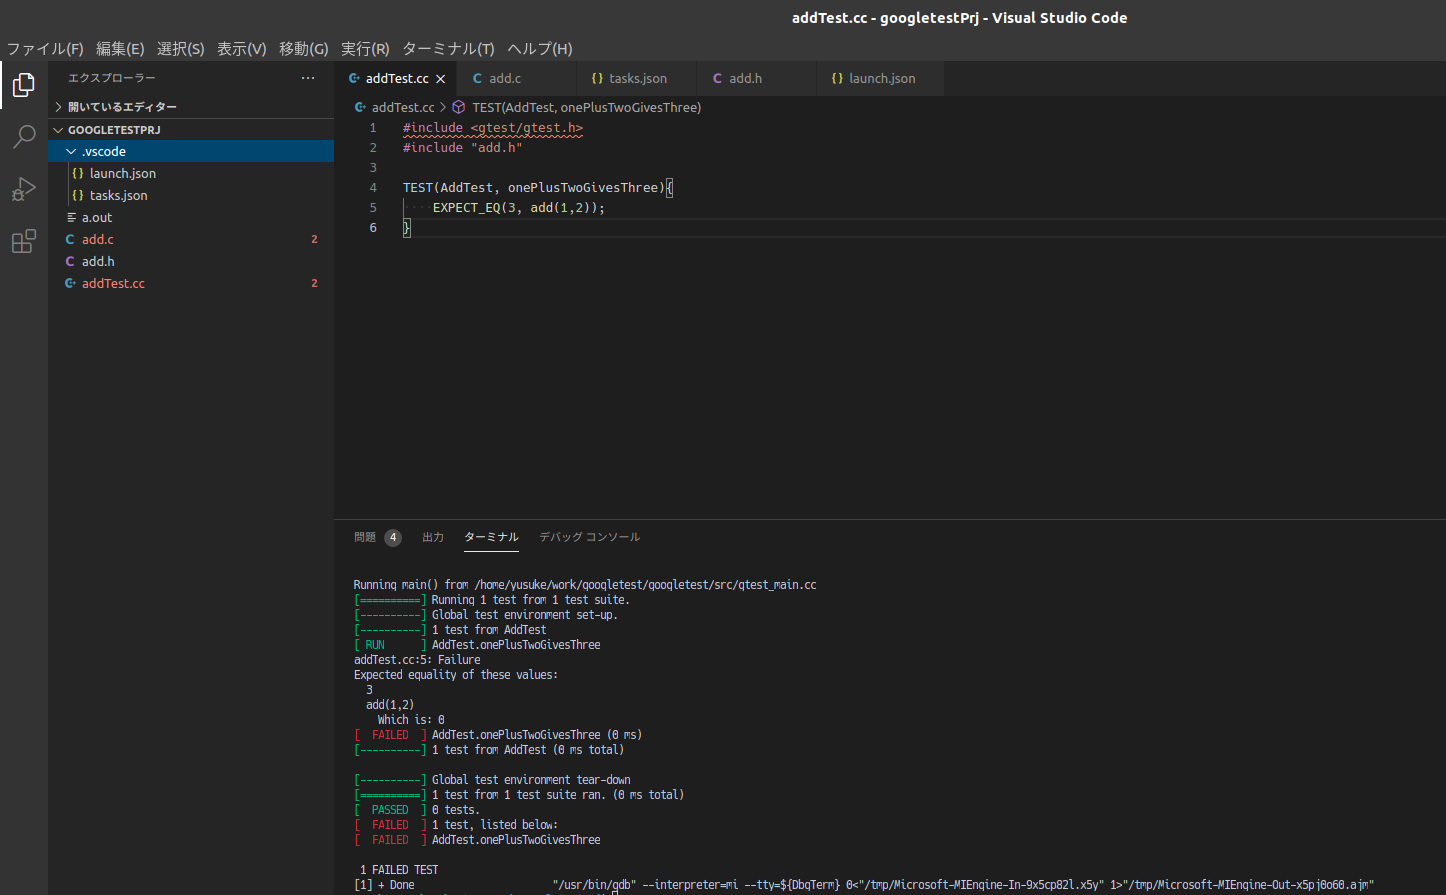
うまく行けば、ターミナル上で、テストが失敗したことが表示されます。
ソースコードの修正
__add.c__にバグが潜んでいるので修正しましょう
# include "add.h"

int add(int i1, int i2){
    return i1 + i2;
}
Ctrl + Shift + B で再度ビルドし、
Ctrl + F5 で実行!!

無事テストが通りました。
intellisenseの設定
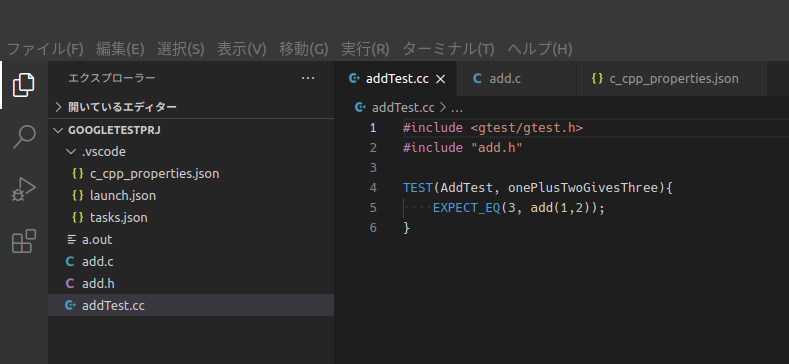
赤波線があって気持ち悪いので消します。
コマンドパレットを開き(Ctrl + Shift + P)、__C/C++: Edit Configurations(JSON)__を選択

c_cpp_properties.jsonが作成されるので下記の様に設定し、intellisenseの設定をします。
{
    "configurations": [
        {
            "name": "Linux",
            "includePath": [
                "${workspaceFolder}/**"
            ],
            "defines": [],
            "compilerPath": "/usr/bin/gcc",
            "cStandard": "gnu11",
            "cppStandard": "gnu++14",
            "intelliSenseMode": "gcc-arm"
        }
    ],
    "version": 4
}

