
Amazon Location ServiceとOpenLayersとAWS Amplifyを組み合わせてマップアプリケーションを構築してみました 
事前準備
- AWS Amplifyのインストール
AWS Amplify #001 - インストール - OpenLayersを手軽に始めるビルド環境を利用
openlayers-starter
実行環境
- node v18.1.0
- npm v8.8.0
詳細として下記について説明します。
環境構築
はじめに、環境構築をします。
環境はopenlayers-starterを利用し、事前にAWS Amplify PackageとMaplibre GL JS Amplifyのパッケージをインストールします。また、ベクトルタイルを表示するためにMapLibre OpenLayers layerのパッケージもインストールします。
npm install aws-amplify
npm install maplibre-gl-js-amplify
npm install @geoblocks/ol-maplibre-layer
package.json
{
  "name": "openlayers-starter",
  "version": "6.15.1",
  "description": "",
  "scripts": {
    "dev": "vite",
    "build": "tsc && vite build",
    "preview": "vite preview"
  },
  "keywords": [],
  "author": "Yasunori Kirimoto",
  "license": "ISC",
  "devDependencies": {
    "typescript": "^4.7.4",
    "vite": "^3.0.4"
  },
  "dependencies": {
    "@geoblocks/ol-maplibre-layer": "^0.0.4",
    "aws-amplify": "^4.3.30",
    "maplibre-gl-js-amplify": "^2.0.3",
    "ol": "^6.15.1"
  }
}
これで環境構築は完了になります!
AWS Amplifyの設定
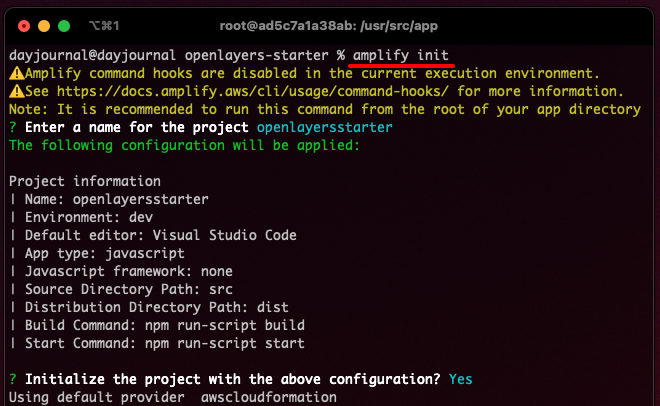
次に、AWS Amplifyの設定をします。
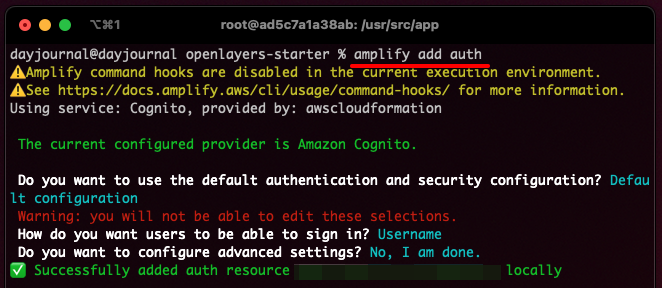
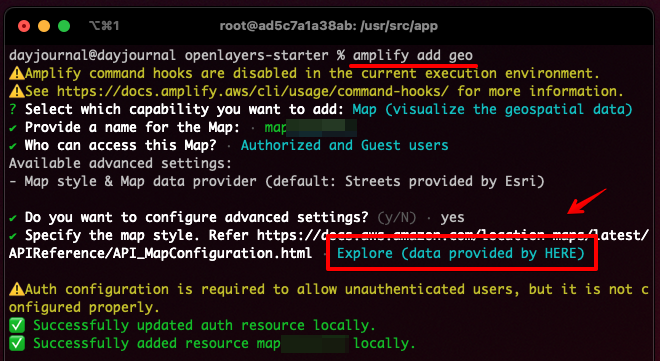
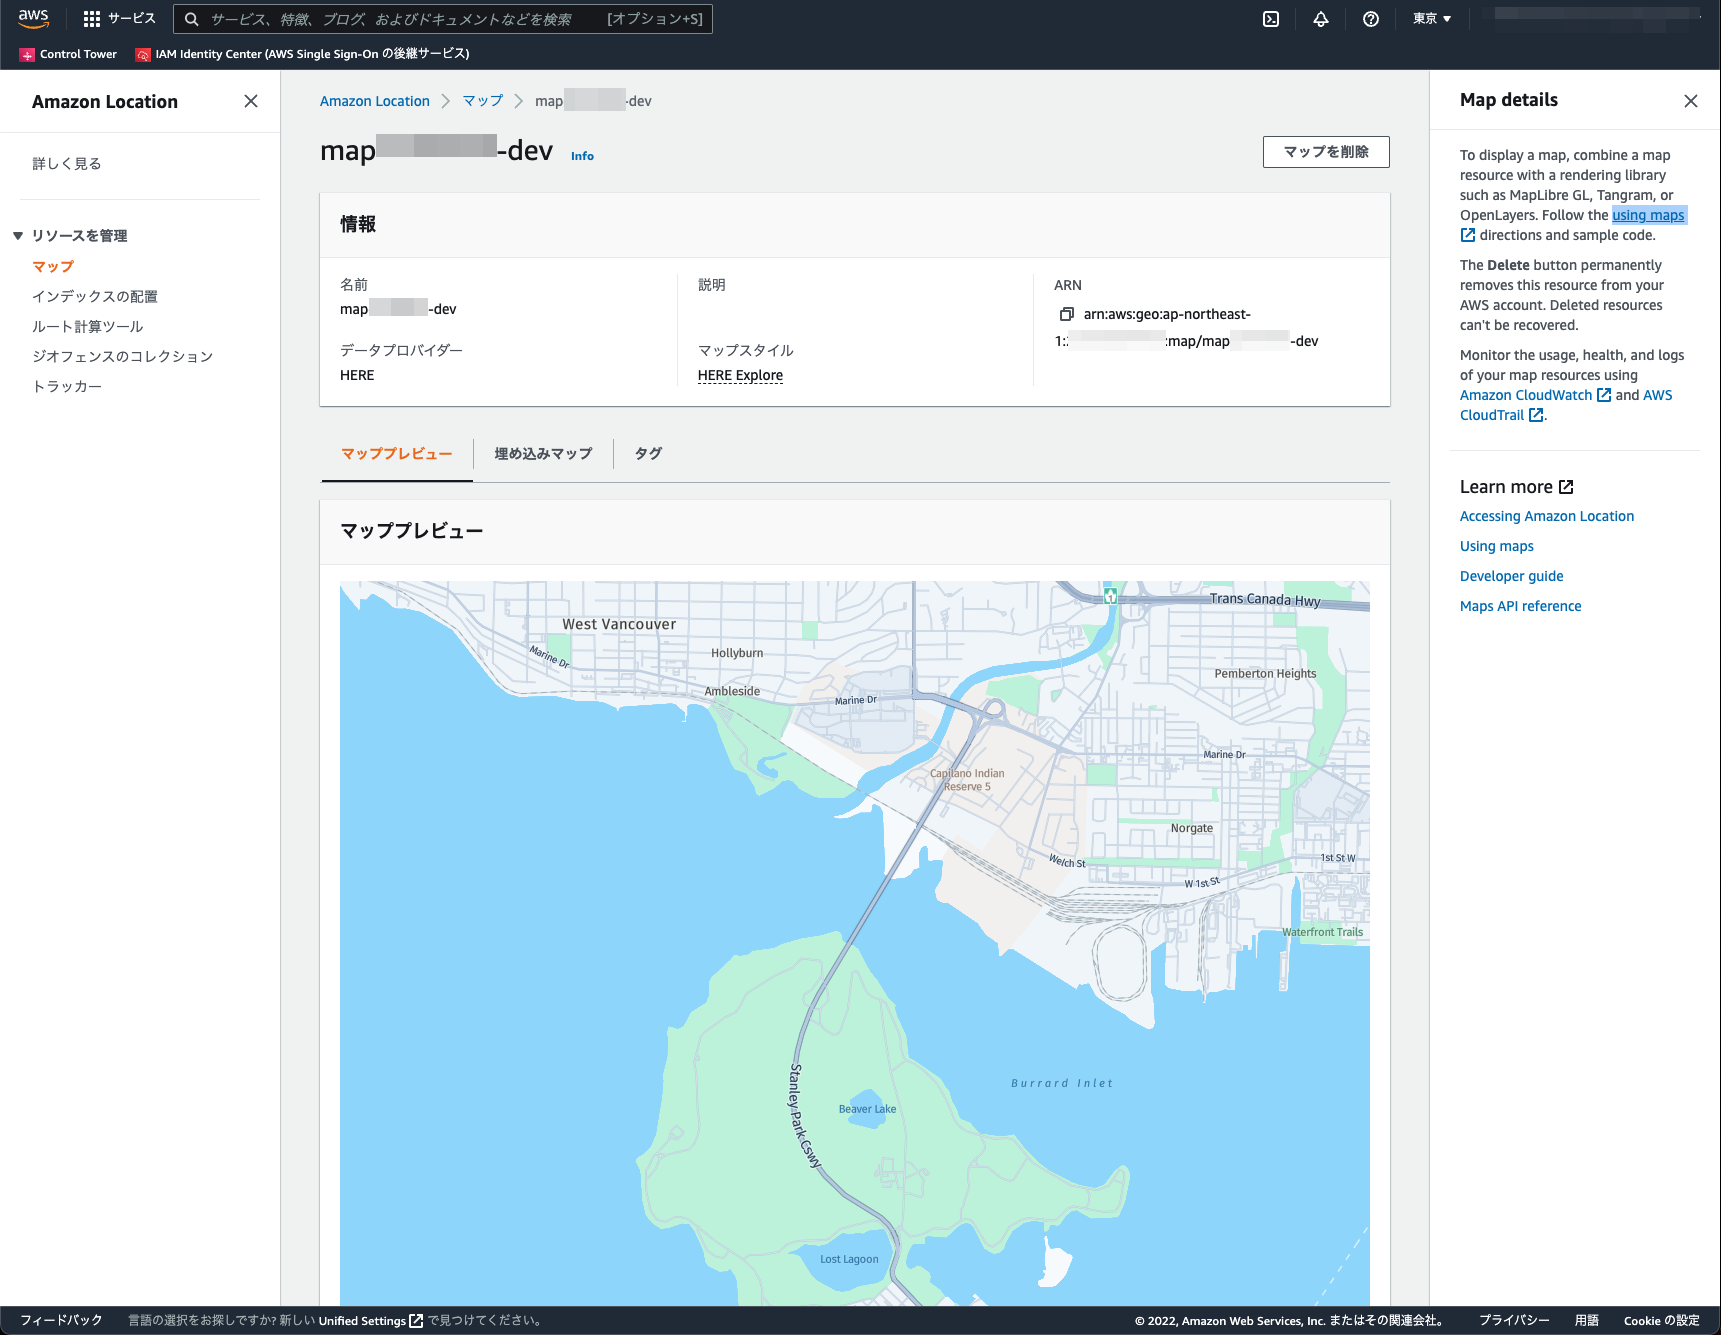
認証機能は通常通り追加します。マップ機能は「HERE Explore」を選択し、アクセス対象は「Authorized and Guest users」に設定しました。
amplify init
amplify add auth
amplify add geo
amplify push
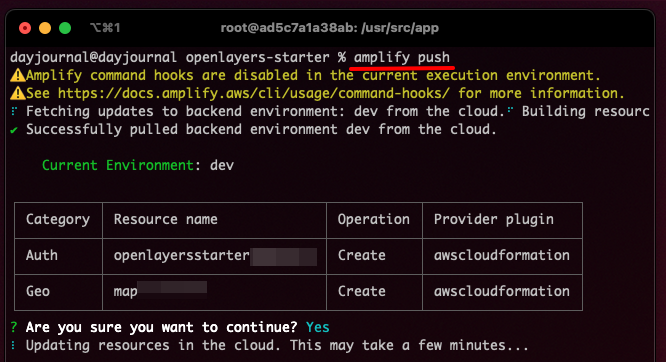
AWSマネジメントコンソールでもデプロイ後の確認ができます。
これでAWS Amplifyの設定は完了になります!
マップアプリケーションの構築
最後に、実際にマップアプリケーションを構築します。
全体構成
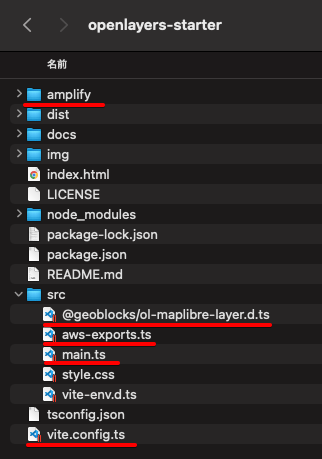
vite.config.ts
AWS AmplifyとOpenLayersの組み合わせをViteで実行可能にする設定をします。
import { defineConfig } from 'vite'

export default defineConfig({
  resolve: {
    alias: {
      './runtimeConfig': './runtimeConfig.browser',
    },
  },
  define: {
    'window.global': {}
  },
  build: {
    target: 'esnext'
  },
})
/src
@geoblocks/ol-maplibre-layer.d.ts
MapLibre OpenLayers layerの型定義ファイルを追加します。
declare module '@geoblocks/ol-maplibre-layer';
/src
main.ts
OpenLayersでAmazon Location Serviceのマップスタイルを表示する設定をします。
import './style.css'
import 'ol/ol.css';
import Map from 'ol/Map';
import View from 'ol/View';
import Source from 'ol/source/Source';
import { fromLonLat } from 'ol/proj';
import { ScaleLine } from 'ol/control';
import MapLibreLayer from '@geoblocks/ol-maplibre-layer';
import { Amplify } from 'aws-amplify';
import { Auth } from 'aws-amplify';
import { Geo, AmazonLocationServiceMapStyle } from '@aws-amplify/geo';
import awsconfig from './aws-exports';
import { AmplifyMapLibreRequest } from 'maplibre-gl-js-amplify';

Amplify.configure(awsconfig);
const credentials = await Auth.currentCredentials();
const defaultMap = Geo.getDefaultMap() as AmazonLocationServiceMapStyle;
const { transformRequest } = new AmplifyMapLibreRequest(
    credentials,
    defaultMap.region
);

const map = new Map({
    target: 'map',
    layers: [
        new MapLibreLayer({
            maplibreOptions: {
                style: Geo.getDefaultMap().mapName,
                transformRequest: transformRequest,
            },
            source: new Source({
                attributions: [
                    '© 2022 HERE',
                ],
                attributionsCollapsible: false,
            }),
        }),
    ],
    view: new View({
        center: fromLonLat([139.767, 35.681]),
        zoom: 11,
    }),
});

map.addControl(new ScaleLine({
    units: 'metric'
}));
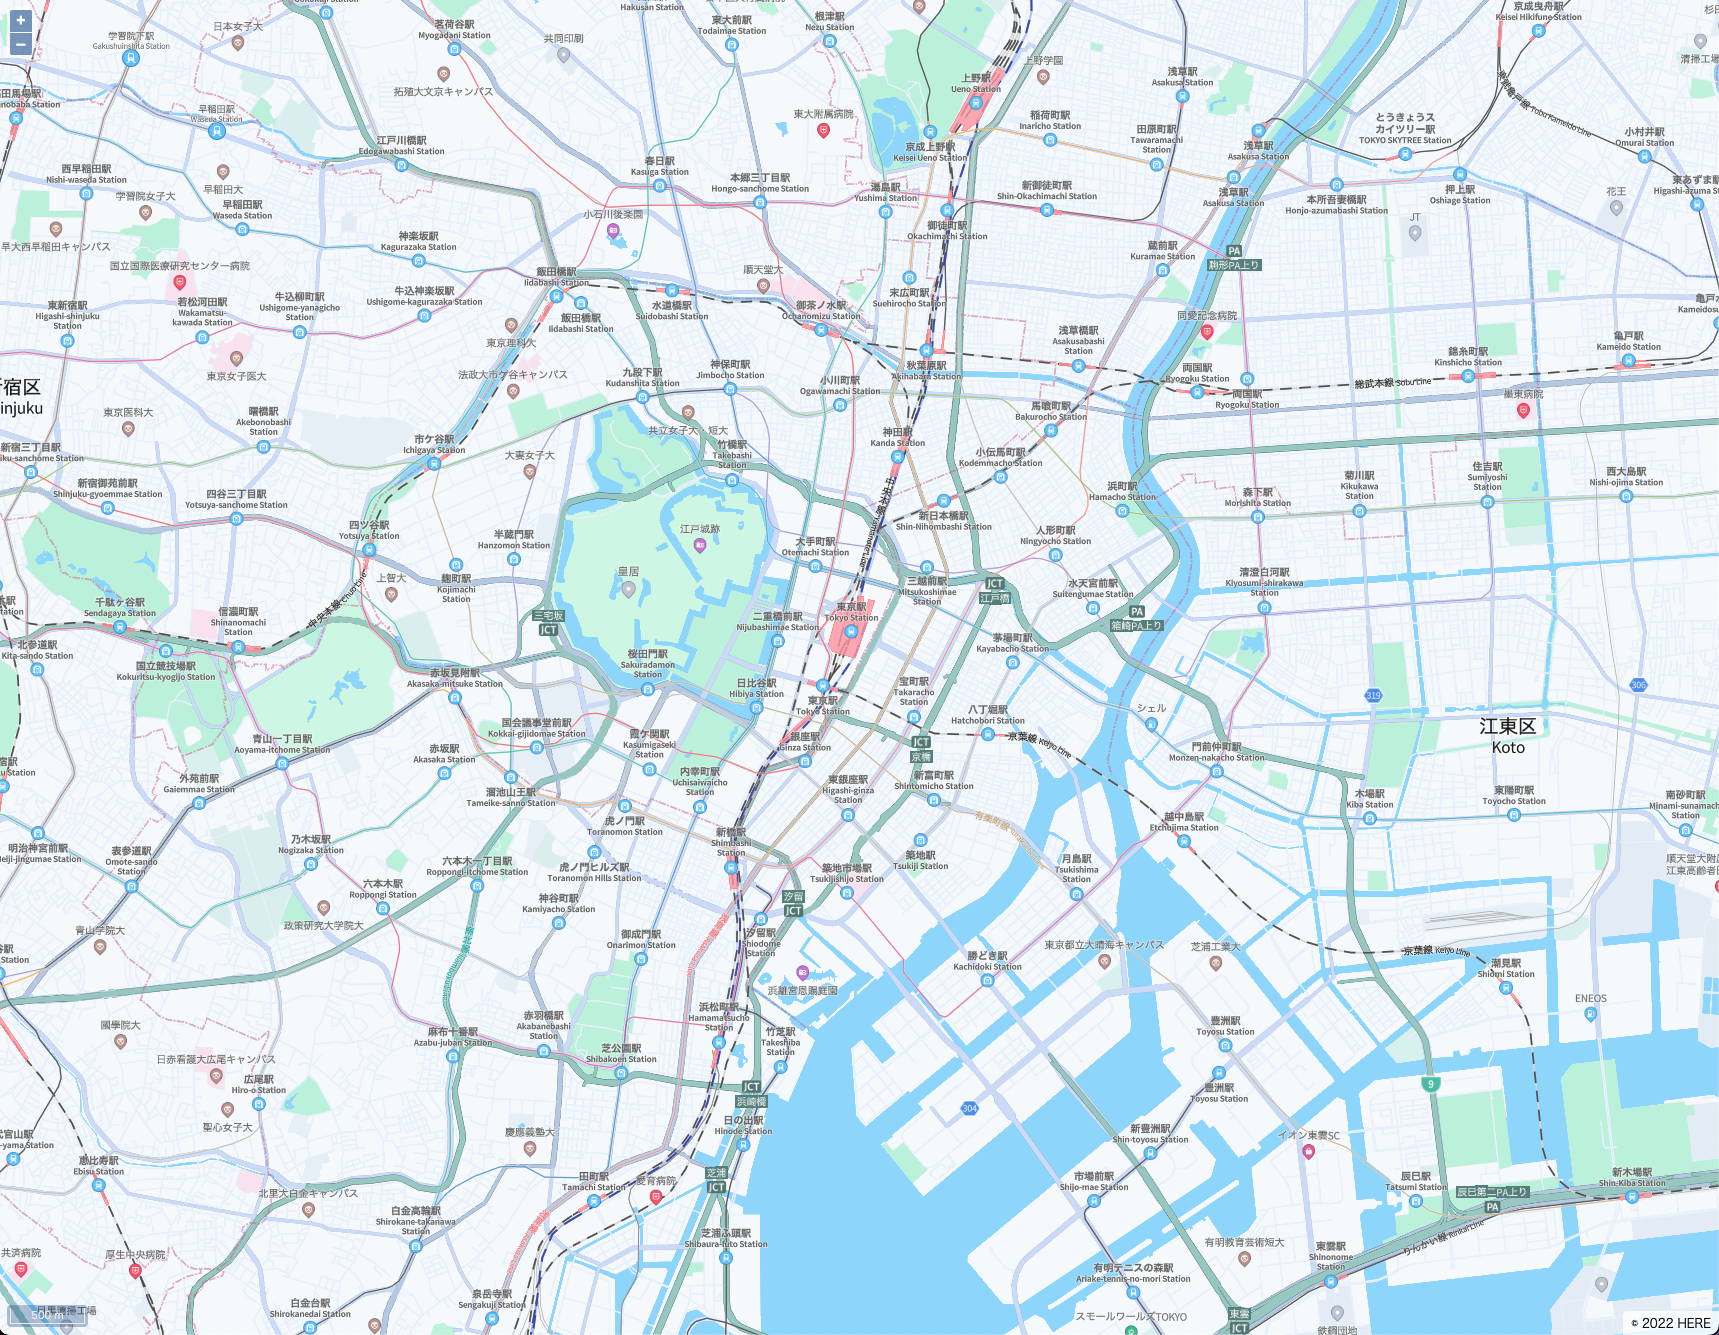
OpenLayersでAmazon Location Serviceのマップスタイルを表示できました!
Amazon Location ServiceとAWS AmplifyとOpenLayersについて、他にも記事を書いています。よろしければぜひ ![]()
tags - Amazon Location Service
tags - AWS Amplify
tags - OpenLayers
やってみたシリーズ ![]()
tags - Try
PodcastとYouTubeやってます。よろしければぜひ。